The Fresh Loaf

A Community of Amateur Bakers and Artisan Bread Enthusiasts.

Recent Blog Entries

davidg618's picture
davidg618


I've been trying a couple of things: increasing sourness (based on what I've learned from Debra Wink, and other online references, varying hydration; and feeding portions of my favorite starter different flours, and developing it at different temperatures (part of the sourness investigation.). I've been doing these things one step at a time, so the results don't get clouded.

For the sourness experiments, along with Ms. Wink's super TFL postings, my other main source of information is:

http://aem.asm.org/cgi/reprint/64/7/2616

"Modeling of Growth of Lactobacillus sanfranciscensis and Candida milleri in Response to Process Parameters of Sourdough Fermantation"; Michael G. Ganzle, et al; Applied and Environmental Microbiology, July 1998

and http://www.nyx.net/~dgreenw/whatistherelationshipbetwe.html

an answer provided by the above author to the question, "What is the relationship between temperature and activity?" in a Q and A blog relating to sourdough.

Sourness: flour and temperature

First, an apology, and a plea. Although I am educated as an engineer and scientist, microbiology is far distant from my underwater acoustics speciality. I've struggled, mostly with the  subject-specific techincal language, in my effort to understand what I've read. Nonetheless, I think I've acquired the background of  knowledge that a home baker, obsessed with sourdough, can use in his or her non-laboratory kitchen to effect the flavor profile of their sourdough breads. Please, if you find my efforts have been based on faulty premises, wrong information, or misdirected experimentation point out the errors, and, more importantly the correct assumptions; accurate, alternative references; or suggest appropriate action--including, "Stop your silly mucking around!"

Debra Wink, in one of her postings, commented that that a flour's ash content contributed to the degree of sourness one might achieve in a starter, but didn't explan how. The first of the above references shows that the activity (reproduction) of Lactobacillus is strongly linked to the the starter's pH ( a measure of acidity). As the acidity increases. or decreases, above or below a most  activity-advantageous value (approximately a pH of 4.2) L. Bacillus reproduction decreases. Assuming, for the moment, the temperature of the starter remains steady, and the activity-advantageous pH can be preserved, the amounts of acetic and lactic acid produced is proportional to the concentration of L. sanfranciscensis. However, in any solution the more acid the lower the pH. Some molecular components of the starter's mix may neutralize a portion of the acidity, while maintaning its sourness contribution. In flour and water mixtures that neutralizing (buffering) quality is supplied by the flour's ash content. Simplistically, I thought, the higher the ash content in the feed, the greater the buffering quality of the flour, and, therefore, the more acids produced before the bacteria activity slows down.

With that in mind, I fed a portion of my favorite starter, at room temperature, for three days a steady, every-twelve-hours diet of first clear flour, known to have high ash content. This became my seed starter for three formula-ready levains. In general, this starter, aledged by the vendor to be authentic San Francisco sourdough starter, doesn't produce much discernable sourness, if any at all. On a few occasions, we (my wife and I) have detected some sourness, which has allowed me to conclude there's some L. bacillus in there, maybe.

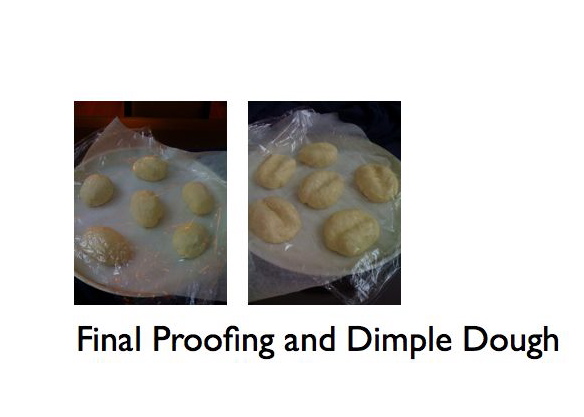
After 72 hours I built 500g of formula-ready levain,at 100% hydration, using first clear flour; it contributed 28% of the total flour weight. The balance of the dough's flour consisted of 10% rye flour, 31% all purpose flour, and 31% bread flour. The final dough contained 2% salt, at 70% hydration. This formula was used three times; each bake consisted of two loaves, formed into approximately 750 g batards. Every loaf was processed as indentically as possible in a home kitchen: two and one-quarter hour bulk proof with two S&F at 45 minute intervals, followed by an additional 45 minutes. Subsequently, the dough was divided, preshaped. rested for 10 minutes, shaped, final proofed for two hours, slashed and baked at 450*F, with steam for the first 15 minutes. The remaining seed starter was stored in the refrigerator at 37°F.

The only intentional variable was in the levain constructions.

First levain: 20g seed starter, three 1:1:1 feedings of first clear flour, initially and at eight hour intervals. Harvested 500g of levain after 24 hours. The developing levain remained at room temperature (68°F to 72°F) for the entire duration.

Second levain: 20g seed starter, three 1:1:1 feedings of all purpose flour, initially and at eight hour intervals. Harvested 500g of levain after 24 hours. The developing levain remained at room temperature (68°F to 72°F) for the entire duration.

Third levain: 20g seed starter, three 1:1:1 feedings of first clear flour, initially and at eight hour intervals. Harvested 500g of levain after 24 hours. This levain was held at room temperature for the first eight hours, approximately 82°F for three hours, and 89°F for the remaining 13 hours. These temperature choices reflect the findings reported in the first reference: optimum yeast activity occurs at approximately 82°F; optimum bacteria activity occurs at approximately 89°F. Additionally, yeast and bacteria activity are approximately the same at room temperatures, yeast activity falls dramatically at 89°F.

Subjective Results:

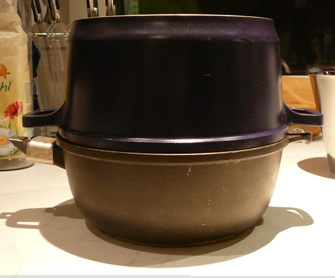
First of all, these were not meant to be controlled, scientific experiments. To the contrary, what i wanted to explore was, "Can a home baker influence the flavor profile of his or her doughs, guided by scientific results, with only those tools common to a baker's home kitchen?".  In my case, a small, lidded plastic box,for the developing levain; placed inside a larger, lidded plastic box (my dough proofing box) to minimize the effects of drafts; all placed inside an oven with a manually controlled oven light, to vary the oven's temperature); and a thermometer, aledged by the manufacturer to be accurate to +/- 1°F).

Furthermore, the only way I could test a finished bread's sourness was by tasting it. (in the laboratory they measured the amount of lactic and acetic acid produced.). My taste would be suspect: I was hoping for discernable sourness with the first and third levains; I would taste discernable sournesss with the first and third levains. So, I asked my wife to taste the finished breads. She had no knowledge of the differences in the levain, nor what my expectations were.

The results are a bit anticlimactic:

We both found breads made with the first and third levains had discernable "tang"; in part because we didn't taste them side-by-side, niether she nor I could state with any certainty one was "tangier" than the other.

The bread made with the second levain, fed with all purpose flour, didn't have any "tang". Good bread, but no sourness.

Next steps:

I'm building a proofing box, wherein I can control temperature better than with the oven light. When its finished, I'm going to push a levain to favor only bactieria growth, and add commercial yeast to the dough for gas production.

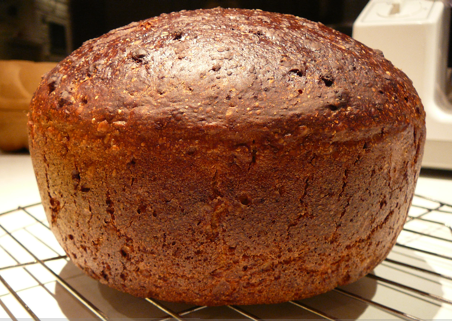
Here's a picture of the most recent (third levain) bread.


Mini Oven's picture
Mini Oven

I've been playing with rye loaf ratios (starter/water/flour) and I came up with one using any amount of rye starter that when refreshed is a paste (100% hydration) and as it ferments loostens to a thick batter.  I was looking for basic numbers (like 1/2/3) and I found them they're  1/ 3.5/ 4.16.   It makes Rye so much easier!  The starter should be generously refreshed 8-12 hours before and mixed into the dough just before peaking and in a 22°c room (72°F) the dough ferments 7-8 hours before baking.   Dough should not be folded or shaped 4 hours before going into the oven.

Basic Ratio> 1 part starter: 3.5 parts cold water: 4.16 parts rye flour    

4 tablespoons bread spice for 500g flour    Salt 1.8 to 2% of flour weight

Hydration of dough aprox 84%.  Handle dough with wet hands and a wet spatula.  Combine starter and water then the flour, stir well and let rest covered.  Add salt about one hour after mixing and any other ingredients.  If room is warmer add salt earlier.  Three hours into the ferment lightly fold with wet hands and shape into a smooth ball.  Place into a well floured brotform or oiled baking pan.  Cover and let rise.  Don't let it quite Double for it will if conditions are right.  Before placing in the oven, use a wet toothpick and dock the loaf all over to release any large bubbles.  Bake in covered dark dish in cold oven Convection 200°C or 390°F (oven can reach 220°C easy with the fan on.)  Remove cover after 20 to 25 minutes and rotate loaf.  Reduce heat by simply turning off convection and use top & bottom heat at 200°C.   Remove when dough center reaches 93°C or 200° F.

All kinds of combinations are possible including addition of soaked & drained seeds and or cooked berries or moist altus and whole or cracked walnuts or a little spoon of honey.

How it works:  I have 150g rye starter at 100% hydration.  I figure for water: 150 x 3.5 gives the water amount or 525g.  I figure the flour: 150 x 4.16 gives 624 g Rye flour.  For salt:  2% of 700g (624g + aprox. 75g in the starter) makes salt 14g or one level tablespoon of table salt.

This amount of dough took 1 1/2 hours to bake and included moist rye altus.  It was baked in two non-stick cast aluminum sauce pans (20cm diameter) one inverted over the other .  The rounder of the two on the bottom.  No steam other than what was trapped inside.  Top removed after 25 minutes.  It has a beautiful dark crust with a light shine.  Aroma is heavenly.


emilyaziegler's picture
emilyaziegler

The original blog post can be found on my website: http://www.foodbuzz.com/recipes/1765625-homemade-wheat-thins

Tuesday, January 12, 2010
Homemade Wheat Thins
Yummm. My family is a Wheat Thin lovin' family. Let me tell you. There was always a box of these crackers in the house growing up. This past weekend, after perusing my King Arthur Flour Whole Grain Baking Cookbook, I decided to make my own! It was a hit!!!! I was so surprised how much they actually tasted like the real thing! Let me tell you, King Arthur Flour's recipe NAILS it!!! I suggest you quadruple, fadruple, or mandruple (hmm.. I may have made up those last two words...) this recipe because these crackers go FAST!!

Homemade Wheat Thins
Courtesy: King Arthur Flour Whole Grain Baking Cookbook

YIELD: About 13 dozen crackers
BAKING TEMPERATURE: 400 degrees F
BAKING TIME: 5 to 7 minutes

*1 1/4 cups (5 ounces) whole wheat flour, traditional or white whole wheat
*1 1/2 tablespoons sugar
*1/2 teaspoon salt
*1/4 teaspoon paprika
*4 tablespoons (1/2 stick, 2 ounces) butter
*1/4 cup (2 ounces) water
*1/4 teaspoon vanilla
*Additional salt for topping (optional)

1. TO MAKE THE DOUGH: Combine the flour, sugar, salt and paprika in a medium bowl. Cut the butter into small pieces and mix it in thoroughly, using your fingers, a pastry blender, a mixer or a food processor. Combine the water and vanilla, and add to the flour mixture, mixing until smooth.
2. Preheat the oven to 400 degrees F. Lightly grease baking sheets or line with parchment paper.
3. TO ROLL AND CUT THE DOUGH: Divide the dough into 4 pieces; keep the other pieces covered while you work with one at a time. Lightly flour your work surface and your rolling pin and roll the piece of dough into a large rectangle, which should be at least 12 inches square when trimmed. Keep your pin and the surface of your dough evenly floured. Flip the dough frequently to keep it from sticking, but too much flour will make it difficult to roll. Keep rolling until the dough is as thin as you can get it without tearing, at least 1/16 inch thick. Trim the dough to even the edges and use a pizza cutter or a sharp knife to cut the piece into squares approximately 1 1/2 inches wide.
4. Transfer the squares to a prepared baking sheet; you can crowd them together, as they don't expand while baking. Sprinkle the squares lightly with salt, if desired. Repeat with the remaining pieces of dough. Save the scraps under plastic wrap and reroll them all at once just one time.
5. TO BAKE THE CRACKERS: Bake the crackers, one sheet at a time, until crisp and browned, 5 to 7 minutes. If some of the thinner crackers brown too quickly, remove them and return the remaining crackers to the oven to finish baking. These crackers bake quickly, so watch them closely - even 30 seconds can turn them from golden brown to toast! Remove the crackers from the oven and cool on the pan or on a plate; they cool quickly. These crackers will stay crisp for several days, but are best stored in airtight containers.


These are truly delicious. I think the Husband-Elect very much enjoyed eating them, check out that smile!:o)


NUTRITION INFORMATION PER SERVING (20 CRACKERS, 29G): l8g whole grains, 101 cal, 5g fat, 2g protein, 11g complex carbohydrates, 2g sugar, 2g dietary fiber, 13mg cholesterol, 108mg sodium, 64mg potassium, 48RE vitamin A, 1mg iron, 7mg calcium, 53mg phosphorus.


emilyaziegler's picture
emilyaziegler

Original blog post can be found on my website:
http://www.foodbuzz.com/recipes/1788878-homemade-whole-wheat-pasta

Tuesday, January 19, 2010
Homemade Whole Wheat Pasta

On the train ride after work, I decided I really wanted to take a stab at making homemade pasta. I have seen plenty of videos on how to make your own pasta by way of hand or pasta maker. Unfortunately, I don't have a pasta maker, so I decided to brave it, making it by hand. Don't be terribly discouraged, but it takes a long time to do it by hand. I do believe I named all of my unborn children during the process of rolling out the dough and slicing it down to the size of a linguine. I may now, this weekend, go out and purchase a pasta maker, to cut the time in half!

The pasta tasted delicious, although it was not too pretty (it's a mix between pasta and funnel cake, if you ask me!!). It was good, nevertheless. I decided to make a healthier form of a white sauce to go with the pasta. I have given up cheese (I know, I know, it breaks my heart, too) in preparation for the wedding in 100 days (ummm.. yeah, I said it, 100 days... it's FLYING BY). I am very happy to say that even though I didn't put any cheese into the white sauce, it is still delicious and fools you into thinking there is cheese!


Homemade Whole Wheat Pasta
1 1/2 cups all purpose flour
1 1/2 cup whole wheat flour
3 eggs, beaten
1 TBS salt
2 TBS water

1. Combine the two flours into a medium sized bowl, along with the salt. "Burrow" a little whole in the middle of the flour so that the bottom of the bowl can be seen, and pour in the egg mixture.


2. Stir in the middle, slowly making your way to the unmixed flour, using a fork. Take your time, this isn't a sprint, it's a marathon. Stir the flour in very slowly so that it becomes quite uniform. This may take quite some time.


2. After the flour and egg mixture is mixed and the dough is formed, knead the dough many times, incorporating any left over flour. I kneaded the dough for a little less than 3 minutes.


3. On a lightly floured surface, roll out the dough using a lightly floured rolling pin. Roll the dough until it is 1/8 of an inch. You may have to flip the dough, and re-flour your surface and rolling pin occasionally. Once it is the desired size, roll the dough around the rolling pin and remove it from the rolling pin onto a cutting board (folded like a business letter).


(If you have a pasta machine, which I really, really, really wish I had, then now is the time to do your thang and skip to the sauce- you lucky bum, if you don't it's okay, follow my directions below).

4. Using a knife (I actually found a pizza cutter much easier to use) slice the dough very thinly. Picture the width of your favorite linguine, that should give you an idea of the size to cut. After the dough is cut, allow it to dry (approximately 3 hours).

You can either store it to cook later, or cook immediately. (As it is fresh pasta, it will take less time than store bought pasta to cook).

5. If you're cooking it right away, boil some water with a bit of olive oil. Throw in your newly made pasta, and cook to your liking! Drain and put some of the yummy sauce that is below!


Emily's I Wish I Could Eat Cheese White Sauce
2 TBS butter
2 TBS flour
2 tsp Italian seasoning
2 cups skim milk
1 TBS fat free sour cream
1/2 cup onions, sauteed
1/2 cup tomatoes, sauteed with the onions
2 TBS minced garlic
1 tsp salt
pepper to taste

Over medium heat, melt the butter. Add the flour and salt. Then add your milk and sour cream (sour cream helps to thicken it up a bit, without using heavy whipping cream). Allow the sauce to bubble and thicken. Add the onions, tomatoes, and garlic. Allow it to cook for a few more minutes to combine flavors. Serve over the pasta!


Bon appétit !! Oh darn my French degree, I mean Buon Appetito! ....or, while we're at it, for my Polish heritage, Smacznego! :o)


emilyaziegler's picture
emilyaziegler

The original post can be found on my blog: http://www.foodbuzz.com/recipes/1765649-homemade-baguettes-and-rolls-

Tuesday, January 12, 2010
Homemade Baguettes and Rolls!!!
This was my first attempt at making homemade bread and I was absolutely TICKLED with the results. This dough was so easy to manipulate and tasted so good after it was finished baking. I recommend this to anyone and everyone. It is so simple. I know that working with yeast can be intimidating, but I promise you it's not. I am a complete novice in this realm of baking. Trust me. Use the boule dough recipe I have recently posted to make baguettes, rolls, or any shaped bread your heart desires! I promise you will not be disappointed. I couldn't keep enough of this bread on the table. It was eaten up so quickly! It remains soft for quite some time, unlike what is purchased in a store. DO IT. DO IT NOW. MAKE THIS BREAD. :o)


Homemade Baguettes
Courtesy: Artisan Bread in Five Minutes a Day

1. Use a grapefruit sized amount of Boule Dough.

2. Here are the instructions, verbatim, from the cookbook: "The gluten cloak: don't knead, just "cloak" and shape a loaf in 30 to 60 seconds. First, prepare a pizza peel by sprinkling it liberally with cornmeal (or whatever your recipe calls for) to prevent your loaf from sticking to it when you slide it into the oven. Sprinkle the surface of your refrigerated dough with flour.

3. "Pull up and cut off a 1-pound (grapefruit-size) piece of dough, using a serrated knife. Hold the mass of dough in your hands and add a little more flour as needed so it won't stick to your hands.

4. "Gently stretch the surface of the dough around to the bottom on all four sides, rotating the ball a quarter-turn as you go. Most of the dusting flour will fall off; it's not intended to be incorporated into the dough. The bottom of the loaf may appear to be a collection of bunched ends, but it will flatten out and adhere during resting and baking. The correctly shaped final product will be smooth and cohesive. The entire process should take no more than 30 to 60 seconds."


[SIDENOTE: Okay, so I didn't have a pizza peel (it is on my list of things to get by the time I'm married), but you can make it work- either transfer the dough VERY CAREFULLY onto your baking stone by hand or slide it on by using a cornmeal covered cookie sheet.]

5. Work the dough so that it is cylinder shaped, approximately two inches in diameter. Make sure your work space is well floured. Once the dough is the correct shape and size, allow it to sit for 25 minutes. At this time, preheat your oven to 450 degrees F.

6. Place a baking stone and empty broiler tray into the oven AS IT IS PREHEATING. Put the baking stone in the middle of the oven, and place the broiler pan below it, on another rack.

7. Once the dough is finished 'sitting,' use a pastry brush and brush water onto the top of it, so that you can cut diagonal slits on the top of the dough using a serrated knife (I found this a touch difficult to do, but try your best).

8. Once the oven is ready to go, CAREFULLY put the dough onto the baking stone. Right after you put the dough onto the baking stone, put a cup of warm water into the broiler tray so that it steams. Quickly shut the door so that the steam stays inside of the oven.

9. Bake the bread for 25 minutes, or until it is golden brown and firm to the touch. Once it is finished baking, place it on a rack to cool. Once it is cool, it is ready to slice and enjoy!


Homemade Rolls!
Also courtesy: Artisan Bread in Five Minutes a Day


The next day, I had enough dough left over to make individual rolls for lunch! There are minor differences to the recipe above.

The dough only needs to be shaped in a ball. It must sit on a cornmealed surface again (either a pizza peel or cookie sheet) for 30 minutes. Place whole wheat flour on top of the dough as it sits. Use the serrated knife again to make the slits (the difference with the baguettes in this section of the recipe is that traditional baguettes do not have flour on top of the bread, so water is used instead). Preheat the oven to 450 degrees again with the baking stone and broiler tray in the same places as noted for the baguette recipe above. Bake for 30 minutes, or until golden brown and firm to the touch.


Enjoy!! It is truly delicious!!!!


jennyloh's picture
jennyloh

My attempt of french dimpled rolls last night , I would say turn out ok.  But I felt that I had to proof longer,  this is one thing I can't seem to get it right. The dough is a little dense, or is the roll suppose to be like that??

I went into a bakery to buy their rolls just to compare,  there's lots more holes,  the rolls felt much lighter.  As for the taste,  it was a little more salty than what I normally like,  I'd probably reduce it.  

For more details,  see attached.  

http://sites.google.com/site/jlohcook/home/breadmaking/french-dimpled-rolls

French Dimpled Rolls


French Dimpled Rolls - Baked

utahcpalady's picture
utahcpalady

Now, before finding TFL I thought I knew a lot about bread baking, not so when you consider artisan style breads and sourdough starter.  I am a food storage fanatic, have 4 children and haven't bought bread for probably5-6 years.  Other than the occasional loaf during tax season (I am a cpa).  So, this is the recipe that I use.  I buy my white wheat from Montana Milling (high protien content) and grind it in my ultramill wheat grinder.  Now, I am sure you could just buy wheat flour at the store, provided it has a good high protien content.  Even though I feel I buy the best white wheat out there, I still add VWG.

Here is my recipe. This was before I knew about weighing my ingredients.

2 cups warm water (110-120deg)

2 T sugar

1 T active dry yeast 

dissolve together,

then add

1 T salt, dissolve. 

Then add 3 1/2 cups wheat flour and

1/2 cup gluten,

mix all together (I use my kitchen aid for this), let rise for 45 minutes

Then mix together (I use a 2 cup pyrex)

2/3 cup warm water,

1/2 cup brown sugar,

3-4 T safflower oil (you can use other types of oil, but this has a nutty taste that i like). 

Take oil mixture and add to the yeast/flour mixture, slowly in the kitchen aid (it has a tendency to slosh out if you do it fast),

then mix in 1 egg. 

Add 3 1/2 cups of wheat flour, let knead in KitchenAid until a nice dough ball forms.  Let rise 45 minutes. 

Punch down and divide into 3 loaves, put in greased loaf pans (I use stoneware pans from PampChef) and let rise for 90 minutes or so.  Bake for 27 minutes at 350 degrees. 

It is a perfect sandwich loaf. Even for peanut butter.

I am trying to adapt this recipe to my starter, haven't been entirely successful yet, as I need to propagate my starter to whole wheat, whereas I currently have a rye and a white starter going.

Stephanie Brim's picture
Stephanie Brim

I actually put this together, meaning to for a while, after dmsnyder mentioned Suas's whole wheat. This is my first try at a truly 100% whole wheat bread and both Adam, my husband, and I think it's a keeper, but with one change: it needs more honey.

Soaker

  • 200g whole wheat flour
  • 115g white whole wheat flour
  • 35g gluten flour
  • 260g milk

Biga

  • 200g whole wheat flour
  • 150g water
  • 5g instant yeast

Final Dough

  • all of the soaker
  • all of the biga
  • 50g butter
  • 55g honey (we think that 80g would have been better)
  • 12g salt
  • 25g milk

Method:

Put soaker ingredients together in a bowl and thoroughly combine. Set aside. Put biga ingredients together in a bowl and thoroughly combine. Place plastic wrap over both bowls and let alone for an hour or so. Mine went for a little over since I was feeding Alexander at the time.

To mix the final dough, break both the soaker and biga up into small pieces and place into the bowl of a stand mixer. Add all other ingredients and mix on low until everything is incorporated into the dough, then medium-low for 3-4 minutes until the dough no longer sticks to the sides of the bowl. Place in a bowl for bulk ferment.

During bulk ferment I did 2 letter stretch and folds. I don't really think I needed to as the dough seemed to be very elastic, but I wanted to be sure. Allow to double after the second stretch and fold if you decide to do it. Overall, the dough got a 2 hour ferment.

Cut into two pieces and shape into loaves. This worked for 1 loaf sandwich bread and about 4 rolls. Baked at 350 degrees for about 30 minutes, then went down to 325 for 10 minutes. I took the rolls out before turning the temperature down.

This is soft, light, and perfect for sandwiches. Both my husband and I like the fact that it isn't too heavy, yet it's 100% whole wheat. Considering the fact that none of my projects have been going completely right lately, this success (and one other that I'll mention on my other blog once I've figured it out *without* it being a slight accident) makes me feel good again.

Now I think I can tackle David's San Joaquin Sourdough. ;)

kathunter's picture
kathunter

I'm very new at this artisan bread making but I'm very determined to do it right.

I've been trying to make a seed culture using the recipe in Peter Reinhart's ARTISAN BREADS EVERY DAY.  For the first batch I used all rye flour and pineapple juice.  It bubbled, barely, at one stage, but never quite bubbled like the recipe said it should and it never double in size.  I did go ahead to the second stage - Mother Starter.  But it was incredibly sticky and smelled nasty.  It was like sticky putty that did not thing with water. I went ahead and put it in the refrigerator as instructed.  It's still there, 4 days later. I'm not sure if it's OK to use.

I started a second seed culter same as above.  It looked like it would progress nicely until I got to phase 3.  Again, it's not increasing in size and the only bubbles are on the bottom that I can see through the glass bowl.  I put it in the oven with no heat but out of cold drafts. Well, my husband accidentally turned the oven on for dinner prep, and well, I think I cooked the starter before turning it into bread.  Should I discard that? 

I just started a third seed culture using white bread flour and water as instructed by Peter Reinhart's above mentioned book.  Any tips to make sure this one progresses as it should?

Should I discard the first two?

Thanks!

Kathleen

droidman's picture
droidman

Barm
150 g Bob's Red Mill light rye
150 g water
75 g white starter @ 75% hydration

Dough
305 g barm
610 g water
915 g flour
22 g salt
3 g caraway seeds

Barm allowed to rise 5 hours. It was wetter than take 1, but I decided to just go with it and see what happened.

Dough very soft and sticky. Miserable to work with, but I persisted. Kneaded for 10 minutes or so.

Initial fermentation in greased bowl for 5 hours.

Proofed in two bannetons for somewhere between 2 and 3 hours (I know, I know: I should keep notes).

Baked in 500 degree oven (my oven sucks, so it's more like 425-450) with steam pan on stone for 30 minutes.

The resulting bread had a lot of holes in it, like a Ciabatta. Next time around, I think I'll up the flour a little bit to compensate for the wetness of the light rye barm. Or maybe just up the amount of rye flour in the barm.

Flavorwise, this is much better than take 1. The caraway impact is much lighter, which allows the sourdough to shine through.

Light Rye Sourdough Take 2

Now, if I could just figure out how to take crumb shots that don't look like the bread is all wet...

Pages

Subscribe to Recent Blog Entries