The Fresh Loaf

A Community of Amateur Bakers and Artisan Bread Enthusiasts.

Recent Blog Entries

LindaLou's picture
LindaLou

I was so happy when my 1 starter white bread came out nice. Tomorrow I will share with everyone at work. My husband had some and said it was very good. I can't get my pictures to work or I would show you. I love the pictures everyone send in by the way.


jpchisari's picture
jpchisari


Here's a Rustic Italian Round I baked today using straight dough method with 15% levain added.

eva_stockholm's picture
eva_stockholm

Bakers share recipes on knead-to-know basis.

dmsnyder's picture
dmsnyder

I'm fighting a nasty cold. I don't have the snowstorm excuse to stay shut in and bake bread, so ... whatever. 

I baked the San Francisco Sourdough from Michel Suas' "Advanced Bread & Pastry" again. Delicious, and not at all aggressively sour.


I also made Italian Bread with biga naturale - my sourdough version of Peter Reinhart's "Italian Bread" in BBA, which uses a yeasted biga.

I like this bread a lot (my version, not PR's). The formula has been posted in a previous blog entry, Sourdough Italian Bread and Sandwich Rolls. I'd been meaning to make it with some Durum flour after my last bake, and I finally got around to it. I substituted  25% of the total "Bread Flour" with Durum flour. Good choice.

This bread is similar to Maggie Glazer's Sourdough Challah in that it combines a slightly sweet dough with a mild sourdough tang. I definitely like this combination of flavors.

I mixed the biga last night and let it ferment over-night. I mixed the dough this morning after I got "activated' ... 10:30 am? It was baked, cooled and ready for dinner at 7:30 pm.

My formula for Sunday-morning-with-a-cold activation:

It took two this morning.

David

Submitted to YeastSpotting

txfarmer's picture
txfarmer

Ciabatta, like baguette, is one of those "basic" but "difficult" breads to get right. I make it every so often just to test out different recipes and see whether my techniques have improved. I've done Jason's ciabatta before, great open crumb, but tasted only OK since it was a stright dough. BBA's version proved to be flavorful but not hole-y, like a flat version of french bread. This recipe is from Maggie Glezer's wonderful book " Artisan Baking Across America", it uses a 24 hour biga, which lends great flavor to the final produt. It's a very wet dough, with relatively little mixing, 4 sets of folding, which results in a very open crumb.


The recipe can be found here:http://lindseysluscious.blogspot.com/2006/03/ciabatta.html, but I highly recommend to buy the book. I did use some of my own techniques:

1. for the first 2 of the 4 S&F, the dough was still very loose, so I did folding in the bowl, the last two I did french folds like she instructed

2. I did NOT use any flour while handling the dough, used oil instead on my hands and counter top. Oil combined with swift movement is more effective for handling such wet dough, AND this way I dont mix in any extra flour

3. I did the dough dividing, shaping (letter fold), proofing (seam side down), final flipping (baked seam side up) all on the same big piece of parchment paper. Well oiled of course. This way all the turning upside down, and moving around can be done by flipping of the parchment paper, without over handling the sticky dough.


She instructs to dimple the dough before baking, which is opposite to the "dont' touch the dough, don't even breath on it, must preserve all the bubbles" theory. I did obey and the result is fantansic. I think it's like how baguette dough is handled - iron hands to get rid of big unsightly bubbles floating on top, which will actually encourage more holes through out the crumb.


The holes are big enough to see through!

Of course all the holes are not just for show, it's there for a good reason - for all the sandwich filling to fill in! Here's a new sandwich idea I got from food network, b

rie and chocolate panini. Look at all the cheese and chocolate melting into the holes, yum!

However, DH is complaining that with so many holes, it doesn't fill him up, haha!

cpc's picture
cpc

I've been reading this website for a while, but this is my first post.  Yesterday I baked the Miche Pointe-a-Calliere from Hamelman's Bread.  I made this for the first time last week, and loved it, so I was excited to try it again.  I halved the recipe, because I'm the only one who eats bread in my house and don't know what I'd do with an almost 4lb loaf!  I used a whole wheat as opposed to white flour culture because that's what I have.  And I extended the primary fermentation and proofing time a bit because it's about 70F in my apartment (not 76F which the recipe recommends).

Here's the loaf!

And the obligatory crumb shot.

The crumb is a bit dense and moist.  I think it was a bit underbaked.  (I was concerned that it would be overbaked because I baked it for the full hour even though I halved the recipe, but I guess that wasn't the case...)  Tastes great though!

ananda's picture
ananda

I have been working with Mary and Nigel for about 18 months now, providing Consultancy services to help them get their cherished bakery project off the ground.

I first met these dedicated Francophiles when they attended the Breadmatters Masterclass in early Summer 2007.   We discussed their project to establish a genuine local bakery in their adopted village of Wye in Kent.   The High Street has a load of potential, and, eventually they came back to me to say they had bought premises and the project was moving.   Alison, my wife, and I went to Kent over the Bank Holiday of 2008, giving me some time to experiment with Mary and Nigel using the specialist type 65 flour they had sourced from one of their many trips made to France.   We made some fantastic Pain de Campagne.

I should add that Mary had worked in Brussels, whilst Nigel had been involved in Aid and Development work in Africa, having lived in New York for sometime, based at the UN.   I put this blog together, because there are some excellent discussions to be found on the site at the moment in relation to flour combinations which people like to use.   A lot seem to centre on creating a flour mix which equates to the French ash content, aiming for somewhere near to Type 65, or, maybe 80.

On my second visit, Mary and Nigel had done the ground work and were preparing to start production in their lovely new bakery.   It had been far from plain sailing, as the project was based in the relatively modern extension built on the back of a High Street building which was an integral part of the village conservation area.   They had a new spiral mixer, and an upright mixer which was wired to continental standards, and gave me a scary electric shock early on.   They also had a sparkly new 3 deck oven and some big peels!

As you may imagine, creating a top baguette was a high priority.   The same with croissant.   Mary and Nigel had just returned from a week long intensive craft baking course with the French Baking Institute.   They were itching to turn their knowledge, and new skills to creating perfect specimens.   Well, I think we did well, and I know Mary and Nigel were very happy with the progress we made that Bank Holiday weekend.   Perfect baguettes and croissants, no!   But so much progress.   Lots of photos attached for you all to see.

These good people opened for trade very soon after.   They are now working flat out, and doing really well.   I heard about queues reaching out onto the High Street.   Committed to the cause of real bread, and dedicated to the entrenched passion and tradition of French baking, I am sure they will succeed and prosper.

Best wishes to all, especially those friends in Kent!

Andy

ps.   I originally had it in mind to try and show what was so different about dough made with real French flour.   I don't know how successful I have been.   I'm not that dedicated to the French cause, myself, and like to make a whole range of different breads from different flours, but I thought these photos do give a reasonable indication of what French flour gives, in terms of both dough, and finished product.   There were some really special qualities to what we achieved in such a small amount of time.


CaptainBatard's picture
CaptainBatard

This will probably be my last post for awhile at FreshLoaf. The days are ticking away and before I know it I will be in a little town in southern France in the foot hills of the Maritime Alps. I will be starting a blog, and those of you who are so inclined will be able to follow my adventures in search of regional breads and their bakers, the trials of a Victory Garden, the building of a wood oven (I hope!) and daily life in a small mountain town.

Now back to the Gerard's Pain Levain. For this bake I have taken MC's thorough description of  Levain "a la Gerard", Shiao Ping's and David's bake and tossed them all together and did what the dough wanted me to. The overall formula was not changed from the original posting.

  • The Levain I have developed for the last several bakes is a little work horse. I have been using it quite a bit so it has remained strong and I have found it only requires a two-build process to triple in size, even with the addition of a pinch of salt. Throughout the whole process I maintained a warm environment for the beasties to flourish.
  • I allowed one hour for a good autolyse at my ddt of 82*. A good gluten structure started to develop.
  • The mixing was with a KA on low for the entire mix. To maintain the constant temperature of 82* I went as far as to preheat the mixing bowl with warm water. The air temp of my house is a chilly 64*. After the autolyse, I mixed for one minute, added diluted starter (with a small protion of the formula water) and salt, and mixed for an additional 2 minutes, then let it rest in a nice warm environment in the proofing cabinet.
  • Two gentle folds were done an hour apart. 
  • After an hour's rest, the dough was gently turned onto a floured surface. The dough at this point still needed some gentle encouragement to maintain it shape. I used the technique that Gerard described to MC, a stretch to the North and South, wait ten minutes and then a  stretch to the East and West, etc.  The 8 extra folds did the trick (considering it was 80% hydration.)
  • The shaping was done with the mantra in mind of "GENTLE... and Deliberate" as shown on MC's great video. I was taken by something that Gerard said when shaping the batards, about moving the air in the dough around ... and that is what it felt like. The dough was filled with air pockets that you could actually redistribute. I need some more practice controlling the batard with wet dough.
  • I like to start at 500*, add steam, load loaves,add more steam turn the oven down to 460*

The crumb has a nutty,creamy and very, very mild sourdough taste was detectable. I was very surprised with the crust of this bread the last two bakes. I think by not retarding the shaped loaves, it developed a crust that was a thin as an egg shell.


                                                                                      Levain in Proofer


                                                                                              Final folds


                                                                                                Divide


This is being sent to Susan@Wildyeast.con for this weeks Yeastspotting....Thanks Susan


breadbakingbassplayer's picture
breadbakingbass...

Hey All,

Just wanted to post my bake from 2/7/10... 

It is based off of this recipe: http://www.applepiepatispate.com/bread/sourdough-italian-french-bread/

But of course, I don't really follow recipes to the "t"...  It's not perfect as there were a few blow-outs, but the crust, crumb, and slightly sour flavor were pretty darn amazing...  Here are the pics first.  I will post the recipe in a few days...

Enjoy!

Tim

breadbakingbassplayer's picture
breadbakingbass...

Hey All,

I'm sure you've seen my post here venting about my breads not turning out very well:

http://www.thefreshloaf.com/node/16100/perfect-baguette-eludes-me-my-breads-are-getting-worse

Anyway, I was inspired to try a Pain a' l'ancienne Baguette from here:

http://www.applepiepatispate.com/bread/pain-ancienne-french-baguette/

Of course, I can't seem to stick to recipes, so here is what I did instead:

Total Ingredients:

350g AP (Whole Foods 365)

100g BF (KA Bread Flour)

100g Graham Flour (Bob's Red Mill)

350g Water

10g Kosher Salt

100g Firm Sourdough Starter (60% Hydr. straight from fridge)

2g Active Dry Yeast (1/2 tsp)

Total Dough Weight 937g

Directions:

Day 1

Make soaker with the following:

175g AP

100g BF

50g Graham Flour

325 g Cool Water

-Mix all ingredients, place in a bowl or plastic container, cover and refrigerate for 24hrs.

Day 2

650g Soaker from Day 1

175g AP

100g Firm Sourdough Starter

25g Cool Water

10g Kosher Salt

1/2 tsp Active Dry Yeast

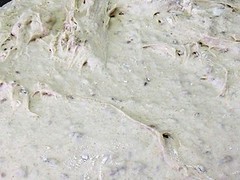
-Mix all ingredients in large bowl, cover and let rest (autolyse) for 20-30 minutes.

-Knead 50 strokes in bowl, cover and rest for 1 hr.

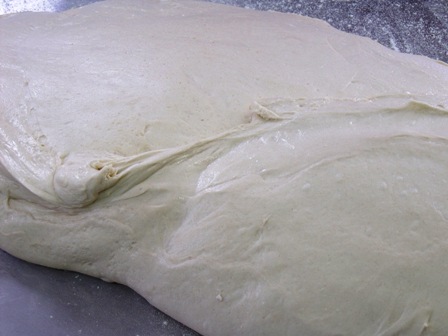
-Turn dough on lightly floured surface, return to bowl, cover and let ferment for 2 hrs.

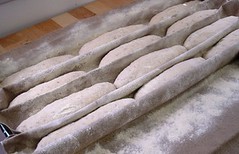
-Divide into 3 equal pieces, preshape into loose ovals, cover and let rest for 15 minutes.

-Place baking stone on 2nd rack from top, arrange steam pan with lava rocks under stone, off to side, and preheat oven to 500F with convection.

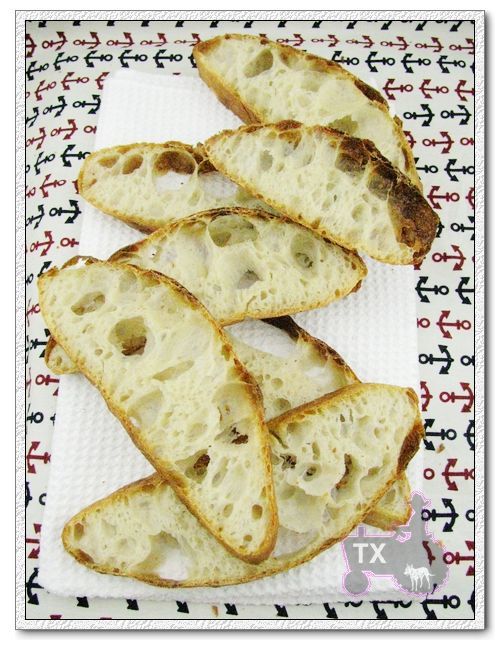
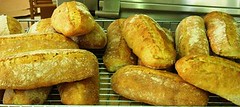
-Shape baguettes by rolling and stretching them gently until they are betwen 15-16" long.

-Proof for 45 minutes on linen couche.

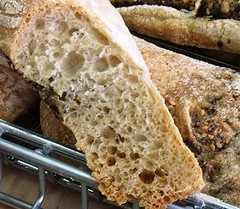
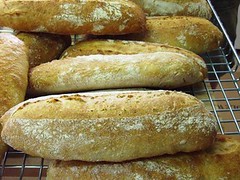
-To bake, place them on peel, slash using lame or sharp razor/knife, place in oven directly on stone.  Add 1 cup of water to steam pan, close oven door, bake for 10 minutes at 460F with convection.  Rotate and bake for another 18 minutes without convection, or until internal temp registers 210F.  Cool for at least 30 minutes before eating...

Notes: I should have baked them at 480F and then at 460F after rotating.
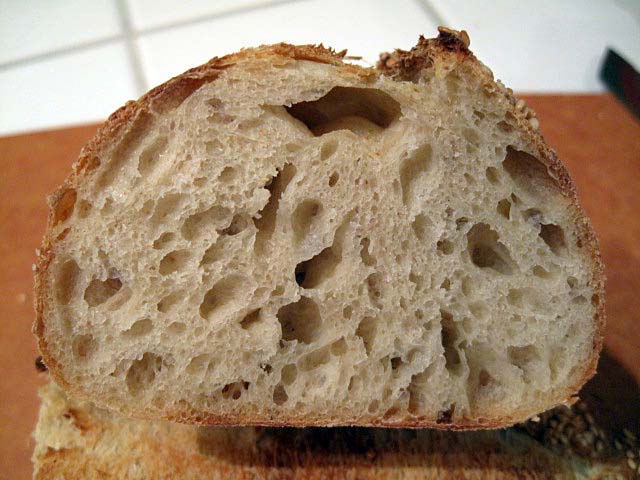
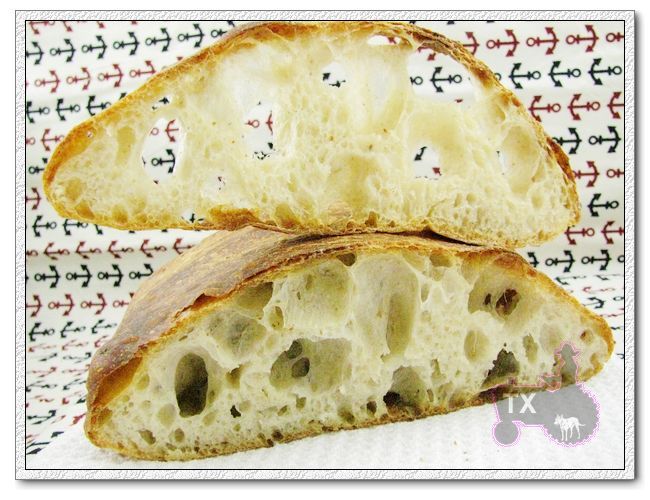
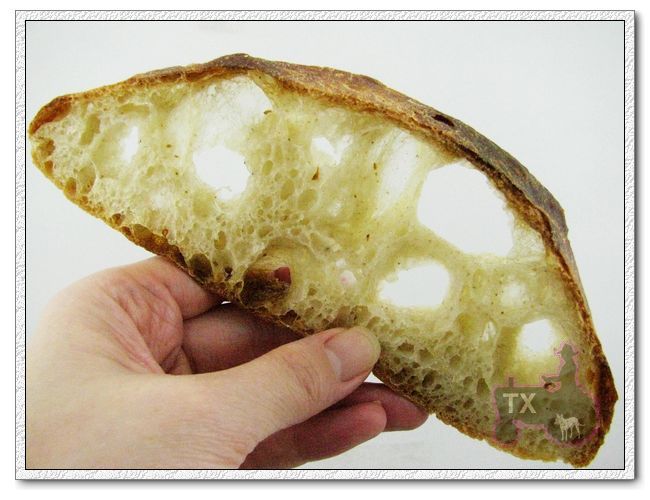
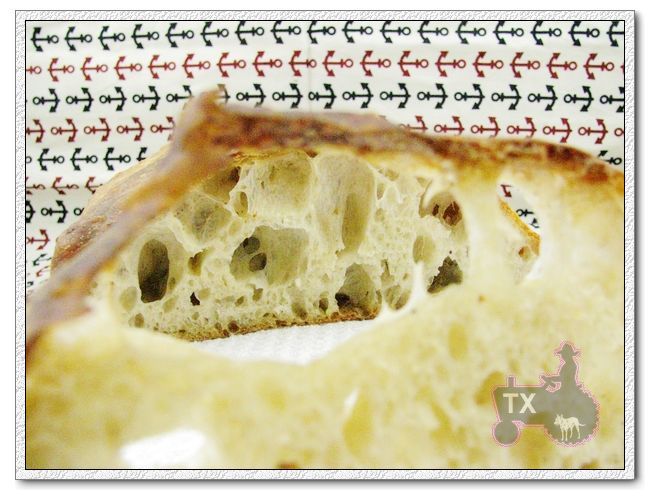
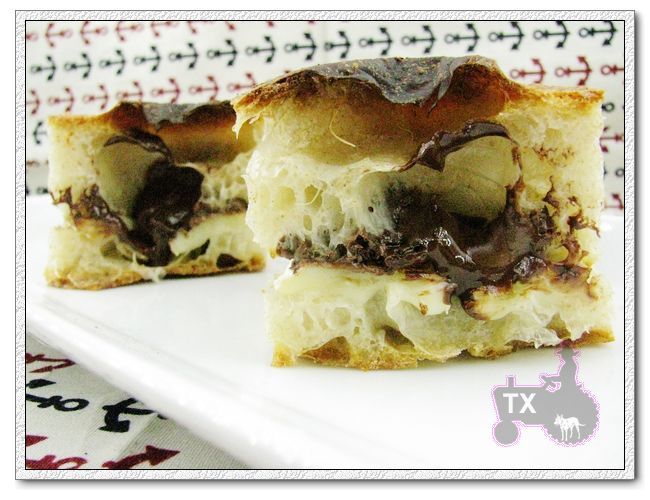
Enjoy!

Tim


Pages

Subscribe to Recent Blog Entries