The Fresh Loaf

A Community of Amateur Bakers and Artisan Bread Enthusiasts.

Recent Blog Entries

Kingudaroad's picture
Kingudaroad

After getting my first bread book for Fathers Day and after reading it cover to cover, I was inspired to try this recipe. The book is very insightful and really is a great book for basic fundamentals.

   I used high gluten flour, bought in bulk from Sun Harvest for the final dough and the firm starter. My mother starter behaved admirably, especially since it was used right out of the fridge and several days since its last feeding. I toasted the walnuts for 10 minutes at 350. I used 25% of the flour weight in walnuts and 15% blue cheese. If you don't like blue cheese do not make this bread. The entire house was overcome with the smell of baking blue cheese. I got a bit of purple tint from the walnuts.


   This is an amazing tasting combo for you blue cheese fans.


Aivaras's picture
Aivaras

There are couple miches I have baked.

2.9Kg JT's 85x3 Miche.


One of the largest breads I have made. Pretty much the same as MC interpretation, only I didn't retard and hydration was lower, about 65%.

1.5Kg Gerard Rubaud Miche.

35% starter (55% hydration, GR flour mixture 70% T55, 18% sifted T150, 9% T80 spelt and 3% sifted T150 rye), overall hydration 65-68%. First fermentation 4 hours, proof about 2 hours.

2.2Kg T80 Miche.


T80 flour, 30% starter (~60% hydration), overall hydration 65%, first fermentation about 3 hours, proof 2 hours.

2.2Kg Poilane Miche.

70% T80, 30% T80 spelt, 35% starter (55% hydration), overall hydration 65%. First fermentation 3 hours, proof about 2 hours.

2.2Kg Organic WW and Spelt Miche.

70% very finely sifted Organic Stone Ground T150 flour and 30% Organic T80 spelt flour. 25% starter (55% hydration), overall hydration 65%. First fermentation 4.5 hours, proof 2 hours.

1.8Kg Pain a l'Ancienne.

50% T55 flour, 45% sifted T150 flour, 4.5% spelt, 0.5% malted barley flour, everything else as described by Shiao-Ping.

Aivaras

siuflower's picture
siuflower


This week bake Jam-filled mini pockets


Siuflower

txfarmer's picture
txfarmer

Pain au Levain, delicate, well balanced flavor. Not sour at all. DH loved it, I prefer it a bit more sour. Borrowed this shape from SteveB's blog here

Another shape:

Nice open crumb, for a 65% dough, it's surprisingly open:


Now the semolina Sourdough, pretty straightforward formula, the dough indeed rose pretty fast just like the instruction says

I didn't mix sesame into the dough, put them on the surface instead. The shape is from "Amy's Bread". I like how the seam opened up during baking, and sesame got seperated on either side.

Open crumb, but holes are mostly distributed on the outside, probably due to the swirl shape

Made semolina pasta to go with the semolina sourdough above

With homemade pesto sauce & a generous piece of salmon, yum!


turosdolci's picture
turosdolci

I like to save these for special occasions because their elegance is truly fitting for those special moments. I make them for family gatherings and think they are a nice summer biscotti because of the ingredients of dates; pineapple, Maraschino cherries and walnuts. They make a very pretty summer cookie tray.


http://turosdolci.wordpress.com/2010/06/24/assunta’s-italian-stuffed-biscotti/


Mebake's picture
Mebake

Two 50% wholewheats i have baked from"BREAD", one is wild yeasted, and the other is commercial yeasted.

WHOLE WHEAT LEVAIN (50% wholewheat):

I baked this lovely light loaf on a stone under a pyrex bowl, but i failed to get the even color round the loaf (its tough when you have a gas oven).

WHOLE WHEAT BREAD (50% wholewheat):

This loaf was sweeter, than wholewheat levain, and somewhat lighter in texture. I managed to get an even browning on this one because i baked it on a stone in a poultry roaster with a lid, with a lava in a pan source of steam.

 The latter one is a keeper for me though, my family dont't appreciate the sourness of artisan breads. Oh well.

Khalid


Aivaras's picture
Aivaras

Hello all, my name is Aivaras. Long story short, more than half year ago i decided to try baking bread, or at least something resembling bread, because I've never baked anything, and then i found TFL. I want to thank all members on TFL, because almost everything i learned i learned from here. I'm starting blog to post some of my older bakes and to try to post after i bake something.

This is Boule (baked on 5/02) i probably would not have baked, except that I made mistake when preparing starter for my weekly bake of Gerard Rubaud bâtards. I was preparing last build for starter and accidentally ended with 100% hydration starter which i decided to refrigerate shortly after mixing. While it was staying in refrigerator, I saw breadbakingbass post and since I had Malted Barley flour which i never tried to use, i thought to give it a try.

Formula:

200g T150 Organic stone ground flour

400g T80 flour

260g T55 flour

100g Organic Malted Barley flour

240g Liquid Levain

24g Salt

580g Warm Water

Total - 1.8Kg; Hydration - 65%

Method:

Mix starter 1:2:2 ratio (GR flour mix: 70% T55, 18% T150, 9% T80 spelt, 3% T160 rye) leave 20 minutes and then refrigerate for 48 hours.

After 48 hours dissolve starter in water, mix only with T150 and Malted Barley flour, cover tightly and leave at 25C for 45 minutes.

After 45 minutes mix half of left flour and leave for 20 minutes, then mix rest flour and leave for another 20 minutes.

Add salt and mix for few minutes.

Ferment at 25C for 2 hours.

Lightly shape into boule, place in lined basket and proof for 2 hours.

Preheat oven at 250C, Bake for 50 min at 230C with steam for 15 min.

Nickisafoodie's picture
Nickisafoodie


Pizza baked home at 650 degrees


Ever since reading about Jeff Varasano and his obsession for the perfect pizza I find myself regularly revisiting his sight and learning more every time: http://www.varasanos.com/PizzaRecipe.htm  The sight is highly educational and a fun read and recommended by many other Fresh Loaf posts.  There is lots to learn from this sight including dough hydration (very wet), hot oven (how to modify yours at your own risk!), flour types, use of a starter and several days of cold fermentation, dough technique, aspects of creating a superior sauce, homemade mozzarella, toppings, and pizzeria ratings and technique, technique and more technique.

His holy grail is a 2-3 minute pie at 850-950 degrees - obtained in his home oven by rigging the cleaning cycle to stay on such ovens being designed to reach up to 1000 degrees to burn off any spills.  I have made very good pizzas at 550 degrees in my oven baking at 7 minutes or so.  I easily rigged my oven as Jeff did.  As others on this site have said proceed at your own risk and every kitchen should have a fire extinguisher near.  I am very happy with a 4 minute pie at 650-700 degrees rather than seeking 850-900 degrees (someday).  Preheating to 650-700 can take 80-90 minutes and longer to get to 800 plus temp.  Use of an inferred thermometer nails the temp.  After all is said and done I find the higher temp pie to be far superior to pies coming out of a standard 550 degree max oven, even though I have made some very good pies in a standard oven with stone.

If you get past the angst of the oven, then the trick is to use dough that is very wet as it can stand up to the heat and still be crisp on the outside and moist on the inside.  My experience has been that an 80-85% hydration works well.  And following Jeff’s method of storing in portion sized plastic containers in the refrigerator from 3-5 days to give the dough superior flavor.  After trying his technique for dough mixing many times I was not getting the proper dough development.  I found this YouTube video “That's Alotta Ciabatta! Start to Finish” http://www.youtube.com/watch?v=v24OBsYsR-A which shows how to make 90-95% hydration Ciabatta using the flat beater for most of the mixing and eventually to the dough hook.  Having used this technique several times, I can say it is the way to go on high hydration dough and achieving the window pane effect.
My recipe is simple: Build Starter: 120 grams total consisting of 60 grams of rye and 60 grams of water (note: you can use 100% white flour.  I prefer having up to 20% divided evenly among whole wheat and rye which adds a subtle flavor profile.  And my starter is 100% rye).  After five hours to build to peak activity add the following: 60 grams (10%) whole wheat 472 grams (80%) bread flour 410 grams water 15 grams of salt (2.5%, higher than the typical 1.75% for bread) 3 grams of yeast (.5% given the use of starter) Total 1,080 grams, enough for three 12”-14” pizza rounds at 360 grams each See links above for mixing technique (YouTube) and storage on Jeff’s site.  The sights are worth a look for any baker using high hydration dough, and pizza lovers.  Jeff has opened his own pizza place in Atlanta, Ga which seems to be getting great reviews.  His story of a passion that turned into his business calling is very interesting.  I found it inspiring to read and learn as we all do when sharing our experiences…


Shiao-Ping's picture
Shiao-Ping

Trying a new ingredient or a new formula excites me.  If I find a new method or a new ingredient to make my daily bread the next morning, I go to sleep with a smile the night before.   I read about the Chia seed in one of Johnny's comments on Sourdough Companion a long while ago and had tried Chia seeds with other grains and seeds several times but never on its own.  I was happy with the results each time but never stopped to think why the results were good; I just moved on.  I looked upon the Chia seed the same as any other grains and seeds. 

It just so happened that last week I ran out of all the grains and seeds, except the Chia seeds.  It was 10 days before my family were due to travel again and I was trying to run the fridge down and not to bake any more bread before we leave - the freezer was already chuck full of sourdoughs to bring away with us.  But, I got excited over questions like: what would it be like to have Chia seeds, and Chia seeds alone, in my sourdough? and what would Chia seeds do to my daily bread? 

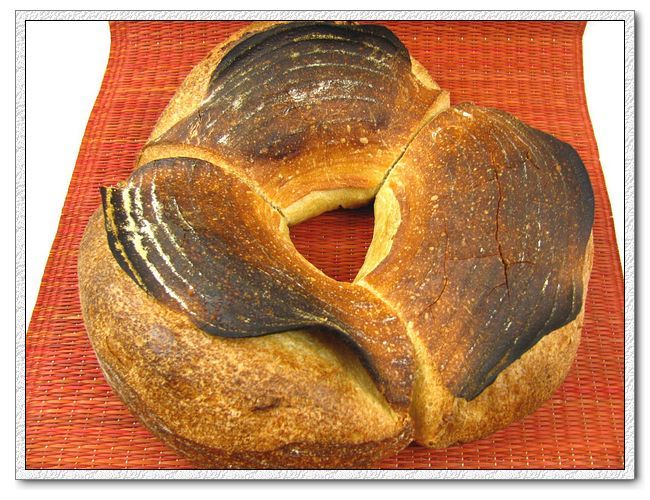
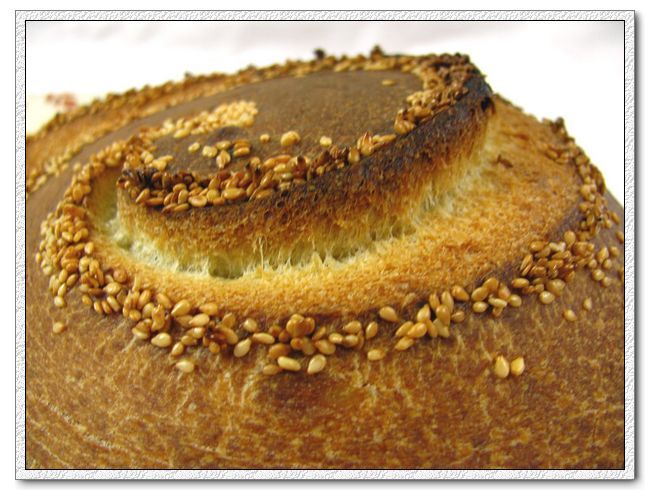
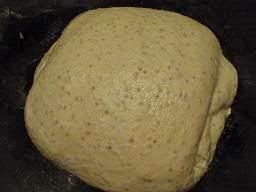
I chose a simple sourdough recipe and added 7% Chia, pre-soaked in four times its weight in boiling water - only 7% because this is not like walnut bread where you want to actually bite into walnuts.  I did not know at first how much water Chia seeds would absorb; nor did I want to trouble myself by soaking the seeds the night before.  I knew boiling water could do the job on the spot.  I first poured double its weight of boiling water over the seeds; the water was gobbled up in seconds, so I poured a bit more, and a bit more again a few minutes later, totaling four times the weight of the seeds.   So, this is my first ever Chia sourdough:


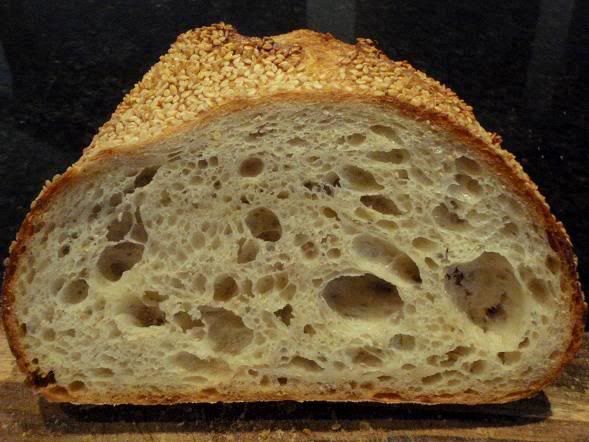
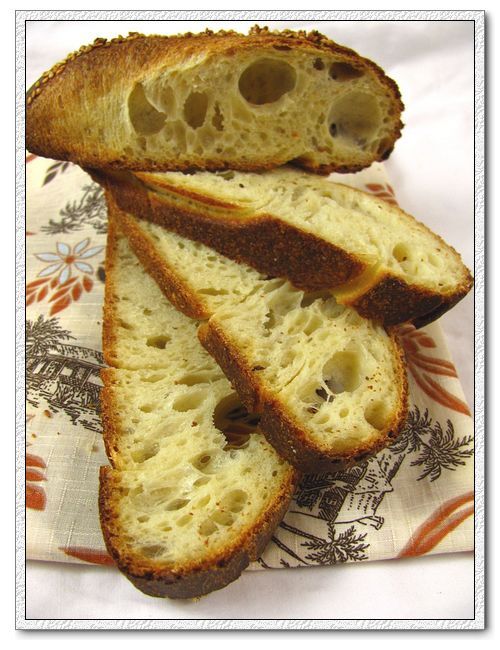
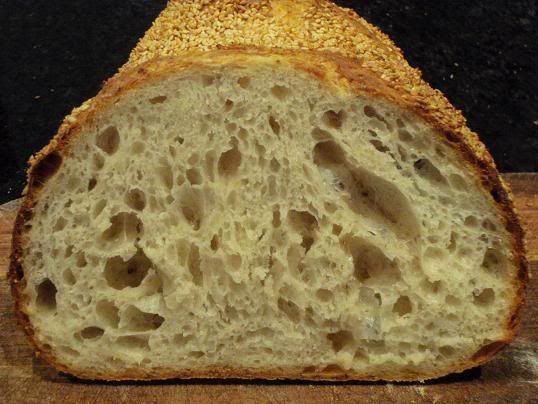
                                                         White Chia Sourdough


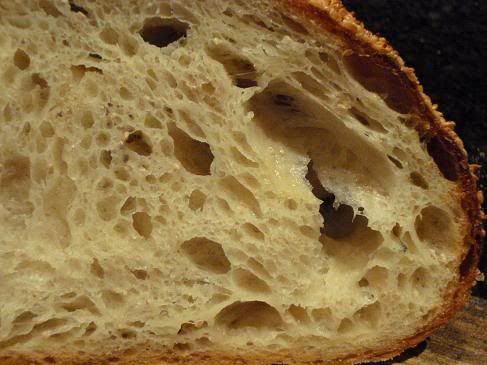
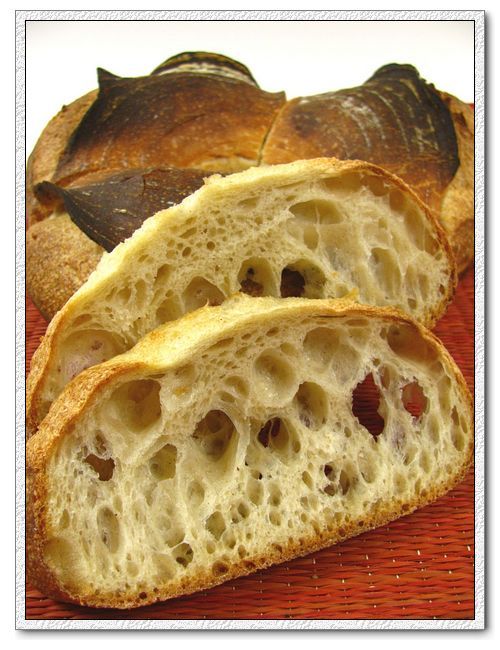
You cannot believe how moist the crumb was.  It was so incredible. 

I am so amazed at how good the bread was that I started to read up on the Chia seed.  There is an article here that talks about Chia as the ancient grain of the future but it looks at it from the angle of nutrition which is not my concern here.  I would recommend the article to anyone who is interested in the topics of omega-3, diet, antioxidants, vegan, or even gluten free solutions; but I am interested in what effects there are on bread, not nutrients.  Here is what I have found with my experiments together with the relevant points from the article:

(1) Moisture:  Chia has a very unusual property - a gelatinous, glue-like substance due to the soluble fiber that is able to absorb up to 12 times its weight in water.  The seed's hydrophilic saturated cells hold the water when it is mixed in with flour.  I picked up some pre-soaked Chia seeds and they did not wet my fingers one bit at all.  With the bread in this post, I have found that the hydrophilic colloids in Chia prolonged moisture in the bread in the most spectacular way.  The moisture which was initially contained in the cells of Chia slowly released itself, like a low GI food slowly releasing its sugar.  (The article says that the Chia gel can form a barrier between carbohydrates and enzymes that break them down, thus slowing down the conversion of carbohydrates into sugar.) 

This moisture is completely different from that in a super-high hydration loaf like Ciabatta which, in my experience, if not finished within a couple of days, turns as dry and tough, and as quickly, as anything I can think of.  But it is similar to Hamelman's Five-Grain Levain, because of flaxseed, one of the five grains used in that bread.  I have found that flaxseed, once soaked, has a similar gel-like property like Chia. 

(2) Texture:  The gelatinous, glue-like substance seems to have also altered the texture of the bread, resulting in softer crumb.  In this regard, I think it is important not to over-hydrate the dough, otherwise you may lose the springiness and chewiness, typical of sourdough bread.  I have also tried soaking the Chia seeds with six times their weight in water, while maintaining my other bakers percentages, and the result was very gummy crumb, most unpleasant to have. 

The article mentioned above says that 8 parts water to one part Chia can be added to bread dough, but I think this would work only if you add a couple of tablespoons, not more, as was suggested and beautifully done by Sharon, the glutenfreesourdoughbaker, here.

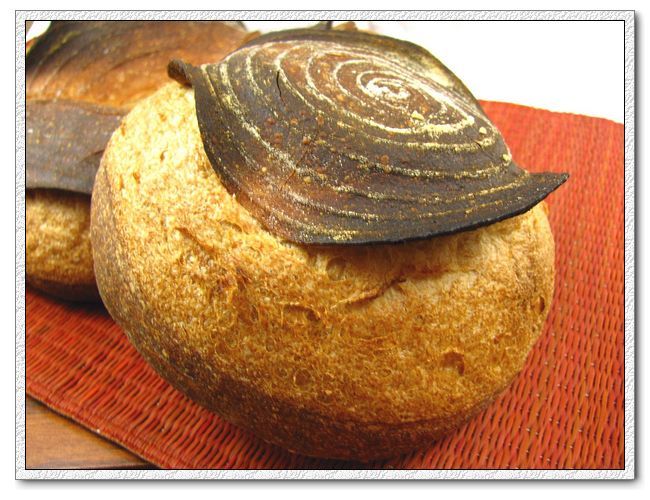
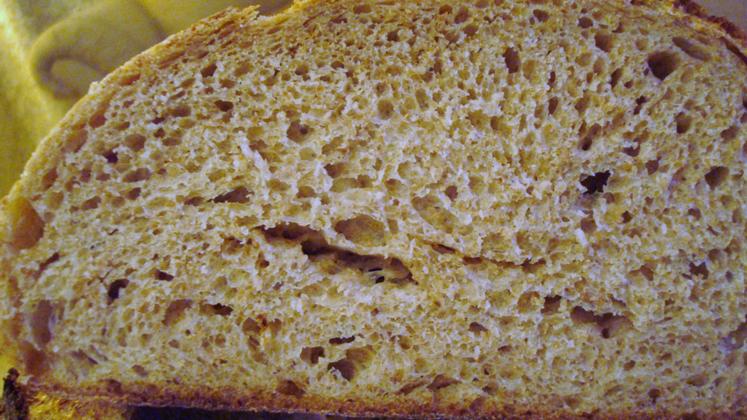
(3) Taste:  This may sound strange, but I have noticed my wholemeal sourdough now tastes sweeter than before.  For people who don't like 100% whole wheat, Chia gel is like a "tonic" that would modify the bitterness in 100% whole wheat bread.  We know most kids choose white bread over whole wheat bread because of the high fiber and bitter taste in whole wheat flour.  Well, I've got news.  I gave my kids and their friend a 100% wholemeal sourdough (with 7% Chia), they thought it tasted like a white sourdough and between the three of them they finished a 750g loaf!


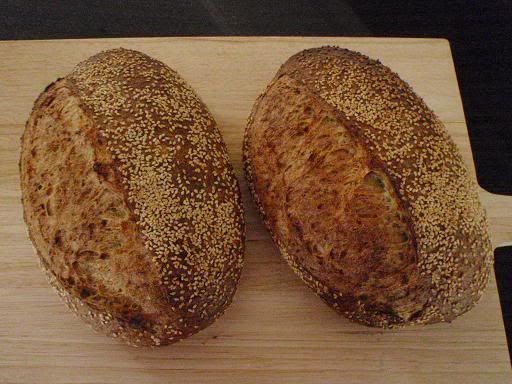
                                                                                      Whole Wheat Chia Sourdough


Formula for my white Chia Sourdough

  • 125 g Wholemeal Starter @100% hydration
  • 500 g Flour (I used Australia's Laucke's unbleached bakers flour, protein 11.9%)
  • 343 g Lukewarm Water *
  • 11 g Salt
  • 40 g white Chia Seeds
  • 160 g Boiling Water
  • Sesame Seeds for dusting

*  I used lukewarm water to bring the final dough temperature to 26 C/ 78 F as my room temperature was cold, around 19 C/ 66 F  

**  Dough hydration was 72% (not taking into account the Chia and the boiling water to soak it).  You may want to adjust hydration to suit your flour.  Total dough weight was 1.1 kg.                               

Formula for my wholemeal Chia Sourdough 

  • 200 g Wholemeal Starter @100% hydration
  • 600 g Wholemeal Flour (I used Australia's Four Leaf's 85% Light Flour, protein 14%)
  • 460 g Lukewarm Water*
  • 14g Salt
  • 50 g white Chia Seeds
  • 200 g Boiling Water for soaking the Chia seeds
  • Sesame Seeds for dusting

***  Dough hydration was 80% (not taking into account the Chia and the boiling water to soak it).  My wholemeal flour is a high gluten flour which is very thirsty for water.  Adjust hydration if your WW flour is not as thirsty as mine.  Total dough weight was 1.57kg.


Method

Following were my steps that produced the breads pictured in this post.  You can use your own dough process.   One thing of note is that my white Chia sourdough had a total of 6 1/2 hours fermentation before overnight proof-retarding, while my WW sourdough had 6 hours all-up and that was too much.  I overlooked the fact that there was more pre-fermented flour and the fact that wholemeal flour (especially the organic version I used) has more enzyme and ferments faster than plain white flour.  As a result, my whole wheat Chia sourdough had less oven spring and less volume.  

(1) Pour the boiling water over the Chia seeds.  Stir and set aside the Chia gel to cool.

(2) Dilute starter by adding the lukewarm water a little bit at a time until all is added.

(3) Add flour and salt into the diluted starter, stir to combine.  Cover.  Autolyse for 30 minutes.  (My dough temperature at time off mixing was 26 C.)  

(4) Knead the dough by way of stretching and folding it in the bowl, about 25 strokes (for the white one) or 20 strokes (for the WW sourdough).  Cover.  Rest for 30 minutes or longer until the dough is completely relaxed and extended.

(5) Pat the dough out inside the bowl and spread half of the Chia gel over the dough; flip the dough over, and spread the remaining half of the Chia gel over it.  Flip the dough over again and start stretching and folding it inside the bowl to incorporate the Chia, about 25 strokes (for the white one) or 20 strokes (for the WW sourdough) but not more as the dough is now loaded with the seeds and is fragile.  Be careful not to tear the skin of the dough on the bottom.  The Chia seeds won't be evenly dispersed yet.  They will get more evenly dispersed in the following S&F's.  (Alternatively, you can do this step on a work bench.) 

(6) Lightly oil your bowl and place the dough back, right side up.  More dough strength develops if the dough rests right side up.  Give it 30 - 45 minutes rest until it is relaxed and extended again.

(7) Turn the dough over and gently stretch it to as far as it can go between two hands without tearing it.  Fold 1/3 from one end to the centre and 1/3 from the other end to the centre, the same way as you would fold a letter; then, from the other direction, fold the dough again like a letter.  Place the dough back to the bowl, right side up.   Rest for another 45 minutes or for as long as it takes for the dough to relax.

(8) Another double letter-folds.  Rest.  Repeat the folds and the rest, if your dough needs it.

(9) Pre-shape and shape the dough.  By the time I finished shaping the dough into a batard, it was six hours from the time my dough was first mixed.  The temperature of my shaped dough had come down to 19 - 20 C.  If your dough &/or room temperatures is higher, shorten the fermentation time accordingly.

(10) I let the white dough sit for 1/2 hour then I removed it to the fridge for overnight retarding.  (For the wholemeal version, I removed it to the fridge straight away.)

(11) The next morning, my dough had nearly doubled in size in the fridge.

(12) I pre-heated my oven to as high as it could go for over an hour.

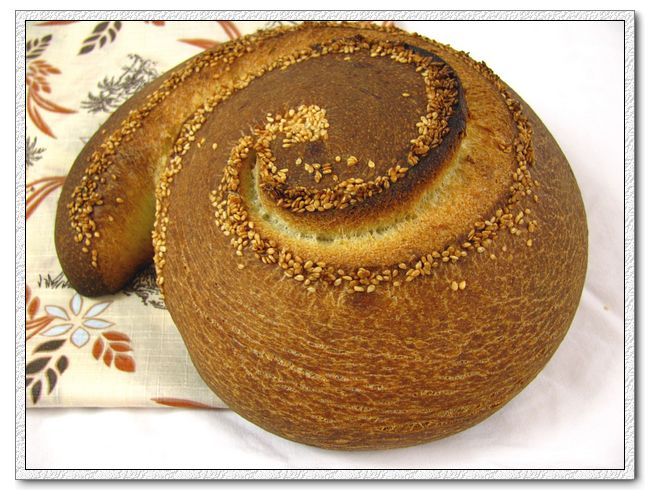
(13) I sprayed the top of the dough with water (if you don't have a spray bottle, you can use a damp towel), then sprinkled lots and lots of sesame on the top.

(14) I poured 1/4 cup boiling water onto the lava stones sitting in a roasting pan underneath my baking stone.  Then, I slashed my batard and peeled it onto the banking stone.  I poured a cupful of boiling water over the lava stones.

(15) Immediately I turned the oven down to 230 C and baked for 25 minutes, then I turned the oven down to 220 C for another 25 minutes baking.

(16) Rest the loaf for an hour before slicing.


On day 4 of my white Chia sourdough, I toasted a slice of it:


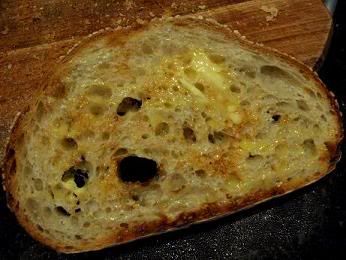
We know that toasting a slice of dry bread temporarily gelatinizes the starch and makes the crumb crunchy and edible.  But try toasting a moist bread, Wow!  The soft crispiness you get from Chia sourdough is amazing.

It has been a gloomy old day, drizzling and overcast.  It's been like that for the last few days.  Nothing to look out of the window for, but something warm in my kitchen:


Shiao-Ping

Chausiubao's picture
Chausiubao

Pain de mie, sandwich bread, white bread, dinner bread, chan-bao, this bread has a lot of different names, and I'd say its one of the most popular breads out there. Our bakery has been playing with how to make it, and I think, finally we've made a break-through in making it from a practical standpoint. 

Simply put, its an enriched dough thats 20% fat and 5% sugar, but the trouble has been in the bake. The bread is too finicky. Its bottom browns quickly (far quicker then the top) what with only a sheet pan and parchment between its tender bottom and the hot baking stone. In addition the small size of our ovens leads to heat loss easily, and we have been needing to rotate the pans somewhere during the bake.

But it looks like all thats in the past, and we can move onto other challenges.

I've reached a point in my training where I am being forced to pick and choose which of the approaches I want to use to get the jobs done. Alternatively I've been using hybrid techniques with aspects from multiple sources. Theres so much information out there in a relatively small amount of bread techniques just being able to confidently call myself a bread baker looks to be quite the unsurmountable challenge, let alone calling myself a baker.

Luckily for me, I enjoy challenges,
--Chausiubao


Pages

Subscribe to Recent Blog Entries