Although blogging has taken a back seat to other activities, I have been baking in the background. It's just that none of those have made the leap from the kitchen to the Web. And, frankly, most of them were old favorites and I really didn't have anything new to say about them, except for yum!
This weekend, though, was different. My wife has decided to make some dietary changes, with the objective of greatly reducing the GI loads of the things she eats. On the one hand, that means eliminating a lot of foods that are either sugary or constituted primarily of simple carbohydrates and replacing them with foods that contribute either higher protein content or complex carbohydrates. So, when she had a package of 100% rye bread in her hand while shopping this weekend, I said "I can make that at home. And I can use sourdough, which will make it even better for you." All true but highly optimistic, considering some of my recent sorties into high-rye land.
Back at the house, groceries unloaded and put away, I made a bee-line for TFL and started looking at the accumulated wisdom and experience regarding 100% rye breads. Of the various possibilities, Mini's Favorite 100% Rye was most appealing to me so I started the mise en place Friday evening. First up was to prepare the rye sour. Keep in mind that I pitched my old starter some weeks back and began another. So, while potent with yeast, the new starter is still fairly mild in flavor. It would have to do. Next up (although not in Mini's original formula) was a soaker consisting of 100g each of cracked rye and boiling water. Still another addition, a sunflower seed soaker consisting of "some" (about a handful) sunflower seeds and enough cool water to cover. Yeah, yeah, I know, always measure for repeatability. I was off the page at that point, anyway, so measurements didn't seem too important. After that, off to bed.
The next morning, I toasted the bread spices in a skillet on the stove top and ground them. Not knowing the exact formulation, I guesstimated that 2 tablespoons of coriander seed and 1 tablespoon each of caraway and fennel seeds should do. Oh, my, the house smelled wonderful! From previous experience, I knew to keep an eye on the fennel seeds; they start out with a greenish cast and turn a golden brown when ready. The caraway and coriander start out a tan/brown color, so they aren't as helpful in indicating when they are done. It is important to give the seeds a shake every minute or so to prevent scorching.
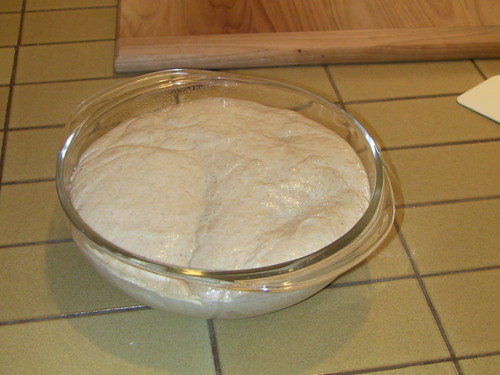
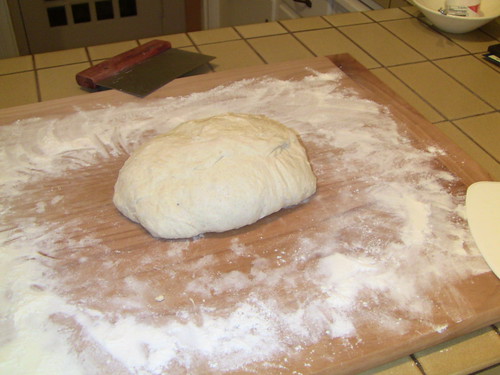
From there, it was a matter of combining the starter, the water, the spices, the cracked rye soaker, the (drained) sunflower seed soaker, and rye flour. It's a bit of a stretch to refer to a 100% rye dough as "dough". Wet mortar seems to have a closer similarity to this stuff than any dough based on wheat flour. Anyway, the ingredients were thoroughly mixed, covered with plastic wrap, and left in the sunshine on our stoep. We're seeing the first signs of Spring here in Pretoria and the sunny stoep was warmer than my kitchen.
An hour later, I brought the bowl back in, troweled the dough onto a wet countertop and worked in the salt, per Mini's recommendation. The dough was put back in the bowl, covered, and set back out in the warmth of the sunshine. At the 3-hour mark, the mortar/dough was showing some aeration, which indicated that the starter was at work.
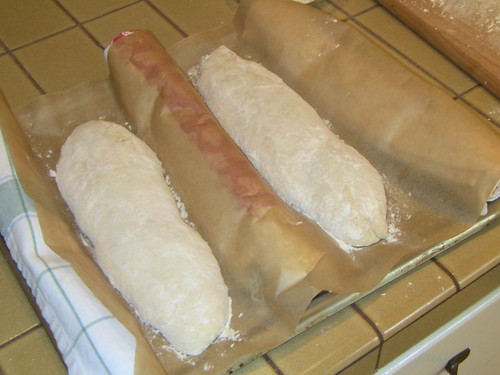
Since the cooking gear available to me is a bit different than Mini's, I elected to split the dough into two loaves and bake each in a 4x8 (inches) loaf pan. Those fit neatly into a covered roasting pan, giving me the steam chamber that Mini devised by flipping one pot upside down on top of the other. Having oiled the pans and dusted them with rye flour, I brought the dough in, divided it into two pieces, shaped each, and gently tamped them into the waiting loaf pans. Each pan was approximately half full, giving me a reference point for gauging their eventual expansion. Just to be sure that I didn't miss anything, I also lightly sprinkled the loaves' surface with rye flour, knowing that the resulting cracks in the flour would be another indicator that the dough was rising. After that, I covered each loaf pan with plastic, put them in the roasting pan, covered it, and set the whole shebang back out in the sunshine.
Two and a half hours later, or five and a half hours into the process, the loaves had filled the pans about 3/4 full, which was about a 50% expansion. The top was a network of dark fissures in the lighter rye flour. After debating the merits of allowing further fermentation/expansion versus the possibility of over-proofing, I decided to err on the side of caution and bake the bread. I did remember to remove the plastic wrap (whew!) from the loaf pans before sliding the roaster into the oven. I also chose to sprinkle a tablespoon or so of water in the floor of the roasting pan, just to add some more steam. Maybe that helped, maybe not.
Per Mini's instructions, the bread went into a cold oven, then spent the first 25 minutes at 200C in convection mode. After that, I took the roaster out of the oven, pulled the loaf pans from the roaster and put them back in the oven, then switched the oven from convection mode to a top and bottom heat mode, still at 200C. Not knowing exactly how long they would take to reach the recommended internal temperature of 93C, I checked back in 20 minutes. The internal temperature was barely 91C, so I gave them an additional 5 minutes. At that point, the thermometer showed 94C, so I removed the bread from the oven and depanned the loaves onto a cooling rack, covering them with a cotton towel. A few hours later, after they were thoroughly cooled, I put each in a plastic bag.
If you read Mini's account and compare it to this one, you'll notice that the added soakers and the division into two loaves are not my only departures from her formula. She is working with a finely ground rye flour (Type 950, I think) that, back in the States, I might call a medium rye. What I have available is a stone ground whole rye with noticeable flecks of bran. I think that my dough was a bit stiffer than she describes hers, probably because of the additional absorption of the bran. Consequently, I wasn't bashful about working additional water in from either the countertop or my hands.
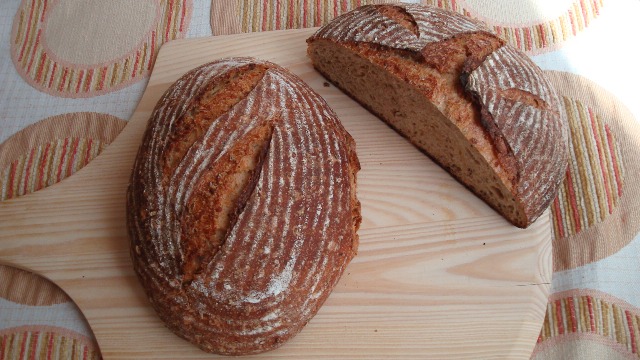
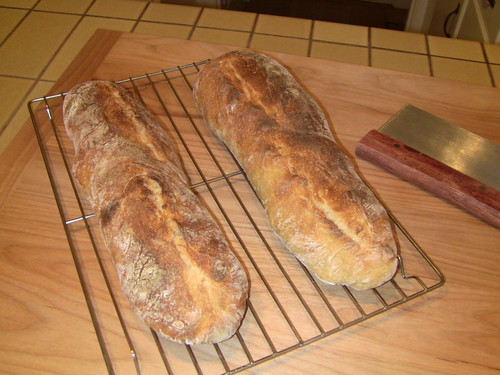
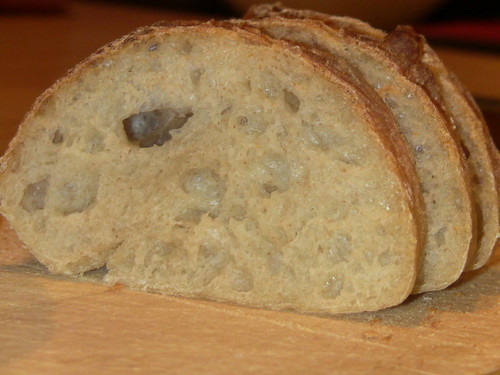
Having given the bread 25 hours to for moisture distribution and stabilization, I cut into one of the loaves this afternoon. Several things became evident. First, I could have allowed the ferment to continue longer. These are not bricks but neither did they achieve the airiness of crumb that Mini's bread shows. My concern about over-proofing made me a little too twitchy. I think that is going to be one of those experience things (with probably at least one flop) to know how much is enough and how much is too much. Second, the bread spices that were so evident during the baking have taken a backseat to the rye itself in the finished bread. They are still in there, but they are the background singers to the rye's lead (if we were talking music). The sunflower seeds add a bit of nutty crunch and flavor to the blend. The crumb is very moist and cool but not gluey. Were it not for the textures of the the cracked rye and sunflower seed soakers, it would be almost cakelike; albeit a very dense and chewy cake. There's a lot going on in this bread and it's only Day 1. I'm curious to see how the flavors evolve as the bread ages. Most importantly, my wife likes it! Since it was intended for her benefit, that's a good thing.
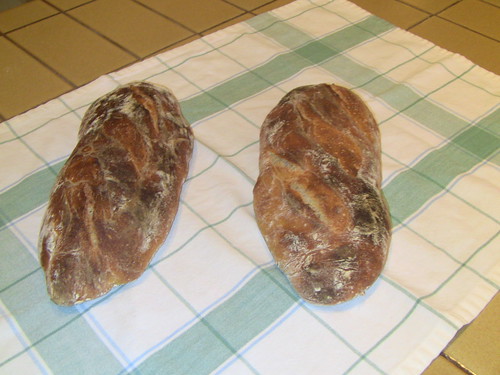
The first picture, below, shows the loaf profile and crumb. Like I said, not a brick but more proofing would have been allowable.

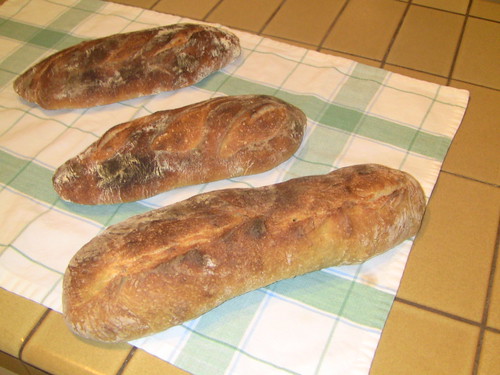
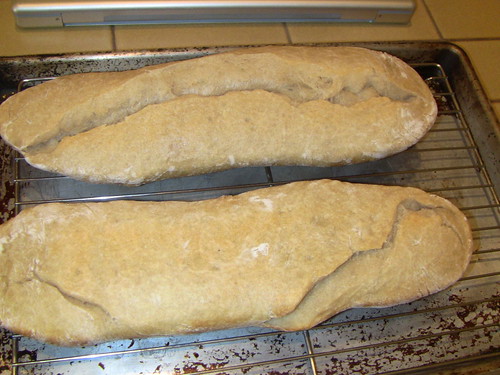
The second picture, below, shows the "crackle" texture in the flour sprinkled on top that was caused by the loaf's expansion during proofing.

There are things that I might do differently next time. I'd probably skip the rye flour dusting in the loaf pans and use a solid fat instead of oil. The oil/flour residue on the sides of the loaves isn't visually appealing to me. I might also skip the dusting of flour on top of the loaves. It was my choice rather than anything Mini recommended and I don't know that it helped me to ascertain readiness as much as I had hoped. Oh, and I would try to remember to dock the loaves prior to baking. That step got left out entirely and it was probably only because the loaves were somewhat underproofed that I don't see any problems as a result.
Thank you, Mini, for sharing your formula with us. Once I feel like I have a handle on this bread, I'd like to try some that have a very long, low-temperature bake to see if I can approximate a pumpernickel that is baked in a WFO overnight.
Paul


 taping
 the loft
 bamboo floor
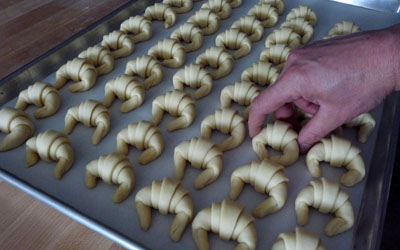 mini croissants
 mini croissants baked
 hot cross buns
 burger buns
