The Fresh Loaf

A Community of Amateur Bakers and Artisan Bread Enthusiasts.

Recent Blog Entries

louie brown's picture
louie brown

Karin's post was so tempting and seemed clear. I did my best to follow her method. I do think that the proofing times were a bit long for my kitchen temperature yesterday (80F,) which only emphasizes the lesson about being able to judge these things for oneself. The cold soaker, the whole wheat starter and the spices combined into a very tasty loaf. Constructive criticism welcomed. Thanks, Karin.


Mebake's picture
Mebake

This is a seeded levain bread baked from Hansjoakim's recipe here. Boy was it tasty! Rye, though at 15% was pronounced, and had a wholewheat aftertaste. The seeds i used where flax, and sunflower.

I involuntarily differed from Hans recipe. Due to my hectic schedule, my rye starter was overripe, and so was my Rye levain. I had to add commercial yeast to get this bread going, so the sour tang was not as intended by hans' recipe.

All in all, this bread is versatile, and appeals to many tastes including mine. I shall make it again, once i get the Rye levain happy again. Thanks Hans for sharing you recipe!


 Khalid

GSnyde's picture
GSnyde

I planned to try proth5's sourdough baguettes this weekend, per Brother David's recommendation.  And that turned out to be an especially good idea.  It's rainy.  My wife and I both have colds (or maybe we each have half of the same cold).  Perfect time for chowder.  And we have several pounds of Alaska Halibut in the freezer, caught by our neighbor.  And chowder just needs to be accompanied by baguette.   

My previous attempt at baguette was with the Anis Bouabsa formula.  It was a very trying experience for a near-novice working with that high-hydration dough (though the results were really good).  My wife wanted something a bit sourer, and I wanted to believe that Pat's 65% hydration formula would also make a superb baguette.  Now I believe.

IMG_1716

IMG_1720

]IMG_1722

I followed proth5's formula, as reported in David's blog (http://tfl.thefreshloaf.com/node/10852/baguette-crumb-65-hydration-dough), using KAAP flour.  I wanted to make three 9 oz baguettes (about 14 inches in length), so I increased the formula by 30%.  And I used Sylvia's magic-steam-towel technique (http://www.thefreshloaf.com/node/20162/oven-steaming-my-new-favorite-way) for pre-steaming and supplemented it with the usual lava rocks in cast iron pan. 

The dough was much easier to work with than the Bouabsa dough.  And the result is just the crispy-crusted-creamy-crumb-slightly-sour baguette I was going for.  I think I'm becoming a better baguetter.  The hot towels were also helpful in clearing my sinuses.

The chowder was exceptional, too.  A variation on my favorite clam chowder (Taddich Grill recipe), but with meaty chunks of Halibut.

Hasn't cured the common cold, but I'd feel worse if I didn't have such good soup and bread.

Thanks, Pat, and David, and Sylvia.

Glenn


txfarmer's picture
txfarmer

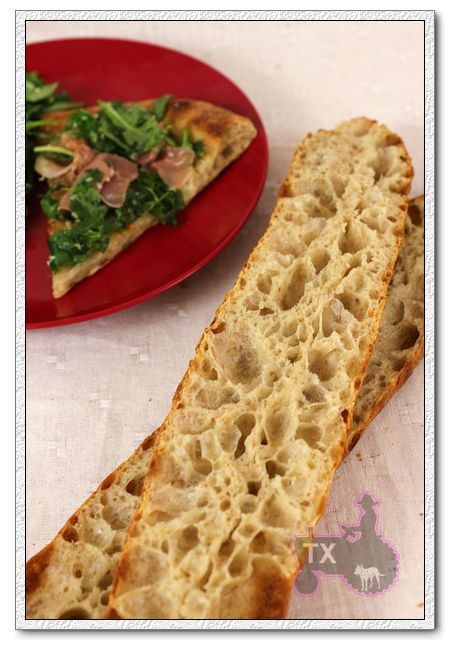
Yet another variation on my 36 hour sourdough baguette dough, only this time, it's not baguette at all, it's pizza! Of couse it's nothing new to make high hydration baguette dough into pizza, but I didn't realize how convenient it is to combine the two. Same dough, but pizza doesn't need to proof, it bakes at the highest oven temp (which is the same temp I preheat my oven for baguettes), it bakes for only 8 minutes (way shorter than the proofing time for baguette dough) - all this means I can use a part of the dough to make and bake pizza while the rest are made into baguette and being proofed. The pizza is made and mostly consumed before baguettes are scored and sent into the oven. How convenient, that's what I call stream-lined baking!


The basic 36 hour baguette formula can be found here, and the rye starter variation I used for this dough can be found at the end of this post. I will breifly outline the process again:

AP flour, 425g

ice water, 325g

rye starter (100%), 150g

salt, 10g

- Follow the basic 36 hour sourdough baguette formula here until dividing the dough into 4 parts, each around 230g.

- Preshape one piece of dough into round for pizza, the rest into cylindar for baguettes

- After relaxing for 40min, stretch the pizza dough into a 11inch round, put on parchment. I find that it's hard to stretch the dough into desired size in one shot, so I stretch as far as I can, then let it rest on parchment. In the mean time, I go ahead and shape the other 3 pieces into baguettes and and it proof on parchment. By the time I get back to the pizza dough, it's easy to stretch.

- Add topping. This time I first drizzle olive oil, then added fresh mozzarella, and grated cheddar. Send the pie into oven to bake at 550F (the highest temp my oven would go) for about 8min. When taken out, the cheese is still bubbling, put on a layer of prosciutto, then a layer arugula (which was tossed with some olive oil and grated cheddar first). Prosciutto tend to get tough went it's baked too long, so it's added afterward, the residual heat is enough to blend all the flavors.

- Score and bake the other baguette doughs as usual when it's finished proofing.


I really like the slight bitterness of arugula, a perfect match for prosciutto, and the cheese. The cheddar cheese I used was pretty salty, so I didn't add more salt.


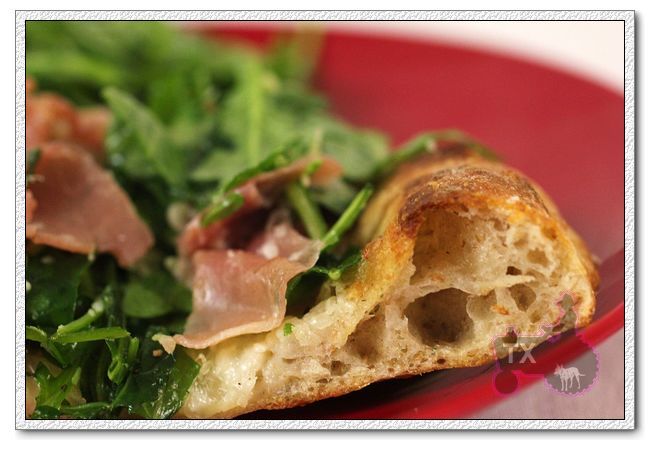
That, is what I call a good crust!
 

The baguettes weren't half bad either, did I meantion how much I like the rye starter variation? The flavor is outstanding.
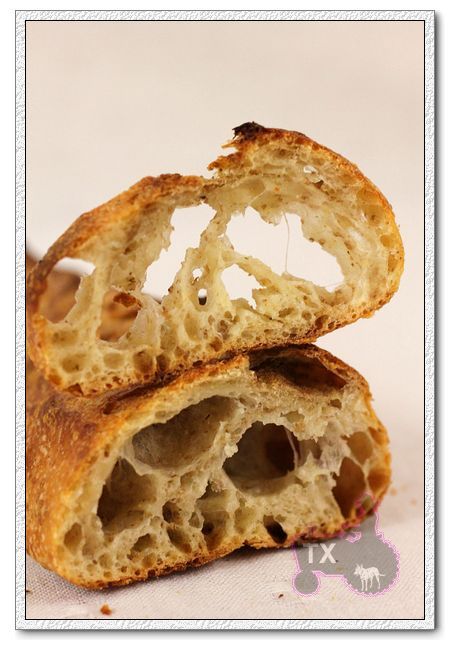
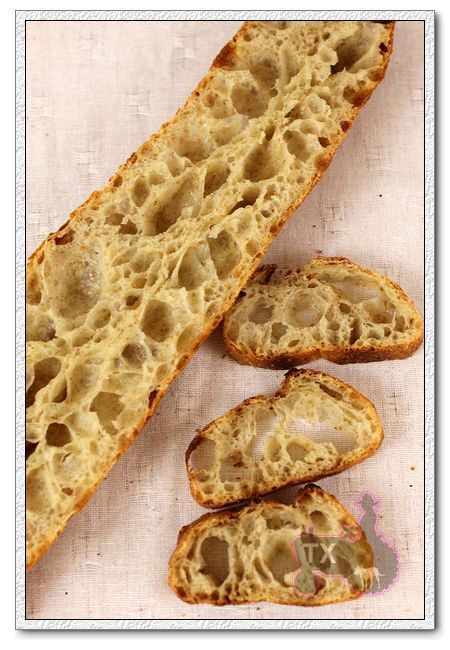
 

I even got some "ears"! Getting a bit more confident with scoring the 80% dough.
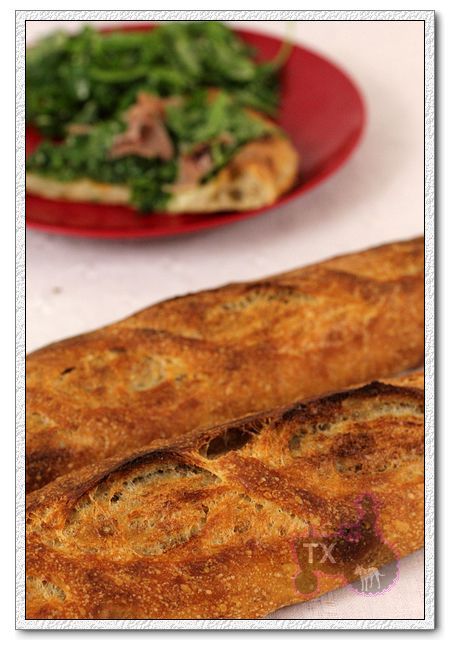
Who knew baguette and pizza are so similar?
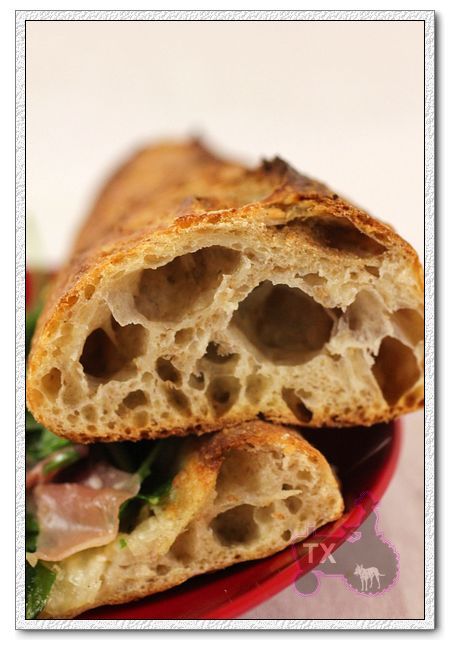
 

The process worked out so smoothly that I think I will always use one piece for pizza from now on - it would mean faster dinner and more room on baking stone for the baguettes.
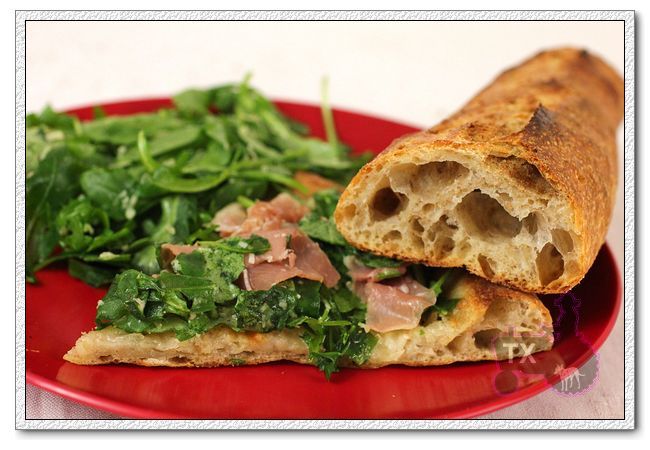
Sending this to Yeastspotting.

Father Raphael's picture
Father Raphael

Is there any advantage in making a sourdough starter using Nancy Silverton's labor intensive method or Peter Reinhart's more simplified one?

copyu's picture
copyu

Hi all,

I'm getting tired of repeating myself on "Pretzel-Related" threads where discussion of "Lye" is concerned and I always have to resist the temptation to turn the whole discussion into a Chemistry lecture. I decided a few days ago to do a little "Kitchen Science" and do an incomplete, but slightly more detailed explanation of what alkalis are all about

What I wanted to do was examine some of the claims I've read here, and on many other pretzel-making/baking/soap-making sites. I got tired of reading YahooAnswers, where someone says "If you can't get Sodium Carbonate (Na2CO3), use Sodium BI-Carbonate, because they are very similar chemicals..." This is a true, but totally vapid and rather stupid statement. Common Salt, Sodium Chloride, (NaCL) is also a 'similar chemical' to Sodium BI-Carbonate, (NaHCO3) and similar to Caustic Soda, (NaOH) because they all have only one sodium ion, per molecule, when in solution...It doesn't mean they will perform similar chemical reactions on your bread or noodle dough, however

Understanding pH in detail isn't that straightforward or easy, but as a guide-line, pH7.0 is completely 'neutral' (or in balance) and it's the measurement you should get from pure distilled water. Lower numbers are found with sour, acidic foods, such as lemon juice and vinegar, around pH3-4. Numbers above 7.0 indicate a 'basic' or 'alkaline' property. Any liquid you test will be either acidic, [low pH, well-under pH7.0]; neutral [pH7.0 or pretty close to it]; or alkaline [pH higher than 7.0]

The problems arise when people fail to realize that the pH scale is "logarithmic" [or negative logarithmic] in the same way that dB [deciBels] are in electronics. This is an "engineering solution" to dealing with ridiculously big numbers. What this means is that the difference between one point on the pH scale represents a difference of a power of ten: pH8.0 is about TEN TIMES more alkaline than pH 7.0; a solution of pH9.0 is 100 times more alkaline; pH10 is 1000 times more alkaline, and so on...A tap-water reading in many cities around the world could be as high as pH8.5, which is also the most-often quoted pH figure for Baking Soda. Caustic Soda, or 'Pretzel Lye', on the other hand (one of the strongest known alkalis), is at least 5pH points higher, meaning that it is at least 100,000 times stronger than baking soda. It is this which allows the alkali to attack the surface starch of your pretzel dough quickly and that gives the brown color and the perfect crust that many pretzel fanatics love!

What I did was make solutions using 'Aqua Purificata', the nearest thing you'll find to pure, ion-free, distilled water at a reasonable price. I measured 3g each, using my most accurate scale, of Baking Soda, Kansui Powder (the ingredients of Chinese Lye Water) and Caustic Soda (or 'Pretzel lye') and mixed the powders with 100g of purified water. I mixed each solution for two minutes in brand-new plastic containers, rinsed with the pure water and dried with heavy paper towels. I measured the pH using an $80 pH meter that is fairly well-calibrated. After 3 minutes in each solution, I took photos of the meter readings. I now think I should have delayed the photography until 5 minutes had passed, but the pics I have will give you an idea of the differences among the three main chemicals I tested

http://www.flickr.com/search/?q=different+alkaline&m=tags&w=71323838%40N00&z=m&s=int

I hope this is clear enough and useful to somebody,

Best,

copyu


dmsnyder's picture
dmsnyder


I've been thinking about baking a sourdough nut bread for some weeks. They are so nice plain and with cheese. With lots of family expected for several days around Thanksgiving, I'll want a variety of breads I can take out of the freezer to serve with meals and for snacks. I like to serve sourdough nut breads with hors d'oeuvres.

I thought over the breads with nuts I've made before but decided to try something new: a French-style (not too sour) Pain au Levain with hazelnuts and currants.

I based the bread on Hamelman's Pain au Levain from “Bread.” I added about 25% nuts and currants to the dough at the end of mixing and followed Hamelman's procedure for bulk fermentation, proofing and baking.


Levain build

Wt.

Baker's %

KAF AP flour

4.6 oz

93.50%

Medium rye flour

0.3 oz

6.50%

Water

3 oz

60.00%

Mature (stiff) starter

1 oz

20.00%

Total

8.9 oz


Final dough

Wt.

KAF AP flour

1 lb, 9.8 oz

Medium rye flour

1.3 oz

Water

1 lb, 1.8 oz

Salt

0.6 oz

Levain

7.9 oz

Roasted hazelnuts

4 oz

Zante currants

4 oz

Total

3 lb, 13.4 oz

Procedure

  1. Mix the final levain build 12 hours before the final mix. Cover the bowl and let it ferment at room temperature (about 70ºF).

  2. Mix all the ingredients except the salt and levain to a shaggy mass. Cover and let rest (autolyse) for 20-60 minutes.

  3. Sprinkle the salt over the dough and distribute chunks of the levain over the dough. If using a stand mixer, mix with the paddle at Speed 1 for 1-2 minutes to incorporate the added ingredients and then with the dough hook for about 6 minutes at Speed 2. There should be moderate gluten development. Add the hazelnuts and currants and mix for another 2 minutes or so at low speed. Desired dough temperature is 76ºF.

  4. Transfer the dough to a lightly floured board and knead briefly to evenly distribute the nuts and currants. Then round it up and place it in a lightly oiled bowl and cover tightly.

  5. Bulk ferment for 2 ½ hours with two folds at 50 minute intervals.

  6. Divide the dough into two equal pieces and preshape as rounds or logs. Let the pieces rest for 20 minutes.

  7. Shape each piece as a boule or bâtard and place en couche or in a banneton. Cover with plastic or a towel.

  8. Proof the loaves for 2 to 2 ½ hours.

  9. Preheat the oven to 500ºF with a baking stone and steaming apparatus in place 45 to 60 minutes before baking.

  10. When proofed, transfer the loaves to a peel, score them and transfer them to the baking stone.

  11. Turn the oven down to 440ºF and bake with steam for 15 minutes, then in a dry oven for another 25-30 minutes.

  12. Transfer the loaves to a cooling rack, and cool completely before slicing.


    Notes on my baking procedure

  • To steam the oven, I use a cast iron skillet filled with lava rocks. This is pre-heated along with the baking stone. Right after the loaves are loaded on the stone, I place a perforated pie pan with 10-12 ice cubes on top of the lava rocks.

  • I start my bake with the oven at conventional setting. At the end of the steaming period, I switch the oven to convection bake and lower the temperature 25ºF.

  • For this bake, when the loaves were fully baked, I turned off the oven and left the loaves on the

    stone with the oven door ajar for 10 minutes.


We tasted the bread when (almost completely) cooled. The crust is very crunchy. The crumb was denser than I had hoped, although this is a rather low-hydration bread. My experience with nutted breads has always been that the crumb tends to be less open than expected, so now I expect it.


The crumb was very chewy. The flavor of the bread was lovely, with no perceptible sourness, except for the sweet-sour flavor of the currents. At this point, the bread, nuts and currents each contributes its distinctive flavor. Quite nice.


I'm looking forward to having this bread toasted for breakfast. 


David


Submitted to YeastSpotting


Franko's picture
Franko

Savoury Polenta Levain


This summer our garden provided us with a bumper crop of little cherry tomatoes , so many in fact that we, or rather my wife Marie, ended up putting a large portion of them in the dehydrator so we could make use of them through the winter time. The tomatoes were cured briefly in a mix of salt, olive oil and fresh oregano before going into the dehydrator. When they were finally ready to eat we were amazed at how well the pure tomato flavour had been retained. I've eaten a lot of the sun dried type that you can find at the grocer or deli over the years, but I've never had any with quite as intense a flavour as these little gems. At last count we had just over a half pound of dried cherry tomatoes , which made me think that we could spare a few to make a bread with. The idea of using them in a loaf with polenta came from remembering an excellent grilled polenta with a sun dried tomato, garlic, parmigiano and olive oil dressing that I'd had years before at a pot luck BBQ with some friends.

Searches on TFL and the web in general didn't turn up much that I was interested in as most them called for eggs and milk or other ingredients I wasn't keen on, so I thought a little experimentation was in order to make the bread I had in mind. It had to be made with natural yeast, polenta -(more accurately, a hot cornmeal soaker), and the dried tomatoes, other than that I was pretty open to using whatever I felt would help compliment the flavour of the tomatoes. Thinking about the grilled polenta dish that I'd had, I decided to just go with some roasted garlic and parmigiano as the flavour additions and see how that worked. Well it worked just fine! The tomato flavour came through as the main player, the garlic and cheese offering subtle support, and the polenta adding a soft texture to the overall loaf. The sour sort of plays around in the background, which is what I was hoping for since I wasn't going for a tangy or sharp flavoured bread. The polenta gives it a soft crumb, and the wheat provides a good chewy crust, making for a pleasant contrast while you're eating it. This bread is great for panini sandwiches and toasts up quite nicely as well, but to me this is what I call a 'cocktail bread' , or something that you might make to take to a friends for dinner, or to have with some olives and cheese and a glass of wine as your waiting for the main course to finish cooking. There are a number of other things you could add to it such as toasted pine nuts, various herbs, or a different type of cheese but if you're looking for the taste of the tomato to shine through I'd recommend using a light hand. The recipe is included below as well as some photos. If any TFL'rs are interested in giving this one a whirl, I'd be interested to hear your thoughts on it.


All the best,

Franko


                      SAVOURY POLENTA LEVAIN

Ingredients

%

Kg

Kg


Levain


Mature liquid Culture

13

10


Bread Flour

100

78


Water

125

100


Polenta


Water-144 F

100

300


Yellow Cornmeal

33

100


Butter/olive oil *

5

15


Final Dough


Bread Flour

100

600


Polenta

69

415


Honey

2.5

15


Roasted

Garlic/

Shallots


6

36


Parmigiano Cheese

10

60


Levain

31

188


Salt

2

12


Water

25

150


Dried Tomatoes

*

10

60


Total


1305.5


Notes:

*drizzle a little olive oil over the tomatoes to soften before starting the mix.

sundried tomatoes packed in oil and drained can be used as well -all or in part

* either butter or olive oil work well, use butter if a richer flavour is desired

Procedure:

  • Mix the levain 16-18 hrs before making the final dough and keep at room temp.


  • Make the polenta at the same time as the levain. Pour boiling water over the cornmeal and butter/oil and stir well then heat in microwave on high for 1 minute, stir until it begins to thicken, then heat for another minute or less and stir again till the polenta is very thick. Pour into a shallow container and let cool overnight. The polenta should be soft and slightly granular, not gelatinized or rubbery.


  • Break the polenta up in the mixer using the paddle attachment on 3rd speed for 1 minute, then add and mix all the ingredients except the salt and tomatoes on 1st speed until combined in a rough mass. Add the salt and mix on 1st speed for 3-4 minutes then on 2nd speed for 7-8 minutes. Adjust the water if needed to attain a medium soft dough. The dough should be soft enough to incorporate the dried tomatoes easily.


  • Mix in the dried tomatoes on 1st speed until thoroughly combined. Knead the dough by hand on the counter for 4-5 minutes using minimal dusting flour and a scraper until it's developed and the dough is smooth and elastic.


  • 1st stretch and fold after 1 hr, then again after the 2nd hr.

  • Retard at 45F or less for 18 hrs. Allow the dough to come to room temp of 70-75F for 1-1/12 hr before shaping.

  • Lightly round the dough, cover and rest for 15-20 minutes, then shape as desired and roll the loaf in semolina. Try to tuck any tomatoes poking through the suface back inside or underneath the loaf to keep them from scorching. Let rise for 2-1/2 to 3 hrs, then slash and slide on to a stone in a preheated 500F oven with normal steam and lower the oven temp to 460F. Bake for 15 minutes then rotate the loaf for even baking if using a non convection oven and bake an additional 20-25 minutes, rotating the loaf once more.

  • Cool the loaf on wire racks for 8hrs wrapped in baker's linen

breadsong's picture
breadsong

Hello, I recently purchased the Tartine Bread book, by Chad Robertson, when I had an opportunity to visit the Bakery.
I was there for breakfast, so alas, did not get to taste Mr. Robertson's bread, but did get to enjoy a lovely croissant & have a good look at his book... 


I really liked how Mr. Robertson described his journey as a baker and it's beautifully written and illustrated.
I especially liked what he said about fermentation...I had to have this book to add to my collection back home!

My dear father-in-law celebrates a milestone birthday this weekend, so I wanted to bake this special Country Bread for him.
I really tried to make sure I was fermenting the dough in the right temperature zone...ensuring a cool enough environment for the leaven and then a warm enough environment for bulk fermentation...requiring some woodstove management as I tried to control temperature in the house!

I retarded the loaves in the fridge for 7 hours before baking. I don't have the combo cooker that is recommended in the book so just baked my usual way.  The first loaf went in straight from the fridge, and I had an interesting blow out on the bottom of the loaf, that actually made the loaf sit up pretty for pictures! The second loaf proofed for about 45 minutes prior to baking, and I scored it differently, hoping that would help control how the loaf expanded.

I scored the tops with an "F" for Father-In-Law...the aroma of the baked loaves is heavenly...the loaves sang nicely and the crust crackled!
I don't have a crumb shot yet because the bread's for the 'big day' tomorrow...I hope father-in-law likes his bread!!!  
Regards, breadsong

MadAboutB8's picture
MadAboutB8

Whole wheat multigrain sourdough from Jeffrey Hamelman's Bread cookbook is the bread that I bake quite often. I really like the mild sweetness from honey and the aroma from the mix of honey, whole wheat flour and grains. It got a nice texture and taste. I am always amazed at how sweet the bread is for a little amount of honey in it.

I wanted to try experimenting Peter Rienhart's whole wheat flour soaker with this WW multigrain loaves. I was so impressed with the 100% whole wheat sandwich loaf from Peter Rienhart's Wholegrain Bread. It delivered a tasty and soft crumb loaf (the details of that bake is here: http://youcandoitathome.blogspot.com/2010/10/100-wholewheat-sandwich-bread-peter.html.)

I was so curious to see what the difference Peter Reinhart's soaker method will deliver to the bread that I baked often and know its taste and texture profile.

Well, what can go wrong with matching technique and recipe of the two bread masters I admire the most, Jeffrey Hamelman and Peter Reinhart. 

The soaker method didn't dissappoint. It delivered more open and softer crumbs. I don't know if I was only imagining...but I think, by using soaker method, the WW multigrain also tastes nicer and sweeter. The taste and aroma from honey is more pronounced. All and all, I'm happy with incoporating soaker method to whole wheat recipe..and will definitely do it again in my future WW bake.

More photos and recipe can be found in the below link.

http://youcandoitathome.blogspot.com/2010/10/lastest-experiment-with-whole-wheat.html


Sue

http://youcandoitathome.blogspot.com/

Pages

Subscribe to Recent Blog Entries