The Fresh Loaf

A Community of Amateur Bakers and Artisan Bread Enthusiasts.

Recent Blog Entries

dmsnyder's picture
dmsnyder


Pat's (proth5) baguettes have been my “go to” recipe for baguettes for quite a while. When she posted a new formula in November  - See Starting to get the Bear  - I promised myself to give them a try. I got around to it today.

These baguettes are made with both levain and a poolish and are spiked with some instant yeast. They still have a relatively long fermentation, for yeasted baguettes. Pat's description of her method included baking some of the dough the day they are mixed and retarding some to shape, proof and bake the next day.

Here is my interpretation of her formula a methods, with some modifications, as described below.


Poolish


Ingredients

Wt (oz)

AP flour

3.7

Water

3.7

Instant yeast

“generous pinch”


Levain


Ingredients

Wt (oz)

AP flour

1.7

Water

1.7

Ripe sourdough

0.35


Final dough


Ingredients

Wt (oz)

AP flour

31.35

Water

19.2

Instant yeast

0.05

Salt

0.55

Poolish

All

Levain

All


Total dough


Ingredients

Wt (oz)

Baker's %

AP flour

37.1

100

Water

25

67.25

Instant yeast

0.1

0.25

Salt

0.55

1.5

Starter

0.35

9

Total

63.1

178


  1. Mix the poolish and the levain and let them ferment at room temperature for 8-12 hours.

  2. Mix all the ingredients except the salt to a shaggy mass. Cover and let rest for 30 minutes. (I actually autolysed for 90 minutes.)

  3. Add the salt and hand mix in a large bowl or machine mix for 3-5 minutes at low speed. (I hand mixed the dough.)

  4. Bulk ferment for 4.5 hours with a stretch and fold at 2 hours. (Or, cold retard for up to some length of time, but surely less than 3 days. Or divide some pieces and retard the rest of the dough. This time, I divided the dough in two after the S&F and retarded half.)

  5. Divide into 10 oz pieces and pre-shape as logs. Rest the pieces, covered, for 20-30 minutes.

  6. Shape as baguettes.

  7. Proof en couche for 1.5 hours (Or until ready. Or retard shaped loaves.)

  8. Pre-heat oven to 500ºF with baking stone and steaming apparatus in place.

  9. Transfer loaves to peel. Score them and transfer them to the oven.

  10. Bake with steam for 5 minutes. Then lower temperature to 480ºF (convection, if you have it), and bake for another 12-13 minutes.

  11. Transfer to a cooling rack and cooling thoroughly before eating.


Because of the size of my baking stone, I divided half the dough into 4 pieces to make mini-baguettes.The dough handled really nicely, I thought. The baguettes were proofed and baked as above, according to Pat's directions. After 17 minutes, they were rather dark, especially the one at the back of the oven. They sang loudly when removed to cool. They came out of the oven just in time to eat with dinner, for a change, rather than just in time for bedtime snack.

Baguette crumb - torn, not cut

We ate one baguette with dinner – Sautéed petrale sole, leeks vinaigrette and warm Swiss chard salad with olive oil and lemon dressing.

The crust was very crunchy. The crumb was quite chewy and nicely aerated. The flavor was good, but I will use a bit more salt next time. I think I will also bake at a somewhat lower temperature for a slightly longer time. 460-480ºF for 20 minutes would be better for me, I think.

Addendum: I baked the second batch of baguettes today. I baked these at 470ºF for 20 minutes.

Baguettes with varied shaping and scoring

Compared to the first batch, the second had less dark crust. It was very crisp. The crumb was basically the same. The flavor was noticeably sweeter, but it still was under-salted to my taste.

These are very nice baguettes. I'll be following Pat's reports of her continuing bear hunt.

David


breadsong's picture
breadsong

Hello,

I've been watching shaping videos, including brand a new one! from Mark at The Back Home Bakery, thanks to freerk's recent post (please see his post here...) and everyone who responded! And many thanks to Mark and those who take the time to make these videos; they are such a great resource.

There was nothing to do except get my hands in some dough!

My husband had a craving for a simple white bread, so I made a batch of Mr. Hamelman's Toast Bread (I snuck in 3% of my Red Fife whole wheat flour for some extra flavor). I made 1.5 times the recipe so I would have a little extra to practice shaping with. 
This quantity made a pullman loaf, a small batard, and two different sizes of couronne bordelaise:


I shaped the small batard trying to use Mark's technique he just posted.
I shaped the couronnes using 1.5 ounce boules for the small one (proofed in a plastic wicker basket), and 2 ounce boules for the bigger one.
I rolled the dough circle for the small couronne a bit thicker, and am happier with the result after baking.


I gave my firebricks (I use these in place of a baking stone) a rest today, and was happy with how the bread baked and rose in the oven in the absence of using a stone. The loaves were nice and crackly too, after baking.

Still having some candied orange peel left over from Christmas baking, I made Gibassier (Ciril Hitz's beautiful recipe).
This is an orange and anise-flavored enriched dough, and the flavor is absolutely-out-of-this-world!!!
I am so glad I made these!:


SylviaH made these too; I found her post today - please see here.
I think she did a much nicer job than I!

Happy baking everyone! from breadsong


em120392's picture
em120392

Hey guys! I just wanted to thank you again for your encouraging comments on my bread-baking-project for school. I appreciate your thoughts very much! =]

I made bagels the other day, and wanted to share my post with you guys.

Here it is!

(my brother and i share a blog: http://bakingacrosscountry.wordpress.com/ )Originating in Poland in the 1600s, Bagels came along with Jewish immigrants to Ellis Island. Since many people of Jewish descent settled in New York, bagels have since been a tradition in the City.

The word bagel is derived from the German word for "to bend," symbolizing the round shape of the bread. Bagels were thought to bring good luck to the receiver of the bread. Usually, women who just gave birth received them for good luck as well as a symbol representing the cycle of life due to their circular shape.

The bagel gains its distinct chewiness from being first boiled, and then baked at a rather high temperature. A prolonged, cool second rise contributes to the bagels developed flavor, as well as the "fish eyes" on the crust. "Fish eyes" are raised bumps on the surface of the bread.

The first time I made bagels a few years ago, I was foolish and used whole wheat, no-knead dough from Artisan Bread in Five Minutes a Day. Although this dough made fine boules, the bagels dissolved in the boiling water, leaving broken lumps of chewy dough. Nevertheless, I was determined to find the perfect bagel recipe.

My brother, Evan, has been baking his own bagels weekly for about a year now. Out in California, each bagel costs over a buck, and they're spongy rolls. Out here in New Jersey, we sometimes get good bagels-but mostly, they're doughy and the size of your face.

Reinhart begins his recipe with a sponge, combining water, yeast, and flour into a thick-pancake like batter. After about two hours, I added more yeast, flour, salt and honey. I tried to mix the ingredients together, but flour flew out everywhere, making a giant mess. I tried to knead the dough in the Kitchen Aid, but the dough was so stiff, I could smell the motor straining.

That's why we have hands, I guess. For about ten minutes, I kneaded the stiff dough until my arms hurt, and the dough passed the window pane test. I measured out the dough into twelve even pieces (thank goodness for a scale). However, 4.5 ounce bagels were a bit too large for breakfast, and I think making about 16 would be a better portion.

After letting the dough rest for a little bit, I shaped them into bagels. I tried both ways, by sticking my finger through the dough and stretching the hole out, and also by forming them from a coil. I found that by poking my finger through, the shape of the bagel was more consistent, but I'm sure with more practice, I could get better at the coil-method.

I let the bagels rest again for about twenty minutes. Reinhart suggests a test for readiness: I placed one piece of shaped bagel dough in a bowl of water and saw it immediately floated.

After the test, I placed them on baking sheets, covered them with plastic wrap, and put them in the fridge for two nights.

On the second night, I brought a pot of water to a boil with an added tablespoon of baking soda. I didn't want to crowd my pot, so I only boiled four bagels at a time, for about a minute per each side. Immediately after boiling, I put them on a cooling-rack to drain, and sprinkled over a combination of sesame and poppy seeds, as well as some sea salt.

After boiling all 12 bagels, I baked them in a 500 degree oven for 5 minutes, rotated the pans, and baked them about 7 minutes more at 450, or until they were deep golden brown.

The next morning, I had a bagel with cream cheese for breakfast. Wow. They beat any one of the partially-cooked ones I get from the bakeries in my town. Since there are only three of us living in my house right now, we froze half of the bagels for future use. I also gave my mentor, Mr. Esteban a handful of bagels to share with his family. I hope he enjoyed them!

Besides my finicky mixer, this recipe was super simple and didn't require all that much effort (but more utensils than normal to clean). Rather than spending 12 bucks for 12 bagels on Sunday, I can bake these (better) bagels for a fraction of the cost. Next time, I'll try to find malt barley to make more authentic bagels, but for now, these are awesome!

Olver, Lynne. "Breads." Food Timeline (2011): n. pag. Web. 14 Jan 2011. <http://www.foodtimeline.org>.


mdunham21's picture
mdunham21

   I’ve been baking bread ever since I stumbled upon my grandfather’s recipe for buttermilk bread.  His bread was a basic loaf but it sparked my love for all things fermentable.  My love grew into brewing my own beer and baking bread was put on hold.  I graduated college in 2010 and finances have become tighter since leaving school.  It is more financially responsible to spend the money on baking bread than brewing suds.  Although I desperately miss the smells that come with brewing a batch of homebrew, the smell of freshly baked bread has been a welcome substitute. 


    Last weekend I made a pate fermentee with the intention of baking baguettes.  I made sure to take a portion of the dough and wrapped it tight for storage in the freezer.  Thursday of this week I was struck with the urge to bake once again and withdrew the pre-ferment from the freezer to the refrigerator.  I mixed up the dough on Friday and went through the motions of fermentation.  The dough was shaped and then prepared to spend the night in the refrigerator.  I wanted to develop a nice flavor profile so I retarded the dough over night and baked them today. 


I will be sure to keep this blog current with my baking adventures; will soon be moving into sourdough. 


Happy baking,


-Matthew


Mebake's picture
Mebake

This is from Hamelman's Bread, under (Yested Preferments). I used a Pate fermentee of my baguette dough. I also added no yeast to the final dough. Mixing was very brief with turning the dough in a bowl every 30 minutes for 3 hours, developed the dough well. This is my first time to underdevelop my dough, and using my hand to fold the dough intermittently.

What i ended up with is developed yet soft feeble dough that jumped to life in the oven. The loaves were quite lighter in mass, and the crumb was soft and holey.

I, however, forgot to add the salt to the final dough, so the flavor was quite lacking.

mcs's picture
mcs

Hey TFLers,
This is a short no-frills video re-visiting some of the parts of shaping that I feel are important.  In the beginning I demonstrate slowly using a damp dishcloth, then I use the same technique with a few different doughs.  Lastly, I use a slight modification on the technique to form a couple of boules.  Enjoy. 

-Mark

http://TheBackHomeBakery.com


em120392's picture
em120392

Hey guys! I'm taking a high school internship course called W.I.S.E. which allows a student to study about and to work in their desired trade. For my W.I.S.E. project, I chose Artisan Bread Baking as my topic.

I have been baking bread since I was thirteen, and I wanted to take this course to further my knowlege and gain work experience in a bakery. Next year for college, I plan to attend Johnson and Wales University, which specializes in the Culinary Arts. I thought that this project will prepare me for my future career, for I am going to be working in an Artisan Bread Bakery.  Also, I found that during this project, I can challenge myself to comlete the BBA Challenge. Starting in January, and ending in May, I hope to bake my way through The Bread Baker's Apprentice.

My brother, Evan, who's 24, and I decided that we would begin a blog to chronical both of our experiences through BBA. Evan lives in California, and I live in New Jersey, and we thought it would be interesting to note the different challenges and sucesses of the recipes.

Anyway, I hope that our blog will interest some fellow bakers, or fellow BBA challenge participants! We'd love to have your commentary, suggestions, or recommendations for new recipes to try!

http://bakingacrosscountry.wordpress.com/

Thank you for taking the time to read!

-Emily (18)


ps. Here is my post for French Bread.

(It might make more sense if you read my W.I.S.E. Project Proposal, as well as previous entries.)


This is my blog entry for Reinhart's French Bread:

I skipped ahead on the BBA challenge. I wanted to go through the book in order, but I didn't have time to bake bagels this weekend. They take two days to make, and I wasn't home enough to bake them. This is a difficulty in bread baking at home-although bread is easy to make, one must tend to the dough according to the starter, risings, and baking, which can be time consuming and inconvenient.

My mentor, Mr. Esteban, enjoys savory breads rather than enriched, sweet breads. I could have moved on to brioche, but I thought he would have appreciated a crusty, slightly sour French loaf more, and I have been itching to try French bread. Also, I felt like I was teasing him about my bread baking- telling him about it, but not making anything for him. I hope he enjoys the baguettes!

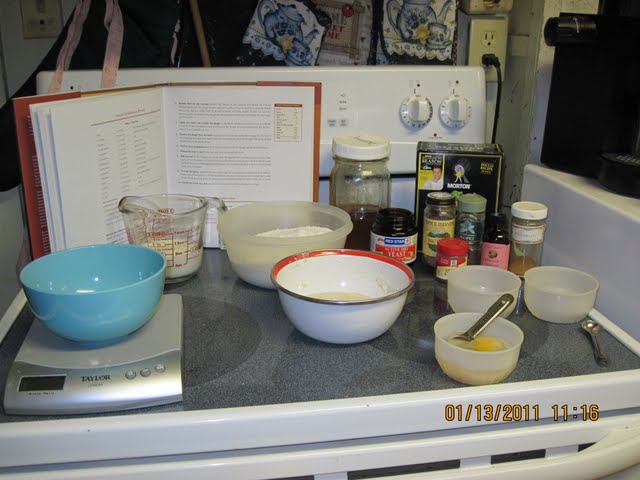
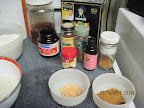
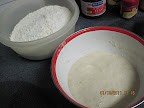
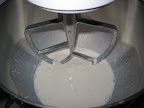
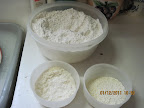
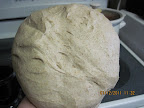
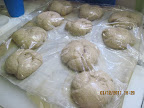
Reinhart begins with a pate fermente, an overnight starter which lends the final dough more flavor. It is simple- it combines flour, water, salt, and yeast into a rather stiff dough. I let the dough rise for about an hour, and then refrigerated overnight.

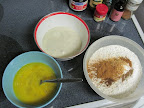
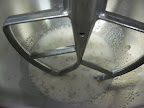
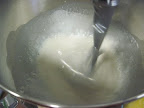
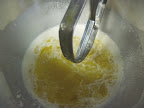
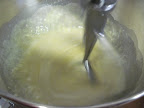
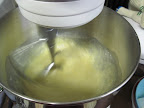
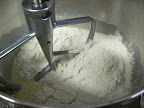
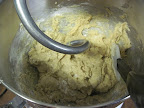
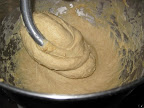
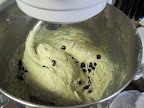
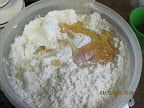
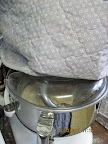
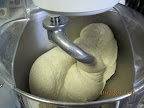
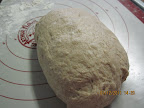
The next morning, I let the pate fermete warm up, and cut it into smaller pieces so I could incorporate it into the final dough. Like the pate fermente, the bread contained the same proportions of ingredients. After mixing with flour, salt, yeast, water and pate fermente into a ball, I kneaded it for about 6 minutes, or until I could easily use the windowpane test. Out of pure laziness, I kneaded the dough in the machine, rather than by hand. I feel more connected to the dough when I knead by hand, but, I was tired and didn't want to dirty the counters.

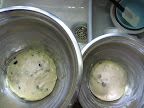
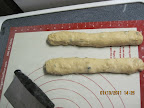
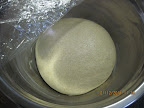
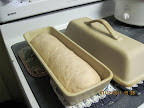
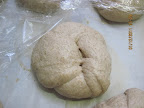
After the dough is kneaded, it rests for about two hours, to rise for the first time. Then I shaped the baguettes like I thought I should. I spread the dough out, and folded it into thirds like letters. I proceeded to elongate them into their proper shape. However, after making them I went on Youtube (great idea, huh?) and watched the proper way. After folding in thirds, you're supposed to create tension on the outside of the bread by rolling it up in two separate "folding/rollings." Afterwards, you gently seal the bread with the heel of your palm and then proceed elongating. Next time, I guess.

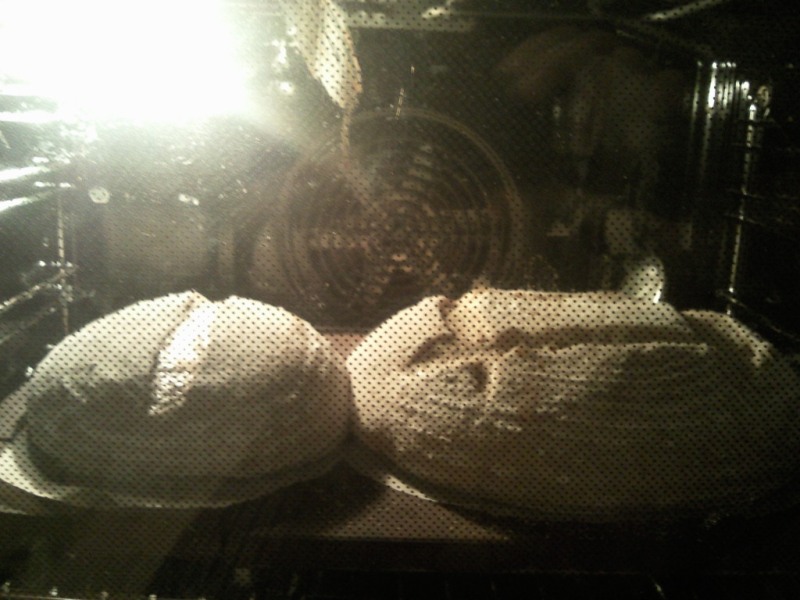
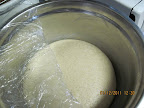
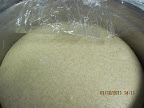
I let the dough rise for the last time for two hours. I do not have a lame yet, so I cut the slits with a pairing knife. On two of the loaves, I cut rather perpendicular, leaving the slashes not very attractive. However, on the third, the slashes were much more pronounced because I used a 45 degree angle.

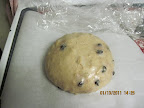
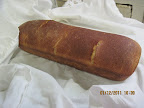
After I took them out of the oven, I could hear the crusts crackling. I was so excited-they looked promising. After they had cooled, I sliced a piece. The crumb was rather dense, not holey and airy like I imagine a true baguette. I was rather disappointed, but the flavor made up for it-it had true bread flavor.

So, I don't know- maybe I'll make these again. I really like the use of the pate fermente and it was very cool to shape baguettes. However, the crumb was really disappointing, and for taking two days and substantial hands on time, I felt cheapened.


Jo_Jo_'s picture
Jo_Jo_

From GreekCelebrationBread


It was a challenge, but I figured out the baker’s percentages for the poolish used in this bread.  I really only wanted enough poolish for this recipe, not enough to make 2 or 3 more recipes!  We just don't eat that much bread!  Thank you to whoever made that wonderful spreadsheet I used!  It really helped a lot. I found it on this website, but am not quite sure where the link to it is!


I have decided to participate as much as I can in BBA Challenge 2011, barring some of the breads that simply don't make sense to make.  I get sick when I eat walnuts, so most of those types are out if they rely on walnuts.  Maybe I will ask for suggestions on alternative ingredients that might work just as well in those breads.  I also might have to substitute other preferments for sourdough for any of the whole wheat breads, since my husband seems to have problems with wild yeasts. I on the other hand do better with white, lean, sourdough breads.

I started this challenge as a personal journey after reading the first section of Peter Reinhart's book.  His book, The Bread Baker’s Apprentice, inspired me because it gave me the science behind bread making.  It spent the time to give me the greatest gift of all, understanding of what exactly is happening in each step of bread making.  I have baked for many years, or maybe I should call it banging my head against a wall wondering why some breads turned out so much better than others.  If I am going to thank Peter Reinhart I must also remember to thank The Fresh Loaf, which has many very experienced bread bakers who spend a lot of time helping people make extraordinary bread.  Anyone can make ordinary bread, some loafs will be ok and some will be a failure and you just won’t know why.  But with a little bit of knowledge and help from people who have gone through it themselves you can make bread in your own kitchen that rivals the local grocery stores if not the local bakers!  The best part is that you will start to understand why it works and doesn't work. 

On to the actual bread, I chose Christopsomos which to me almost looks like an alien.  You know, creatures from outer space!  I decided that since this is a bread that reflects the special occasion it is made for, that is must be a very Blueberry weekend coming up.  Yes, my fruit of choice is dried blueberries which are totally awesome.  I also chose to use almonds instead of walnuts, simply because walnuts make me sick and almonds don’t! 

I started by measuring and weighing and gathering all my ingredients and equipment, “mise en place” which means everything in it’s place.  Makes a bigger mess, but sure helps you not forget things.  Rather like the scout motto, “Be Prepared”.


From GreekCelebrationBread

I mixed the ingredients, with the only variation being that I used the milk to prepare my Active Dry Yeast by soaking for 10 minutes.

I followed this with adding the poolish to the milk and yeast, using the paddle to mix them. Then I added the other liquid ingredients and used the paddle on setting 2 to mix them.

After I finished mixing them together to make a smooth liquid, I added the dry ingredients and used the paddle to form them into a sticky gooey mess. At first I held back some of the flour, but when I saw how moist it was I went ahead and added it and used the paddle to mix. I took the paddle off at this point and put the dough hook on. The recipe did not call for an autolyse, but I gave it 20 minutes because it was so shaggy looking. This seemed to help the dough a lot.  I then used my dough hook on setting 2 for about 10 minutes, what a mess it looks like.

I measured the blueberries and almonds and added them to the mixer, then used the dough hook on setting 2 to mix them in. Still looks pretty wet and messy, but when I touch it the dough feels tacky not sticky.

It is now formed into two balls and put into separate bowls to rise for 90 minutes. They shaped nicely, and didn't stick to my hands nearly as much as I thought they might. This has been a fun bread to make so far.

The second picture is at 82 minutes, I think this will need a little bit longer to rise. My house is definitely not as warm as other peoples.

This dough is really awesome, so supple and easy to handle. I loved it. The boule is made and the long strips are ready to go on top.

Next comes placing the strips and cutting, then making the little curly things at the ends.

The decoration on top looks a little bit out of shape, but hopefully it will look better before it's done! Who cares what it looks like as long as it tastes good!  Will edit this tomorrow with a picture of the crumb, that is if I can wait!

Joanne


Jo_Jo_'s picture
Jo_Jo_

This is the bread that I make for my husband, who likes a softer crust and whole wheat.  I like it too, but my favor my sourdough baguettes.  I have spent weeks tweeking this recipe and really like the flavor and texture of the Kaiser shaped rolls I made this time.  They were allowed to rise an extra 45 minutes while the loaf in my clay baker baked.  I'm getting better at braiding the buns without ruining the crumb inside.  The ultimate critic will be my husband though, so we shall see.  First here's my newest version of my recipe:

Whole Wheat Honey Potato Bread

Poolish

14 oz (397 grams) whole wheat flour

14 oz (397 grams) water

3 pinches yeast


Mix till all is moistened, then cover and let sit for 8 to 24 hours, best if it is actively bubbling when you use it.  Can be refrigerated after about 6 hours for up to 3 days.

Dough

All of poolish

21 oz (596 grams) bread flour

4 tsp yeast

2 tsp salt

1.5 oz (2 Tablespoons) Honey

.6 oz (18 grams) shortening

1 oz dry milk

.7 oz potato flakes

11 oz water

Process:

I set the ingredients out before starting, measuring them with my scale.  I used my kitchenaid to mix for about 2 minutes, then allowed the dough to rest for 30.  I then kneaded the dough for about 6 minutes, shaped it into a ball, and put it into a bowl to rise for a couple hours.  It took closer to four hours from what I remember.  I pulled it from the bowl ad shaped it, then allowed it to rest for 10 minutes.  I cut it into two pieces, and used 1 lb 12 oz in my clay baker and the rest were made into kaiser rolls.  I have been trying to figure out how much dough to use in my clay baker, if 2 lb 4 oz was to much and 1 lb 12 oz was not enough, then maybe next time I should try 2 lbs of dough. I put the clay baker into the oven and turned it on to 425* baked for 30 minutes and then removed the cover and baked at 380* for another 15 minutes.  I think the crust color is just about right.

The loaf of bread was a little disappointing, when I pulled it from the oven.  Thought I had misread my dent in the dough test, but while it might have been a little better with a slightly longer rise time I think the crumb is actually ok.  It is just a short loaf that took the shape of the pan, probably because I like my dough more hydrated.  I will definitely put more dough in, and might try a little bit less water next time and a little more shortening, plus I might try 50% whole wheat and 50% bread flour.  Not real sure why I had cracks in the crust, another reason I thought this was going to be a brick.  The flavor is outstanding in this bread, probably because I left the poolish in the fridge a couple extra days.


Happy this turned out so much better than I thought it had, now on to making my Greek Celebration bread from BBA.  This should be fun!

Joanne


Jo_Jo_'s picture
Jo_Jo_

How is it that you start the day thinking you have plenty of time to bake your bread before leaving for a class tonight, but end up with a brick because your bread takes 4 times as long to rise?  I knew I should have put the dough into the fridge and done all my baking tomorrow, came so close to doing it too.  The first rise took 4 hours, and the second after shaping took 2 hours and I finally decided it was done because I knew it needed to cook before I left.  I wsa forced to put the loaf in my clay baker into the oven first because it is supposed to be started in a cold oven.  My kaiser rolls turned out a lot better, due to having a warm kitchen from baking and having an extra hour to rise.  I am so glad that there will always be another loaf next week, but meanwhile I will cut into the loaf tomorrow and find out just how dense it is.  Looked so promising too..... if I had just put it into the fridge!

Joanne

Pages

Subscribe to Recent Blog Entries