The Fresh Loaf

A Community of Amateur Bakers and Artisan Bread Enthusiasts.

Recent Blog Entries

Franko's picture
Franko

Pain au Levain with Red Fife 75% Sifted

Last week I posted a bake of this bread, http://www.thefreshloaf.com/node/24636/sweet-amp-sour that although a good loaf, I wasn't entirely happy with it because of it's close crumb and slight under baking. The finished loaf however resulted in a flavourful combination of the three different flours used in the mix, which I felt had good potential for an even greater flavour profile. One of the things I wanted to change from the last bake was the level of sour flavour, which was not as strong as I like. Since then I've been building my starter to a fairly stiff consistency to bring more acidity to it. With the warm temperatures we've been having here on Vancouver Island recently it's become a very active and tangy community of yeast cells. The mix, bulk ferment and final rise for Pain au Levain went well, giving me enough dough for two 800 gram loaves, one of which was shaped as a boule and placed in a brotform, and the other as a batard of sorts. I'd lined a wicker bread basket with linen and very clumsily sewn it into the basket to make a brotform, all the while suffering through stabbing myself repeatedly with the needle and hearing the occasional burst of laughter from across the room. It's not a thing of beauty but it does the trick, giving the dough a shape that's somewhere between a boule and a batard, or as David Snyder called a similar one of his, a 'boutard'. Both loaves went into a 500F oven turned down to 460F after 5 minutes and baked for 35-40 minutes with steam system in place during the first 5 minutes. With this bake I didn't have to rush off to a golf game, so the breads had a thorough bake, checking the internal temps for a 210F reading before I removed them to cooling racks and wrapped in linen. The loaves have a more pronounced flavour this time and a good sour tang that stays on the palate after eating. The crumb is more open than the previous loaf and with a bit of gelatinization as well. A good result for both loaves that I'm satisfied with.


Attamura Loaf

Somewhere along the way during the 3 builds of the levain I over- scaled and wound up with more levain than I needed for the Pain au Levain mix I was doing. Hmmm... Well rather than return the excess to the starter, I decided to try making an Altamura type bread using Atta flour, or Attamura, a project that Varda http://www.thefreshloaf.com/user/vhaimo has been working on over the last few weeks with some good results to show for her efforts.

The mix was made almost entirely with Golden Temple durum Atta flour except for the standard wheat flours and rye in the levain, roughly 67 grams total or 13.4% The levain was 27% of the mix, hydration was 70% (not counting the levain) and the salt at 2% for 500 grams of Atta flour. I did the mix using my new toy, a Bosh Compact, as it has a very gentle folding action when used on 1st speed that I felt would be just right for slowly developing the fragile gluten of the durum flour. The dough came together almost identically to ones that I've made previously using Extra Fancy finely milled durum flour, making a very smooth and supple dough. The dough had a temperature of 79.3F going into a 2 hour bulk fermentation and stayed in the mid 70'sF range throughout. Stretch and folds were done every 30 minutes and it was clear that the dough was gaining strength and fermenting well at each of these intervals. After the last S&F the dough was rested for 20 minutes and then shaped in a cap style by pressing the dough into a disk and folding it to almost meet the opposing side of the disk. The shaped loaf was placed fold down on floured linen and covered with another piece of floured linen for a final rise of 2 hours, then tipped on to a parchment covered peel and slid into a 450F oven on a stone.

So far so good, this might actually work I thought. The door of the oven was left open for the 1st 15 minutes, then closed for the duration of a 40 minute bake. No steam was used during the bake. After checking the loaf for an internal temperature of 210F, I left the loaf on the stone, turned the oven off and propped the door ajar to allow the loaf to cool gradually over the next hour.

 The final result of this bake is something that looks like an Altamura type bread but has a deeper flavour than the one I made with Extra fancy durum flour a few weeks back. I actually prefer the flavour of the durum Atta flour over the X Fancy, which works out well as it's considerably less expensive and readily available here in B.C. I think two of the key factors in the success of this loaf was the high level of acidity contributed by the levain, as well as steady temperature during the bulk fermentation phase. Both Hamelman and Suas mention in their books 'Bread' and 'Advanced Bread & Pastry' respectively, that increased acidity and use of preferments will help strengthen the fragile gluten network of high ratio durum mixes. I'm satisfied now that a reasonably good loaf can be made using 100% (or very close to) Atta flour keeping these two factors in mind as critical to success.

Formulas and photos below.

Best wishes,

Franko

Pain au Levain with Red Fife 75% sifted


Ingredients

%

Kg


Levain


Central Milling Artisan White Malted

94

100

Nunweiler Dark Rye Flour

6

6

Mature Starter-stiff

20

21

Water

60

64


191

Final Dough


Central Milling Artisan White Malted

43.76

365

All Purpose Organic White

31.17

260

Medium Rye Flour

5.03

42

True Grain Bakery & Mill Red Fife 75% sifted

20.02

167

Levain

22.9

191

Water

70

616

Sea Salt

2

18

Total Percentage &Weight

194.88

1659

Total Hydration

73.8

690.5

Total Prefermented Flour

13.9

116.5

Desired Dough Temperature-78F/25.5C

PROCEDURE:

Mix the flours, levain, and water till all the flour is evenly saturated and autolyse for 1 hour.


After autolyse is complete mix the dough on 1st speed for 6-7 minutes, or by hand until the dough is smooth and cohesive with medium gluten development. Place in a bowl and cover with plastic for a 2 hour bulk ferment.


Stretch and fold the dough in the bowl every 40 minutes over 2 hours. Ambient temperature for this bulk ferment was 71-72F/21.6-22.2C . After bulk ferment is complete, divide the dough into desired weights and round lightly. Cover the pieces with cloth or plastic and rest for 15-20 minutes.


Shape the dough pieces into batards or boules, using brotforms, or free-shaping as desired.


Final proof of 1.45 to 2 hours depending on ambient temperature and scoring considerations. Tip the loaves onto a parchment/semolina lined peel and allow to air dry for 5-10 minutes before scoring. For the batard, a slightly shorter proof is needed to achieve the ear effect, which is done at a 30 degree angle not quite end to end.

The boule can be slashed as desired, but for the side slash pattern of the loaf pictured, it was allowed to proof marginally longer to avoid it blowing out above the side scoring.


Bake in a 500F/260C preheated oven, on a baking stone, with preferred steaming method in place. Bake for 5 minutes at 500F/260C, then lower the heat to 460F/237C, remove the steam system and continue baking for 35-40 minutes, rotating the loaves midway through the bake for even colouration. Check for an internal temperature of 210F/98.8 before finally removing the loaf to cool. Cool on a rack, wrapped in linen, for a minimum 5 hours, or overnight before slicing.


Attamura Bread


Ingredients

%

Kg/Grams

Levain


All Purpose flour

100

100

Water

50

50

Mature Starter-stiff

20

20

Total Weight


170


Final Dough


Golden Temple Durum Atta Flour

100

500

Water

60

300

Levain

27

135

Sea salt

2

10

Total Percentage & Weight

189

945

Total Hydration

70


Total Prefermented Flour

22


DDT of 78F-79F


PROCEDURE:

Levain

Build the levain over 12-16 hrs using 3 feedings in increments of the total flour indicated for the levain.


Final Dough

Mix the flour, water, and levain until all the flour is saturated and autolyse for 40 minutes. Adding the salt, mix on 1st speed for 4-5 minutes, or by hand until the dough is uniform and of a medium soft consistency.

Bulk ferment for 2 hrs, doing stretch and folds in the bowl every 30 minutes. The dough should become slighty more developed with each S&F.

Shape as desired, or press the dough into a thick disc 9 inches/22.86cm in diameter, relax the dough for 5 minutes and fold the disc over to almost meet the other edge of the dough. Place fold down on floured linen and final proof for 2 hours. Flip the dough on to a parchment lined peel so that the fold is right side up. Slide the dough into a preheated 450F oven and stone and leave the oven door ajar for the 1st 15 minutes. No steam is neccesary. Close the door and bake for 35-40 minutes. Check for an internal temperature of 210F before turning off the heat and propping the door open. Leave the loaf in the oven for an hour to cool gradually then remove to a cooling rack and wrap in linen. Allow to cool overnight before slicing


lumos's picture
lumos

I know.....It's really reckless of me to blog about my miiiiiles-away-from-perfect-looking baguette soon after Jay (Longhorn)'s wonderful report on SFBI course with the picture of his great looking baguettes.  But I'd already finished writing this up last night and  didn't know he'd do such a thing while I was sleeping..... Oh well......:p


As many of you may think I’m turning into a broken record know, now I’ve got 6 bags of real, authentic French T55 and T65 flour in my hand which my daughter brought back from Paris for me,  this is going to be the last blog about my poolish baguette with improvised UK flours for a while, I think.  Just to show you what my regular baguette usually looks like.

 (Never mind the bent tip. It caught on the hot baking stone when loading….::sigh::)

The formula is loosely based upon Hamelman’s Pain Rustique with Poolish (uses 50% of flour for poolish) and Richard Bertinet’s Poolish baguette (adds small amount of rye to poolish), hence the name, ‘Hamelinet Poolish Baguette.’  With those combination of flours, I added small amount of WW and wheatgerm to emulate French flour which is higher in ash than typical flour in UK, and also introduced TFL’s Gold Stamp cold retardation in the fridge for extra improvement in flavour and texture.  So, basically it’s a mish-mash of ideas and tips I’ve picked up along my never-ending, long journey in search for MY ultimate baguette from home oven…in England.


************************************************************************************************************


Hamelinet Poolish Baguette with Cold Retardation


INGREDIENTS  (makes 2 x 40cm mini-baguettes)

Poolish –  Flour (total) 125g …. Strong 115g

                                                             Rye  10g

                      Instant dry yeast 0.2g

                      Water  125g


Main Dough - Flour (total) 135g …..  WW  10g

                                                                          Strong  85g

                                                                           Plain  40g

                                     Wheatgerm  1/2 tbls

                                     Instant dry yeast  0.6g

                                     Good quality sea salt  5g

                                      Water  60g


METHOD

  1. Mix all the ingredients for poolish and ferment at room temperature until it peaks. (6-7 hrs @ 22C)
  2. When the poolish reaches its peak, add all the ingredients for the main dough and mix to a shaggy mess.
  3.  Autolyse for 30 minutes. (or 20 minutes if it’s a warm day)
  4.  After the autolyse, S & F in the bowl. (6-8 x S & F as you turn the bowl once). Rest for 20-30 minutes.
  5. Another S & F in the bowl.
  6. Cover the bowl and cold retard in a fridge for 21 hrs.
  7. After 21 hrs (you should see a few large air pockets just below the surface of the dough), take out from the fridge and leave for 30+ minutes. The dough does not need to return to room temperature.
  8. Turn out the dough and divide into two equal pieces. Pre-shape (just one letter folds)  and rest for 10-20 minutes, depending upon room temperature. Be careful the dough doesn’t’ ferment too much at this stage.
  9. Shape into baguette and proof between the cloche. Pre-heat the oven @ 240-250C with a baking stone and a tray filled with pebbles/lava rocks.
  10. Just before the dough is ready, put a heat-resistant deep dish with boiling water in the oven to ‘condition’ the oven. (Note : If necessary, uncover the couche to dry the surface of the dough in the last 10-15 minutes of proofing)
  11. When the dough IS ready (finger test!), score and spray the surface with water generously.
  12. Take the dish with hot water out from the oven, load the dough onto the baking stone, spray inside the oven generously and pour 1/2 – 3/4 cup of boiling water onto the hot pebbles/lava rocks. Shut the door immediately.
  13. After 5 minutes, spray inside the oven again, IF necessary.
  14. After another 5 minutes (= 10 min after loading the dough), take the tray of pebbles/lava rocks out, lower the oven temperature to 220C with fan and bake for 12-15 minutes.
  15. (If the crust is browning too quickly) Lower the temperature to 200-210C.
  16. Take the baked baguettes out of the oven and cool completely. (No extra-drying in the turned-off oven with a door ajar. It’d dry the crumb too much)


(This part suffered from the bent tip, ended up with one side with closed crumb......Excuse, excuse. :p)


(More evenly spread holes in unaffected part of the baguette......Yes, the crust looks too thick. Some ****** sales xxxxxxx person rang me just about when I was trying to take the baguettes out from the oven.....)


 ************************************************************************************************************


So…….the next report will be …..the experiment with T55 flour, at last. With proper, authentic flour, I will have NOTHING to make excuse for my dire result!  Watch this space.....with kinder heart, please!!

best wishes,

lumos

GSnyde's picture
GSnyde


[

I’m coming up on my first anniversary.  It was late August last year when I first baked something like bread and wrote something like a blog post about it. 

So how do I celebrate this anniversary?  Perhaps by baking some wonderful bread to demonstrate the skill and experience I’ve gathered over the past year?  Of course not!  That’s would hardly be a meal fit for a glutton for punishment.  No, I have to try something new and difficult, to re-live the feeling of utter novice-hood that I remember as if it were just last year.

Croissants and Laminated Pastries!!  Something I could study for weeks, work at for days and finish by realizing how very much I have to learn.  Sounds like the kind of challenge that got me started baking bread. 

I started preparing myself for this experiment by reading everything I could find and watching lots of videos about making lamented dough (yes, I know that word is missing a letter; more about the lamentation later).  I was hoping that if I knew the mistakes other people had made, I would only make my own new and novel mistakes (of which I was sure there would be plenty).

Of all the writings on croissants on the World Wide Web, the best by far is Txfarmer’s TFL post about her pursuit of the perfect croissant (http://www.thefreshloaf.com/node/22677/poolish-croissant-pursuit-perfection).  I careful reviewed her lengthy and detailed description of all the lessons she learned in repeated attempts.  Her account is a perfect example of what makes TFL great.  So much work so generously shared, and a wonderful pictorial of a successful course of experimentation. In the process of making the dough and shaping the croissants with the benefit of her numerous tips, I realized that she probably saved my ten pounds of butter worth of inedible (or at least grossly imperfect) croissants. 

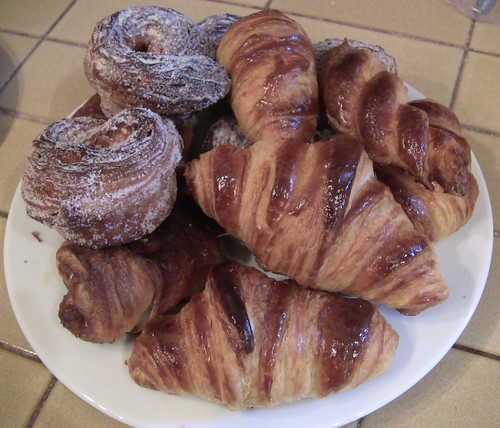
I made two batches of dough, one Friday for baking Saturday, and one Saturday for baking Sunday. Each batch was split, with some of the dough going into croissants, and some into pastries—morning buns Saturday and pains aux raisins Sunday.

The Morning Bun recipe is here (http://www.7x7.com/recipes/tartines-heavenly-morning-buns-recipe), as cited in Sue’s blog post a couple months ago (http://www.thefreshloaf.com/node/23704/tartine039s-morning-bun-best-eaten-fresh-morning-every-morning).  The pains aux raisins recipe is here (http://www.foodnetwork.com/recipes/jacques-torres/croissants-pain-au-chocolat-pain-raisin-and-danish-recipe/index.html). 

In general, I found the process challenging but manageable.  So many steps, a full weekend is needed, and almost as much patience as butter.  I found the dough to be very elastic after the third fold, and never could get it as thin as ¼ inch, even after repeated rests.  I also learned on the first batch to be very patient with the proofing…it does take a long while at 70 degrees F. for the pastries to get sufficiently jiggly.  The first batch was a bit underproofed, I think.

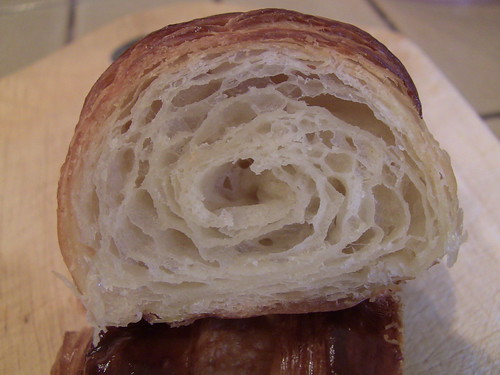
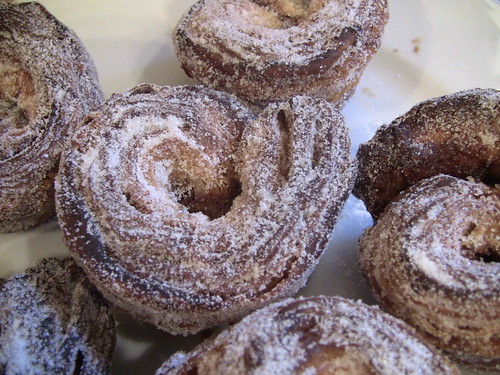
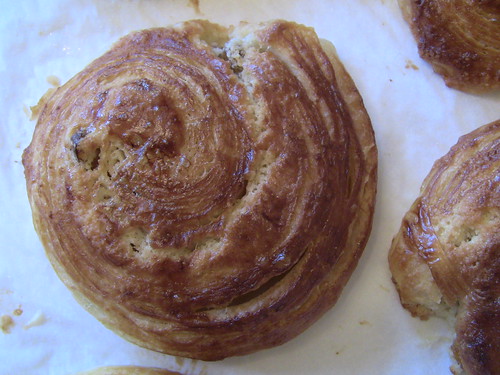
But, all told, the results were very satisfying, even delectable.  The croissants are flaky on the outside, tender on the inside—a wonderful mouthfeel.  I slightly oversweetened the morning buns the first time, and will cut back the sugar coating a bit next time  The texture of the morning buns is pretty close to the way they should be.  Just a bit too heavy and chewy, probably due to underproofing.  And the pains aux raisins (which I may re-name “raisins d’etre”) are delightfully tender and delicious, with their almond cream and rum-soaked raisins.

I’m pretty pleased with my first tries at laminated goodies, and grateful to my mentors.

The peak experience was a mid-morning macchiato with warmed pastries.  A real morning buzz.

Now, about the lamentation.  Yes, I admit I love a good pun almost as much as a bad one.  But I really do have a lament about this baking experience.  I knew pâtisserie had lots of butter.  But, until I saw and dealt with the quantity of butter in this recipe, I hadn’t realized that eating this stuff is basically eating butter and sugar held together with just enough flour and liquid.  I imagine if I ate these regularly, someone would need to bash my arteries with a rolling pin (per the proper lamenation technique) just to get the blood to squish past the plaque buildup.   I’d end up looking like our local pinniped friends, the elephant seals.

It is simply not fair that something soooo good is soooo bad!  Plus, I know that Txfarmer is right that it would take a lot more practice to get really good at it, and of course I have to eat my homework.  Plus, today I got an Amazon package with the Tartine cookbook with all their amazing cakes, tarts and pastries.  I’m doomed!

So, if I can muster the will power, this will not be a weekly, or even monthly, habit.  But I will return to these sinful pleasures on occasion, hopefully when I have a crowd of butter-loving carbotarians around so I don’t need to eat more than one or two myself.  Okay…maybe three.

Glenn

cranbo's picture
cranbo

In response to a thread, I thought I'd start a thread with simple sourdough recipes for beginning sourdough bakers.

The idea is that the recipes are:

  • use steps that build upon well-established baking techniques
  • forgiving enough if starter hydration is not exactly 100%
  • use common ingredients (that you can find at any supermarket)
  • use a minimum of ingredients (no more than 7)

The recipe does assume that you have a healthy starter which:

  • is well-established (at least 14 days old and has lived at moderate room temp (between 65F and 75F) for that period of time); 
  • has been fed regularly (i.e., 2x or 3x per day) for the last 3 days, and is being stored at moderate room temp (between 65F and 75F) for that period of time; 
  • is active (can double within within a 4-6 hour interval) and (again!) is being stored at moderate room temp (between 65F and 75F) for the last 3 days; and
  • is at 100% hydration (that is, it's fed using 100g flour and 100g water for every 50g of reserved starter)

If your starter can't do all of these, the recipe might still work, but won't work nearly as well.  Requirements: You'll need a small digital scale to weigh out the ingredients in grams (if you're a beginner who's serious about baking, you'll find this a cheap and worthwhile investment).  

cranbo's Beginner's Sourdough - makes one good-sized loaf

(OP updated 2013-06-06)

Originally posted Sept 2011

Flour (100%): 550g* 

Water (56%): 308g**  

Starter @ 100% hydration (20%): 110g

Salt (2.2%): 12 g

Wheat germ (1%): 5.5g (or 1 tbsp) (optional)

Total (179%): 986g

*This recipe was originally designed for all-purpose flour or bread flour, which most people have; you can use whole-wheat flour but the result will be more dense; 100% rye flour not recommended for this recipe. 

**if you use only whole wheat/wholemeal flour, use 378g water, whole wheat absorbs more moisture, and if you don't add more water, your loaf will be dry. 

  1. Dissolve starter in a portion of the water.
  2. In mixing bowl, add starter, remaining water, flour & wheat germ.
  3. Stir/mix to combine, until all raw flour is incorporated, 1-2 minutes.
  4. Let rest for 20 minutes.
  5. NOW ADD THE SALT. 
  6. Knead for 5 minutes in mixer on lowest speed, or 10 minutes by hand. It might be a little sticky still, that's OK.
  7. Stretch and fold the dough 4 times, with 30 minutes rest in between. (search TFL for "stretch and fold"; this means:
    1. flatten your dough into a rough rectangle
    2. tri-fold your dough like you would a letter: first top-to-bottom, then left-to-right. You will end up with a nice package. Flip it seam side DOWN back into the container where it will rest. 
    3. NOTE: it helps to dip your hands in water, or spray them with cooking spray, to keep the dough from sticking to your fingers when doing stretch and fold. 
  8. Shape into desired shape (boule, loaf pan, etc.; read up on shaping techniques here on TFL). 
  9. Now cover the shaped dough, and refrigerate overnight. This will help develop a lot of flavor. 
  10. The next day, let it rise, covered, in a warm place until a bit less than doubled. This can take a long time, plan for 3-6 hours. Pay attention to the bread (learn how to do the poke test to know when it's ready). As I said, it should be just a bit less than doubled. 
  11. About 1 hour before you think you're ready to bake, preheat your oven to 450F.
  12. Right before baking, SLASH YOUR LOAF with a knife or a razor. 
  13. Next, create some steam in your oven (1c of hot water on a hot sheet pan is one way to do it).
  14. Bake at 450F for about 40-45 minutes; check at about 30 minutes, reduce heat to 400F.
  15. Remove and let cool on rack at least 1 hour before eating.

Baking Variation: instead of Step #12, carefully place the uncooked dough in a cold Dutch oven. Then follow the remaining instructions, baking the bread in the cold dutch oven for 20 minutes, uncovering, and baking for 20-25 minutes uncovered (for the same total baking time, around 40-45min). The Dutch oven technique gives you great oven spring and nice browning. 

My results:


The funny shape is due to the shape of the enameled cast-iron pot I baked it in. 

If you try it out, let me know what you think.  

longhorn's picture
longhorn

One year ago David Snyder began his Day 1 blog entry with "Wow! There is no possible way to descirbe today in full..." and I agree! Reading David's blogs and looking at David's photos of his own breads convinced me that I would benefit from this class...so.. one year later I am taking my turn at the SFBI experience. David wrote a great summary last year and I will refer you to his blog for what is almost certainly a more thorough coverage of the class than I will provide. But I will stive to explore what I find most insightful and different from David.

Our day began with the students gathering to meet each other and enjoy a light breakfast of poppy seed scones, dried fig and almond scones, and an apple tart with coffee. The breakfast clearly demonstrated that the staff and students are talented bakers!

Our instructor for this class is Mac McClelland. Mac brings an interesting background to baking - having worked as a mechanical engineer for Caterpillar before his love of baking led him to take classes and then the full SFBI curriculum and become a baker. As in David's class Michel Suas warmly welcomed us to the school. As in David's class about half of the day was spent in lecture format and about half in the lab with Mac demonstrating and us copying him in dividing and shaping dough and loaves.

For me the "commercial" equipment was an interesting experience. Fifty pound spiral mixers, automatic loaders and five deck ovens were unknown territory and thus exciting. The real highlight though was handling dough at the "short mix" stage (five minutes at speed 1 on the two speed spiral) and "improved mix" stage (an additional five minutes at speed 2). A window pane of the short mix dough was ragged with thin and thick spots. And the dougth was still somewhat sticky. The improved mix gave a window pane that was about half thin and half thicker and was quite a bit tougher and less vulnerable to tearing. The improved mix dough was also less sticky - with the water more incorporated into the flour.  It was these hands on, tactile experiences that were my motivation for coming to SFBI. 

There were no surprises for me in the fermenting/proofing/shaping/scoring discussions. The techniques taught are quite familiar. I did, somehow, manage to bring more technique to my baguettes than I routinely achieve and the results were, to me quite pleasing. Photos of my baguettes are below. I feel obligated to point out that I shaped all the loaves but the rear one was inadvertently slashed by one of my classmates!

Like David, I found it wonderful to be able to make full length baguettes!

Tomorrow we will make 15 baguettes from three doughs - short mix, improved mix, and intense mix.

This will be a good week!

Jay


asfolks's picture
asfolks

Beer and bread has always seemed like a logical combination to me and I have made several variations on beer bread. This version is based on an American Rye Ale and uses only beer for hydration.

The French Broad Brewery is just down the road and I am lucky enough to have a friend who works there. Not a bad deal, trading beer for bread.

Ingredients:

Levain:

100% hydration fed with KA Bread flour – 300g

Soaker:

French  Broad Rye Hopper Ale – 487g

KA Organic AP – 307g

Bob’s Red Mill Whole Rye flour – 180g

Final Dough:

KA Organic AP flour – 288g

Sea Salt – 18g

Paste Topping:

Bay State Med. Rye – 75g

French  Broad Rye Hopper Ale – 95g

Instant Yeast – 1g

Sea Salt – 2.5g


Process:

Fed active starter 8 hours prior to mix and fermented at 70°F

Flour soaker established 3 hours to mix and held at 70°F

Mixed Levain, Soaker and Final 288g of AP flour by hand and rest for 30 minutes.

Add salt.

Stretch and Fold at 00:15, 01:00, 01:30, 02:30, for a total bulk ferment of 4 hours.

Shaped 3 boules @ 525g and rested on couche seam side up, after 15 min. rest brush paste mix on seam side of boules and proof for 1 hour.

Bake @450F 15 min. with steam and then @ 400F 30 more min.


txfarmer's picture
txfarmer

Sending this to Yeastspotting.

Click here for my blog index.

In reply to my soft chocolate sandwich loaf post, lumos tossed me a bone, and I took the bait immediatly. Hey, it involves chocolate and lamination, two of my many bread related obsessions. Essesntially it's a technique popoular in Japan a while ago: a sheet of chocolate laminated into an enriched soft dough, displaying random but cool looking marble effect, and a subtle chocolate taste. You can use ANY lightly enriched dough for this, I used the classic Sourdough Hokkaido Milk Loaf, but any of the following would work as well (click for detailed formulas):

Some notes:

- It's still a soft shreddy bread, so you still have to do the intensive kneading required, no shortcuts here.

- Use the same dough/flour amount as a normal sandwich loaf. For my Chinese pullman loaf pan, I used 250g of total flour just like the Sourdough Hokkaido Milk Loaf post specifies, for a 8X4inch loaf tin, you can either increase the flour amount to 280g or leave it at 250g, depending on how tall you want the loaf to be.

- I got the chocolate sheet recipe online, but later lumos sent me a very similar one, thanks!

Sourdough Chocoate Marble Loaf

- Chocolate sheet
Dark chocolate, 50g
butter, 20g
bread flour, 20g
cocoa powder, 10g
corn starch, 5g
milk, 60g
sugar, 20g
egg white, one

1. Melt chocolate and butter seperately
2. Mix and shift bread flour/corn starch/cocoa, add milk and sugar, mix until blend
3. Add melted chocolate then melted butter, mix thoroughly
4. Put on low heat, stir constantly, until the mixture thickens and clears the side and bottom of the pot.


5. Put the mixture between two sheets of plastic, roll to a 18CMX18CM square, freeze until use.


- Sourdough Hokkaido Milk Loaf dough enough for your tin (or similar soft white enriched dough), after first rise and put in fridge overnight.

- Assembling:

1. Take the dough out of fridge, press flat, let rest at room temp for one hour.
2. Roll out to 25X25CM square, put the frozen chocolate sheet in the middle

3. Seal the chocolate sheet in, roll out again to 18X36CM, do a single book fold (i.e. fold in thirds, envelope fold, three-fold)

4. Roll out to 18X36CM and do the single book fold again (may need to rest dough for 10-20min before rolling out )
5. Roll out to 18X36CM and do the single book fold for the third time (may need to rest dough for 10-20min before rolling out )
6. Rest dough for 20min, roll out to be slightly longer and wider than the loaf tin, cut in 3 stripes with one end connected

7. Braid and put in oiled loaf tin

8. Proof and bake as the original dough formula requires, in this case it took 6.5 hours to proof, and 40min at 375min to bake.


Marble effect inside out


Do note that this is not a dessert-like sweet bread, it's a typical Asian soft loaf - slightly sweet, shreddably soft, with subtle chocolate flavors.

Oh yeah, it's A LOT easier than making croissants, the chocolate sheet is not easy to melt.

Postal Grunt's picture
Postal Grunt

I've finally caught up with writing these recipes and posting them on my blog. The format and style of writing is still a work in progress but I hope that they will be of value to other bakers. There are no claims of authenticity, only an admission of shameless lifting from other formula or recipes posted here on TFL or on the internet.

http://chaosamongstthefloursandflowers.blogspot.com/2011/08/sourdough-anadama-bread-recipe.html

http://chaosamongstthefloursandflowers.blogspot.com/2011/08/horiatiko-psomi-recipe.html

Comments, humor, and questions are welcome.

breadsong's picture
breadsong

Hello,
While visiting Victoria last March, I picked up a book called My sweet Mexico, written by Fany Gerson.
This book is full of all sorts of lovely things, and as I was looking through the book a few days ago, came across a recipe for Alegrias (Amaranth “Happiness” Candy).
The ingredients listed pecans, peanuts, raisins, pumpkin seeds, piloncillo sugar, honey, a bit of lemon (or lime) juice,
and puffed amaranth seeds.
I wondered if I could take those ingredients and make an Amaranth “Happiness” Bread!

Tried to decorate the top with 'flowers',
with ingredients used in the bread:  

                                                 a pumpkin-seed flower:

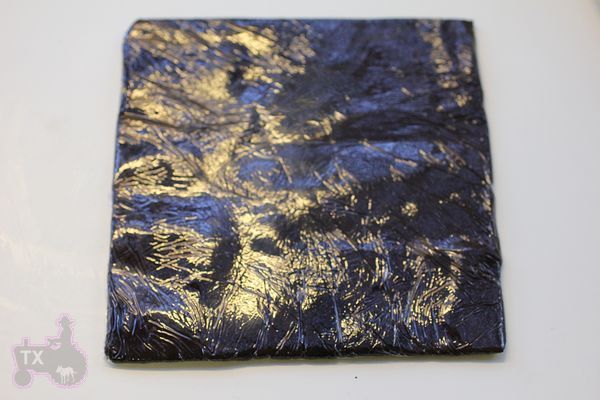
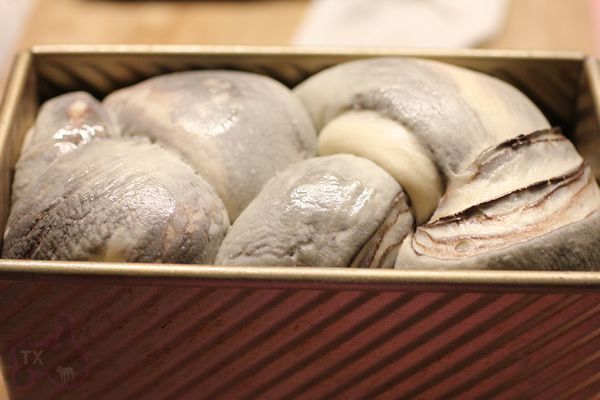
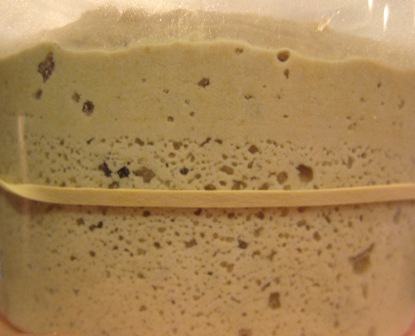
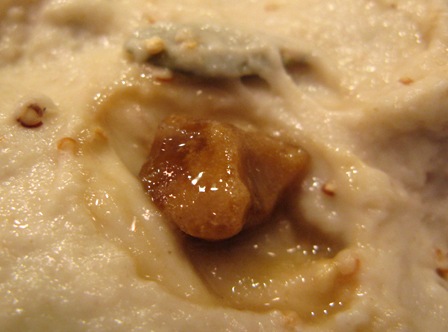
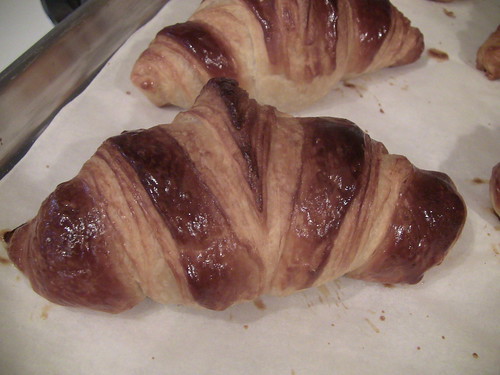
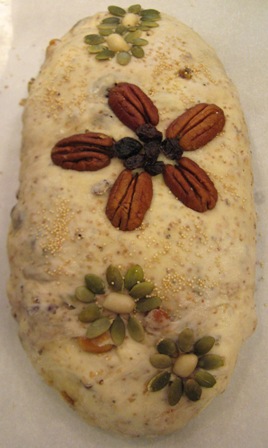
 ... a picture taken before baking
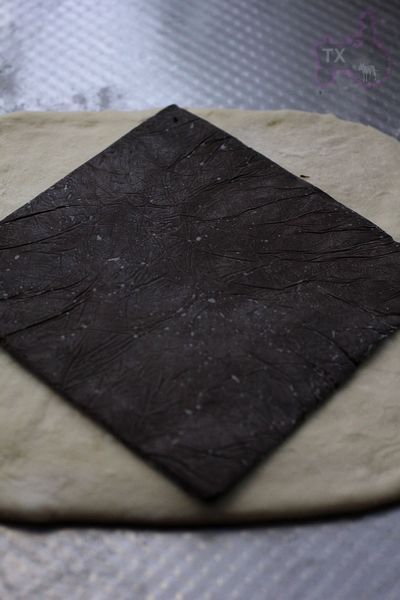
I tried making an amaranth starter for this bread, recalling Farine’s very helpful post about using different types of flours in preferments; based on the advice in Farine’s post (courtesy of Safa Hemzé), I kept the amaranth flour in the starter, and kept the amaranth flour to 15% of the total flour.

Mini posted about Amaranth Starter – it was interesting to read that she thought the starter smelled like corn; I definitely tasted the flavor of corn when I first tasted the bread. The power of suggestion?!

This is how my amaranth starter looked after it had doubled:

This is the formula I worked out:


A note on how to 'puff' amaranth (It’s like making mini-popcorn!):   I heated a deep pan over medium-high heat for a minute or two, added 1 Tablespoon of amaranth seeds, which immediately started to pop; covered the pan quickly, removed from the heat, and shook the pan around holding the lid in place until most of the amaranth was popped (‘puffed’).  I did this three or four times, until I’d popped enough for my bread recipe. Keep those amaranth grains moving though - they'll scorch easily in a hot, dry pan.

Unpuffed:  
                                                                       Puffed:

Crumb shots:
 

...the effect of piloncillo sugar:
What this sugar looked like in the dough, after mixing:


The second bake today is Mr. Hamelman’s Sunflower Seed Bread with Rye Sourdough.
The sunflower seeds within, and crusting the loaf, sounded enormously appealing.
I saw jsk’s lovely bake with this formula today, and there was a helpful reply to the OP from David (thanks David…gave me some guidance re: S&F’s with this dough :^)   ).
I also happened across this beautiful post of Benjamin’s, and inspired by the beauty of that loaf, tried to score my sunflower-seed-crusted bread similarly. My loaf is not a thing of beauty like Benjamin’s!!! but despite my loaf's appearance I am happy with this bread’s very flavorful, moist crumb and crunchy, toasty crust of sunflower seeds!
 

The last bake is Mr. Hamelman’s Rustic Bread, from a week or so ago, trying out a new stencil.
The bread, and some crumb shots:


Happy baking everyone!
:^) from breadsong


dmsnyder's picture
dmsnyder

We have my sister and brother-in-law and my younger son's two daughters staying with us this week. This morning, we had a traditional Sunday brunch with bagels, smoked salmon, farmers' chop suey and sourcream coffee cake. My neighborhood bread tasters joined us.

The bagels were made with the Krakow Bagel formula I tested last Summer for Inside the Jewish Bakery. The bagels are supposed to be twisted, but I shaped them in the more usual manner. They are very chewy with a crisp crust and delicious flavor. They received rave reviews. If you want the formula, you will have to buy Stan and Norm's book when it's released in the next few weeks.

I also baked a couple loaves of my San Joaquin Sourdough to have with our dinner of proscuito and melon and fettucine with ragu.

I loved five year old Naomi's comment on the bloom as I took the loaves out of the oven: "Ooooo .... They got so big, they broke!"

Hope you all are having as much fun this weekend as I am!

David

Pages

Subscribe to Recent Blog Entries