The Fresh Loaf

A Community of Amateur Bakers and Artisan Bread Enthusiasts.

Recent Blog Entries

dmsnyder's picture
dmsnyder


Yesterday, I made Chicken Cacciatore for tonight, when my sisters would be at our house for dinner. It seemed to me I should be serving some sort of Italian bread with this dinner. I didn't really feel like tackling a brand new recipe, although there are a number of Italian breads on my “to bake” list. I thought about the sourdough version of Reinhart's Italian bread from BBA which I have made many times and enjoyed. However, once the idea of formulating an “Italian version” of my San Joaquin Sourdough occurred to me, I knew that's what I was going to make.

I was delighted with the result, although I don't know that anyone more knowledgable than I regarding Italian breads would recognize it as in any way “Italian.” 

Ingredients

Wt. (g)

Baker's %

AP flour

400

80

Fine durum flour

100

20

Water

350

70

Salt

10

2

Sugar

14

3

Diastatic malt powder

5

1

Active Liquid levain

100

20

Olive oil

14

3

Total

993

199


Method

  1. In a large bowl, disperse the levain in the water.

  2. Add the flours, sugar and malt to the liquid and mix to a shaggy mass.

  3. Cover the bowl and let it rest for 20-60 minutes.

  4. Add the salt and olive oil and mix thoroughly. (Note: I squish the dough with my hands until it comes back together, then do stretch and folds in the bowl until it forms a smooth ball and the oil appears completely incorporated.)

  5. Transfer the dough to a 2 quart lightly oiled bowl, and cover the bowl tightly.

  6. After 30 minutes, do 20 stretch and folds in the bowl. Repeat 3 more times at 30 minute intervals.

  7. Refrigerate for 12-36 hours.

  8. Take the dough out of the refrigerator and allow to warm up for 1-2 hour.

  9. Divide the dough into two equal pieces and pre-shape as rounds. Cover with a clean towel or plasti-crap and let rest for one hour.

  10. Shape as boules or bâtards and proof en couche or in bannetons for about 45 minutes. (Note: Optionally, if proofing en couche, roll the loaves on damp paper towels then in a tray of sesame seeds. Alternatively, you can brush the loaves with water and sprinkle with sesame seeds. If proofing in bannetons, you would use the second method but after transferring the loaves to a peel, just before baking.)

  11. One hour before baking, pre-heat the oven to 480ºF with a baking stone and steaming apparatus in place.

  12. Transfer the loves to the baking stone. Steam the oven, and turn the temperature down to 460ºF.

  13. After 12 minutes, remove the steaming apparatus. (Note: What I actually do at this point is switch to convection bake and turn the oven down to 435ºF for the remainder of the bake.) Continue baking for another 12-15 minutes or until the loaves are nicely browned and the internal temperature is at least 205ºF.

  14. Turn off the oven, but leave the loaves on the baking stone and the oven door ajar for another 5-10 minutes to dry the crust.

  15. Transfer the loaves to a cooling rack. Cool completely before slicing.


The crust was chewy except for the ear and bottom crust which were nicely crunchy. The crumb was nice and chewy-tender. The crust flavor was sweet and nutty with the sesame flavor we always enjoy. The crumb was sweet and nutty. Absent the rye flour and with the addition of the oil, sugar, malt and durum flour, the flavor was delightful but very different from that of the San Joaquin Sourdough.

The four of us consumed 2/3 of a loaf with dinner. When I was going to slice some more, sister Ruth told me she would prefer to save it for breakfast toast. Her proposal prevailed.

I'm sure this will make delicious toast, even competing with the Hamelman 5-grain Levain I also baked this afternoon.


David

Submitted to YeastSpotting

jamesjr54's picture
jamesjr54

Our friends from Israel (wife) and Idaho (husband) joined us for a bike ride today as temperatures in New England hit 80F! 

So challah was on the menu. I used the Honey Whole Wheat from the front page. Came out wonderful. Perfect compliment to grilled salmon with garlic chive butter; steak tips with Santa Maria Seasoning; tomato, cucumber feta salad; and grilled eggplant from the garden. We ate the sesame seed version and sent the poppy seeded one home with our friends.  She said it looked like the challah you get in Jerusalem from the home-style bakeries. She's being nice, I know, but I took it as a compliment!


alexlegeros's picture
alexlegeros

Do you love cooking shows?  Ever noticed a difference in the way cooking shows present what it is to cook?  Are they the Julia Child types that lightheartledly take hammers to meat and throw a little wine into the pot because "heck, it was already in my hand!"  Or do they precisely measure things and triple-check for accuracy like on "America's Test Kitchen?"

Read about my thoughts on this dramatic stylistic choice and how it impacts bread baking in my lastest blog, hosted here: 

http://sourdoughrye.blogspot.com/2011/10/liberties-and-flair.html

Anonymous baker's picture
Anonymous baker (not verified)

This stollen is an amazing thing: rich, heavy, and fruity. The dough is different from anything else I know and a little tricky to work with. Before I give you the recipe and the technique, I will start by telling you a little about the history of Dresden Stollen. Seeing that there are very different stollen recipes around, I think you need this little introduction to understand how the Dresden stollen is different and why it is worth making, despite all the effort.

In Saxony (the region in the East of Germany, where Dresden is), stollen has been a tradition Christmas bread for centuries (the first written documents about stollen are from the 1329). At that time, however, stollen was a light, yeasted bread, containing nothing but flour, water, yeast and sometimes oil. It was sold and eaten during he pre-Christmas period of Advent fast. Saxony was then catholic, so the use of any richer ingredients such as butter or milk was strictly forbidden. The Saxon rulers, however, were apparently dissatisfied with their Advent bread, so they applied to the pope for a permission to use butter in their stollen. The pope allowed this in 1491, on the condition that they atone for their sin by donating liberally to the church. Although meant only for the rulers and gentry, the pope's permission was quickly applied with much more liberation. Maybe to compensate for centuries of butter-free fasting, the Saxons transformed the stollen into a rich, buttery bread stuffed with fruits. No longer a fast meal, the stollen became a Christmas celebration bread. After a while Saxony turned protestant, but the stollen remained. Of course, with its centuries of tradition, the title "Dresden Stollen" was soon used for trading purposes, unfortunately not always with high-quality products. Since the beginning of the 20th century, the traditional Dresden stollen bakeries fought against the on-slough of so-called Dresden stollen. Today, "Dresdner Stollen" is a registered trademark and only selected backers from Dresden area can use it, provided that their stollen meet criteria with regard to the minimum amount of butter and dried fruits.

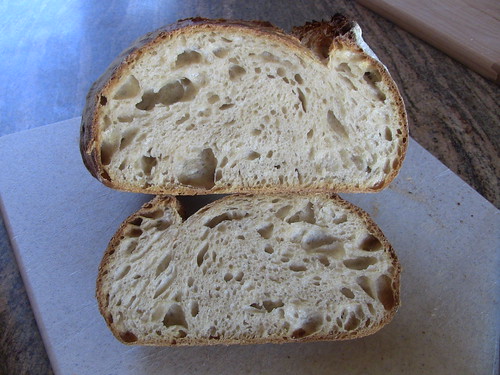
Enough of history, let's look at the bread. A real Dresden stollen contains at least 500g Butter and 650g sultanas per 1000g flour. This makes it extremely heavy and rich. Furthermore, the stollen is traditionally heavily coated in icing sugar. The bread needs to ripe for at least 3 weeks in order to develop its flavours and texture and keeps in proper conditions easily for several months. 

The recipe that I have here is based on a century old recipe for Dresden Christmas stollen, that Dresden bakeries use as a foundation. Of course, I have adapted it to suit our tastes. You are free to do the same. Just what ever you do, do not cut down the fat! Without the fat, the stollen will never keep as long and it will not develop the proper texture and taste. The same goes for the amount of fruits. You can play with the sugar though, for example leave out the sugar coat (I prefer our stollen uncoated).

Right, enough said, here is the recipe:

Ingredients:

1000 g flour (fine, weak flour; all purpose flour should do nicely)
250 g cream
42 g fresh yeast (or 14 g dried yeast)
500 g butter (or 450g butter and 50g lard or tallow)
1 g ground mace
0,5 g ground cinnamon
0,5 g ground cardamom
zest of 1 lemon
150 g sugar (I use Muscovado whole-cane sugar)
50 g candied lemon peel (instead I make my own by soaking peel from two lemons in honey
for several days)
150 g candied orange peel (instead, I soak peel from 4-5 oranges in honey)
500 g sultanas
250 g currants
100 g rum (optional, I use Amaretto instead)
200 g ground almonds
+ extra butter (approx. 250 g)
+ extra fine castor sugar (approx. 100 g)
+ extra icing sugar (at least 250 g)

0. Save the date
It's important not to start baking stollen too late. My personal experience with this recipe is that they need at least 4 weeks, ideally 6 weeks before you cut into them. Really! We always cut our first stollen on the first Advent Sunday, so I bake my first batch 10 weeks before Christmas. I bake my second and sometimes third batch about 5-6 weeks before Christmas, partly for us and partly as presents for friends.

0. Preferment
The stollen dough is very heavy and it will need a strong yeast activity to raise it. For this purpose, I like to preferment a portion of the flour. I take 300g of the flour, break in 21g yeast, and knead it with 250g cream. I leave it to ferment for 1 hour by room temperaure and than for 12-24 hours in the fridge. You can also use sourdough in the preferment. I have successfully baked sourdough-only stollen, you just need to let them rise longer.

0. Soaking
Place the sultanas and currents in a large bowl. If you are using alcohol, pour it over the fruit. Add enough boiling water to cover the fruit. Leave to soak for at least 30 minutes, but best over night. It is important to soak the fruit even if you are not using alcohol, or else it will burn in the oven. Don't forget to drain the fruit well before you start making the dough to make it as dry as possible.

1. Dough
I sieve the flour onto a working surface (this definitely does not work in a bowl). Break in the remaining 21g of yeast (you can leave this out, just adjust the rising time). Rub the lemon zests into the sugar and mix the sugar into the flour, together with the mace, cinnamon, and cardamom. If you are wondering about the small amounts, the stollen is not supposed to taste very spicy. However, this is your stollen, so you can add any spices you like. Cut the preferment into small pieces and distribute it on the edges of your flour mound and do the same with the butter/lard. Now comes the kneading. Be warned, that you will need about 30 minutes to knead the dough. You can try it in your mixere, but make sure your mixer can take it. Better invest the time or coax a physically strong friend or relative into helping. Start by taking a few pieces of the preferment and the butter and kneading them together. As you do this, the dough-lump in your hands will turn sticky. Place it in the middle of your flour mound and knead it there, until so much flour has been incorporated that it's dry again. Now take some more preferment and butter and knead them in your lump. This will make it sticky again, so add flour. And so on and so on. At some point, the dough-lump may become difficult to handle. Feel free to cut and put aside about two thirds of it and continue kneading with the rest. You can put the pieces together in the end. Do not be tempted into adding more flour or any liquids. Trust me, just keep kneading, it will all be well in the end. As you work, the kitchen will be slowly filled with the smell of lemon zest and the spices - Christmas is on the way!

2. Fruits
You are tired, your fingers ache and you are a proud owner of a homogeneous dough lump that reminds you of short-bread dough. Congratulations, let's add the fruit. Take your drained sultanas and currants and mix them with the ground almonds. This will help soak up the remaining liquid. Mix them with the candied orange and lemon peel and pour the whole lot on your working surface. You might have the urge to check the recipe now, because you think you have too much fruit. But it really can be incorporated into you dough-lump. First, cut the dough-lump into 5 pieces. Start by working the first piece into the fruit. As the fruit is wet, this will make it all turn into a strange paste. Keep adding piece by piece, until the whole lot is incorporated. Don't worry if you feel more like making mudpies. Place the whole mass into a bowl and clean your working surface with a dough scraper. Now evaluate the dough. Is it like a soft short-bread or cookie dough? Than you are done with it. If it's too wet and soft (probably it will be), dust the working surface with flour, turn the dough onto it and carefully work in a little more flour. Not too much, though, the dough should be just about manageable. You won't need to make anything fancy with it, so as long as it does not stick to the work surface or your hands like crazy, it's fine.

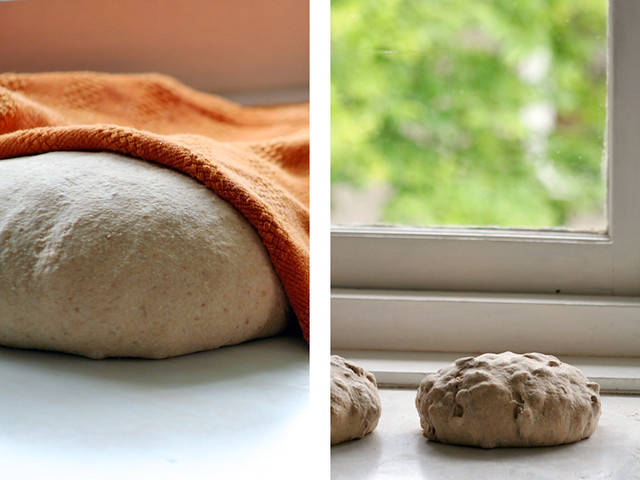
3. Divide, form, and rise
Divide the dough into 2-5 pieces. For us, I prefer to make two large stollen. This size apparently has a positive influence on the texture of the stollen later on. But you can make several smaller stollen, too, for example as gifts. Just don't forget to adjust the baking time. Form each stollen into a rough, high log. Just pat it into shape - no rolling, no stretching. Just a note here: the traditional Dresden stollen has no almond paste inside. With all the dried fruit and its sugar coat, I also think that it does not need it. But it's your stollen, so if you like, add it now. Put the formed stollen on a baking sheet with baking paper (make sure the stollen are far enough apart) and let it rise for about 2 hours (more, if you are using only sourdough or less yeast). The stollen will become a little puffy, nothing more. It will definitely not double.
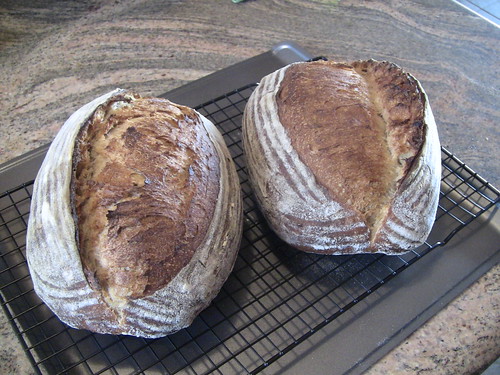
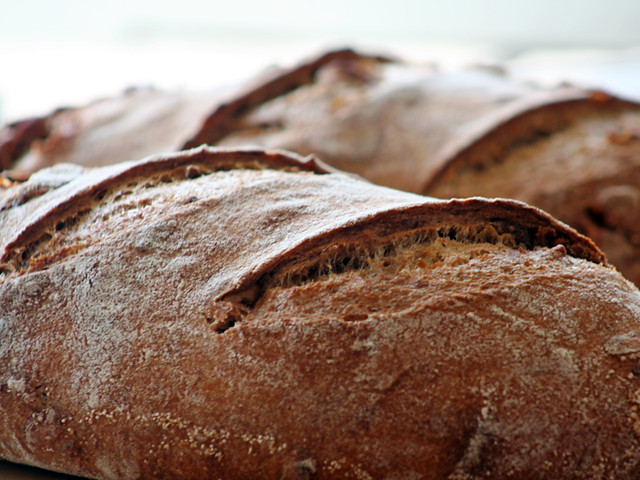


4. Score and bake
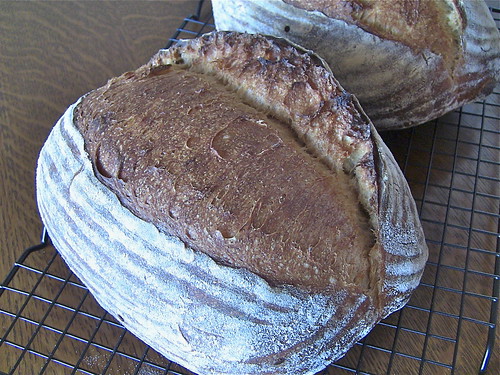
There is a traditional way of forming a Dresden stollen. I use a different, simple way used for stollen from Thuringia (another region in Germany). It's easier and the stollen are less flat, so they are also moister. Basically, you just make a log and then you score it with a single cut all the away down the stollen's back. That's it. I score the stollen directly before putting it into the oven. I don't preheat the oven, just pop it in and bake it at 180°C for approx. 1-1,5 hours. Keep a watchful eye on the stollen. Cover it with aluminium foil if it has turned brown before its time and adjust the time according to the size of the stollen.
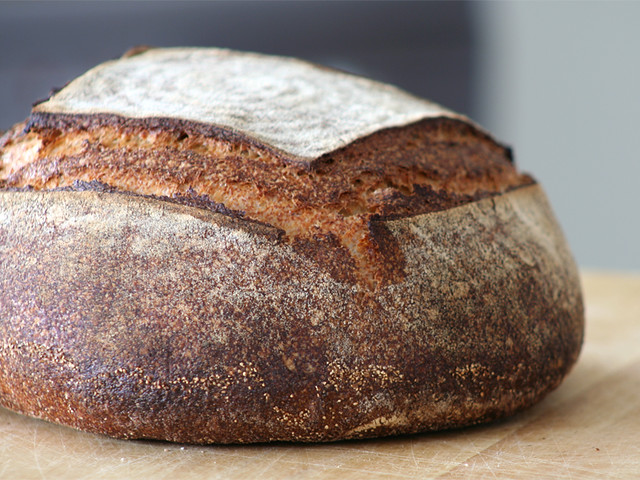

5. Coat
This is an optional step. Traditional stollen is heavily coated in sugar. If you want to coat the stollen, brush it with liquid butter (as much as the stollen can soak up) immediately after taking it out of the oven. Than sprinkle it heavily with fine castor sugar. The castor sugar will soak up any access butter. Wait for the stollen to cool and sprinkle it with a very thick layer of icing sugar. As I wrote, I skip this step. Firstly, I find the coated stollen too sweet and secondly it makes a mess when storing. Alternatively, it is also possible to store uncoated stollen and brush it with butter and coat it in sugar right before cutting into it.

6. Store
The stollen has to be stored for at least 4 weeks (I recommend 6) before cutting into it. If you cut it earlier, you will be disappointed. Cutting it later is even better. Stollen store best in an old fashioned cool celler, with high humidity. If you don't have such a cellar, you can store stollen outside in wooden boxes provided that your climate is cool enough (that's what I do). Otherwise store the stollen in the coolest room of your house, but not in the fridge. Some people like to freeze the stollen, I don't think its necessary and it has a negative impact on the texture. If you are storing stollen in a cellar or outside, simply wrap it in cotton cloth and put it in a wooden box, so that it can breathe. Otherwise wrap it well in a plastic or aluminium foil. The idea is that if you cannot provide an environment with high humidity, such as cellar or outside, you should prevent the stollen from drying out. That's it, now wait.

7. Eating
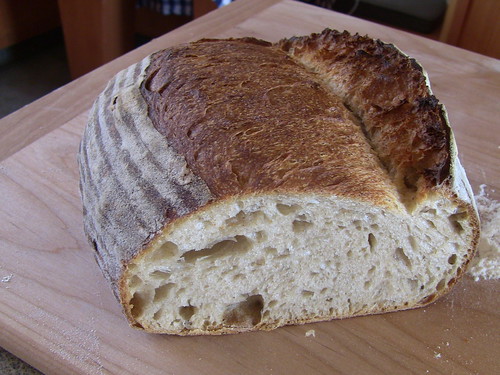
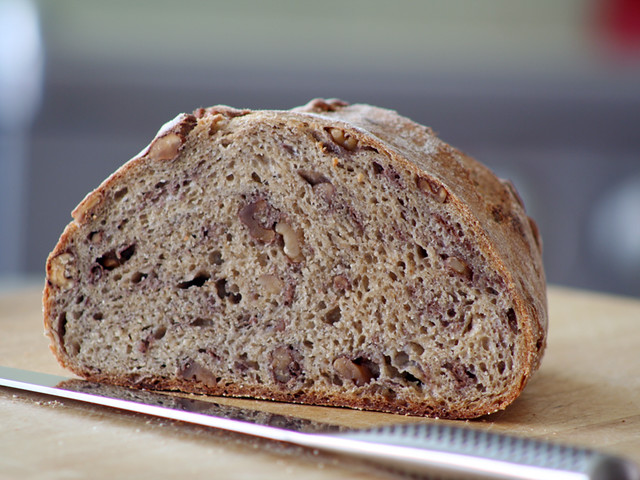
If you cut into a stollen 2-3 weeks after baking, you will be disappointed. It will taste fine, but the crumb will be far too dry. Don't give up and put the stollen away again and wait a little longer. The texture will change over time and after six weeks it will have a short-bread-like crumb and the taste will be a mixture of spices and fruits, all rolled into a buttery, sweet bliss.

So to sum up, a Dresden stollen is not hard to bake. All it takes are good quality ingredients, some muscle and a lot of patience. The reward is a truly unusual bread. Although I am not German and grew up baking other Christmas goodies, stollen has become to me a personification of Christmas. You take the best, you do your best, you wait for the occasion, and then you enjoy it in full.

Mebake's picture
Mebake

This is Flax seed bread from Hamelman's "BREAD", i baked two days back. It is a 60% Rye bread with soaked flaxseeds. I used Wholegrain Rye in the Rye sour instead of the medium Rye called for. I also adhered to Hamelman's recipe and procedures, including the addition of 1.5 tsp of instant yeast in the final dough.

This Rye dough with flaxseeds is very sticky! I had to add 2 Tbl of Vital wheat gluten to the white (12% protein) flour to emulate the strength of High gluten flour. The dough ended up very .. very thirsty, that i ended up adding almost 75g more water to the final dough to get the consistency of the (paste) right. Once i immersed my hands (i mix entirely by hand) into the dough, i knew i had to toil in the pasty mess for at least 20 minutes trying to get whatever white flour in there to develop.

The dough kept on tearing even during shaping, but i finally managed to get them into floured lined banettons.

The only way to get this boule to bloom properly was load it seam side upwards.

Lower Profile due to all the added hydration

But with a very evenly opened textured, and moist crumb.

The dough, although quite a hassle to mix, does make a wonderful Rye bread, with a flax seed crunch and a pleasent soury note. My elder family members loved this bread. It is wonderful with cream cheese, or pastrami.


GSnyde's picture
GSnyde

They say everything happens for a reason, and I believe them.  But I can’t always identify the reasons some things happen.  Why was this bake of the San Francisco Country Sourdough (my version of pain de campagne) the best ever?   This was probably the 7th or 8th time I’ve baked it, but this one had that je-ne-sais-what like my best bakes of Tartine BCB and last week’s bake of Hamelman’s pain au levain.  Beautifully caramelized, golden brown, crispy crust; moist, airy-but-substantial crumb, with nicely gelatinized membranes; complex wheaty flavor with a hint of rye.

I guess I should compare this to other bakes of the same formula.

Here’s what was the same:

  • The ingredients and the basic technique (described below).

Here’s what might have been different:

  • My starter was very active (after last week’s near-death experience).
  • Both the primary ferment (3 ¼ hours) and the proof (2 ¼ hours) were on the long side.
  • My handling/shaping skills are improving, and I got a nice taut sheath.
  • I made a recipe-and-a-half so I could cold retard one loaf’s worth to bake tomorrow for some friends.

Whatever factor(s) made the difference, I hope I can do it again.

And excellent with some early Autumn barbecue.

San Francisco Country Sourdough (Sourdough Pain de Campagne) version 10-8-11

Yield: Two 750g Loaves; or Three Mini-Baguettes (235g each) and one 800g Loaf; or One 1000g loaf and two 250g baguettes; 0r Three 500 gram loaves; or…   

Ingredients

LIQUID-LEVAIN BUILD

100 grams   AP flour

24 grams  Whole Wheat flour

12 grams  Whole rye flour

170 grams   Water, cool (60 F or so)

28     Mature culture (75% hydration)

FINAL DOUGH (67% hydration, including levain)

640 grams   All-Purpose flour (83%)*

85 grams  Whole wheat flour (11%)**

45 grams   Whole rye flour (6%)

435 grams   Warm water (80 F or so) (56%)

17 grams   Salt (2%)

306     Liquid levain  (48%)   

* used CM Artisan Baker’s Craft (malted)

** used CM Organic Hi-protein fine whole wheat

Directions

1. LIQUID LEVAIN:  Make the final build 12 to 15 hours before the final mix, and let stand in a covered container at about 70°F

2. MIXING: Add all the ingredients to the mixing bowl, including the levain, but not the salt. Mix just until the ingredients are incorporated into a shaggy mass. Correct the hydration as necessary.  Cover the bowl and let stand for an autolyse phase of 30 to 60 minutes. At the end of the autolyse, sprinkle the salt over the surface of the dough, and finish mixing 5 minutes. The dough should have a medium consistency. 

3. BULK FERMENTATION WITH S&F:  3 hours. Stretch and fold the dough in the bowl twice 20-strokes at 45-minute intervals.  Place dough ball in lightly oiled bowl, and stretch and fold on lightly floured board at 45 minutes.  If the dough has not increased in size by 75% or so, let it go a bit longer.

4. RETARDED BULK FERMENTATION (optional):  After second S&F on board, form dough into ball and then place again in lightly oiled bowl.  Refrigerate 8-20 hours, depending on sourness desired and scheduling convenience.

5. DIVIDING AND SHAPING: [Note: if bulk retarded, let dough come to room temperature for 30-90 minutes before pre-shaping.]  Divide the dough into pieces and pre-shape.  Let sit on board for 30-45 minutes, and then shape into boules or batards or baguettes.

6. PROOFING: Approximately 1.5 to 2.5 hours at 72° F. Ready when poke test dictates.  Pre-heat oven to 500 with steam apparatus in place.

7. BAKING: Slash loaves.  Bake with steam, on stone.  Turn oven to 450 °F after it hits 500F after loading loaves.  Remove steaming apparatus after 12 minutes (10 for baguettes). Bake for 35 to 40 minutes total (for 750g loaves; less for smaller loaves).   Rotate loaves for evenness as necessary.  When done (205 F internal temp), leave loaves on stone with oven door ajar 10 minutes.

Happy baking!

Glenn

Submitted to http://www.wildyeastblog.com/category/yeastspotting/


mcs's picture
mcs

Last week, Charlie came from Bowling Green, Ohio to hone his baking skills during a one-week internship at the Back Home Bakery.  Despite the initial butterflies, Charlie quickly adapted to the bakery hours and work schedule improving his dough handling skills throughout the week.  Below are some of the highlights from the week.

Thanks for the hard work, and I hope your family gets to enjoy some of the bread/pastries you learned to make during your internship.

-Mark
http://TheBackHomeBakery.com


Charlie transferring baguettes from the canvas to the baguette screen.


Here goes Charlie on the rolls


Charlie shaping croissants like a pro


Voila!


mcs's picture
mcs

Michelle came to the Back Home Bakery from Vancouver, BC last month for one week of bread baking and pastry making.  Like most visiting interns who specialize in rustic breads, Michelle quickly added an introduction to laminated doughs to her repertoire.  She used her meticulous nature and detail oriented hand-skills to create picture perfect Apfelstrudels, Spinach Puffs and Cheese Danish too.  I think her favorite breads to shape were the Buckwheat Flax loaves we make into boules. 

Unfortunately, most of the pictures we took during the week were on her camera or tablet, so she is invited to add her own photos to this thread!

Thanks for the help Michelle, and I hope you and your husband continue to enjoy your baking skills at home.

-Mark
http://TheBackHomeBakery.com


Michelle pre-shaping the dough slabs on Day 1 of Puff-Pastry making.


Michelle demonstrating that moving quickly while working with sticky dough will make your life easier.

alexlegeros's picture
alexlegeros

Greetings fellow bread bakers and bread lovers,

I have been thinking all morning about what led me to bake bread, and I think it might be fun to share some stories and experiences about how we all came to this really rewarding activity.  I think we all come to breads in a very personal and meaningful way, and I'd like to hear from you what it was like. 


Here's the link to my blog where this post is hosted.  Hope you don't mind my attempts at MS Paint illustration!  Be kind--all I have is a touchpad!

http://sourdoughrye.blogspot.com/2011/10/why-i-started-baking-bread.html

PiPs's picture
PiPs

We had a bleary eyed start to Saturday after a late evening celebrating my birthday. A dinner out with friends at a fantastic bistro www.confit.com.au

Taste sensation of the night was baked fresh dates stuffed with gorgonzola, mixed cress salad, pedro ximinez dressing…OMG!!!

Anyway … bleary eyed today.

This week’s bake was about sifted flour and walnuts. I kept it simple, no tempering, no focussing on multiple passes…
The night before mixing – one pass then sift and remill caught material then sift again. Combine the sifted flours. I caught about 10% weight of my original flour, but I am not focussing too much on the extraction rates.

The weather here for the past few days has been very erratic, making my starter builds and bread planning a little dicey. This morning was no exception as a thunderstorm rolled through Brisbane at around 6:30am, dropping temperatures dramatically.

I mixed two doughs today, one with walnuts and the other using two starters (a rye and a firm sifted wholewheat). The rye starter originated from my desem starter and has been refreshed over a week with freshly milled rye flour.

Walnuts and oil

Walnut Bread
Total dough weight: 2kgs
Hydration: 85%
Prefermented Flour: 10%
DDT: 22-24°C

Sifted wholewheat starter @ 60% Hydration: 172g
Sifted wholewheat: 900g
Fresh milled rye: 73g
Water: 855g
Salt: 21g
Lightly roasted walnuts: 3 cups
Walnut oil: 2tbps

Autolyse flour and water for 1hr.

With wet hands squeeze and incorporate starter, salt and walnut oil into dough until smooth and feel no lumps then place in oiled container.

Bulk ferment roughly 4hrs with four stretch and folds 30min apart in the first 2hrs and another gentle stretch and fold at 3hr mark. Walnuts are squeezed through dough after 2nd stretch and fold.

Divide and preshape. Bench rest 20min. Shape.

Bench resting Country Bread and Walnut Breads

Final proof was roughly 1hr at room temperature (22°)…was surprised how fast this proof was.

Bake with steam on stone for 10mins at 250°C then a further 35mins at 200°C.

The walnut oil was mentioned in the “Tartine bread” book and is something I have always wanted to try. It is aromatic and rich, almost intoxicating. A fine walnut bread toasted, spread with honey and ricotta is amazing.

Walnut Bread

Walnut Crumb

Walnut gringe


Country Bread with two starters
Total dough weight: 2kgs
Hydration: 82%
Prefermented Flour: 15%
DDT: 22-24°C

Rye starter @ 110% Hydration: 115g
Sifted wholewheat starter @ 60% Hydration: 180g
Sifted wholewheat: 933g
Water: 773g
Salt: 25g

Country bread with two starters

Autolyse flour and water for 1hr.

With wet hands squeeze and incorporate starters into dough until smooth and feel no lumps then knead for 10mins (I use slap and fold). Rest dough for 5mins. Incorporate salt and knead for a further 10mins.

Bulk ferment 3hrs with three stretch and folds 30min apart in the first 1.5hrs.

Divide and preshape. Bench rest 20min. Shape.

Final proof was roughly 30min at room temperature (22°) then into fridge for 2hrs and back onto bench for 1hr before baking…it was a messy proof, but the oven was busy….slightly underproved…I love the dramatic look :)

Bake in preheated dutch oven for 20mins at 250°C then a further 20mins at 200°C removed from dutch oven and placed on stone for even browning.

These were baked boldly.

Country breads

Country bread crumb

The country bread was fantastic, I love the dark flavours of the crust. Brittle and thin due to dutch oven baking.

Well ... the desem starter is again happily snoozing in the fridge ... but …

… I now have a rye starter sitting on the bench taunting me …

All the best, Phil


Pages

Subscribe to Recent Blog Entries