There really is a difference. And right now we’re loving fougasse. So much that we have entirely rejected the idea of making focaccia.
When I first read about fougasse, I thought it must be virtually the same as focaccia. I dismissed making fougasse because I’d made focaccia. They were the same, after all....
Our fougasse craze started after reading about Chad Robertson’s fougasse in “Tartine Bread”. (It’s a GREAT book!!) But because of still being certain – what with my terrific retention skills when reading – that fougasse was simply French focaccia, I used the ingredients for our focaccia recipe along with Robertson’s shaping and baking method to make our first fougasse.
Amazingly, not only is the fougasse quite different from focaccia (even using the same dough), but both of us have decreed that fougasse is superior to focaccia. At least that’s what we think right now.
Because fougasse is baked on a stone instead of on an oiled pan, there are more crispy bits. Not too crispy though… it’s juuuuust right! Of course, it can be cut with a knife but we think that fougasse tastes better torn apart.
After the first couple of times making fougasse, I noticed that in his book, Chad Robertson suggests using baguette dough for making fougasse. ie: no oil in the dough itself.
So we tried that too. And it was good. Really good.
We’re not sure if it was better than fougasse made with focaccia dough. Just different. It’s the shaping, slashing and baking that will produce the characteristic (I think) fougasse texture and flavour.
Yes. We love fougasse so much that we can’t stop making it! I’m thinking that once you start making it, you won’t be able to stop either.
I am very pleased to be the host of October 2011's Bread Baking Babes’ task. Here is what I wrote to the BBBabes:
So far I’ve made fougasse using focaccia dough or baguette dough; plain with oil drizzled on before; plain with no oil drizzled on until just after baking; with poppy seeds added to the dough; with black olives; plain drizzled afterwards with oil infused mushrooms.
All were a little different but all were equally delicious. Of course, I’m hoping that you too neeeeeeed to make fougasse and will now bake along with us.
To receive a Baking Buddy Badge to display on your site: bake fougasse in the next couple of weeks and post about it (we love to see how your bread turned out AND hear what you think about it) before the 29 October 2011.
There was some strong verbal abuse to be heard in the BreadLab kitchen this morning. The air trembled with ancient Dutch strong language when that elusive and downright arrogant confectionery that calls itself "French Macaroon" failed in the oven... yet again!
Four failed bakes in a row is a hard blow to take, but: Back to the drawing board! Retreat and start from scratch, learn from your mistakes and have another go! The battle is lost, but the macaroon war is definitely on! The BreadLab vows to tame this fickle French "petite mandigotte" one day soon!
Meanwhile, to boost baking confidence, go back to what you know best. Let your genes take over and bake what is ingrained somewhere deep inside your memory. Something you know so well, you could reproduce its smell, taste and texture with your eyes closed, simply because it has been with you your entire life.
Dutch Macaroons
Browsing the story of the French Macaroon, it seems the intricate colorful variety we love so much today, hasn't been around in its present form all that long. In 1830 they were still served as two separate halves, spiked with liqueurs, jam or spices. It was Pierre Desfontaines of the French patisserie Ladurée who, at the start of the 20th century gave us the "Paris macaroon" that is so "en vogue" today:
Around the same time, here in Holland things were hardly as gay as in Paris, where slums were taken down, the Grands Boulevards were taking shape, and the Paris we know today came into being. The industrial revolution brought a lot of money to the city.
Meanwhile, in Gouda (where the famous cheese is produced), a Dutch baker was at the other end of the wealth spectrum, and probably could only dream of colorful macaroons in his shop window just like the ones in Paris.
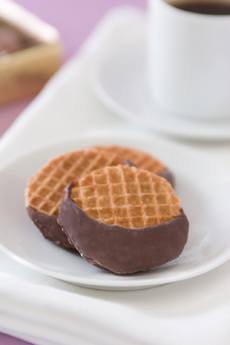
Instead, he was wondering, in good old fashioned Dutch Calvinist spirit, if all those left over scraps of dough at the end of the baking day could still serve some purpose. He whisked up some molasses with brown sugar and cinnamon, put all the scraps of dough together, baked it into a wafer, sliced it in half, put in a big dollop of syrup in between the two layers, slapped them back together and sold them as "stroopwafels" (syrup wafers).
Two layers with a filling in between... Let's call it a Dutch Macaroon! Not nearly as dainty and intricate as the French variety, but just as satisfying in the end ! And a perfect way to boost shaken baking confidence, since they are pretty much fail safe.
The stroopwafel took The Netherlands by storm, and the rest of the world is falling for it as well, or so it seems. In New York City they are dipped in chocolate and called Dutch Moon Cookies, for unknown reasons they are considered valuable bounty in a cartoon involving wolves (note the small dutch flag on the side of the treasure chest!)
And what about this tutorial on how to properly eat a stroopwafel?
The Recipe
All in all enough reason to get your waffle iron out and make your own stroopwafels! If you love these cookies, you will love them even more home made. Nothing can beat eating it fresh, crunchy and warm.
Here is the video recipe from the BreadLab.
Stroopwafels
for the dough: 4 cups (500 gr.) low gluten flour 1/2 TS cinnamon 1 cup (250 gr.) softened butter 1/2 cup (100 gr.) white caster sugar 2 large eggs 0.25 ounce/7 grams instant yeast 1/2 cup/118 gr. warm water
for the syrup: 1 1/2 cup (300 gr.) brown sugar 1 cup (250 gr.) butter 1 TS cinnamon 6 TBS dark corn syrup
Dissolve the yeast in the water and add to the flour together with the softened butter, the eggs, sugar and cinnamon. Combine all ingredients well, form into a ball and let it rest for about 45 minutes. It will have slightly risen by that time and the dough feels silky to the touch, but doesn't stick.
In the meantime, prepare the syrup mixture by gently heating up and dissolving the ingredients over a medium low heat, stirring in the butter and making sure the sugar doesn't burn. Once the sugar has dissolved, turn off the heat and stir every once in a while for a smooth consistency while it cools.
Heat up your iron to a medium high heat and form ping pong ball sized balls out of the dough. Put them in your iron and bake for about 30 seconds per cookie. Use a cookie cutter to cut out a perfect circle. Slice the cookie in two layers while it is still warm and use a thin sharp knife.
All that is left to do now, is put the syrup between the two halves and slap them together. The syrup might have cooled too much to work with; simply return it to the heat and gently warm it through again. Don't let the sugar burn!
Enjoy, Freerk
P.S. You would do me a big favor endorsing my BreadLab iniative. Every "like" will get me closer to realizing a 6 episode documentary/road movie; chasing the best bread Europe has to offer. Thanks in advance!
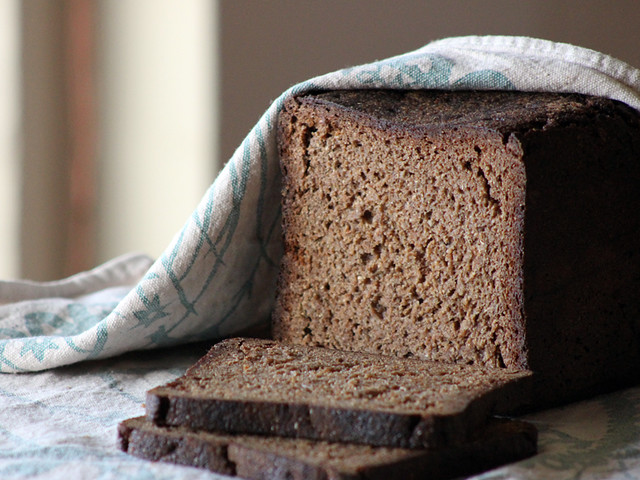
I have returned to last weeks Dark Rye formula with a test bake to determine if the rye flour I am milling is creating havoc with the 100% rye formula.
Two batches of dough were prepared using different flour in each.
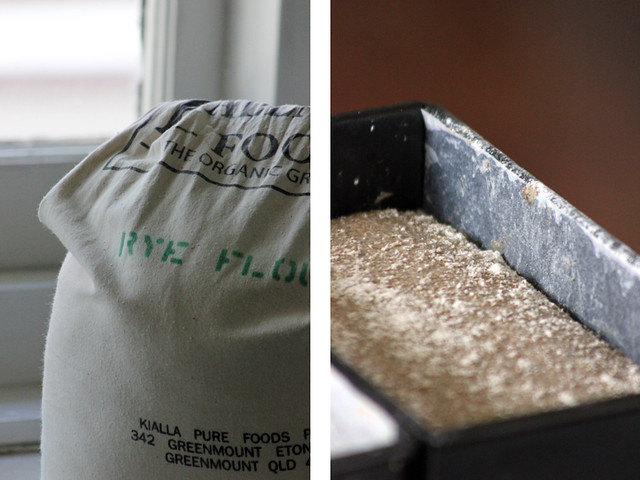
For one I used organic wholegrain rye flour from Kialla Pure Foods and for the other I milled organic rye grains from the same company in my Komo Fidibus XL mill.
I didn’t mill the flour quite as finely as previous after reading about starch damage and the issues it can cause with 100% rye breads.
Two separate sours were built using the different flours and then kept at 28C for 18 hours.
The night before, a soaker (the only common ingredient between the two doughs) was prepared containing all the salt, cold water, rye flour and coarsely milled rye grains. This was kept at a 20C for 15hours.
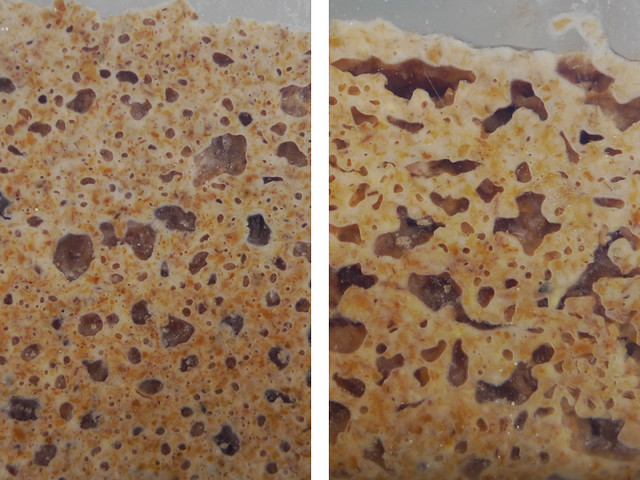
The sours felt quite different when first mixed. The fresh milled sour felt a little drier and I would have been inclined to add water. I didn’t though.
Two sours Bought flour on left, fresh milled sour on right
On the following day I observed that the sour built with store bought flour had risen higher and had an even distribution of bubbling while the home milled sour had not risen as high (it was certainly active) and the bubbling seemed uneven with larger bubbling.
Mixing Incorporating bought flour sour on left, fresh milled sour on right
When it came to add the sours the difference was dramatic. The store bought sour was “poured” out and was extremely runny. I had to spoon out the majority of the fresh milled sour with only a small proportion being runny.
The same temperature water was used in both to achieve common dough temperatures and then placed immediately in greased tins. I did not bother bulk fermenting the dough this time.
Again the fresh milled flour dough felt stiffer and was much easier to handle while the store bought dough proved a challenge to place in the tin in one piece.
Proofing took 1.5 hours with the fresh milled dough rising slightly higher (it may have had to do with hydration of dough)
They were docked and placed in a very hot oven (270C) for ten minutes before being baked for a further two hours at 200C and another hour at 150C. Again the oven was set to auto off and bread cooled in oven for a further two hours.
Breads were wrapped before slicing 36 hours after baking.
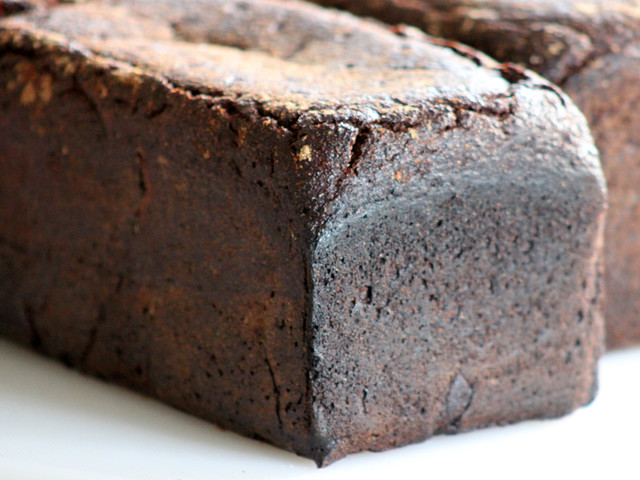
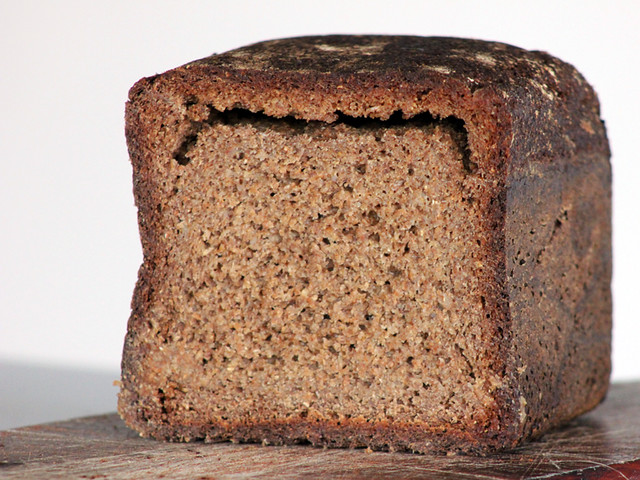
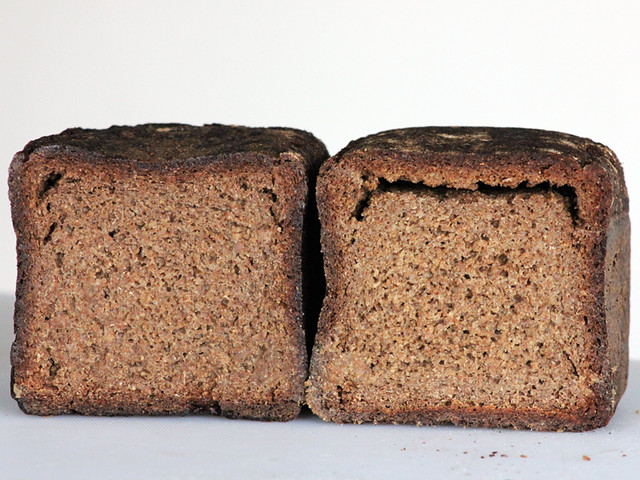
The first difference came as soon as I cut the breads. The fresh milled bread is a nightmare to cut. Takes a lot of muscle and the cuts are not clean, while the knife easily carves through the bread with store bought flour.
The fresh milled bread has lost its roof again. The other bread is intact, though is showing some signs of separating in some of the corners.
Fresh milled flour rye having lost its roof
The flavour is quite distinct between the two. The store bought flour bread is not as sour. They both are delicious, but the store bought flour has a nicer mouth feel.
Bought flour rye
Side by side
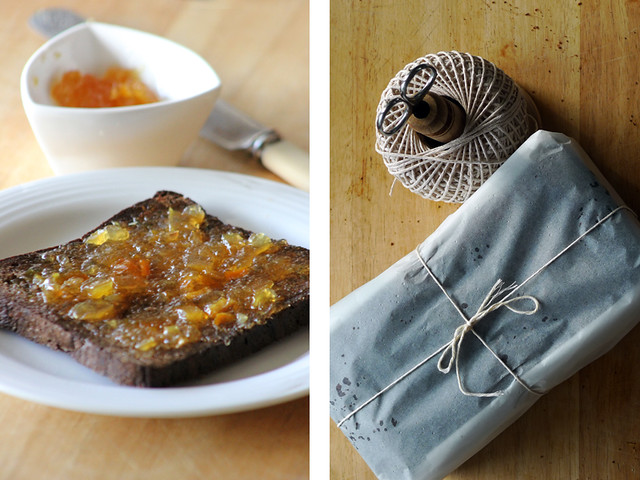
Breakfast
I have no idea if it is traditional at all, but one of my favourite ways to eat this is with marmalade. We made this marmalade a few months ago using lemons from my tree, grapefruits from my grandfather's tree, oranges from a friend of ours and mandarins from my partners sisters.
Well rye aficionados?...
Would love to get some feedback and advice on this seemingly ongoing project ... problems solved, problems found ...
I didn't even finished my last rye bread (the one I wrote about here) and I was eager to do another one. This time with rye chops in it. Or...at least I think they are rye chops... I took some rye berries, soaked them overnight in warm water, and next morning I chopped them with a sharp knife. I guess that makes them rye chops...doesn't it? As a difference from last time, I used british rye flour (last time it was austrian) from Doves Farm. I increased the hydration (from 83% last time), but I can't say for sure how much, I can't estimate precisely how much water was absorbed by the rye berries, but I think overall hydration was somewhere between 88%-89%.
20% strong white flour (doves farm), 80% rye flour, 20% rye chops, some caraway and fennel seeds, toasted and crushed. (sorry about the quality of the picture, it was taken very early in the morning, but I want to show you the "rye chops")
Everything seamed fine until I put it in the oven. How can this beauty:
turn into this "beast":
After 24 hours I cut it in two, and the crumb was a bit sticky. I thought the bread is compromised, but I let it sit another 24 hours until I sliced it and taste it. It is quite delicious. When toastes, the rye chops gets a nutty wonderful flavor. The bread is sweet from rye, and sweet from berries. I feel like I'm on the right track, but I want to have more volume in my rye breads than this:
I am happy that I don't have to trasform this bread into altus (that was my fear when I first cut it), but I'm dissapointed that I didn't get more volume. It has only 6 cm height :( What did I do wrong? the dough was not overproofed, that is for sure. Maybe a bit underproofed? I worked it too much when I shaped it? And why does the crumb feel a bit sticky when the internal temperature after baking was (again) 98C?
Three years ago, I made Double Knotted Rolls from a formula provided by nbicomputers, AKA Norm Berg, AKA co-author with Stan Ginsburg of Inside the Jewish Bakery. (See: Norm's Double Knotted Rolls) We enjoyed these rolls a lot, especially for sandwiches made with leftover Thanksgiving turkey.
When I received my copy of Inside the Jewish Bakery yesterday, I had already planned to make these rolls today. However, the book had no specific recipe for these rolls and no indication which of the three formulas for rolls should be used for them. I was pretty sure it would not be the "Light Enriched" dough, because that is the one used for Kaiser Rolls, and Norm specifically distinguished between the "soft roll" dough formula and that used for "hard rolls," like Kaiser Rolls. That left two formulas. Neither was the formula I had used in 2008, but I decided to use the "Sweet Egg Dough," because that looked closest. Here is the result (in photos):
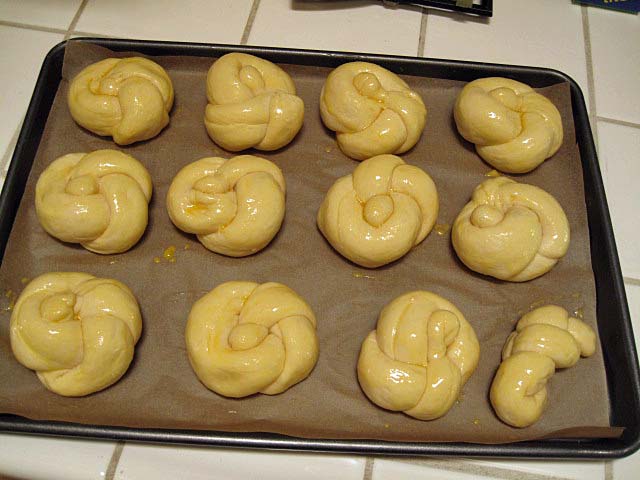
Rolls shaped and ready for proofing
Mixing followed the general instructions for mixing roll dough, and it worked well. Instructions (in Norm's words) for shaping can be found in this topic: Double knot roll. There are numerous YouTube videos of this technique, many erroneously presented as the method for shaping Kaiser Rolls. In addition, both Hamelman's Bread and Greenstein's Secrets of a Jewish Baker have good roll shaping illustrations. I scaled the rolls at 3 oz, with one bit of dough left over to make a sort of Figure Eight Roll.
Rolls proofed and egg-washed
Inside the Jewish Bakery has an enlightening discussion of how different degrees of proofing were used for different products made with the same dough. For the Double Knotted Rolls, a 3/4 proofing is necessary to get the right crumb texture.
These rolls can be baked plain or with poppy seeds or sesame seeds. (Onion rolls are a whole other genre!) My wife much prefers sesame seeds. I can go with sesame or poppy.
Rolls proofed, washed and seeded. Ready to bake.
I baked at 350 F for about 15 minutes. The rolls were slow to brown. Next time, I'll use the oven's convection setting, probably at 330 F.
Baked and cooling
These rolls were less rich than I remember, but still very good. Next time, I believe I would return to the formula Norm provided in 2008. Who's counting calories?
I finally got around to making Hamelman's "Pain au Levain with Whole Wheat Flour." For comparison, I also baked his Pain au Levain. The former was cold retarded overnight. The latter was not. However, I did retard the firm sourdough starter used for both breads overnight, and I believe this resulted in a tangier pain au levain than my previous bakes.
On to some photos:
Pain au Levain boules
Pain au Levain crumb
Pain au Levain crust
If I were nit picky, I'd say this dough was slightly over-fermented, and I think the loaves were slightly over-proofed. However, it had a thin, crisp crackly crust that I wish I could reproduce at will, and the flavor was delicious, with more of a tang than usual, as mentioned.
Pain au Levain with Whole Wheat Flour
Pain au Levain with Whole Wheat Flour crumb
This bread had a more complex flavor that the "regular" pain au levain when tasted 2 hours out of the oven. There was a slight WW grassiness, which I do not enjoy, and a lingering sourdough flavor, which I do enjoy. This type of bread usually tastes better to me on the day after it was baked, and I trust this bread will follow the pattern.
It's hard for me to say which of the three version of pain au levain in "Bread" is my favorite. Experience suggests it's whichever one I'm eating at the moment. I really, really like all three.
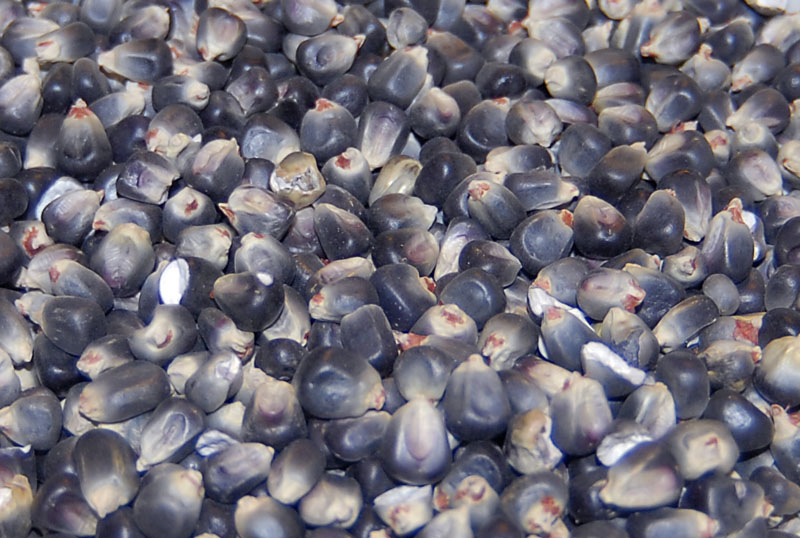
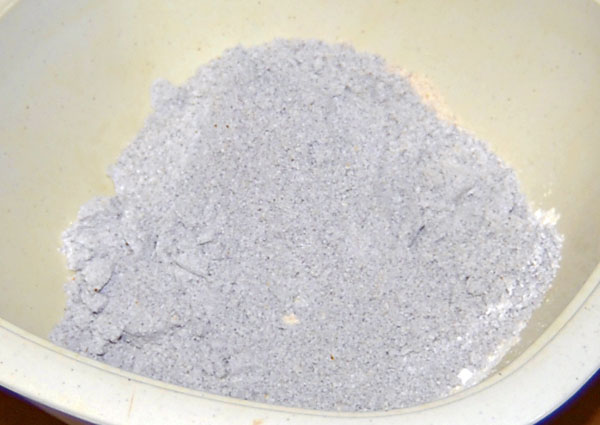
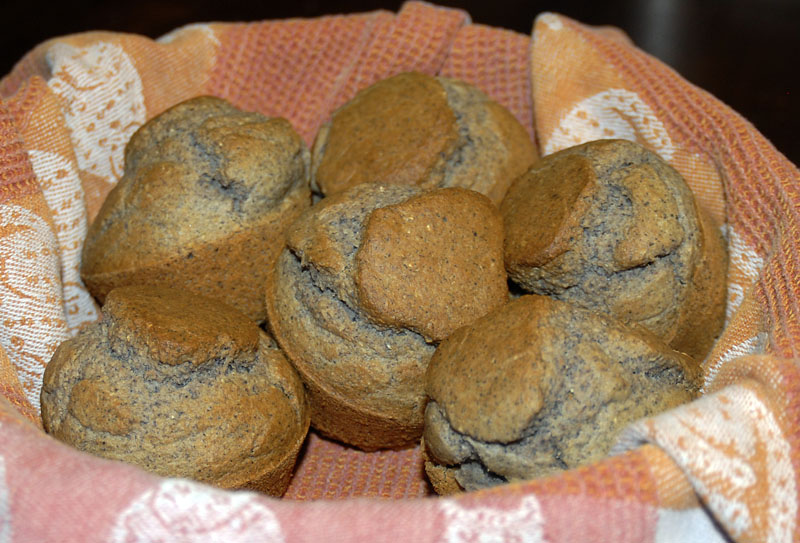
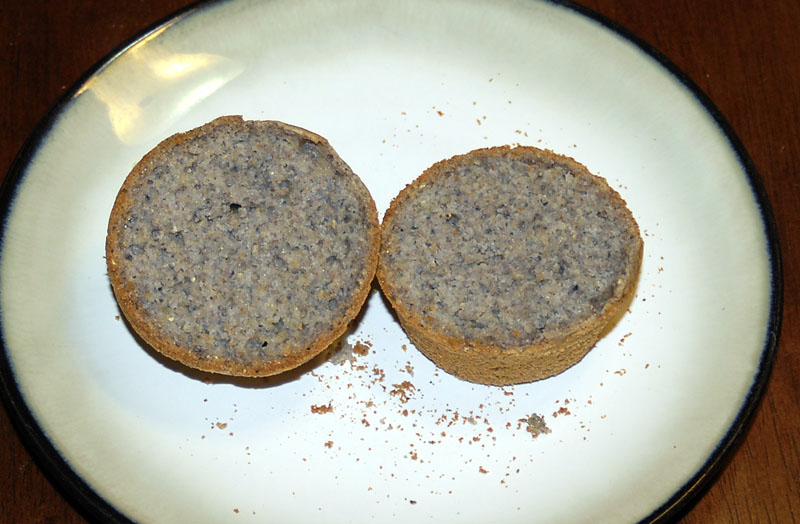
I broke out the metal 'stones' for my Retsel and made cornbread tonight. The corn was organic blue corn from Heartland Mill. The wheat flour in the recipe was a mixture of hard red and hard white wheat from Pleasant Hill. These, plus some butter and jam, were all we needed for dinner tonight.