
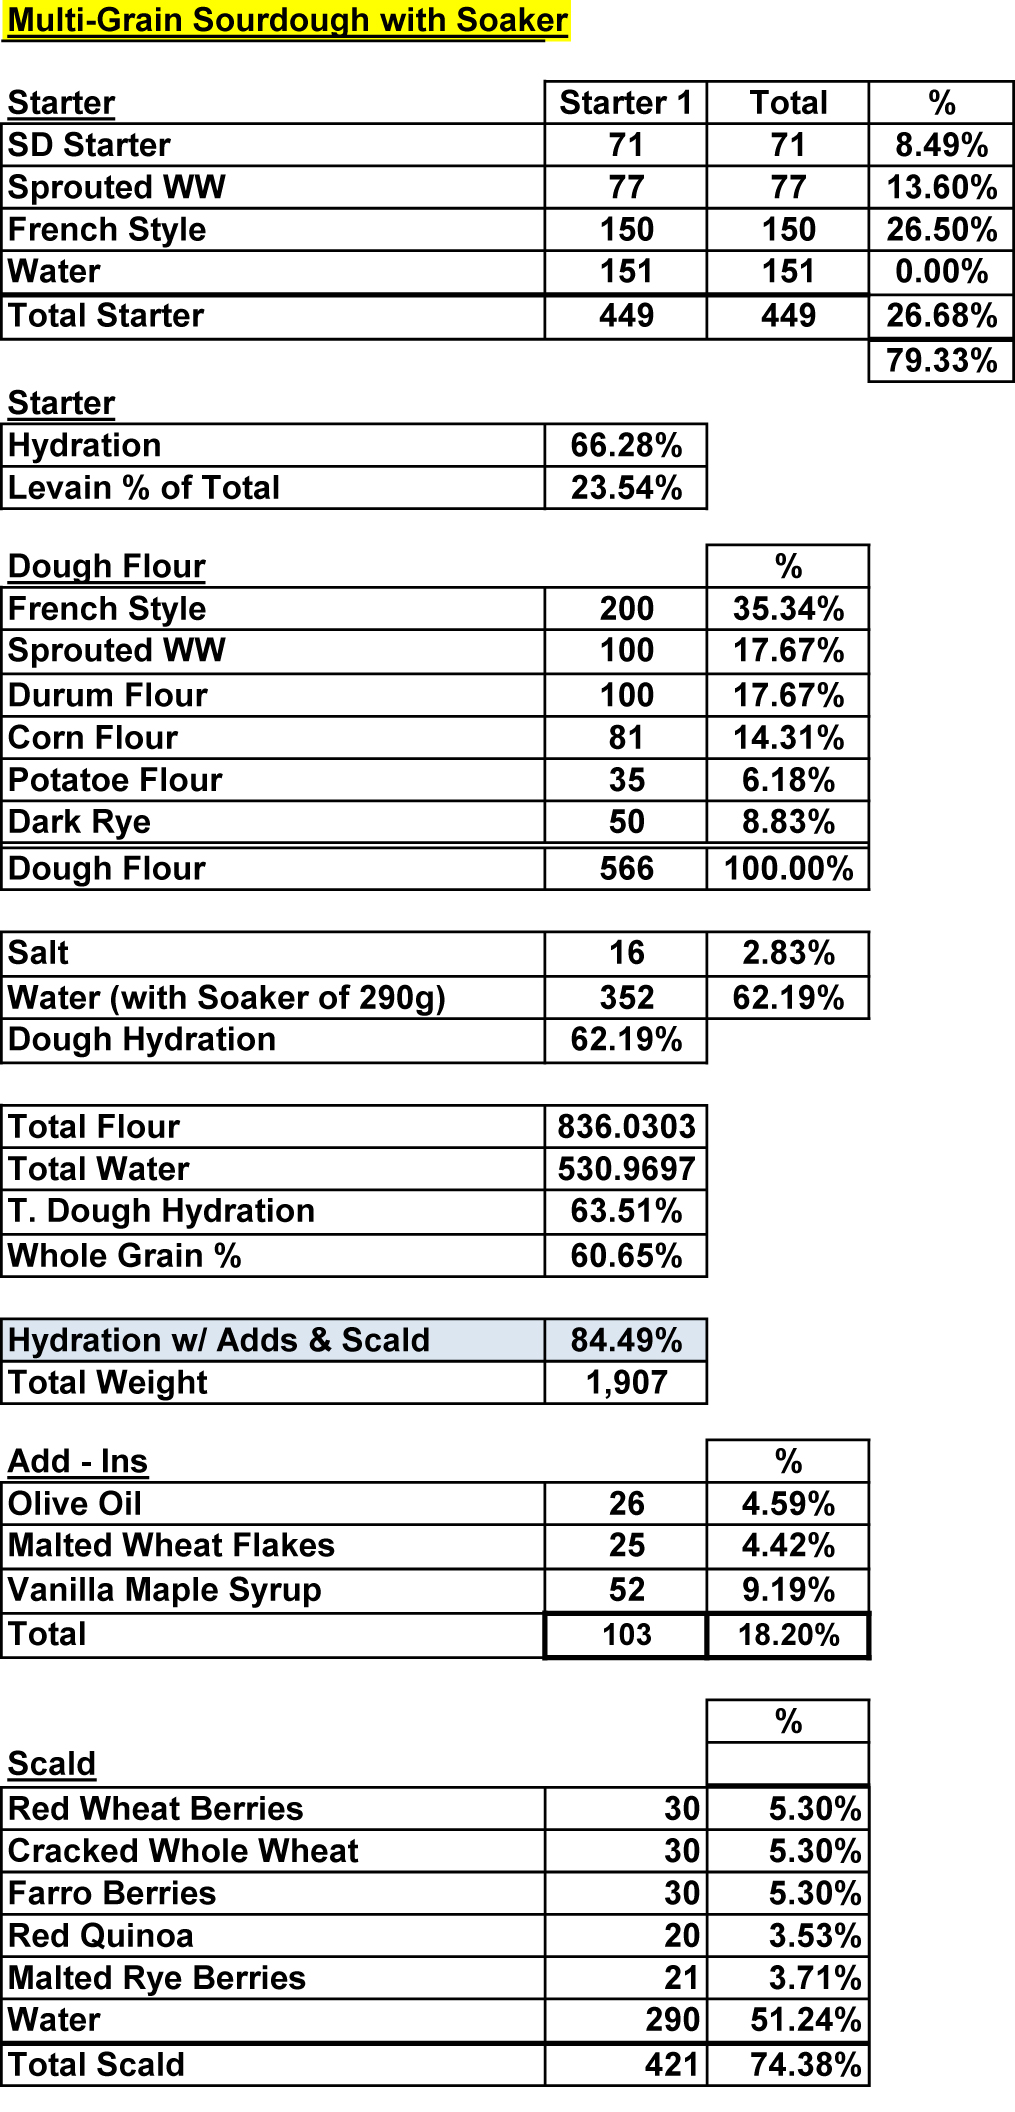
Multi-grain Sourdough with Soaker

Today it's snowing. Not enough to bring out the snow-blower but enough to enjoy a nice cup of soup with a sandwich made with my hearty multi-grain bread. I've made similar breads before and I followed the basic procedure but I varied the soaker/scald ingredients and the combination of flours in the main dough.
I used some Vermont maple syrup infused with vanilla to add a touch of sweetness to offset some of the bitterness from all the whole grains used in the recipe.
I cooked the whole grains with 290 grams of water on my stove top and let it come to a boil for about 5 minutes. I then transferred the scald to a bowl and let it sit overnight covered. The scald absorbed all of the water so I adjusted my final water amount accordingly. I still ended up with a very moist dough but one that was manageable.
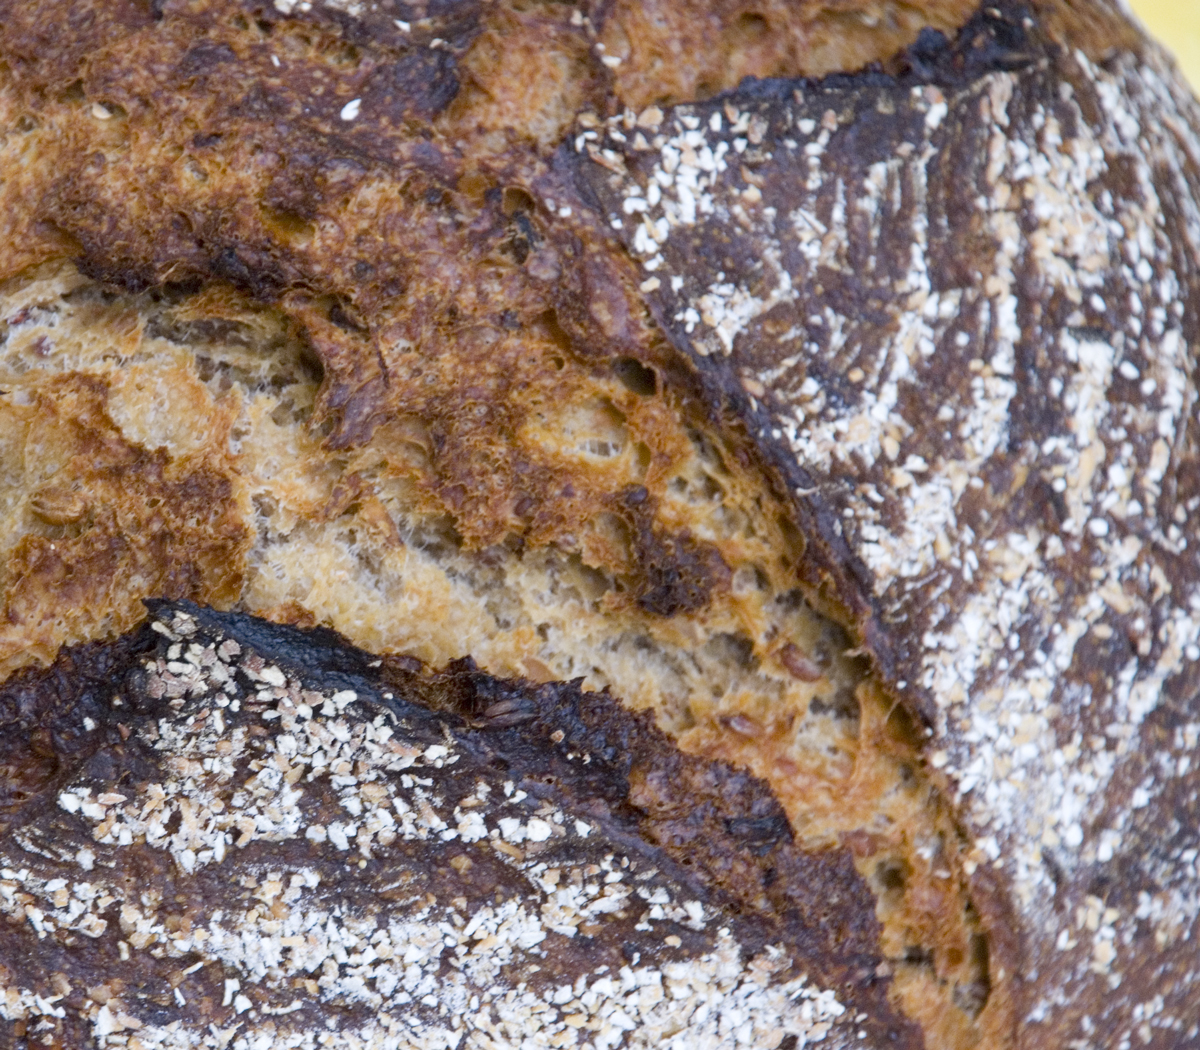
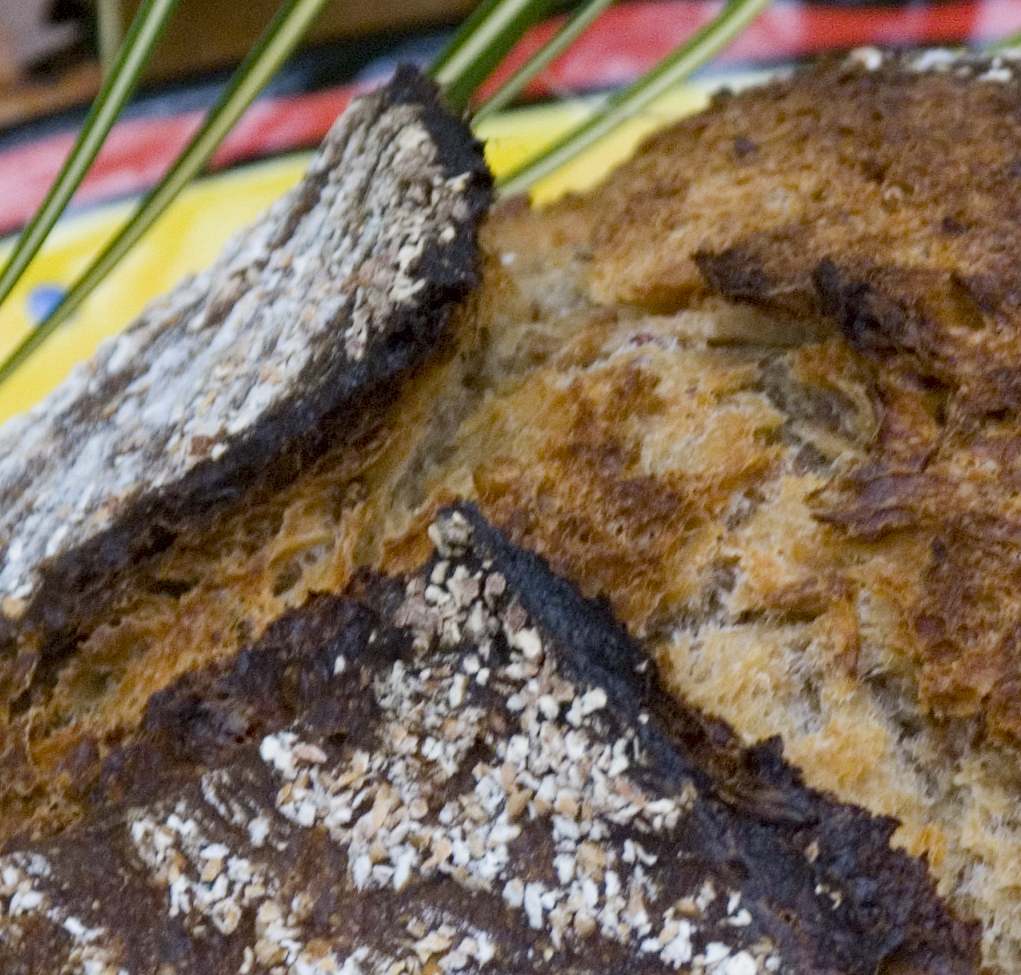
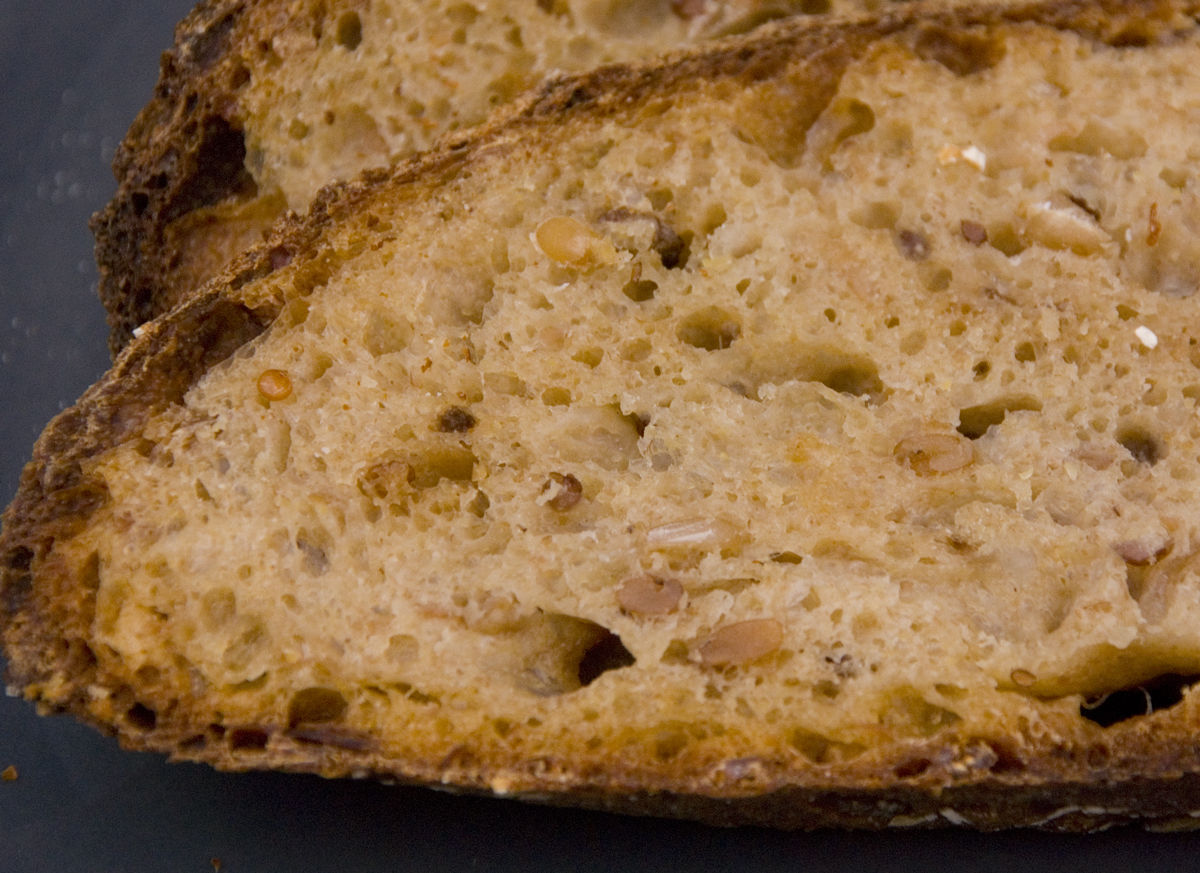
I really like the way the crust and crumb came out on this bake. A nice dark thick crust with a chewy interior, perfect for the cold days and nights ahead.
I have to say I've bought multi-grain breads from the supermarket in the past and there is just no comparison to this healthy and tasty bread.
 [1]
[1]
 [2]
[2]
 [3]
[3]
Main Dough Procedure
Mix the flours with the water and honey in your mixer or by hand for 1 minute leaving 50 grams of water to add later. Let the dough autolyse for 20 minutes to an hour in your bowl and make sure to cover it. Next add in the salt, olive oil and the soaker and mix for 2 minutes. Add the balance of the water as needed and mix for an additional 4 minutes. The dough should have come together in a ball and be tacky but not too sticky.
Next take the dough out of the bowl and place it on your work surface or a clean dough rising bucket sprayed with cooking spray. Do a stretch and fold and rest the dough uncovered for 10 minutes. After the rest do another stretch and fold and cover the dough and let it rest for 10 minutes. Do one more stretch and fold and put the dough into a lightly oiled bowl and let it sit at room temperature covered for 2 hours. After 2 hours you can put the dough into the refrigerator for 24 hours or up to 2 days before baking. Feel free to do some additional S & F's if you feel it is necessary. I baked the bread about 24 hours later.
The next day (or when ready to bake) let the dough sit out at room temperature for 1.5 - 2 hours.
 [4]
[4]
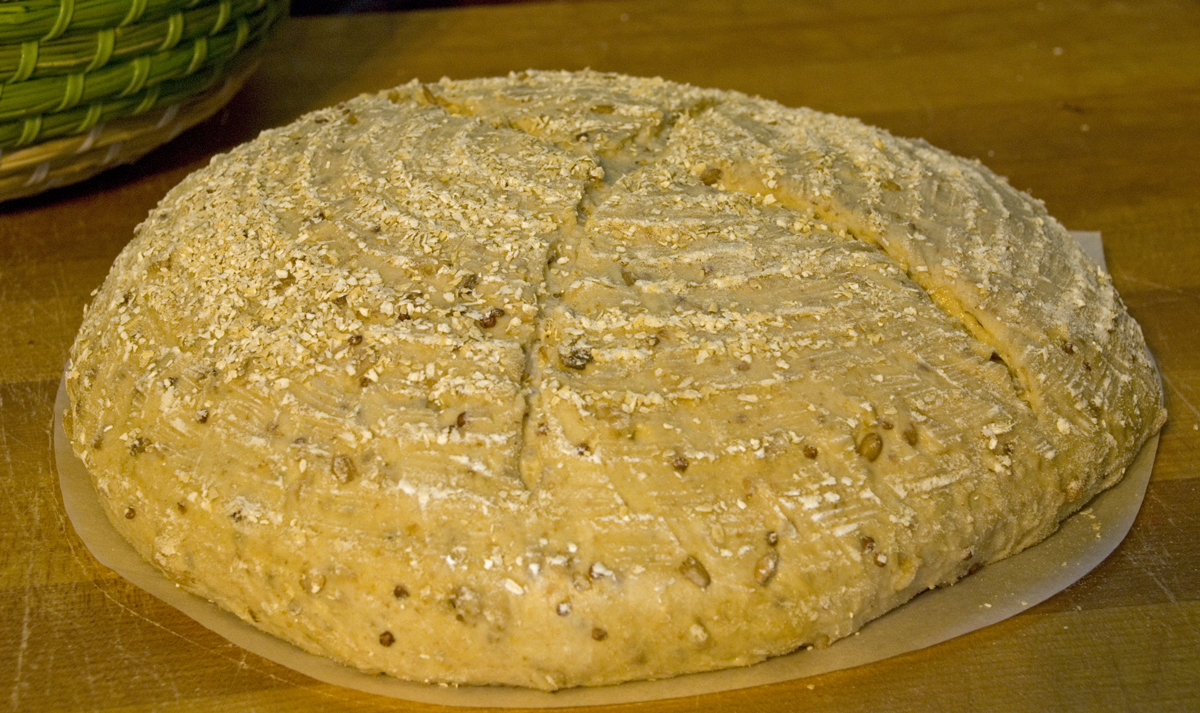
Next, form the dough into your desired shape and put them in floured bannetons, bowls or on a baking sheet and let them rise covered for 2 hours or until they pass the poke test. Score the loaves as desired and prepare your oven for baking with steam. I made one large miche for this bake. I also added some organic oat bran to the bottom of the basket which adds a nice texture to the outside of the bread.
 [5]
[5]
Set your oven for 525 degrees F. at least 30 minutes before ready to bake. When ready to bake place the loaves into your on your oven stone with steam and let it bake for about 5 minutes. Next lower the temperature to 500 degrees for about 2 minutes and then lower to 450 degrees. Since I baked this as a miche I then lowered the temperature to 425 degrees about half way through the bake until it was finished. When you have a nice dark crust and the internal temperature reaches at least 210 degrees you can take it out of the oven and place it on a cooling rack.
Let the loaves cool down for at least an 6 hours or so before eating as desired.
 [6]
[6]
 [7]
[7]