
Super Low Tech, 'tin foil hat', no knead loaves & baguettes
Hey TFLers --
First time posting, long time diy bread baker.
Just thought I'd toss up some picts/words about my oven/bread setup, as my neighbor was over this evening (she's a no knead bread apostle), and requested I post instructs here for her, so her relatives can also see the low tech setup I'm using for bread baking that makes the wonderful crust and crumb.
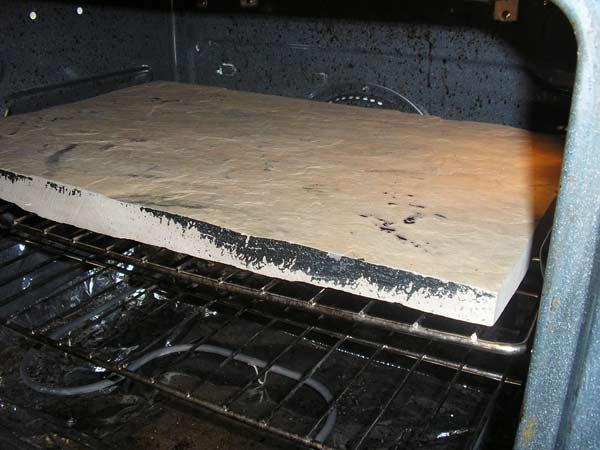
STONE:
Here's my oven stone. Just a chunk of cut rock found in the cellar of a Boston apartment 22ish years ago. Fits perfectly inside my current oven with 1 inch-ish space around all sides. (Here in upstate ny there are lots of slate quarries that will sell ya a chunk of scrap rock for $5-10 bucks. Friends in Vermont have purchased scrap soapstone, and actually cut it themselves with a circular saw to fit perfectly in their ovens, too, so anything will work.) Of course, ANY pizza stone would work just dandy too.
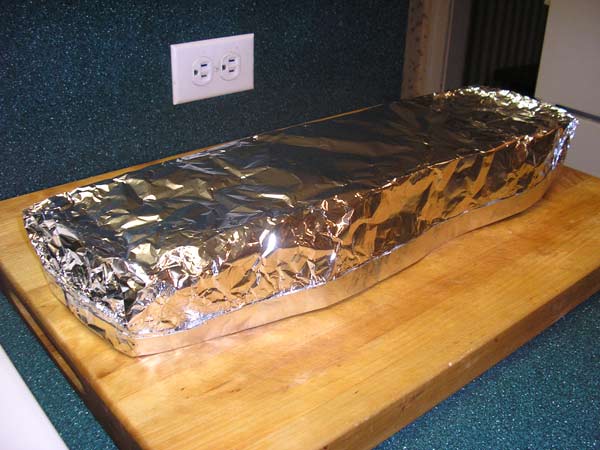
TIN FOIL HAT (aka the container, aka the steamer)
Best thing about tin foil covers instead of Dutch ovens? You can make it large enough to do 4 full sized loaves or baguettes at once -- or at least make enough bread to fill up your stone to capacity. You can also make covers for 6-7-8 cup flour doughs for very large loaves...
...but whatever size loaf/loaves you're making-- just make the foil cover to fit the job at hand. No need to get all technical about it either. Cheap, fast, and flimsy cover works as well as one that you spent an hour making.
FYI, it's totally ok if there's a little space at the bottom of the foil so you don't have a perfect seal -- it's not going to matter. It'll still make bread as good as your dutch oven. You can see my cover below doesn't touch the cutting board perfectly.
Here's the one I made to fit over my 24" baguettes today, top view.
Underneath view:

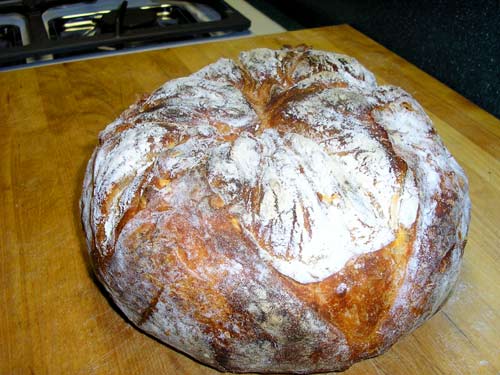
LOAVES made from that stone & tin foil setup today:
Potato-Cheddar (lots of left over potatoes to use up!)
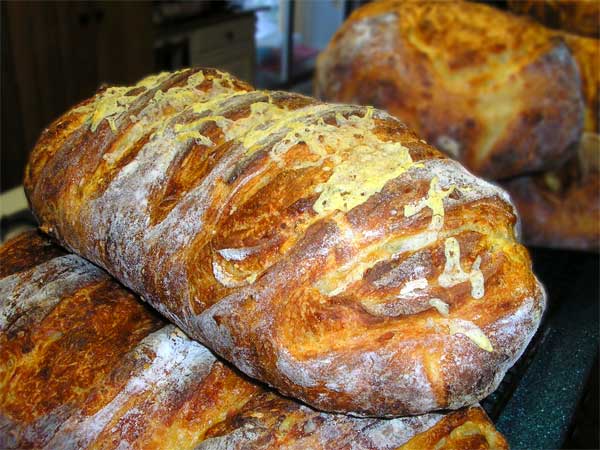
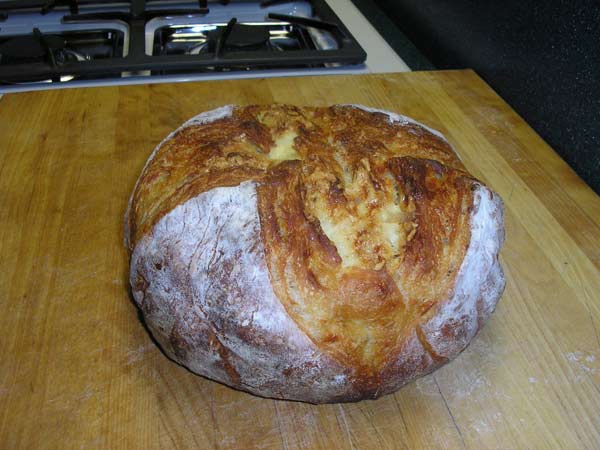

Potato Parmesan
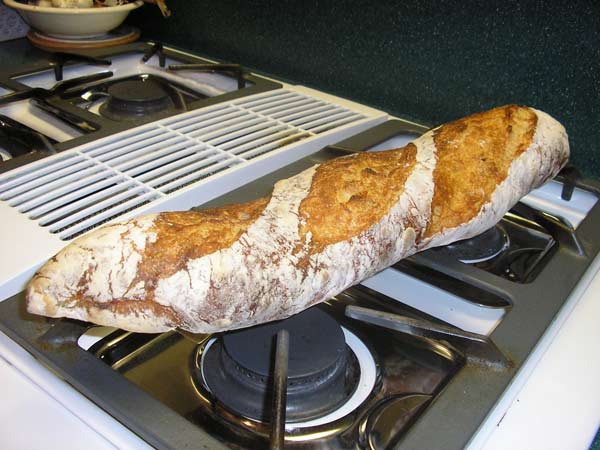
POTATO BAGUETTES:

RECIPES:
Overall, Im basically just using a 'hybrid' style of super simple breadmaking. It's 'no knead style' dough rising meets structured folding and forming of free standing loaves that will work without the hard sidewalls of a Dutch oven.
Usually, Im kinda lazy, so I rarely measure stuff or work off recipes just general proportions and a "feel" for the right dough consistancy. So breads are usually impossible to reproduce exactly, but I can get close if I make it again within a month (or jot down a few notes). Generally I just look though my pantry for flours available, and try to use up the older stuff first -- as opposed to going out and buying ingredients for specific recipes.
If I'm adding cheese to the loaf, and I do that often, I introduce it, grated, into the dry flour at the beginning of the recipe so it permeates the whole loaf's flavor. The cheeses then disappear into the loaf yet add acomplex and satisfying flavor to a no knead bread. (and usually I'll add in an extra handfull of cheese on final proof so there's detectable cheese bits in there also) The dough usually ends up around the proportions of Jim Lehey's no knead recipe in terms of flour to hydration/wetness.
About the only rule I follow is just one small pinch of yeast per approximate cup of flour added, and then toss finished well hydrated dough in fridge covered for at least a day, usually two for initial rise.
I also occasionally put different leftovers into the bread to use them up and get rid of them. When I do that, the loaves come out a bit like a Stromboli inside. After all, bread goes with almost everything! Sometimes I'll add black beans & cheese. Or Homemade Salsa. Or leftover chili verde. Or Crumbled meatloaf and cheese. Or chopped marinated banana peppers & cheese. Or a little bit of leftover turkey gravy, or the last 1/3 cup of homemade blue cheese dressing, or mashed potatoes (see bread picts above for these)... ...whatever's in the fridge, often gets dumped into a loaf.
Ive also used various leftover stocks in place of water -- chix, beef, pork, which add fabulous flavor in the final baked loaves. (1/2 your normal salt addition, if you use salted stocks though -- using stocks ends up with a loaf reminiscent of a 'dumpling', if you happen to like dumplings)
FOLDING THE DOUGH:
Since these are actually free standing loaves without DO sidewalls to guide them up, you WILL have learn some basic folding of your doughs to get some 'height' out of the finished goods. I actually learned from seeing an old Julia Child TV show back in the 70's when she had a guest bread baker who made french batards and baguettes on that episode.
This short video of Peter Reinhart will also demonstrate an easy way to fold wet 'no knead' doughs, to add internal structure needed for free standing loaves. (I just use flour instead of Peter's water and oil setup though-- as Im a bit lazy to pull out and arrange, and then clean up clean all of those extra items, just to make a couple fresh loaves):
http://www.youtube.com/watch?v=1timJlCT3PM [1]
FYI, 'pinching the seams' down very firmly into each other, to close them, is the real key to 'folding'. No matter what folding pattern you choose to use inside your loaves: SEAL THOSE SEAMS EVERYTIME. Ive always gotten tall, proud loaves and great pan spring using every conceivable folding pattern imaginable--- but only as long as I seal all the seams firmly together every time-- and do three passes of this folding with 5-10 minute rests in between each series of folds.
SCORING THE DOUGH:
Just grab your shapest knife and steel it very well (shapen it), then rub a bit of oil on both sides of the blade and slash quickly. Keep the blade at about a 15 degree angle to the table. Works perfect every time with a sharp, sharp narrow bladed knife. You don't really need the fancy scoring tools for 3-4 loaves a week at home.
VARIATIONS/NOTES (never be afraid to 'wing it'):
~ The past few years, Ive been using a high gluten white flour as a base to add other flavors into. With a no knead style dough in particular it always seems to add:
- more oven spring, less susceptible to over proofing in final rise(s)
- adds a nice, somewhat chewy texture and mouth feel to the loaves
- seems to be able to 'hold it's structure while proofing better than AP
- generally makes it more idiot proof, and tolerant, in terms of acceptable hydration level (i.e. tolerant of a wider range of water you can add and still get nice, erect loaves)
If you're having trouble with flat loaves, or not enough oven spring, try subbing high gluten for your AP a few times, you'll be pleasantly surprised by how forgiving it is.
~ Ive been getting my high gluten flour at wholesale costs in 50lb bags for under $20 (late 2010 price) at HillCrest foods in Saratoga Springs, NY. http://www.hillcrestfoodsne.com/ [2] You can also pick up a huge variety of flours and grains there -- I also get all my organic, and various whole wheat and rye flours in bulk there, too. Im sure there's local wholesale dealers of flour in every area of the US if you snoop around on google a bit. Search for "wholesale flour {insert biggish city name that's near you plus state initials here}" (don't use the quotes in your search though)
~ Occasionally, if I want to add a smoky, wood fired oven flavor to the loaves, Ill throw a couple still hot, charred wood chunks/glowing embers of some apple firewood into a pan below the stone. Bake as usual. Really adds nice flavor to the loaves but definitely want a working exhaust fan near the oven.
~ With such a thick pizza stone I often throw it out on top of the gas grill and cook pizzas out there with a nice 700+ degree heat that make great crisp crust with bubbles. Best thing about this is tossing chunks of wet apple wood into the fire and getting a light sweet smoky flavor into the pizza.
~ I always use parchment, because the rough surface of the natural stone makes 'coming off the peel', and removing loaves difficult. Much simpler to final proof on parchment, then just sling both into oven together.
~ Obviously you can use anything to cover the bread to get a wonderful crust if tin foil will work as a 'container'. I've used foil turkey roasting pans, upside down soup pots (w/ metal handles!), clay plant pots w/ bottom hole filled with foil, etc, etc.
~ For really nice, crazy good thick style pizza crusts, try making a tin foil tent to fit over your pizza for about 1/2 the cooking time (but use a really high heat oven when you do this: 550+ degrees.
~ You can also make bread & pizza outdoors over a camp fire's embers, on a flat stone, using some creativity and foil to fabricate a mock "oven". Hardest part is actually finding a nice flat rock in the wild! Pizza is particularly easy, get the rock nice and hot 800+ degrees, stretch your dough to fit the shape of your rock, throw your dough on the stone, then add your sauce/toppings right on the heated rock while dough is starting to cook. (quickly of course), toss on your tin foil cover and you're good to go. pretty amazing how well the crust comes out as long as you get the foil cover on tight to retain heat coming off the rock.
Anyhoo, Happy Holidaze to all! (Greetz to Paula, HTH ya out w/ the relatives.)
Dave