The Fresh Loaf

A Community of Amateur Bakers and Artisan Bread Enthusiasts.
A_W's picture

Wet Crumb

March 27, 2009 - 2:51pm -- A_W

I know this question has been asked a lot, but I just can't seem to find my answer and TFL was on it with my last problem so here it goes again.


I have been getting great bread.  Everything looks as it should.  My only real problem is wet crumb, some even describe it as "oily".  I have been checking my temps after cooking, around 200-210 F, so that should be right. My recipe is as follows.

600g flour (Usually all white, but my last loaf had 2/3 WW and still wet on the inside)

420g water

1/4-1/2 tsp yeast

1-2 tsp salt

jackie9999's picture

Dough too elastic to work with...

March 27, 2009 - 2:25pm -- jackie9999

Making bagels or challah...the process of forming the dough into 'ropes' is brutal..a real battle. It seems to have a mind of its own. It springs and shrinks, nothing like I see in the youtube 'how tos'.... I try and coax it into an even rope like shape and it fights me! I end up with a lumpy, thick, thin stretch of dough that, when proofed, still shows some signs of having gone through a war.  What am I doing wrong??

SulaBlue's picture

Sub for Molasses in Israel?

March 27, 2009 - 1:45pm -- SulaBlue
Forums: 

I'm trying to share my recipe with a friend in Israel - and got to the molasses and went &*^!@. She doesn't even know what molasses is. What's a substitute for that part of the world? If she were in the UK I might think treacle. What about honey? Am I correct that it's in there as a sweetener for both flavor and a sugar-boost for the yeast as well as to help with the caramelization of the crust?
Floydm's picture
Floydm

I worked from home Wednesday and used it as an opportunity to refresh my starter and bake a couple of loaves.

The dough I made was a "little of this and that" dough.  I threw some leftover mashed potatoes in, the last couple of ounces of a bag of rye flour I had, a bit of whole wheat flour from another bag I needed to use up, and a couple of cups of AP flours.  I made the dough very wet, 70+ percent hydration.

I folded a few times throughout the morning and tried to shape a couple of freeform loaves in the early afternoon.  It was amazingly sticky.  No amount of water on my hands or flour on my board (or vice-versa) was working for me. 

After 10 minutes of sticking and swearing and being about ready to dump it into the compost, I dumped the gobs into a couple of loaf pans.  Two hours later, I came downstairs to the kitchen and was pleasantly surprised by how much it had risen in a loaf pan despite the way I had abused it.  So I baked them.

sourdough loaf

Not my most beautiful loaf, but pretty darned good.  I don't think anyone else but me could tell this was not what I'd intended to make.  And the sourdough flavor was tremendous: the extra abuse and longer rises let it develop more.

nosabe332's picture
nosabe332

I decided after a few sensible, somewhat alarmist, posts here on TFL that i would not buy unglazed flooring tiles (terracotta, saltillo, etc) for use in my oven. There are too many health concerns involved with the manufacturing and raw material differences between flooring tiles and bakeware. Any cause for concern should not be ignored. It's likely that flooring tiles could be perfectly fine to bake with. On the other hand, maybe not.

It helps that I'm getting a good amount of money back after taxes, which I decided to spend on a baking stone and other baking equipment. And to keep track of what I could get, I'm putting together this list:

Sur La Table, (Best Manufacturers) $42, 14x16x5/8

Old Stone, (via Amazon) firebrick, $29.95, 14x16x?

Breadtopia, Fibrament, $51, 13x17.5x3/4, $69, 15x20x3/4

Ace Mart, American Metalcraft, Corderite, $44, 14x16x1/2

Central Restaurant, Fibrament, $58.49, 15x20x3/4


i never thought i'd see the day that sur la table looked like an economic option!

ques2008's picture
ques2008

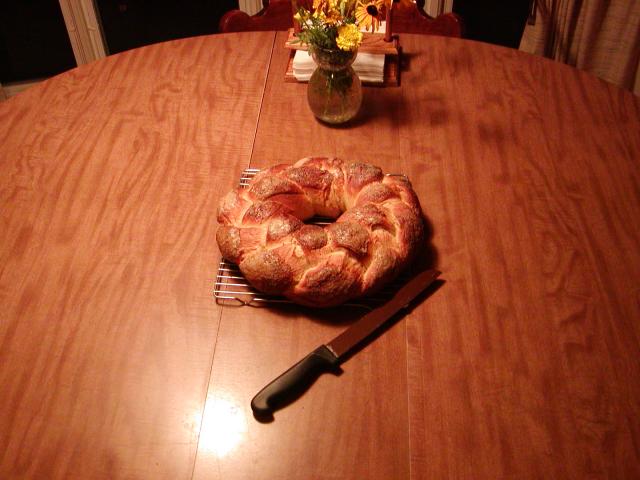
Finally got myself an inexpensive digital camera and would like to show off one of my "creations" which is far from original.  I'm sure many of you have made this danish ring.  I got this recipe from www.cookscountry.com/recipe.asp?recipeids=3846&bcd=46152.  Cooks Country is a great web site, by the way, and would like to know how many of you are members and whether or not you use your membership.  They seem to have a gold mine of knowledge with truckloads of practical advice.  I'm thinking of signing up.

Anyway, I'm showing pictures of the (1) preparation for the dough where I slather it with the filling, (2) the finished product and (3) the product partially gobbled up.  I halved the recipe, and didn't quite succeed with the cutting and the turning upside of each slice, but the recipe gives a step-by-step.  I'll try it again one day, and hopefully, get the technique right!

Picture 1:  Prepping the dough.

 prepping the dough


2.  Danish ring fresh out of the oven:

danish ring as it came out of the oven

3.  And now, as it was partially eaten (closer look of slices - as you can see I did not quite do the slices with flying colors!)

partially eaten ring


vincent's picture
vincent


INGREDIENTS ·         2 cups evaporated milk

  • 3/4 cup white sugar
  • 1/2 cup butter
  • 4 teaspoon instant dry yeast1 1/2 teaspoons salt
  • 1/2 teaspoon baking soda
  • 1 teaspoon baking powder
  • 6 cups all-purpose flour
  • 4 tablespoon vegetable oil
  • 4 tablespoons or more dry bread crumbs for topping
  • Note no water added
DIRECTIONS
  1. Heat the milk in a small saucepan until it bubbles; remove from heat. Add the butter and sugar and the salt; stir until melted. Let cool until lukewarm. And dissolve the baking powder and the baking soda
  2. Pour the cooled milk mixture into a large mixing bowl.. and 6 cups of the flour and the instant dry  yeast (note: be sure you mix well the flour and the instant dry yeast ; stir well to combine. Add the remaining flour, 1/2 cup at a time, stirring well after each addition. When the dough has pulled together, turn it out onto a lightly floured surface and knead until smooth  . And it should a little bit sticky not so wet…if it is to dry add milk just enough to make sticky and when you kneading just  greased the surface with vegetable oil  no flour.
  3. Lightly oil a large mixing bowl, place the dough in the bowl and turn to coat with oil. Cover with a damp cloth and let rise in a warm place until doubled in volume, about 1 hour.
  4. Preheat oven to 375 degrees F (190 degrees C).
  5. Deflate the dough and turn it out onto a lightly floured surface. Divide the dough into 25 pieces (depending how many you cut) as long it will be equal parts and form into rounds. Then dip into the bread crumbs and roll it all over.  Place the rolls on a lightly greased baking tray. Cover with a damp cloth and let rise until doubled in volume, about 1 hour
  6. bake at 375 degrees F (190 degrees C) for about 15 to 20 minutes or until the tops are golden brown.

  7. i cut remeaning dough about a quart in the pandeasl dough is for the ensaimada  for my trial to make ensaimada it's  the same recipe in the pandesal....


MY TRIAL ENSAIMADA ( PRETZEL LOOK)


 when you finish the 1st rising of the dough fold it just like pretzel fold and when you finish folding brush with scramble egg the outer surface then cover again with cloth let it rise for 1 hour then bake

Note: i baked them together 1st layer is the pandesal 2nd layer ensaimada after 10 minutes i switch the position  puting the ensaimada 1st layer and the pandesal 2nd layer... until golden brown

bake at 375 degrees F (190 degrees C) for about 15 to 20 minutes or until the tops are golden brown. then get the baking tray spread with margarine by brush and dip in into the sugar i prepared it is hot when done by margarine and sugar....  same reicpe of the pandesal ....  my trial taste good and the pandeasal ....enjoy

vincent

Pages

Subscribe to The Fresh Loaf RSS