
Eighteen things I've learned from three years of experimentation with whole grain and wild yeast bread
Hello Fresh Loaf friends! After a couple of years of lurking and learning, I thought it was time to share a little, in particular to help new bakers get over the hump. Below is a version of what I posted on my occasional blog, Improbable Pantry, but oriented to the baking audience here at the Fresh Loaf. I'm in particular interested in your feedback to my methods and insights, as well as my research questions, which I'll post in the first comment below.
Eighteen Things I've Learned from Three Years of Experimentation with Whole Grain and Wild Yeast Bread
I had been baking no-knead bread since Mark Bittman popularized the technique he learned from Jim Lahey of Sullivan Street Bakery in New York in 2006. All purpose (or bread) flour, water, salt, and a measly quarter teaspoon of instant yeast. Time—24 hours. A little attention once in awhile and bake in a super-hot covered dutch oven that brought a spectacular oven spring and crackling crust. The result was an incredible bread that rivaled any local bakery. Friends and family would ooh and aah.
Pretty soon I’d moved on from white flour to a 50-50 mixture of whole wheat and white bread flour. This was more robust as well as healthier, but it never quite rivaled the airiness and taste of a white flour loaf, but really didn’t want all that refined white flour. I would experiment now and then with different flours, checked out Jim Lahey’s book “My Bread”, but didn’t go beyond.
Michael Pollan’s book “Cooked” came out in 2013—a transformational book about the transformational nature of cooking. It is a cookbook with four recipes, one per chapter: fire, water, air, and earth – the ancient four elements. The “air” chapter concludes with a recipe for sourdough bread and was inspired. Sourdough is not just an alternative to commercial yeast, but also transforms (there’s that word again) the wheat so that it is more digestible and nutrients are more available. In short, sourdough bread is healthier. And it tastes good.
I made my own sourdough starter, which just needed a little patience and a little attention. I read books, some of which were confusing and some overly prescriptive. The time commitment seemed intrusive—when was I supposed to go to work? But I got over the hump, and now I’m a bona fide bread nerd who grinds his own grain, feeds his sourdough like a pet, and gets a little downcast when I resort to bought bread because my old bread ran out before I could create another loaf.
My sourdough starter is now almost three years old. I’ve learned a few things along the way.
The most important lesson is that there are as many different ways to bake sourdough bread as there are bakers, and that once you get a feel for it, it’s hard to mess up. One loaf may be a little better or worse than the last, but the bread is most likely to be very good.
So, to help you get from the “there’s so much information out there, I’m overwhelmed” stage to the, “OK, I’m ready to give this a try, and I can’t mess up too badly” stage, here are some of the lessons that I learned, as of today. Since I keep experimenting, tomorrow I'll be even wiser.
|
No knead bread is an excellent way to get started. |

Getting Started.No-knead bread is an excellent gateway. If you love making it, by all means continue. And if you’ve never baked, it’s a great place to start.
References. There are some tremendous references, some easier to understand than others. Start with one, but try others – there are different approaches. I heartily recommend Josey Baker Bread for its good humor, relaxed approach that encourages flexibility and experimentation. The website http://www.thefreshloaf.com/ is a great online community of bread bakers. And breadtopia.com, has great, detailed instructional videos as well as a terrific online store to get baking supplies such as the clay baker and oven gloves.
Learn from doing. At first, it pays to adhere strictly to the formulas and the methods, but you’ll eventually get a feel for what works well for you and be confident enough to branch out.
Be prepared to have some crummy loaves. Try not to be too sad and chalk it up to experience.
Timing is flexible, and the refrigerator is your friend. Baking bread takes a lot of clock time, but the active time is not much. You do have to be around at certain milestones, but there’s a lot of flexibility, and the flexibility increases when you make intelligent use of the refrigerator. Creating a baking schedule that works around your other commitments takes a little forethought, and a little experimentation on weekends when you can commit to being around, so that you can get a feel for where you can push and pull the schedule.
Temperature matters. Pay attention to the temperature in your kitchen (or wherever you let your dough rise). I got the timing down on my go-to loaf one winter, and then spring sprung, and the warmer temperatures led to more yeast activity. By the time I got the loaf in the over it was tuckered out, over-proofed, and I had flat tops on my loaf. There’s a big difference between a 63 degree kitchen and a 75 degree kitchen!
When experimenting, change only one thing at a time. if you want to have any idea of the effect of different ingredients, ratios, and techniques. This is way harder than it sounds. Taking good notes will help you remember what worked and didn’t, and provide a basis for what to try next. I used a spreadsheet until I got a good feel for what I was doing. And ultimately, just try some new things and see how they turn out and don’t stress about it too much.
Making Sourdough Starter. Making sourdough takes a little faith and patience but once you have a starter, it’s pretty hard to kill. After awhile, you get to know how to treat your starter so it so is ready when you are. I learned how to make starter from Peter Reinhardt’s The Bread Baker’s Apprentice, but there are lots of places to show you how. I use rye starter. With no gluten, it’s less messy and easier to handle than wheat flour. And you can also buy starter online.
Sourdough care and feeding. I use a teaspoon to a tablespoon worth of starter each time I bake, and then if the starter is looking reasonably active, just toss the remainder back in the fridge in a covered container until the next time I bake, usually within a week. Every other time I bake, I refresh the starter by removing all but a teaspoon of it, and add 50 grams of water plus 50 grams of flour (rye). Then I leave it on the counter for a few hours to get active, and then toss back in the fridge. This may not mean much to you until you’ve started baking—sorry!
Making two loaves is no harder than making one loaf. You can keep ready-to-bake bread dough in the refrigerator for up to a week—or so I’ve read—I’ve only tried to do this for a few days though. And you can freeze sliced bread for a long time, which means you don’t have to worry about getting your next loaf baked before you current loaf runs out.
Making two loaves is no harder than making one loaf.
Think ahead. you want a steady supply of home baked bread, you need to think about the next loaf while you’re still eating your current loaf. Think a few days out. But if you keep a sliced loaf in the freezer, you will always have your own bread around.
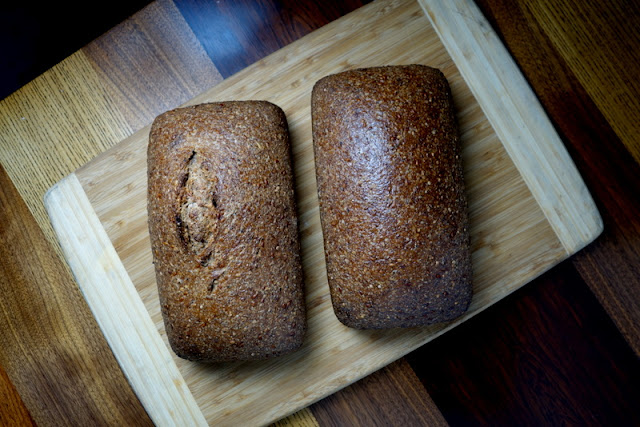
Sandwich loaves make sense most of the time. Boules (big round loaves of bread) look beautiful. But loaves in loaf pans are a lot easier to handle, taste as good, are less messy, and are also beautiful. You can bake any bread in a loaf pan. With loaf pans, use a light coating of oil on your work surface to shape your loaf instead of flour. It works just as well, and is a lot less fussy and easier to clean up. Stack a second loaf pan upside down on top of the first is a lot easier than covering with a tent of foil.
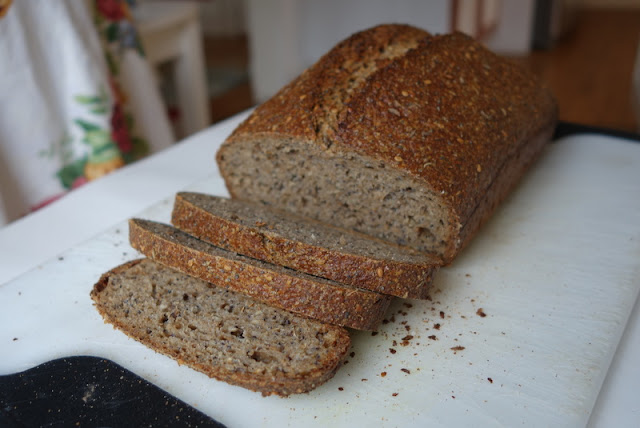
Sandwich loaves make sense most of the time.
Clay Baker. The best is getting a clay bread baker for oblong loaves. Superb! Use rice flour for shaping the loaf at the end—it doesn’t get gummy like wheat flour (no gluten) and is easier to clean.

This covered clay baker makes the best loaves!
Whole grain has arrived! When I started with sourdough a few years ago, the artisinal baking books were oriented towards white flour. But the best books are now moving towards whole grains. Hurray!
Fresh milled flour. Baking bread with freshly milled whole grain flour is way better than any flour you can buy off the shelf. It’s like the difference between freshly roasted and ground coffee and Maxwell House. And healthier. And I've recently started playing with flour made from sprouted grains.
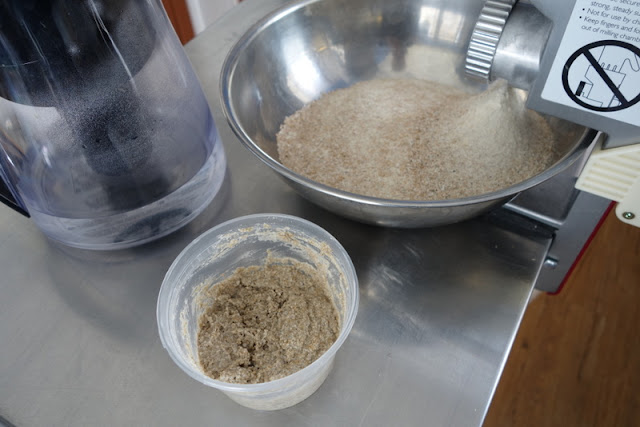
Fresh milled flour is better than any flour you can buy.
Salt. A little more or less salt can make a big difference in the taste. Too little, and it’s noticeably bland. Too much, and you just think “salty”. Pay close attention to the salt amount in the formulas. I’ve found that 12 grams for a loaf with 510 grams of flour and 420 grams of water is perfect. That’s 2 percent in bakers percentage terms.
Covering the bowl. Some sources say cover your bowl with plastic wrap, a towel, or a plate and some have different covering methods for different stages. I found that the plate works pretty well for all uses, and it’s easier to clean up. The “shower cap” bowl covers from breadtopia are even better!
Keep at it. Read books, blogs, articles. Try different formulas, grains and methods. Share your enthusiasm (and sourdough starter) with others.

Jeff's Current Go-To Sandwich LoafYield: 1 sandwich loaf
Total Time: 23 hours, or more.
This is my current go-to bread that I don't even have to think about. Since I do keep experimenting, my current go-to loaf a month from now may well be different. And if you don't grind your own flour, use store-bought whole wheat. Store the cut loaf cut side down on a cutting board. Don't wrap in plastic.
IngredientsLeaven
Grams
Bakers
Percent
Rye starter
20
40%
Water
60
120%
Red Fife Flour, Freshly ground
50
100%
Final Dough
Leaven
all
Salt
12
2%
Water
360
71%
Red Fife Flour, Fresh Grind, from Mistybrook
310
61%
Another whole grain flour, fresh ground (e.g. Spelt)
100
20%
Bread Flour
100
20%
Total Flour
510
100%
Total Flour
560
Water
420
Dough hydration
75%
% Whole Grain
82%
Method1. Make leaven by mixing together all the leaven ingredients, and let stand for a 4-5 hours (if it's warm) to 12 hours or overnight (if it's cold). You should see some bubbles at the top.
2. Add the final dough ingredients to the leaven. Let sit for ½ hour. Do 10 aggressive stretch and folds. After a 1/2 hour, do four gentle stretch and folds, then repeat at 1/2 hour increments. Note that there's a lot of flexibility in the timing. If it's 45 minutes or an hour between stretch and folds, that works too! Don't stress. Overall, let ferment at room temperature for 6 hours, or until it shows signs of a good rise. This could be a lot longer if it's winter and you keep your house cold.
3. Form into loaf, and put in a lightly oiled bread pan, with with another bread pan inverted over the top as a cover. Let rise 2 hours (or longer if your house is cold).
4. Bake at 425 with convection, 20 min, after first preheating at 450.
5. Remove covering bread pan, and bake another 20 minutes
6. Remove bread from pan, and bake another 20 minutes
7. Let cool for at least 2 hours before slicing. Resist the temptation -- the bread is still baking.


Comments
Bread research questions, or – stuff I wonder about that I haven’t had time to research. In particular because it’s so difficult to do research when I change only one thing at a time, and then do a real side-by-side comparison.
1. Pre-ferment or not. My first forays into sourdough instilled in me the idea of building a loaf in stages. Use a little bit of sourdough starter (a teaspoon or so) to make a slightly larger pre-ferment, which I then added to the full loaf (or loaves). Then I came across this video at breadtopia where I saw Eric take a heaping serving-spoonful of starter, add it to his full dough, and call it good.
I’ve tried that, and it seems to work fine if I let it go long enough, and in particular if I use the refrigerator for slower fermentation. I typically keep a 100-gram starter on hand (50-50 rye and water), and now instead of just taking 10-20 grams for my pre-ferment, I take 90 grams for my whole loaf, and just feed the remaining 10 grams to get up to my full starter. Much more convenient! But I haven’t done side-by-side comparisons. I’m curious about others’ experience.
2. Sift or not to sift. I’ve never sifted the bran out of my flour. For those that have tried it, do you see a real difference? I’m not eager to add extra steps.
3. How much to handle? I typically do several sets of stretch and folds early in the bulk fermentation time. Does anyone use the no-knead approach with whole grain or mostly whole grain breads?
4. When to salt? My earliest direction (from Reinhardt, if memory serves) was to salt partway through the bulk fermentation process, after a couple of rounds of stretch and fold. I’ve taken to adding salt at the beginning, to avoid the extra steps, and I haven’t really noticed a difference. Has anyone done side by side testing on this?
5. Flour for the starter. Although my starter began as whole wheat, it’s migrated to rye, and I’ve kept it that way. I like that the rye doesn’t get sticky and gluteny. Has anyone done testing of different types of flours in starters and notice a difference? It’s generally such a small quantity that it wouldn’t make much difference.
That's it for now. I'm looking forward to your insights, or your own research questions!
One of the things I'm interested in (and will do this for my next taste testing loaves) is how inoculation rates (i.e the amount of sourdough starter as a ratio to total dough weight, or the amount of fermented flour to the total amount of flour) affect the both the dough handling and the end product. So, low inoculation with long ferment (room temperature or fridge), high inoculation rate with shorter room temperature and/or longer fridge ferment.
Another variable would be the hydration of the starter and whether it is fermented at room temperature or in the fridge.
And just to note - re your point 17 (learnings), I buy disposable shower caps from the dollar store. $1.25 CDN for eight of them, and as long as they don't touch the rising dough I reuse them. If they get sticky I throw them away and buy a new package! Much cheaper than ones that have been re-labeled for 'bread use'. :)
I did feel a little foolish buying shower caps, but they were only $3.00 for 5 and so far I've only used (and reused and reused) two of them and they're still hanging in there. Plus I was trying to get up to the $75 minimum for free shipping for the clay baker!
Yes, they do a good job of sucking us in to spending more money just to get free shipping, don't they? :) As in - "If I spend $10 more, I can save the $6.99 shipping fee!" :D
...I love the content he has on the Breadtopia site. It's a nice complement to The Fresh Loaf, and I learned a lot there. So I'm happy to support the business that makes it possible. The other piece of equipment I bought to get to my limit was the Danish Dough Whisk. Do I absolutely need it? No. Do I like using it? Yes!
Oh absolutely, no criticism of Breadtopia or yourself intended, at all. I do that myself. I was attempting to poke gentle fun at human behaviour and how easy we are to manipulate (and how we love cool stuff, whatever our hobby or hobbies). Whether it's baking, cooking, gardening, quilting or whatever, it's amazing how many gadgets one 'has to have'. And yes, that includes a Danish dough whisk (I like using mine too). :)
In the grand scheme of spending for hobbies, baking bread is pretty cheap!
most of the stuff you will learn the hard way in 3 year of serious bread baking. Wll done
Thanks for that.
Just a quick remark from quick look through: rye has gluten. Less than wheat, but still.
I'm curious about your clay cooking vessel. I have a Romertopf, and I thought about trying it for baking bread, but I was concerned about putting room temperature dough into a hot, preheated, maybe 400dF clay vessel.
How do you use yours? At what temperature do you normally bake?
Regards-
Dave
The clay cooker is intended for bread. From the creation story on Breadtopia's page, they modeled it after the Romertopf, but optimized it for baking bread. And it's considerably less expensive.
I preheat mine as the oven pre-heats, up to 475 degrees with the convection going--presumably equivalent to 500 degrees. I invert the room temperature dough into the hot baker with no problem. Bake covered for 15 minutes, then uncovered for for 20-25. It's a huge improvement over using the metal loaf pan with another loaf pan inverted on top. Just a much crustier, cracklier bread experience.
Just make sure not to set the super-hot clay baker on a countertop. I set mine on the gas stovetop grates. Or you can set it on a towel on a countertop to prevent thermal shock cracking.
Jeff