May 5, 2009 - 9:12pm

My turn to post a pic or two...
 I thought it about time I started reciprocating with photos after all the awesome shots I've been viewing from you all since I joined The Feash Loaf three weeks ago.
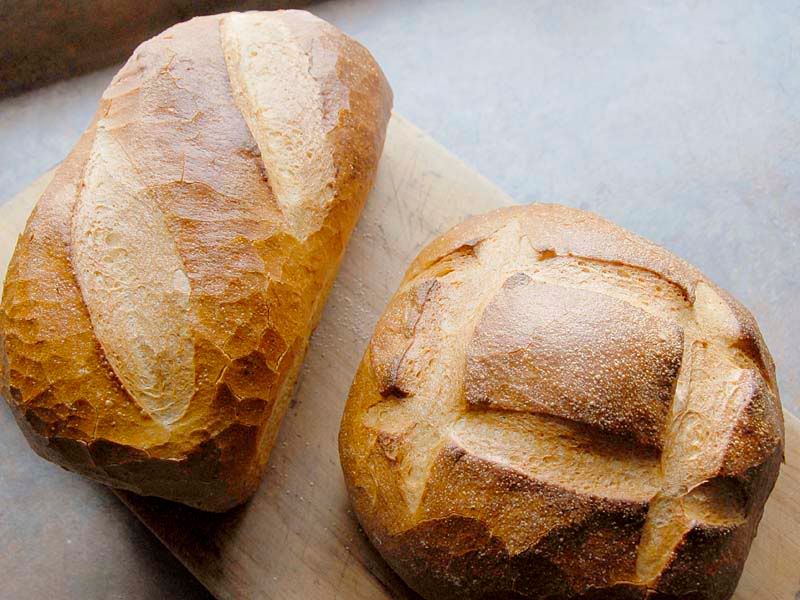
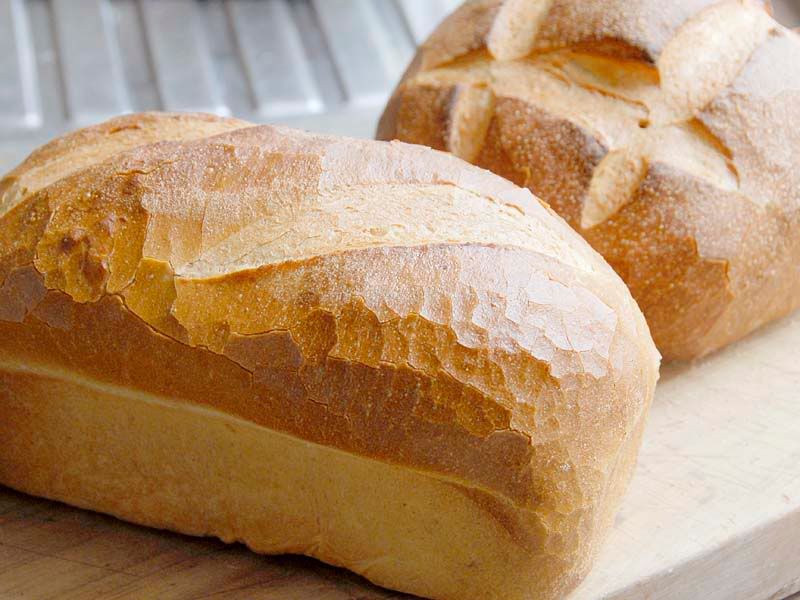
I've been concentrating on getting my sourdough starter up and running and baking ciabatta loaves which my family have benn devouring ravenously. But there has been a complaint from one of my daughters that she has no sandwich loaf with which to make her lunch. So here is my first attempt at a plain white SL (two loaves: a Boule and some kind of regular loaf too )
I might take another pic of my ciabattas later and post them below.
Paul.
Share


here's how I overproofed my sourdough ciabatta loaves. You can see that the crust has shrunk and wrinkled a bit and the crumb has collapsed. They still taste great and I think I know how far to proof for next time.
Incidentally the first couple of SD batches were much better, I wanted to try for more height with this batch and went a little too far. I guess you have to make this mistake a few times in order to learn.
These also were made from a 9 kilo batch of sourdough I mixed up over a week ago. Its been in the fridge since then and a batch takes 2 days from refrigerator to the final loaf, and the SD flavour is amazing, smells like the loaves have been baked with parmesan cheese !
Paul.
Very nice bread noyeast. The crust on your sandwich loaf is especially nice. Can you expound on how you baked that?
Eric
firstly let me say that I've only done what I 've read right here on TFL ! so much great information.
ehanner, I just purchased a simple terracotta clay tile for 5 bucks yesterday and placed it near the bottom of my ordinary domestic oven. I also placed my heavy cast iron caserole dish right on the bottom of the oven, to be used for steaming water.
The temp was set to 250 C ( 482 F ) and once up to temp I let it sit a further 5 mins before baking the loaves. I checked the temp of the stone with my infrared thermometer and it was 240 C. I thought this would be ok.
The dough was final shaped by rolling and tucking so as to create some surface tension to help in scoring later and also to maximise the oven spring.
One loaf went into a loaf tin before final proofing and the other was a freeform boule. Scoring went well using a craft knife, I had been fairly careful at mixing time to get the consistency I thought would be good for scoring well, yet wet enough for a good quick rise and it seems to have paid off.
The boule was placed for final proofing onto my pizza peel dusted with semolina flour and covered with an upturned plastic container.
When the oven was ready, I boiled the electric jug, and placed the loaves into the oven, the boule, to my delight, slid off the peel easily and onto the baking stone. The loaf in the tin went in next to it. Approx 2 cups of boiling water from the jug went into the hot caserole at the same time and the door was closed. I set the timer for 35 minutes, but was unsure how long they would need. Turns out they needed just 22 minutes.
A second lot of boiling water, about 1 cup, was then poured in quickly after 3-4 minutes and the temp reduced to 170 C (338 F)
The loaves were turned once after 12-13 minutes.
After 22 minutes I checked the internal bread temp with my espresso thermometer and it registered 98 C ( 209 F) which was a little higher than recommended, so out they came.
I was pleased with the crust, and with the lightness of the crumb, better than I had hoped.
The recipe was very simple: just 2 t sugar disolved in a cup of warm water into which went 4 t "surebake" yeast ( granulated yeast containing commercial enzymes etc. ) Once frothy, I mixed another 1/2 cup of warm water, 4 cups plain flour and autolysed for 30 mins.
Kneaded for 2 mins, added 1 t salt and kneaded a further 10 minutes. Placed the dough into my plastic rising tub and let it sit in the oven at 30 degrees C till doubled ( about 50 minutes ) kneaded once and let rise again till almost but not quite doubled. Shaped two loaves and proofed on the counter top for a further 45-50 mins before baking. I wanted the loaves to rise to approx 3 times their initial volume before baking, which they did. I think oven spring added a little more volume and height.
My oven allows a very low setting with thermostat which I find invaluable for rising dough, as its winter here in New Zealand and the kitchen can be cold.
Paul.
Paul,
Thank you for describing the process you used to bake your loaves. You attained a very nice crispy crust that I suspected came from the use of heavy steam. I am a little surprised you were able to boil through 3 cups of water during the bake. I don't think I could do that using my pan and oven.
I do think it is possible to over steam. In general I think most bakers try to time the amount of water so the pan is dry after half the baking time or about 12 minutes. That way the crust has a chance to dry out. Whole Wheat free form loaves, Rye usually just get a quick steam of maybe 5 minutes the dry for the remainder so the crust dries out.
But, that said your crust looks very nice.
You will have to send a picture of winter in New Zealand. That's one of the places I have never visited.
Eric
I tried a little less water a couple of days ago to see if it made a difference. Jury is still out though but I can see your point makes sense. I may have to use even less yet !
Thanks,
Paul.