March 21, 2014 - 7:37am

Bread science video
Share


I've been craving a little burger action this week and thought why don't I try my hand at baking some buns. After all, everyone knows that you can't have a good burger with out a good bun.

These were done with just bread flour and 75% hydration. I used the Ken Forkish method- autolyse, pinch and fold salt and yeast into the dough and several rounds of stretching and folding. I bulk fermented in the fridge over night and shaped and proofed in the morning. I think the cold ferment is why I got some good blistering. The crumb was a bit dense in places, but over all they weren't bad. My wife and I both prefer softer buns, so I ended up going in a different direction today.
I used eggs and milk with the next batch.

Here's the recipe I used:
500g bread flour
100g water
200g whole milk
1 egg, plus 2 egg yolks
10g salt
1 1/2 tsp yeast
20 min autolyse with flour, milk and eggs.
Add salt and yeast, use pinch and fold to incorporate.
30 minute rest followed by stretch and fold.
30 minute rest followed by stretch and fold.
1 hr bulk rise.
shape in to rolls, 1 hr proof with dimple test.
Baked in wider dutch oven at 450 degrees. 20 min with lid on, 20 with lid off.

It was interesting baking them in the dutch oven, I just loaded them in there like rolls. They got a pretty big oven spring and developed crack on the top as you can see. I was surprised how crisp the crust was considering the eggs and milk in the recipe. The flavor was great and the crumb was really tender. I ended up using more yeast in the recipe just to move things along so we could eat them for dinner. All in all I was pleased with the result, especially for winging it on the recipe.
I do have a question for the community. Do I need to be cautious with using eggs and milk in a longer proof if I wanted to dial the yeast down?


I bought 5/500g bags of Italian Chestnut flour a number of years ago. Somehow I never found anything that I liked to use it in so it sat in the freezer in its vacuum packs waiting...and waiting..and....well you get the idea. I have been cleaning out and sorting and using up . I decided to only cook from my larder for 2014 , at least as much as possible.
I fed my starter with rye and apple yeast water. The dough was made with equal parts chestnut/whole wheat /durum. Dough water was 1/2 whey. The flavor is remarkable. Very full of complex grains and earthy. Sweetness as you chew. Crumb is very tender and a lovely crunch to the crust. It is easy to get a bold bake with the chestnut flour , I have found. Baked at 500 in hot pots for 10 min and then 460 for 5 min and lid off for 20 min. I am really pleased with this bread.
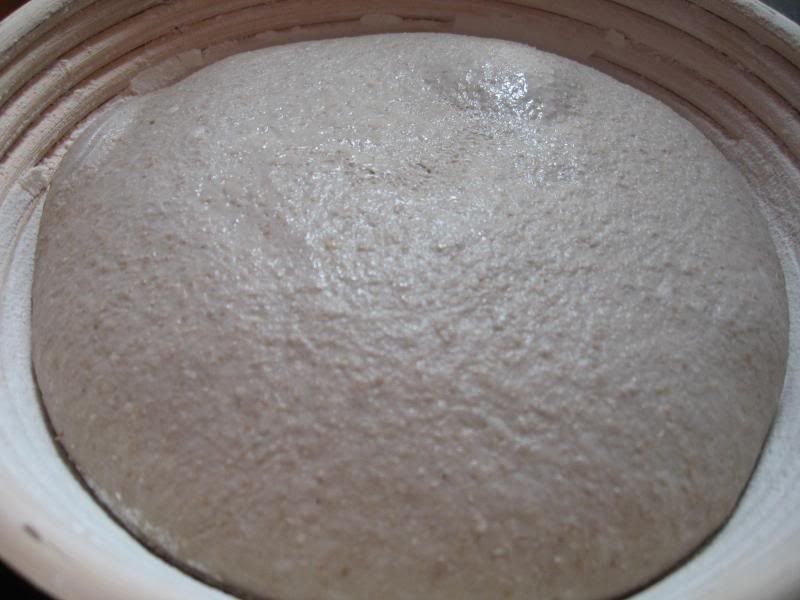


After the last bake of this bread, I wondered if I could get a more open crust by doing all the mixing by hand, rather than some by machine. So, that's what I did. The formula was the same as that used in Pane Valle Maggia, ver. 2 3/7/2014, except I did not take the time to grind fresh whole wheat flour. I used Giusto's Organic Fine Whole Wheat flour instead.
My procedure was as follows:
1. The two levains - rye sour and whole wheat - were mixed the night before mixing the final dough and fermented at room temperature for 13 hours.
2. Around 11 AM, I mixed the levains with 500g of water and the AP and WW flour. This was left on the counter for a 3 hr. "autolyse" while I raced to the hospital and taught a class for pediatric residents. (How you spend your autolyse time is your choice.)
3. The salt was added and mixed into the dough with a spatula. Then about 60g of additional water was added. This was mixed in by hand, using the pinching maneuver recommended by Ken Forkish in FWSY.
4. Bulk Fermentation was done at room temperature for about 3 hours with stretch and folds every 30 minutes for 2 hours.
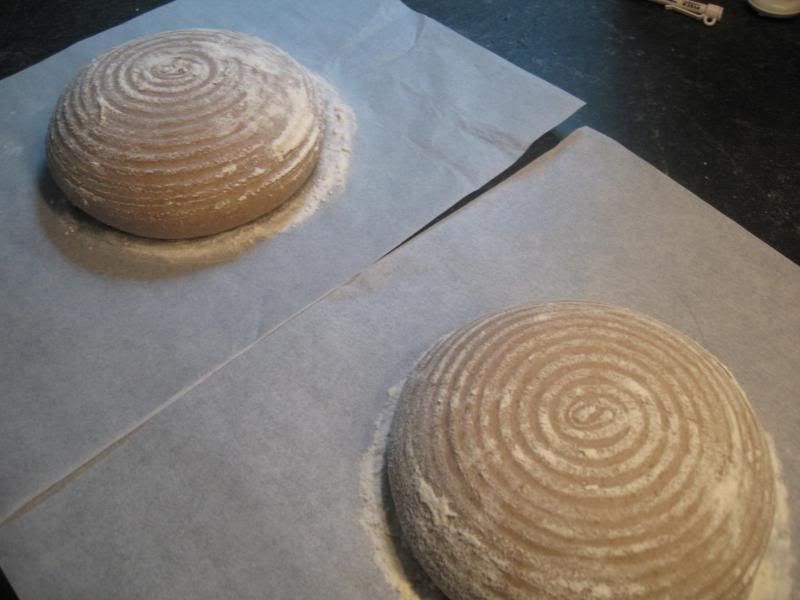
5. The dough was then divided into two equal pieces and pre-shaped as rounds. These were allowed to rest while I washed the container I had used for bulk fermentation and floured my linen-lined bannetons.
6. The pieces were shaped as boules and placed, seam-side up, in the bannetons which were then placed in food safe plastic bags and refrigerated.
Note: This was one of the stickiest doughs I have ever worked with. Not surprising given the combination of lots of rye and lots of water. Shaping was a real challenge!
7. After about 12 hours, the oven was preheated to 500 dF with a baking stone and my usual steaming apparatus in place.
8. The loaves were transferred to a peel and scored.
9. The oven was steamed and the loaves were transferred to the baking stone.
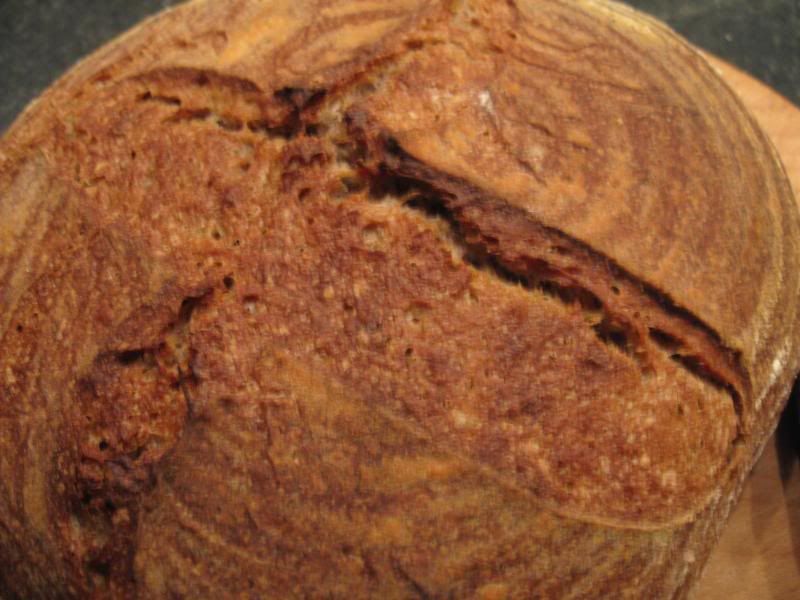
10. The loaves were baked for 13 minutes with steam and then another 20 minutes. Note: Inadvertently, the whole bake was done with the convection fan on.

The loaves sang loudly as they cooled, and nice crust crackles developed.

I sliced the loaves after 3 hours. The crust was crunchy. The crumb was somewhat more open and, overall, less dense-seeming than the last 2 bakes. It was tender and chewy. The flavor of the bread was mildly tangy with a nice wheaty flavor. I really can't say it was noticeably different than the bake using fresh-milled whole wheat flour.


Bottom line: This is a delicious bread. It is similar to several of the breads I have been making from FWSY since last Summer with mixed flours, except that this bread has the highest percentage of whole grain flours. It is a type of bread that has become our favorite.
My next variations may be to add mixed seeds and cracked or flaked grains and to try a version with added dried fruit and nuts. I have also though about baking this bread in the Lodge Combo Cookers, as I bake Forkish's breads and the Tartine Basic Country Bread.
David


My basic white bread recipe with the following additions:
1/4 cup sugar
1 Tbs. cinnamon
2/3 c. Craisins
1/3 cup Sunflower seeds
Powdered sugar glaze.

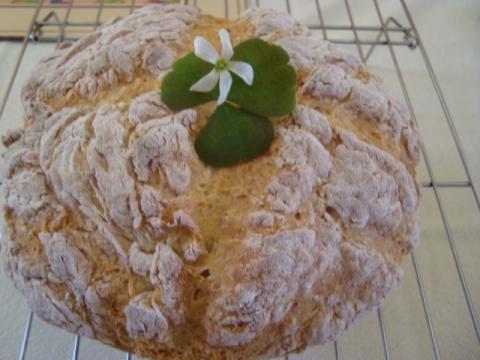
I haven't posted recently and would like to wish everyone a very "Happy St. Patrick's Day"!
Family has kept me busy lately and in a few days my youngest grandson is having some very extensive corrective overbite surgery done. It's going to be a long recovery. He's taking it very well and wants to have it done.
To keep things on a cheerier note. A little St. Pat's Day feast. Along with the traditional dinner of Corn beef with all the trimmings.
I make this soda bread a lot. Everyone loves it and you will find it here on my blog along with some other versions.
http://www.thefreshloaf.com/node/11028/sylvia039s-irish-soda-bread
Just out of the oven and warm sliced with some Kerry Gold butter.
A family tradition now for 4 generations no that would be 5. My 22 yr. old grand daughter loves to bake.


And a little added note of fun for today! I haven't quite been together the past few days with worry. Can't believe I did this..but here it is.
Too late now...guess you missed it : )
Watch out for the Leprechauns! They can be real pranksters.
Have a great green day!
Sylvia
I love my naturally risen breads. However, I'm trying to delay fermentation so I can mix dough one evening, and bake the next evening.
I follow something like the tartine process. If I change the proportions of leaven to dough so that it will take 24 hours for the bulk ferment do you think the dough will be more sour than sweet?
Refrigeration is not an option, due to space and the quantity of dough I'm working with.
I'd appreciate any input from more experienced bakers than myself!
Thanks!
Hi all. I've lately converted to sourdough a la tartine and while it's getting better, I'm still having a lot of problems, especially at that last in the oven spring.
Here is what I do - basically follow tartine country loaf method. Build levain, combine flour, water, levain. Autolyze 45 min. Add additional water and salt. Bulk ferment, s&f 4-5 times. Total time 3-4 hrs. gently bench rest, shape into proofing basket, fridge retard 8 or so hrs. Bake in Dutch oven a la tartine.
So far, all normal. But I tend to put more water than tartine (up to 50-75 mls more). Am I making too slack a dough?
Am I over fermenting? Under fermenting?
i can see when I do final score that there is no spring. At all on the latest attempt. I haven't cut it open yet to see whether interior is really dense but it doesn't 'feel' too heavy weight.
Also in previous poolish baking, I have done the slow retarded rise at the bulk fermentation phase, then a short final rise on the counter, rather than tartine's method of shorter bulk fermentation and retarded final proofing. Should this make a difference in flavor profile or oven spring?
my ideal bread would be tartine open crumb, good crust with no pronounced sour flavors.
Thanks for any help.
Hello all! Can anyone point me in the right direction to better reading and understanding bread formulas, more specifically on this site? I understand bakers percentages (read about them on google earlier). I do not get the builds and charts as much though on this site, I have seen about 3 or 4 different charts here on The Fresh Loaf. I am very into furthering my knowledge about bread formulas to enhance my experience making bread. If anyone could provide me with some knowledge that would be awesome. Thank you! :)


This recipe is formulated for a dessert menu so the quantity is larger than perhaps a home baker truly needs, or is able to consume ;). The quantity produced will fill a 1/2 sheet pan, at a height of around 1 inch, before rising in the oven. It is imperative to not over whisk any ingredients in this recipe as air pockets are unsightly. Banging the pan on a firm counter top is advisable. The results are consistent and have produced this delicate little cake countless times. At the restaurant we paired it with strawberry compote, lavender and Chantilly cream. I list vanilla pod in this recipe, however it is optional luxury, if not available, don`t concern yourself as we did not include it our restaurant version. The Ingredients are as follow;
| Yield | |
|---|---|
| Prep time | 15 minutes |
| Cooking time | 30 minutes |
| Total time | 45 minutes |
For Brown Butter;
Pre-heat a medium saucepan and add a full pound of fresh butter. Cook until the butter colors hazelnut, the butter can overcook quickly at this point so take of heat immediately. Strain while hot.
For Financier Loaf;
Pre-heat oven to 350F. Allow brown butter to cool to room temperature. Whisk brown butter in to slightly foamy egg whites until combined. If using vanilla bean, incorporate at this stage. In a separate vessel, sift ground almonds, all purpose flour and icing sugar together. Sifting allows air to incorporate into the mass during baking and produces a delicate texture. Gently whisk wet mixture into the sifted flours, until combined. Transfer cake batter to a sheet pan, lined with parchment paper. Bang pan several times on a countertop, bringing bubbles to the surface of cake. If large bubbles exist, pop them with a sharp pin, needle, toothpick, etc. Bake the financier cake until the edges begin brown, about 30 minutes. Baking times are subjective, so be sure to use your instincts while it cooks, as opposed to timer. Best serve at room temperature, or slightly warm. It is advantageous baking this in a sheet pan because once cooled, it can be cut in to invidual portions with a sharp knife, or ring molds.
Financier is the a dainty French cake revered for it's crumb less nature, hence it's suitability as a snack cake for well dressed individuals. Traditionally this cake is baked individually in 'gold bar' shaped molds.Shaped financier molds are easily found from online sources, typically in silicone. Silicone molds are suitable for aesthetic purposes, however some lovely crispness on the edges will be sacrificed as a result. When available, always use well butter metal, ideally copper. Best of luck with your baking, and if any practical questions come up while executing this recipe, I'll be happy to troubleshoot and get you back baking.