The Fresh Loaf

A Community of Amateur Bakers and Artisan Bread Enthusiasts.

Most bookmarked

alfanso's picture
alfanso

Bouabsa style baguettes (again)

A break in the action.  I'd been so busy lately with my batard thing that I neglected the simple pleasures of rolling out a few baguettes.  So I took a time-out and decided to go back to the first (and easiest) of my baguettes formulae, the one that kicked off the whole thing for my attempts at achieving a good result - Bouabsa style baguettes.

As I had with my recent successes in batard bakes, I baked these directly out of the refrigerator.  The original formula calls for a bulk retard, then bench warm-up, divide, shape and final proof.  So I was rebelling against all of these steps as my overnight retard was with the already shaped baguettes, and no post-retard warmup.

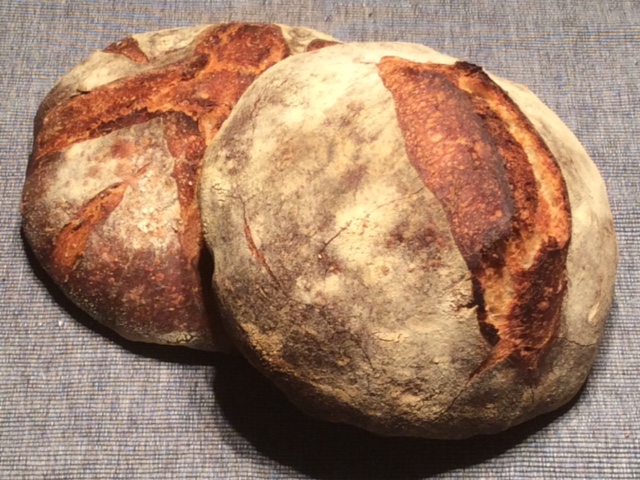
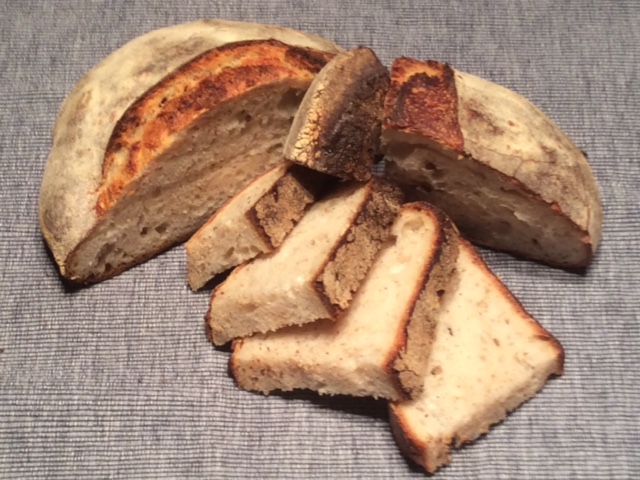
From an external point of view, the crust is all that I would want it to be - well shaped and scored, baked dark and nice oven spring.  Internally, the crumb is tight!  Nothing like what I had experienced way back when the crumb just about exploded open.

So, quickly paring down the possibilities on why, it seems quite obvious that the lack of a final proof must be the culprit.  For the method that I've been playing with, refrigerator-proofed, insufficient bench bulk rise - 60 minutes with three letter folds, is a likely reason as to why they didn't achieve a better crumb.  

I will give these another go in a few days with a change to something or other - more likely than not I'll go for a more extended bulk rise to see how that experiment comes out.  The original 60 minutes was quite skimpy on the rise time, but for now I will remain stubbornly attached to a pre-shaped retard and direct-from-the-refrigerator bake. (It's that Janet's mother thing I'd mentioned a few months back - do something just a bit different to make it your own.)

Steam released and baguettes rotated.

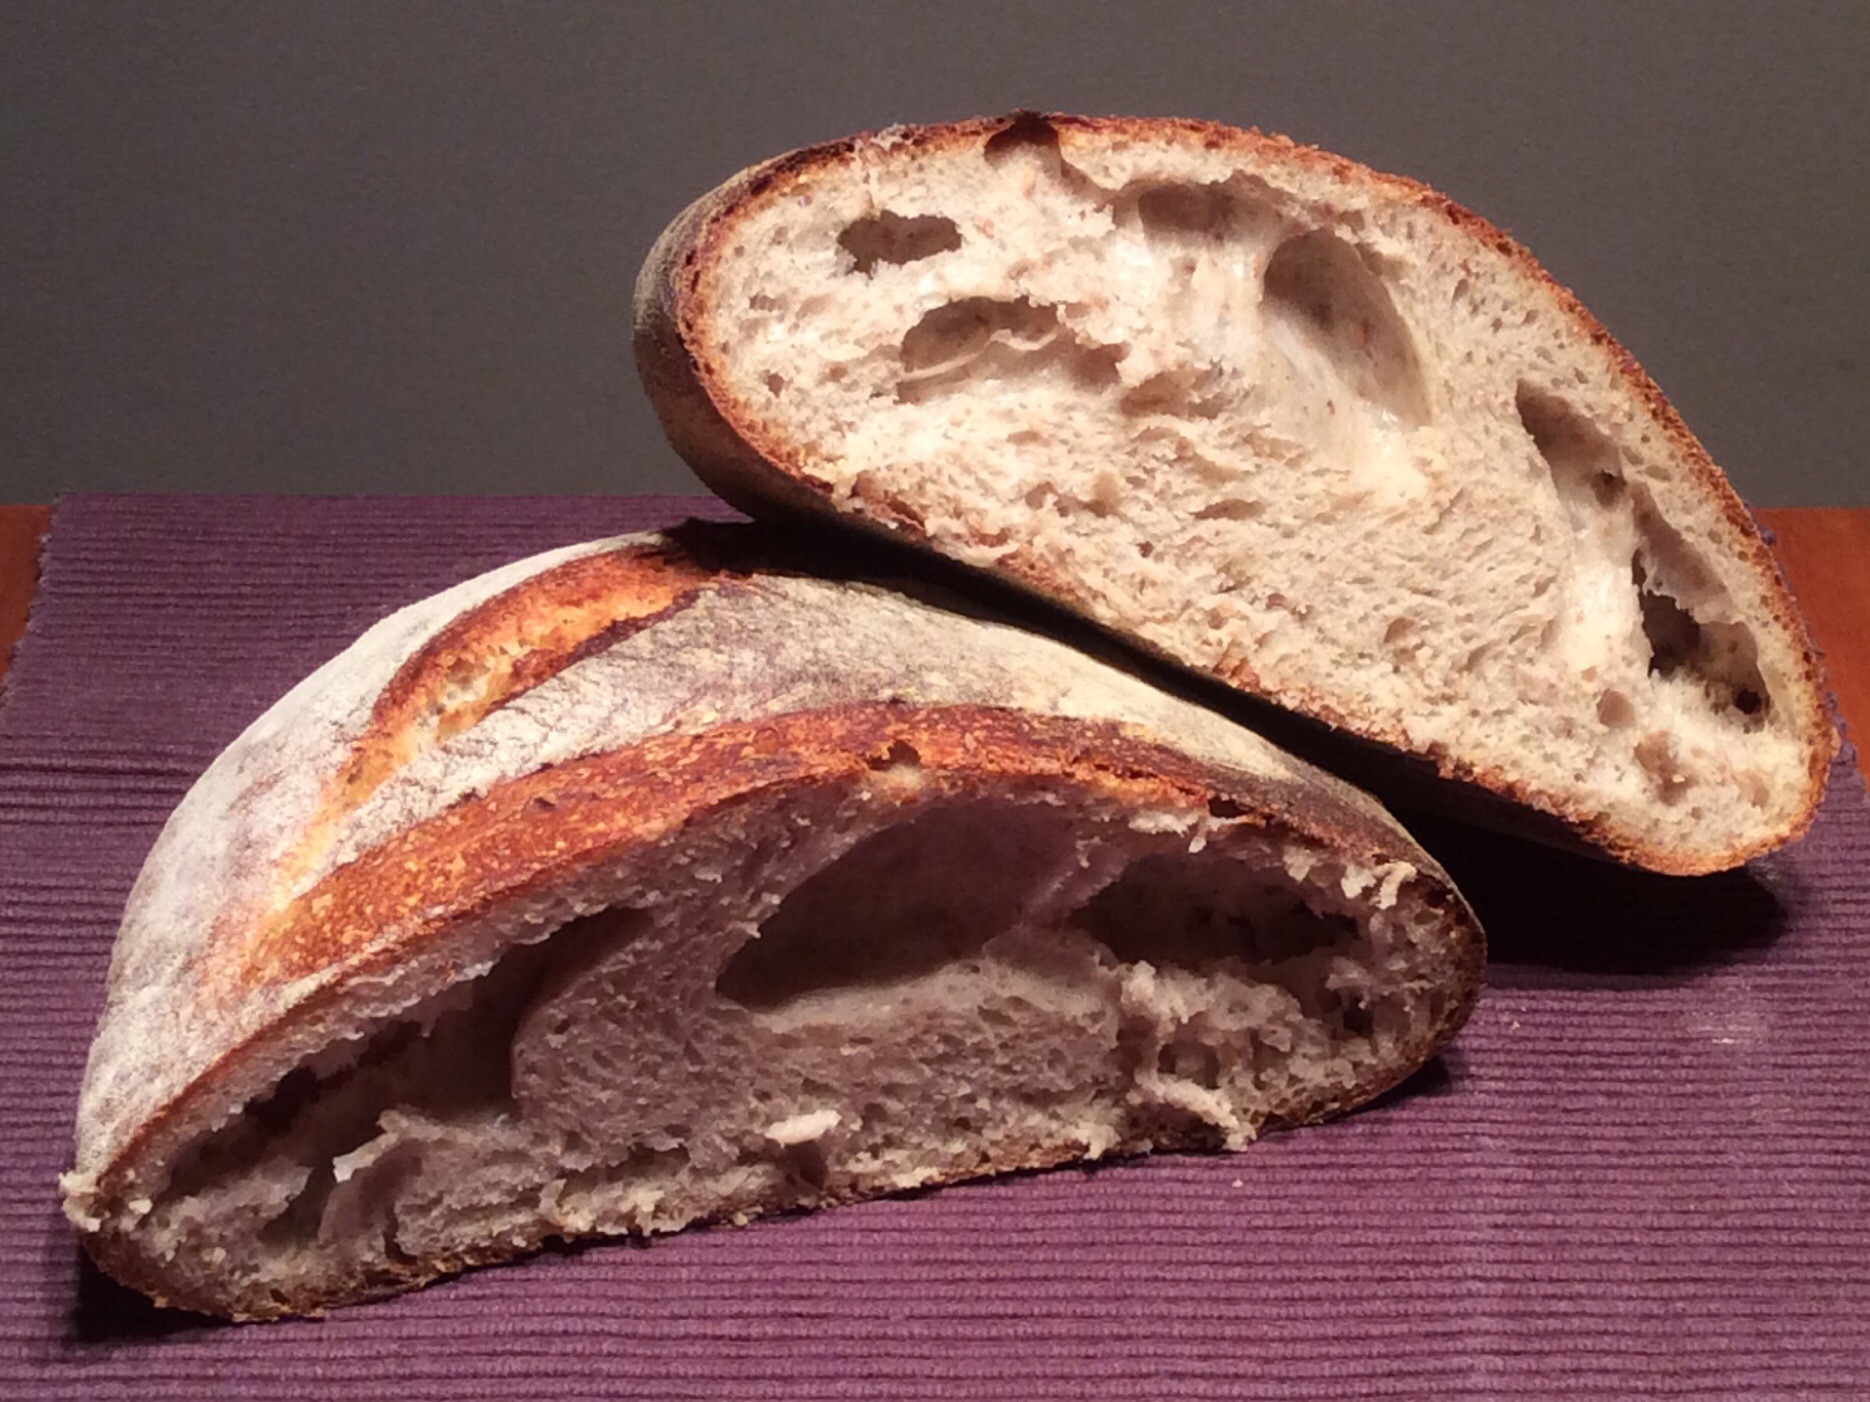
For comparison here is a pic of the open crumb from an early successful Bouabsa bake in Dec, 2013:

Back to the drawing board...

alan

FrugalBaker's picture
FrugalBaker

Understanding Local Bread Flour

Hi everyone, have not been posting much lately due to the busy schedule I was having. Though, that does not mean I have not been baking. I have been wondering on why my bakes are still lacking on the optimum oven spring like most of the gorgeous loaves on TFL. Then one day, I tried out a recipe given by one of the active member in here, Abe. It was a Tartine Bread recipe from My Weekend Bakery. Stuck to the recipe anyway (except that I had to cut short on stretch and fold time due to the hot weather in here). The bread was not bad but it was too chewy and not much of an oven spring....it was because of this, I found out the local bread flour was simply too strong.....so I have decided to embark on yet another experiment!


My Verdict :

  • 50% bread flour : 50% all purpose flour = Too soft, not enough of gluten to hold its shape
  • 60% bread flour : 40% all purpose flour = Slightly better, but still not good enough
  • 70% bread flour : 30% all purpose flour = It's getting there but the bread needs to be more chewy for my liking
  • 75% bread flour : 25% all purpose flour = This is the right ratio to work with...finally.


Here are some of my recent bakes with modified bread flour usage....am just loving the alteration I made and enjoying using the Dutch Oven too....not looking back at all!


With whole rye grain (hope this is the right term to use,LOL)       Accidentally In Love : )


This is by far, my most gorgeous bake....my friends told me it's poster worthy! Hope to have more in the future.


Crumb Shot (Denser texture due to the buckwheat that I added, I believe some of them got mashed!)


Suggestions and comments are all welcome...happy baking everyone!


Best Regards,

Sandy

greiggy's picture
greiggy

How to achieve impressive-looking tin loaf

I have recently been experimenting with tin loaves -- they just work better for sandwiches and the toaster. We like a partt wholemeal/wholegrain malted seeded recipe -- but here's the challenge.

My wife wants to see a 'proper' loaf that looks as tall the ones bought in the bakery or farmer's market where they sell them as farmhouse loaves.

Mine taste fine. Really good, actually. But they look square, a bit squat rather than tall.

I have a farmhouse size tin which is a size bigger than the usual 8 x 4 in (to get the width) and I go for about 1250 g dough from 750 g flour. Typically about half strong white bread flour and the rest stoneground white (cream coloured, contains the wheatgerm) and about 15% stoneground wholemeal, with 25 g brown malt and a handful of malted grains.

Size isn't everything -- but perception is. I just need mine to look more like the farmhouse loaves sold commercially to satisfy my picky 'customer'!

simonewilliams's picture
simonewilliams

Baking facilities for rent

I have a small artisans bakery in Beacon New York. I currently attend 7 farmers markets, supply a few whole sale accounts and have a small storefront.  I am interested in renting my facility during our downtime which is usually in the afternoons.  Any interested?

Colin_Sutton's picture
Colin_Sutton

This week's 1-2-3 Sourdough

So, I'm continuing to use the same recipe to hone my skills with sourdough baking. I've had problems with proving the dough at too warm a temperature and for too long, and then the development of excessively large holes (See this post for one of my previous attempts).

I think I'm now making progress! My loaves have more oven spring, were fully cooked (hollow when bases tapped) and the score marks, while not perfect, are much wider than previously.

What have I learned so far from the previous bakes and so many helpful comments from members of this forum, for which I am deeply grateful:

  • European flours seem to produce much wetter doughs than the American flours for which many are written suggest;
  • Lowering my proving temperature has helped (I'm now using 23°C / 75°F);
  • Be much more careful with proving times;
  • Use the "poke test" rather than the clock to avoid over-proving - this post by RoundhayBake was particularly helpful;
  • Shaping and creating tension takes practice, and YouTube videos are very helpful for understanding the techniques;
  • Linen-lined bannetons sprinkled with rice flour really are much easier to prove in than unlined cane containers;
  • Retarding overnight is especially helpful for my schedule (I'm starting on a Friday evening and baking on Saturday morning);
  • Slashing dough with a baker's lame really is easier when it is cold, but I still need a lot more practice, and still find a very sharp serrated bread knife easier.

Photo of two boules of my 1-2-3 Sourdough after baking

I'm following a modified version of a 1-2-3 Sourdough, posted previously by KathyF. Here's my calculations for two loaves, using 1kg total weight of flour:

Total formula:

  • Allinson strong bread flour: 959g (96%)
  • Stoneground wholemeal flour: 41g (4%)
  • Water: 655g (65%)
  • Salt: 23g (2%)
  • Diastatic malt: 9g (1%)
  • Seed starter: 69g (7%)
  • Total: 1,756g (175%)

Preferment:

  • Allinson strong bread flour: 97g (70%)
  • Stoneground wholemeal flour: 41g (30%)
  • Water: 80g (58%)
  • Seed starter: 69g (50%)
  • Total: 287g (208%)

Final dough:

  • Allinson strong bread flour: 862g
  • Water: 575g
  • Salt: 23g
  • Diastatic malt: 9g
  • Pre-ferment: 287g
  • Total: 1,756g

Method

  1. Mix flour and water and autolyze 30 minutes.
  2. Combine all ingredients and knead just until you start to get a window pane.
  3. Bulk rise 23°C (75°F) for 3 to 4 hours, with 5 sets of sets of stretch and folds every 20 minutes.
  4. Pre-shape and bench rest for 15 minutes.
  5. Complete final shaping and place in a rice- floured banneton.
  6. Leave to rise at room temperature for about an hour.
  7. Retard at 4°C for 8 hours, return to room temperature for 45 minutes.
  8. Transfer to a pre-heated "La Cloche", score and cover.
  9. Bake for 5 minutes at 245°C (475°F).
  10. Turn the oven down to 230°C (450°F) and cook for 20 minutes.
  11. Uncover and bake for 20-25 minutes at 220°C (425°F), or until fully cooked.

I'm much happier with these loaves than previous ones, though I did mess up the scoring of one of them, and it spread more in the oven because I knocked some gas out of it.  Things are definitely going in the right direction :-)

Photo of slices of one of my 1-2-3 Sourdough loaf

The first loaf went beautifully with some home-made butternut squash and tomato soup this evening.

Comment and suggestions, as ever, welcome.

Happy baking! Colin.

AlanG's picture
AlanG

Sinclair's Bakery

My daughter is in Bozeman Montana with her boyfriend this weekend for the wedding of one of her friends from graduate school.  When she told me earlier in the spring about the wedding, I sent her the link to Mark Sinclair's Facebook page and the video about his bread bakery trailer.  Well she connected this morning and bought a couple of goodies.  I don't know if Mark still looks in at TFL, but he now has two new satisfied customers!!

Alan

KathyF's picture
KathyF

Extra Sour Sourdough

Teresa Greenway has a recipe for "Extra Sour Sourdough" in her e-book "Discovering Sourdough: Part II Intermediate Sourdough". So I thought I would give it a try.

You start out the evening before preparing your starter at 166% and leaving it on the counter overnight. The next day (she says at noon, but I got ahead of myself and started at around 9 am.) you mix everything together except the salt and let it rest for 20 minutes. You then knead in the salt for a minute. She uses a mixer. I hand mixed the first mix and put it all in my bread machine to mix in the salt. I ran it for about a minute. Then I put it in a bucket for the bulk rise.

The recipe calls for a 6 to 8 hour bulk rise at 80F. with 4 rounds of stretch and folds. Our weather has been a bit cooler so my room temperature was more like 75F. I let it rise for 6 hours. It was really puffy even with the stretch and folds so I didn't leave it out any longer. I also tend to worry that it's going to over ferment and I'll have a pile of goo. It probably would of been alright if I let it ferment for a couple more hours, especially as it was cooler.

Then I scaled, pre-shaped and bench rested for 10 minutes. I then shaped, put in bannetons and right into the fridge. Since I started early, they stayed in the fridge for about 16 hours.

I have to say, they did come out more tangy than my other loaves. If I had been able to bulk proof at a higher temperature, I bet I would of had more sour. Also, I forgot the diastatic malt and I believe that it helps with increasing the sour also. All in all, I call it a success.

Here is a crumb shot:

RobG's picture
RobG

Flat Sourdough?

Hi everone,

I'm a fairly new home- baker and am having trouble with getting my sourdough to rise. This is maybe the fourth bake I've done with the same starter and ingredients, changing up the kneading and fermenting a little each time.  Every time though, my bread comes out on the flat side.  It's like it has no oven spring. The crust and crumb are good and the taste is phenomenal but shape is poor.  

Here's some detail on recipe and process:

1 cup starter

3 cups Unbleached AP flour

1.5-2 cups of water (to get consistency right)

2 tsp salt


Mix starter, flour and water and let rest for 30 mins then mix in salt.

Begin ferment for 3 hours at room temp. Fold dough after first hour then again 30 mins later.

Retard in fridge for about 8 or 9 hours. 

Shape dough into loaves and let rise to 1.5-2 times

place in dutch oven and spray loaf with water.  

Bake at 450 for 15 mins, release steam, bake at 450 for another 10 mins, turn down to 400 and bake for another 20-25 mins

 See post picture (upsidedown for some reason)

Thanks for any and all help!

Rob


7/25 Edit

Hi everyone,

I'm in the middle of making my bread for the day and need some feedback.  My dough is currently fermenting and has been for the past 2 hours but I'm seeing no rise.  Should I let it keep fermenting or shape now and let it rise in banneton?

Here's the recipe and method:

3/4 cup of starter at 90% hydration
1.25 cups water
2 3/4 cups bread flour
1/3 cup ww flour
1.5 tsp salt

-Mixed starter, flour, water (1.1 cups but turned out to be much too little, probably due to inaccuracies in flour qty.  Added another 1/6 cup) and let autolyze for 30 mins.
-Added salt and kneaded bread by hand for 10ish minutes until it was stretchy and smooth.
-Bulk ferment for 1.5 hours so far with a fold at 50 mins. No rise by this point.  another fold at 100 mins, no rise by this point either.

Just before autolyze:

Displaying 0725150907.jpg

after first fold:

Displaying 0725151118.jpg

After second fold:

Displaying 0725151229.jpg

7/26 edit

I ended up having to let it bulk ferment for about 6 hours to see any signs of rising.  I then shaped and let rise again for another 3 hours before the dough was at a good spot.  Still, it looks like much better results this time!

Displaying 0725152225.jpg

Bottom blew out though:

Displaying 0725152225b.jpg

Crumb:

Displaying 0726150957.jpg


Thanks for all of your help!

rileyworks's picture
rileyworks

Traveling to Southern Italy and Sicily: suggestions?

My wife and I are traveling to Southern Italy and Sicily. I am hoping to have an opportunity to share some bread baking ideas with the locals we meet. Has anyone been to an agriturismo or bakery there that they can suggest? Or other ideas to meet bakers there? I speak only some Italian and maybe less baking technical Italian. Thanks, Dohn 

Colin_Sutton's picture
Colin_Sutton

Gluey crumb with flying crust

I was ever so pleased with the appearance of this loaf, after my recent efforts (http://www.thefreshloaf.com/node/43124/bettershaped-loaves-avoiding-overproofing).

I thought the tension achieved while forming the boule was fine and despite it looking and sounding cooked, I gave it an extra five minutes and left it to cool for well over an hour before cutting.

What I found were massive holes in the crust and a very gluey, damp texture to the crumb.

This was a 65% hydration sourdough loaf weighing 880g.  Clearly it was not baked long enough despite 250°C for 20 minutes in a La Cloche and 230°C for another 25 minutes.

I need to do some reading-up on flying crusts and work out why I didn't create sufficient tension before it went into a banneton.

Thoughts, as always, appreciated. Happy baking. Colin.

Pages