The Fresh Loaf

A Community of Amateur Bakers and Artisan Bread Enthusiasts.

Most bookmarked

Yippee's picture
Yippee

20160525 Evil Mom Making Bread - Cramique

A loaf made for my son...


About seven, eight years ago, I was busy tending a bread dough and did not meet my younger son's demand. He was in kindergarten then and just learned how to write. He  stuck this note on my bedroom door to protest being ignored. So I became the "Evil Mom".

I've kept the note on the door ever since...


 This loaf is made especially for him, he likes raisin breads...


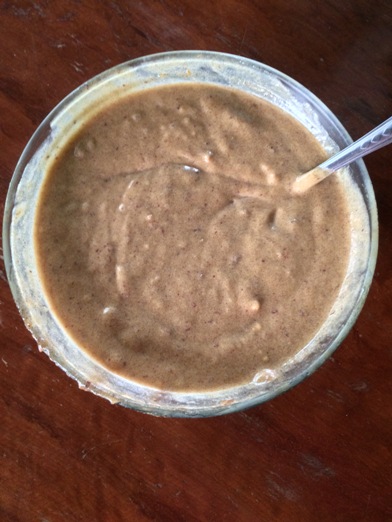
Start by making "candied" orange peels...


Done in a vacuum crock overnight,  re-boil the syrup-peel mixture a couple times;  syrup = sugar:water by volume 1:1; stacking bowls on top to weigh the peels down...


The aroma of orange syrup permeates the air - so festive, fragrant that it's almost unreal. Orange syrup is used in place of sugar...  


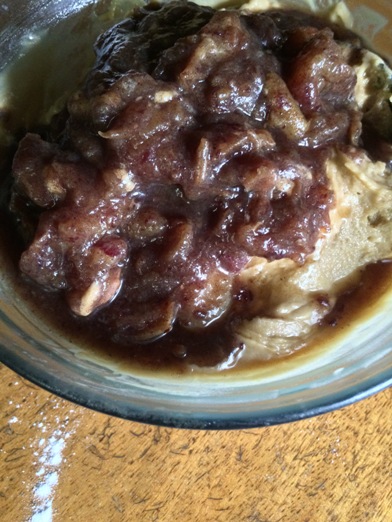
Infuse and plump the raisins in orange syrup, and this is the key to success of this loaf...


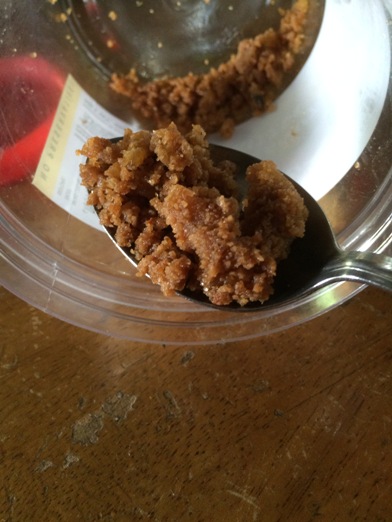
 Not "candied" all the way, but good enough to get rid of the bitterness in pith...


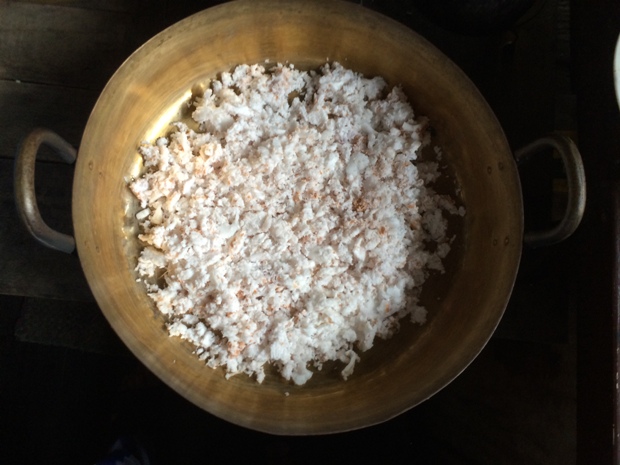
Mixing the peels, Zo gets busy these days...


Mixing the plumped raisins in the dough...


A relatively short bulk ferment this time - 48 hours...


Using the taping knife in shaping almost every loaf,  I'm loving it...
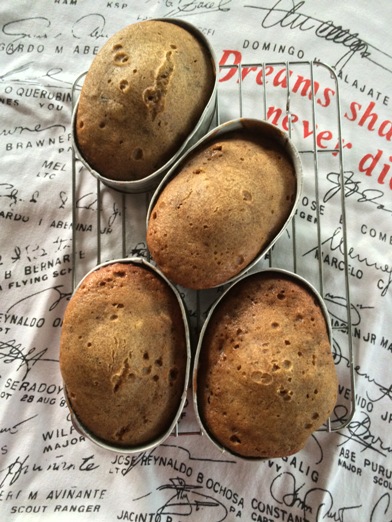


Panned...


Nudging the dough down and in the wine cellar it proves, temperature set @ 55F...


Dough after 6.5 hours, a bit under proved - exactly what I want.  Continue to prove at room temperature while oven preheats, and off I go to swim...


Back from swimming, both the dough and the oven are ready, perfect...


Applying egg wash...


Prepping the scissors...


First time cutting a dough like this...Baked @ 400F for 45-60 minutes, cover the top with foil if needed...


Bread flour, 30% pre-fermented with starter; 30% hydration (from starter); 8% orange syrup; whole egg 25%; butter 15%; salt 2%; diced "candied" orange peels 10%; orange flavor infused raisins 30%


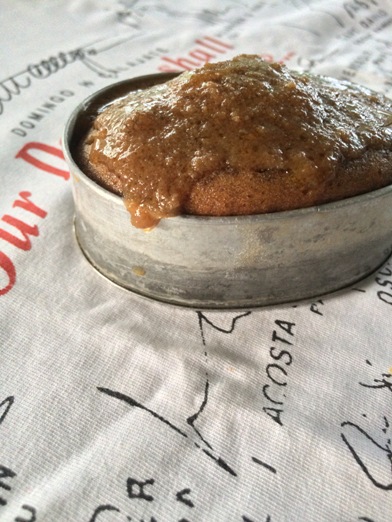
Early morning light paints the rosy hue...


The aroma from this bread brings the holiday "feel" to the house...
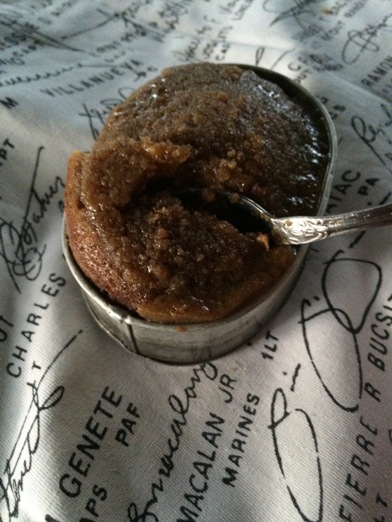
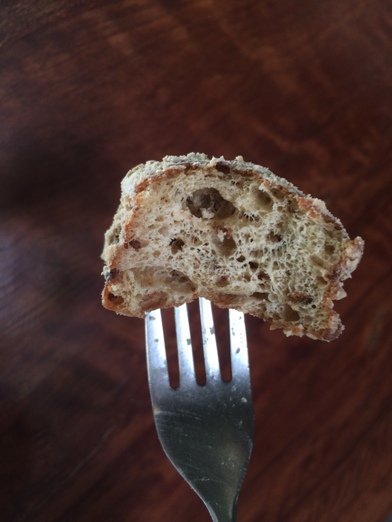


Crumb shot...


Having fun playing with cameras...so you know, you don't need expensive cameras/lenses most of the time; a cell phone will do...


Ready for breakfast, it's not just any raisin bread...It's raisin bread made with mommy's love ❤❤❤


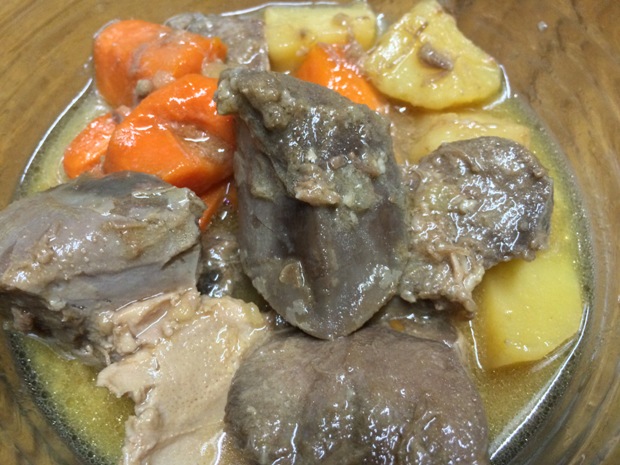
I like having bread with soup - roasted red pepper with potatoes on top, roasted tomatoes on the right, and okra on the left...


AlehCemy's picture
AlehCemy

DIY Bread proofer box

Hello everybody!

I'm currently planning my DIY bread proofer box, but have run across a few problems.
I have the problem of having a too hot kitchen on summer and a too cold kitchen on winter, so I wanted to build a proofer box that I could regulate the temperature to compensate the weather, which means my proofer box need some way to heat or chill. The heat part is easy but the chill part is proving rather difficult. So I came here to ask for help from experienced with making an proofer box. Any idea on how I could do it?
Another thing, is a humidifier necessary? My weather can get pretty dry during winter or even summer. Not sure if it's something I need to compensate for.

Thanks for your attention!

helloiamako's picture
helloiamako

Comparing hydration 70% and 65%

I've baked two sourdough bread yesterday. The first is hydration 70% and the second is 65%. Although different ingredients, 65%hydration has got better crumb. 65% bread recipe is here,

http://www.breadwerx.com/how-to-get-open-crumb-from-stiff-dough-video/

Than you Trevor, my baking is getting better!

Ako

Abelbreadgallery's picture
Abelbreadgallery

Roasted barley bread

Bread flour, whole spelt flour and whole barley grains roasted and grounded at home.

Handmixed, straight method.

chockswahay's picture
chockswahay

Honeyed Spelt and Oat Sourdough .......

A couple of days ago ABakEr suggested I try this (thanks Abe) .......... 

I baked it this morning ................. oh crikey....... it's heavenly!  It includes a fair amount of jumbo rolled oats as a soaker....

The hydration is higher than I am used to however this was a situation where strech and fold worked very well (new to me!).

I proved it overnight in the fridge and then this morning put it straight into the oven on a quarry tile and covered it with an upside down pyrex bowl to emulate a Dutch Oven.  I sprayed the top after slashing then baked at 230c for 20 mins with the cover on then 10 mins with the cover off.....

The texture is moist and light and there is a hint of sweetness, making it ideal as a breakfast bread (we ate it with only butter at lunch time, it's that tasty!)

The full recipe can be found in Sarah Owens book....

https://www.amazon.co.uk/Sourdough-Recipes-Rustic-Fermented-Savories/dp/1611802385


chockswahay's picture
chockswahay

I'm pleased with this one!

Still continuing with my 'experiments' I made this this 20% Rye Boule....

This is the first time I have managed to get an 'ear', I like it!  Also on this occasion I put the proved dough straight in to the oven from the fridge.

Recipe and method:

15g rye starter + 15g rye flour +15g water .............. 'brewed' for 15 hours...

Then 40g of the brew + 40g rye + 40g water ...........'brewed' for 8 hours...

Add this lot to (240g Strong white bread flour + 120gwater autolysed for 30 mins)

Knead for 6 mins, add 3g salt, knead for another 4 mins

Prove at room temp 4 hours then shape and place in round banneton overnight in fridge

8 hours later take out of fridge, slash, spray, into preheated Dutch Oven @230c for 15 mins then lid off and another 5 mins....

By content and volume the total recipe consists of:

240g strong white bread flour

60g wholemeal rye flour

180g water (the starter was 100% hydration)

3g salt

By default the starter represented 50% of the Dry flour :)


I'm looking forward to lunch today :)


nonnaluna's picture
nonnaluna

Artisan Bread The Boule

At least once a week, I bake bread.  One of our favorites is the ciabatta (slipper, in Italian).  But, yesterday, I decided to revisit a book I purchased a while back and baked boule (ball, in French). The last bread I baked from that book was an Italian Semolina Bread.

boule I

t's a 5-Minute Artisan Bread riddled with holes and full of flavor. This bread is "quick, easy and rustic" using only white flour, yeast, salt and water. There is no need to knead the dough. But after seeing how easy it is, you may need to need it more often than not. You mix the dough in bulk then stash it in the refrigerator until ready for a chewy, delicious loaf of homemade goodness.

The trick lies in not kneading the dough but instead mixing the dough in bulk, stashing it in the fridge, and then forgetting about it until the craving for freshly baked bread descends upon you. When that happens, simply take the dough out of the fridge, lop off enough for a loaf, shape it, let it rest, and then take a moment to slide it in the oven before you casually go about your life. And then don’t come forget to come back later to retrieve the best artisan bread of your life from the oven.  --For the recipe and to read more visit:  Leite's Culinaria 

After looking at the recipe you might find it a little intimidating since the directions seem to go on and on.  But, I assure you that it is easier than it looks.  Rather than mixing my dough in a container, I used my standing mixer. It mixes as easily as 1-2-3.  Then, I put the shaggy dough into a plastic, loosely covered, container for the 2 hour rise and to store in the refrigerator.  I let mine rise 3 hours.  The book say up to 5 hours is ok.

boule raised dough

The dough lasts up until 14 days in the refrigerator.  Therefore, be sure to use it up before the 14 days are over.  In the book, it says that the dough can be frozen in 1 lb. portions in an airtight container and defrosted overnight in the refrigerator prior to baking.

It's important to note that when the dough is rising and when it is stored in the refrigerator, make sure that the lid, on the container, isn't airtight. The trapped gasses my cause a ka-boom!

When you are ready to bake, all you do is cut off a piece of dough, (follow directions for this) shape and let rest for 40 minutes before baking.  Instead of using my pizza peel, I used a pizza pan lined with parchment paper.

boule before baking

The results are a chewy,  delicious loaf of homemade goodness riddle with holes.  The prefect bread for dipping and sopping up sauces and gravy.

boule

The book (Artisan Bread in Five Minutes a Day) which includes this recipe and many more can found here.

 boule

bikeprof's picture
bikeprof

microbakers - online presence and credit cards

Greetings - as I plan to go all in on the microbakery, here are a couple lingering questions (among many others):

1. What are you doing for your online presence?  Just FB/Instagram?  Your own website? Do you have an online shop for orders? All of the above?  What hosting service/tools do you like/dislike?

2. What are you doing for payments?  Do you take credit cards?  If so, what credit card processing service do you use?

The 'Why's' behind all of these are important too...

The plan for me is to do a combination of farmer's markets and local subscriptions for individuals (Idaho cottage food regulations require direct sales to customers).  For the farmer's market piece, I don't think I need to be online beyond FB/Instagram, but for subscriptions, it seems like it could help.  Credit card processing would definitely seem important if online orders were a major part of the business (which I think would be the case when the markets aren't running all winter).

Any insights are appreciated, as always (I also think we need a conference for microbakers, as there are a bunch out there that have lots of insights to share).

PalwithnoovenP's picture
PalwithnoovenP

Sticky Toffee Pudding ~ Dad's Birthday

My dad is now a septuagenarian! He just turned 70, thank God! We're truly blessed! I've been busy this past two days preparing for and celebrating my dad's birthday.

I inherited many traits from my dad. His nose, his height, his huge veiny hands, his hair that grays early, his love for all things vintage (What 21 year old would love to listen to Elvis Presley, Jo Stafford, Connie Francis, Engelbert Humperdinck; to drive and gaze at vintage cars; to collect old cutlery and kitchenware?), his creativity, his resourcefulness, and his fiery temper! Just joking! He will be very mad if he reads this!!! Again, a joke!

We love to drive. On his birthday last year, I got my student license to learn driving. A year later, only 3 trips on the national highway; my license is already expired but I had a lot of learning. I already know the vehicle well though not as well as dad. He also maintains them well, all of our "cars" are 30+ years and still well conditioned ready to go head on with brand new models. They also have unique parts that allow them to travel on mountain paths and rough terrain.

Our International Harvester Scout 1972. This is where I first learnt to drive.


A jeep that dad himself assembled in 1978. This is my practice vehicle in the highway.


What trait I love most that I inherited from him and I think it really defines me as his son is his behemoth sweet tooth! We really love sweets! I remember when I was a child, we use to share a can of condensed milk for dessert! We also like sweet and rich desserts; other people will often tell that they will have a headache from the sweetness but it's fine for us!

We also love watching James Bond films. Watching it is our bonding aside from driving and making desserts. He loves the classic Bond films so his favorite is Sean Connery in Dr. No. My favorite is the latest Bond, Daniel Craig in Casino Royale. It also happens that it is the film where my favorite Bond girl appeared, Vesper Lynd! I really love how Eva Green played the character there. During his birthday we made a Pierce Brosnan marathon of Bond films.

Because we love sweets and James Bond is British (it's illogical, I know!), I planned to make a classic British sweet dish for his special day, Sticky toffee pudding! I really have a soft spot for British things. I also have a slight British accent when speaking English, just started about a couple of years ago which I must admit is a Harry Potter influence. The "standard" accent here is American but I sound like a drowning cat when trying so when I tried to apply the British pronunciation, I sounded smoother and it has become natural for me now. From watching a lot of British films, I have pretty mixed English vocabulary now but I still can't call fries chips, it will confuse my friends severely.

His best friend's son working in Saudi Arabia just sent us a pack of dates. It is one of our favorite dried fruits! Not sure what is the variety but it's perfect timing for the pudding!


We pitted the dates one by one and divided it among ourselves. Dad quickly packed half of it for him to snack on. Mom and I divided the rest between us. Though I want to eat them immediately, I really saved it for this day! I have to hide it from their prying eyes or my share will be eaten too!


I based this on many recipes online. Some call for mixed spice, coffee, and even malted chocolate drink such as Ovaltine! Ingredients common in all are flour, eggs, butter and sugar. I just noted their amounts and proceeded to work my magic in doing this without measurements. I used dark brown sugar for a lovelier colour and caramel flavor that complements the dates well. I creamed the butter well using just a spoon a bowl until fluffy. I added two eggs one at a time for easier mixing and mixed vigorously until mixture is super aerated. I folded in plain flour very gently at the very end.


The dried dates were softened in boiling water along with a bit of bicarbonate of soda. There's no other leavening agent in it other than that. It will react with the acid present in the brown sugar to produce a light sponge. Just after a few minutes and they're all soft and juicy!


I mixed it into the batter at the very last minute so as not to lose any of the carbon dioxide produced by the chemical reaction.


I deposit the gorgeous batter into greased and floured llaneras. For little cakes, I prefer to grease and flour my tins; not only does it makes the cake pop right out of the tin when unmoulded, I also love the slight crust it yields on the cakes.


I baked it in my pre-heated clay pot for 25 minutes until a skewer inserted in the center comes out clean. I also made a bigger one for lovers, really for my mom and dad to share and it baked for 35 minutes, the last 10 minutes over embers. Because my clay pot doesn't have a flat bottom and I do not have a rack that fits inside the pot, I have to put them on top of another llnaera so all cakes ended up being lopsided. Still pretty and yummy for us! It is already fortunate that there are no spills that burnt.


The cakes rose nice and high in the pot. I can't explain the bubbles that broke through the surface, it always happens when baking cakes in my clay pot. No worries! More poking will be done later! Their look reminds me of a Madeleine with it's signature hump!


Here's how it looks like when unmoulded. I didn't bother to unmould it onto a plate for a better presentation, it is meant to be homey and rustic. The llanera also serves as the bowl where you eat it, less mess and less dishes to clean!


After cooling a bit, you must poke a lot of holes to facilitate absorption of the lovely silky rich toffee sauce (Just simmered cream, brown sugar and butter. I used whole milk for my sauce instead of double cream because I couldn't find it.) that will turn this into sticky toffee pudding. My chopsticks are perfect for this! It's pretty therapeutic!


A bath of toffee sauce and we're sold. Love the sweet comforting flavor. A little bit of cream or custard won't hurt, ice cream too is a nice touch, even some flaky sea salt to offset the sweetness but we like as it is. At least, it's getting cooler, we're eating this comforting cold weather dessert at 81F. We're really feeling the cold for a week now because it's always 93F for two months. It's also starting to rain now.


The sides and bottom of each cake are crispy. The crumb is fine and soft and full of caramel flavor. The dates also come through but not much of a textural interest because I chopped them too finely, perhaps I will leave them whole next time. Dad really loved this because he loves dates, caramel and sweet and rich things! I'm excited to try more British sweets. What's next? Jam roly-poly? Spotted dick? Or Sussex pond pudding?


Here is the Lover's Sticky Toffee Pudding!


-----------------------------------------------------------------------------------------------------------------------------------------------------

A simple pork tongue stew for dinner. My dad and I really like tongue! It's our favorite organ meat / sweetbread.


-----------------------------------------------------------------------------------------------------------------------------------------------------
Some Dayang dayang. It's is dad's favorite among my original creations partly because he plays a huge part in it. He requested me to make some since he already made the coconut sweet. Here is my second time making it. The main change is I used plain flour for these for a softer texture which seemed counter productive. It didn't have the volume and lightness of the first batch because of the lower protein so it was denser and chewier.


I didn't fry it too dark this time so no bitterness, only coconut flavor.


Here is the coconut sweet I was talking about. Dad made this by himself over a wood fire for a good two hours.


Still the same. Lots of cake crumbs for coating. Very delicious!


Happy birthday daddy! I love you! Mahal na mahal kita!

dmsnyder's picture
dmsnyder

Whole Wheat Sourdough Bread

Whole Wheat Sourdough

5/21/2016

This bread is a first trial of a mostly whole wheat sourdough bread leavened with my standard liquid levain rather than the one prescribed by Forkish or Hamelman, or Suas for their versions of a pain au levain with a high percentage of whole grains.

My levain is built in two feedings from my refrigerated “mother” which is kept at 50% hydration and is fed only every 3-4 weeks. I did an activation feeding of 30g Starter, 75g Water and 75g Flour mixture (See my note, below.) This was very ripe in 10 hours. I then did a second feeding to make 280g of Levain, enough for this bake and also for a batch of San Joaquin Sourdough baguettes. That starter was very ripe in 6 hours. The portion for this bake was refrigerated overnight.


Total Dough


Ingredient

Wt (gms)

Bakers' %

AP flour

103

21

Whole Wheat flour

378

77

Whole Rye flour

9

2

Water

400

82

Salt

10

2

Instant yeast

1/8 tsp (<1)

<1

Total

900

184


Levain


Ingredient

Wt (gms)

Bakers' %

AP flour

52.5

70

Whole Wheat flour

15

20

Whole Rye flour

7.5

10

Water (80dF)

75

100

Active liquid starter

30

40

Total

180

240

  1. Dissolve the starter in the water.

  2. Add the flours.

  3. Mix thoroughly.

  4. Transfer to a clean container and cover tightly.

  5. Ferment at 76dF for 6-12 hours (until moderately ripe)

  6. Refrigerate overnight.

Note: My sourdough starter “food” is a mixture of 70% AP, 20%WW and 10% Rye. I keep a mixture of these floors in a liter jar. I use it for my stored “mother” in the refrigerator, which I feed every 3-4 weeks, and to activate the mother when I am preparing to make bread.


Final Dough


Ingredient

Wt. (gms)

AP flour

40

Whole Wheat flour

360

Water (80-90dF)

310

Salt

10

Instant yeast

1/8 tsp (<1)

Levain

180

Total

900


Procedure

  1. Heat enough water for the dough and a few cc's extra.

  2. In the bowl of a stand mixer, dissolve the Levain in the water.

  3. Add the flours and mix thoroughly at low speed with the paddle. (Speed 1 for a minute or two.)

  4. Scrape down the bowl. Cover it, and autolyse for 20-60 minutes.

  5. Sprinkle the instant yeast and the salt on top of the dough.

  6. Mix at low speed for 6-10 minutes. The dough should be soft and tacky – almost sticky – but not runny. Adjust water or flour in small amounts as needed. There should be some gluten development, but the dough will not completely clean the wall of the bowl.

  7. Transfer the dough to a lightly oiled container and form a ball. Cover tightly.

  8. Ferment for 2 1/2 hours at 76dF with stretch and folds at 50 and 100 minutes. By the second S&F, the dough should have good strength. It will still be soft and a bit tacky.

  9. Transfer to a lightly floured board and pre-shape round or oblong. Cover with a cloth, and let the gluten relax for 10-20 minutes. (If you want smaller loaves, you could divide the dough into two equal pieces before pre-shaping.)

  10. Shape a bâtard or a boule and place in a floured banneton or brotform. Or place the loaf on a sheet pan on bakers' linen with folds to support the sides.

  11. Refrigerate overnight.

  12. Take out of refrigerator and proof at 80dF for 1-2 hours (optional)
  13. Pre-heat the oven to 500dF for 45-60 minutes with a baking stone and steaming apparatus in place.

  14. Transfer the loaf to a peel. Score as desired.

  15. Turn the oven down to 460dF. Steam the oven. Load the loaf onto the baking stone.

  16. After 15 minutes, remove the steam source.

  17. If you have a convection oven, turn on convection at this point, and reduce the oven temperature to 435dF.

  18. Bake for an additional 25-35 minutes or until the crust is nicely browned, the loaf sounds hollow when thumped on the bottom and the internal temperature is at least 205dF.

  19. Transfer to a cooling rack and allow to cool completely before slicing.

Photo Gallery


San Joaquin Sourdough Demi-baguettes and Whole Wheat Sourdough: Today's baking

Whole Wheat Sourdough cut profile

Slices


Tasting Notes

I sliced the loaf about 6 hours after it was baked. The crust was chewy. The crumb was remarkably open considering the flour mix. The aroma was nutty/wheaty and just a bit sour. In the mouth, the crumb was cool, moist and tender. The predominant flavors were sweet, nutty, wheaty, and milky. Of course there were neither nuts nor sweetener nor any milk product in this bread, just flours, water, salt and levain. I love it when a bread offers such complex good flavors!  When a thin spread of unsalted butter was added, it amplified both the sweetness and the lactic acid sour of the dough.

When I started making this bread, I expected it to be a first try and anticipated going through 5 or 6 adjustment before I got it “right.” Based on this first tasting, I now think I'll stick with this version. If I change it, it will likely be to add some solids – seeds, nuts, dried fruit and the like. I bet it would go well with dried figs and walnuts. 

David

Pages