The Fresh Loaf

A Community of Amateur Bakers and Artisan Bread Enthusiasts.

Most bookmarked

bread1965's picture
bread1965

Pane di Matera vs Altamura

Hi bakers.. 

I've been away for a while and back home. I've had the good fortune of spending many weeks traveling through Italy this summer. One place on my bucket list was Altamura for the bread. I wanted to try the authentic big loaves we know as Pane di Altamura (not to be confused on this board with Alfonsomura!), as I had never tried this type of bread.

I was in Matera, about an hour away from Altamura, sight seeing the city and Sasi (caves, long story, google). We were in Matera for our first full day and the next morning we were going to detour to Altamura and find a bakery and try the bread.  As I'm walking along the main square in Matera that afternoon, I see a jumbo sized loaf of bread that looks like the classic Pane di Altamura. So I walk in and there's a wall of fresh loaves in different sizes. As I talk to baker behind the counter he essentially tells me that they too make bread from 'rimacinata' flour from fields just down the road -  I end up buying a kilo of flour from him and bring it home to try, labeled as from Matera.

He goes on to tell me, after I ask if they copy the Altamura bread style that in fact it's Altamura that copies their bread style! (classic). And he says in fact that their bread is better!. You have to love the competition! I ended up buying a small loaf him that he slices.  A few minutes later I'm sitting on some church steps (it's italy after all) eating his bread.


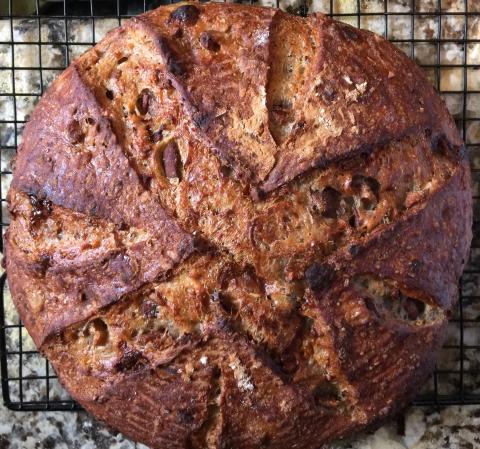
Suffice it to say, it was a wow moment.  Interesting flavour and mouth feel, earthy yet sweet. It was dry, but not in a way that I'd complain about - not sure how to describe it. But truly great bread.  I'm sure the entire experience is influenced by my sitting in the shade of a church, overlooking an Italian piazza, surrounded by my family, munching on ridiculously good bread. It's now been too many weeks for me to be exact about how it tasted. But it is a great memory. We never made it to Altamura in the end, but that was fine with me after that experience. I put the flour in my freezer when I got home and this fall I'll try my hand at making a loaf with it. 

In the bigger picture, we had some incredible bread and pizza along our travels. I couldn't begin to tell you how good they all were. But of the other experiences, one that stood out was olive bread braids that I had up on the Dolomite Mountains at this small restaurant. I didn't have my camera with me, but they were truly great. It was simple, flavourful and memorable. I'll have to try recreating them too.

Ok. Back to reality and baking bread.. bake happy.. bread1965

alfanso's picture
alfanso

SFBI Pain au Levain w/caraway seeds

I had such a good bake with my one previous turn at David's SFBI Pain au Levain (my way!) , a mostly all AP flour dough, that I knew I'd be returning to the scene of the crime soon enough.  Again using my 75% hydration levain and adding water to make up for the difference vs. a liquid levain, I also decided to add caraway seeds to the dough.  A good slather of cornstarch glaze before and after the bake.  More caraway seeds were sprinkled on top, post-bake, between two final glazes.

Once more a slight error in rolling out a baguette caused a bludgeon-like shaping in the final result.  Plus a funny "tuck" visible on the end of the batard, also evident in the final result.  As I mentioned in my recent blog entry about my do and don't lists, any early error is magnified in the downstream results.  But I'm pretty pleased with the finished product once more.  Still waiting for the cool down before inspecting the interior, or for that matter, sinking my dentures into one.

3x350g baguettes, 1x575g batard.


Crumb shot added

semolina_man's picture
semolina_man

Tom Cat's semolina Filone


Formula from this site.  24 hour poolish followed by a 12 hour refrigerated bulk ferment with stretch and folds.  1 hour warm moist proof, 55 minute bake at 405F.  

Refrigerated bulk ferment tames this very slack and difficult to manage dough.  


tuziksmith's picture
tuziksmith

Is Stone-Buhr bread flour unbromated?

Have been trying to get an answer from Stone-Buhr but so far no response. Does anyone know if Stone-Buhr bread flour unbromated? The package says it's unbleached but I am not sure about bromate. Any help would be very appreciated!

nillo's picture
nillo

Emile Henry Baguette Baker/Questions

Hi,

I was given the Emile Henry Baguette Baker, and I have a couple of questions: The instructions say to proof the baguettes in the baker, and place the baker in the preheated oven. Whenenver I am baking in a ducth oven or other pot, I preheat the pot and place the bread in there once it's time to bake - would this not be better for the baguettes as well?

Also, the lid has holes. Would you recommend to close these? What is the point of the holes since you want the steam to stay in the baker for the first minutes....

McTavish's picture
McTavish

Stone baked bread bottom has no appeal

Hi,

I'm having problems with bread not baking underneath when using my baking stone. The rest of the surface looks fine, tastes great but lacks depth of colours and harder crust to the bottom. I initially suspected the stone wasn't getting hot enough, so I tried going from a 30 minute oven preheat at 230C (max temp) to a full 1 hour preheat and still having same issue.

I experimented and did 2 sourdough loaves, a Boule and a sort of Batard shape from the same batch. After shaping both, the Boule retarded in the fridge for 15 hours, and the Batard was left to prove at room temperature for about 4 hours.

Both baked at 230C for an initial 10mins and then reduced to 210C for a further 40mins. Both (and most breads I've made) have had great oven spring using the stone, yet after the 50mins baking time the bottom surface looks nothing like the rest of the bread.

Also, noticed from earlier bakes in the past, that when I retard the prove it always cracks and blows out on the underside of the bread. (see Boule, it kinda did the same thing again)

I've posted some pics to show end results. At this stage I'm only guessing it's likely something to do with the baking environment but would love to hear you guys valued opinions and advice as how to avoid this.

Thanks! ;)


MontBaybaker's picture
MontBaybaker

Central Milling vs Honeyvile vs. KA?

It's difficult to find decent bread flour in quantity (or even 5lb) where I live, so think I'll order.  Whole Foods (30-40 min. one way) only has Giusto's Baker's Choice? with 11% protein.  I have a year-round cool cement garage, gasketed storage containers, and vacuum sealer.  I'll also have to try Costco with a friend who has membership (not worth the $ now that the kids have moved out).  

In terms of affordable shipping, my short list at the moment for a high-protein, unbleached, malted flour includes:

A)  Central Milling High Performer High Protein or Ultimate Performer,  B)  KA High-Gluten (aka Sir Lancelot), or C)  Honeyville Farms Imperial High Gluten or Alta Artisan.

I've never used any of these and would appreciate feedback, plus any other brands to consider.  Central Milling is about 2-1/2 hours north (in non-commute traffic, LOL), so maybe we'll get up there at some point on another errand and buy direct.  Thank you for the advice!  

Piloni's picture
Piloni

Levain vs starter

Hi everyone. I have a query I would like some advice / opinions on.

When I see recipes that require a levain build before added to final dough I sometimes question if this is really necessary. This is mostly when the levain is at a 100% hydration rate including a 100% hydration starter.

My question is: is it really necessary to build a levain which is at 100% hydration when you already have a starter (which you have enough quantity of) at the same hydration level.

For example :

Levain =

40g ap flour

40g water 

20g 100% hydration starter

Could you not just use 100g of mature freshly fed 100% starter??

My main thought for reasons is in the instance that you only have a very small starter and you don't have enough quantity to use as the only leavening agent in a starter -straight to dough- recipe.

I understand other reasons for a levain include adding flavour of different grains to the dough( ie rye/ spelt/ ww) but surely you can just add these grains to the flours in the final dough.

Look forward to hearing your opinions and answers!

Many thanks,

Danni3ll3's picture
Danni3ll3

1-2-3 sort of Raisin Date Cider Seed Bread

Well this was almost a bust! I am not sure what happened but my bread didn't rise very much at all. I thought it might have been that the alcohol in the cider killed the yeast but there are sourdough recipes out there done with hard cider. This was on top of messing up the hydration when I realized I was short 65 g of levain and took some of my stiff starter from the fridge and added water to it. So this is not a true 1-2-3 sourdough. This is what I did.

Ingredients for two loaves
135 g of partially sifted whole grain flour levain at 100% hydration
65 g of the same starter cold from the fridge and diluted to 250% (Should have done the math first instead of winging it)
400 g warmed cider
400 g unbleached flour
150 g multigrain flour (Robin Hood)
50 g dark rye
50 g toasted pumpkin seeds
25 g toasted sunflower seeds
111 g chopped dates, soaked in boiling water for 5 minutes and drained
48 g sultana raisins, soaked in boiling water 5 minutes and drained.
12 g salt

Toasted seeds in frying pan on medium high heat until lightly browned.
Soaked dates and raisins in boiling water. Drained after 5 minutes.
Mixed levains into cider and added flours. Mixed well by hand until dough looked shaggy and let rest in warm place for 30 minutes.
Added salt and add-ins and incorporated by folding and pinching the dough. Dipped hand in water occasionally to reduce sticking.
Placed dough in a warm place and did 4-5 stretch-and-folds every half hour for a total of 6 times. Dough seemed very loose.
Let dough rise until poofy and about one and a half time its original volume. This took a long time.
Turned out on a floured surface, divided into two parts and pre-shaped. Let rest for 10 minutes and shaped using the letter fold method. I had to repeat this because the dough was quite slack and sticky. Hydration probably ended up too high due to my error with the levain. Placed in floured baskets and put into fridge to retard overnight.
The next day, I took them out of the fridge and noted they didn't rise at all so I left them to rise at room temperature for almost 5 hours until there was some semblance of a risen loaf.
I heated oven to 500f with the Dutch ovens inside. When oven was heated for at least 45minutes, I turned out the dough onto parchment paper. Scored the dough.
I carefully placed the dough inside the Dutch oven using the paper as a sling, put the lid and baked for 20 minutes at 500f. Dropped temp to 450f and baked an additional 10 minutes. Removed lid and baked till dark which was another 10 minutes.

Danni3ll3's picture
Danni3ll3

Honey Pear Gorgonzola Bread

For the honey bread challenge, I got the inspiration from here: https://bakingfanatic.wordpress.com/2014/03/23/gorgonzola-and-pear-sourdough-loaves/

I had a piece of leftover Gorgonzola from making pizzas and some dried pears on hand and thought that honey would go great with them. I added an oat soaker because I love the texture it gives to bread.

Ingredients
50 g whole rolled oats soaked in 100 g boiling water for a few hours
50 g dried pears soaked in boiling water for a few hours and drained
100 g multigrain flour
227 g unbleached flour
25 g honey
167 g water
72 g Levain (rye and partially sifted whole wheat at 100% hydration)
1/4 tsp yeast
6 g salt
40 g pecans, chopped
50 g Gorgonzola, crumbled
Autolyse the water, flours, honey and oat soaker for a half hour.
Mix in the salt, yeast and Levain by pinching and folding.
Add in the nuts, Gorgonzola and drained pears by first spreading the dough into a rectangle on a wet counter and sprinkling the add-ins on top. Roll up and do a set of slaps and folds to incorporate the add-ins evenly.
Put in a warm spot to ferment. Do 4-5 stretch-and-folds every half hour for a total of 4 times.
When the dough is just about doubled, turn out on a floured surface and pre-shape. Let rest for 20 minutes and shape using the letter fold method.
Place in floured baskets and put into fridge to retard overnight.
The next day, heat oven to 500f with Dutch oven inside. When oven has heated for at least 45minutes, turn out dough onto counter sprinkled with cornmeal. Score cold dough.
Sprinkle cornmeal in bottom of Dutch oven, carefully place dough inside, put lid on Dutch oven, and bake for 20 minutes at 500f. Drop temp to 450f and bake an additional 10 minutes. Remove lid and bake till nice and dark.

It stuck to the Dutch oven so I had to put the lid on to steam it out. I popped it back in the turned off oven for a few minutes to recrisp the crust. Crumb shot will come when it cools down.

Pages