The Fresh Loaf

A Community of Amateur Bakers and Artisan Bread Enthusiasts.

Most bookmarked

IceDemeter's picture
IceDemeter

Failure? Well, it LOOKS like it...

Well, all of you evil influences managed to tempt me off of my planned path of simple formulas (with some experiments of percentages and timing just to figure out what works best here), and off in to the crazy territory of the more complex recipes...

I can't say that I am really ready for it, but - well, that's part of the fun! 

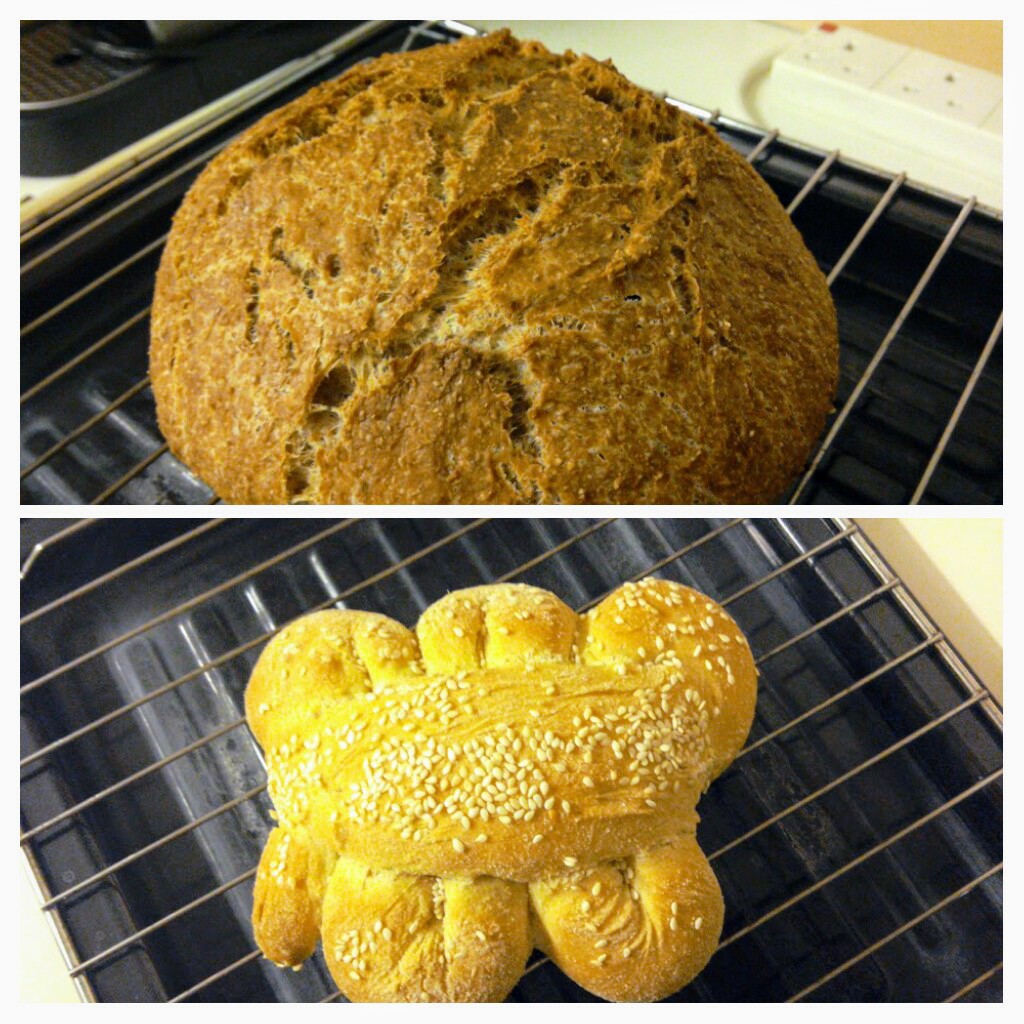
For my "base" bread for the week, I stuck with the 50% whole grain that I enjoyed from last week, but scaled down and with a different preferment percentage and timing.  I haven't quite developed the feel for fermenting / proofing yet, so it was slightly under-proofed, and I didn't get as much caramelizing as I would have liked, but it's still just fine for our "base":

No crumb shot yet, but I'm sure it'll be just a bit more dense than last time.  I've learned that I need to either keep the percentage of levain higher (pre-fermented flour was just 10% of total flour weight), proof at a higher temperature, or allow for more time in my schedule for this to bulk ferment.  No worries, and not a "failure" - just not quite as much oven-spring as I would have liked.

Edit to add crumb shot:

As for the other experiment, well, it sure LOOKS like a failure!  No oven spring, the scoring basically disappeared, and it looks like an oversized pancake:

As I stood there today, explaining to my husband what a total failure this was (completely under-fermented, under-proofed) and how I had royally messed it up (trying to go by the clock and not the dough - and being far too concerned about the prospect of OVER proofing), he raised an eyebrow and inquired whether I realized that I had basically inhaled 3 pieces of the "failure" while we were talking...  It may LOOK bad, but folks - this thing is freakin' CANDY!

Yeah - so I went with a toasted barley porridge, soaked chopped figs, toasted almonds and wheat germ, 5g each of white and red rye malt, and --- yeah.  It's candy.  It actually might be a GOOD thing that I messed up the texture, since I imagine that if it had turned out as a SUCCESS then I'd have inhaled the whole thing by now!

In my opinion, one of the great things about experimenting with bread is that there really aren't any "failures" - even the worst results can be used as bread crumbs or added to a bread pudding or used as altus in a future bake.  Gotta have fun with it!

 SUMMARY  
  WEIGHT (G)BAKER %  
      
 TOTAL MILLED FLOUR795100.00  
 Flour in Levain (whole grain rye)759.43  
 Flour in Autolyse72090.57  
   (340g hard red wheat, 280g all purpose, 100g whole spelt)    
 Added Flour in Final Mix00.00  
      
 TOTAL HYDRATION70588.68  
 Water in Levain759.43  
 Water in Porridge / Soaker11013.84  
 Water in Autolyse52065.41  
 Added Water in Final Mix00.00  
 Other liquids00.00  
      
      
 TOTAL DRY ADDERS27334.34  
 Toasted Additions (60g almonds 30g wheat germ)9011.32  
 Soaker Additions (60g barley, 3g salt, 120g soaked figs)18323.02  
 Autolyse Additions00.00  
      
      
 Final Mix Additions00.00  
      
 SALT151.88  
      
 FINAL DOUGH1788224.90  
      
 FINAL FLOUR795100.00  
 FINAL HYDRATION 59574.84  
  (NOT including water absorbed by grains / fruit in porridge / soaker)  


 METHOD
      
 DAY 1:    
      
1Build Levain with a 3 stage build:Stage 1Stage 2Stage 3 
 Starter 6   
 Flour112244 
 Water112244 
 Plan for final dough mix 12-16 hours after stage 3 feed if leaving at room temperature, or after
 doubling at room temp then refrigerating   
      
2Toast almonds and wheat germ then crush almonds.  Cook barley in 180g boiling water for 35 min
 giving 120g cooked total (60g water).  Soak chopped figs in 120g water (use this water in autolyse)
      
 DAY 2:    
      
1Combine any prepared toasted additions, soakers/scalds/porridges, and  
 all flours with water in a rough mix.  Cover and allow to sit at room temperature  
 for 1 to 2 hours.  Sprinkle salt on top so don't forget it.   
      
2Spread levain over top of autolyse and thoroughly mix in.  Add up to 25g more water if needed.
 Allow to rest, covered, for 10-20 minutes.   
      
3Thoroughly knead dough in bowl for 10-15 minutes, then allow to rest, covered, for another
 15 minutes.  Knead again until dough is smooth and forms cohesive ball (about 5-10 minutes).
 Place in to clean fermenting container and cover for bulk fermentation.  
      
4Do stretch-and-fold on dough every 30 minutes for first 2 hours (30/60/90/120) minutes, as
 needed.  Add in another couple of sets at 150/180 minutes if necessary.  After that, allow 
 overnight in the fridge (look for 30-50% volume increase).  
  SF@ 2:15, 2:45, 3:15, 3:45, in to fridge at 4:00 
 DAY 3:    
      
1Remove proofing bin from fridge and allow to come to room temperature and finish proofing.
      
2Release dough from fermenting container on to clean work surface.  Use damp hands and 
 damp bench knife to pre-shape.  Cover and allow to bench rest for 30 - 60 minutes. 
      
3Very lightly flour hands, work surface, and surface of dough.  Flip over, degas, and do final
 shaping.  Place seam down in parchment lined banneton, cover with plastic, and 
 allow to proof at room temperature (watch for level - might be up to 3 or 4 hours) 
 Bake when finger poke returns veeeery slowly.   
      
4Preheat oven to 475 degrees with roasting pan placed on cookie sheet inside.  Wait at least
 20 minutes after oven chimes that pre-heat is finished.   
      
5Score top of dough, take lid off roaster, and quickly place dough in to roaster with the 
 parchment paper.  Spritz inside roaster with water, replace cover, and drop temp to 450 degrees.
 Bake covered for 20-25 minutes, then drop temp to 425 degrees and bake uncovered for  
 35 to 45 minutes (until internal temp is 208-210 F).  Allow to cool for 24 hours before slicing.
 Suggest: allow to cool for 10 min in oven with temp off and door opened before removing


Troodledoodle's picture
Troodledoodle

Crustiness, or lack thereof......

I have been baking sourdough bread for a while, and I'm happy with the crumb of my loaves, but slightly mystified at the variability of the crust. I'm hoping someone can pinpoint what makes a crispy crust, or a soft one, so that I can choose which way to go, depending on the kind of loaf I want.

The basic loaf I've been making is the one from Tartine: 75% hydration, 90% white bread flour, 10% whole wheat bread flour, 20% levain, 20% salt. I do the stretch & fold method, 3-4 hours bulk fermentation, bench rest, proof overnight in the fridge. I preheat a Dutch oven on the highest temp my oven will go to (440) for 30 minutes, then bake covered for 30 minutes, uncovered for 25 minutes. This seems to result in a very crisp crust, not too thick, the bottom crust stays crisp, but the top crust softens a little over time (but not too much).

Yesterday I tweaked the recipe (but not the method), and got an incredibly soft crust, almost like a soft English muffin! The changes I made were, I thought, minor: 75% hydration, 85% white bread flour, 10% whole wheat bread flour, 5% rye flour, 25% levain, 21% salt. Not a huge difference in recipe! But a big difference in crust. The crumb itself was much softer & moister, could the tiny amount of rye explain all of this?

As I say, I like the crispy crust, I like the softer crust; what I don't like is not knowing how to create either of those, so I'm hoping someone can enlighten me! I'm also wondering if I should try misting the loaves with water before putting them in the dutch oven - I don't get the clouds of steam come out when I remove the lid that the book says you will. 

BreadBabies's picture
BreadBabies

gradually adding water to dough -- anyone familiar?

I recently saw Paul Hollywood use a technique I've never seen or read about anywhere. He was making a ciabatta loaf. He was using a stand mixer. He didn't add the entire amount of water at once.  He added some, let the gluten develop through kneading in the mixer and then added more and continued to let the machine knead the dough.

His explanation was quite brief and didn't really make any sense to me.

Does anybody know and understand this technique? Does it have a name?  Why would someone do this/how does it work?

kimemerson's picture
kimemerson

Olive bread not as dark after baking

Hello,

     I just baked a few loaves of olive bread which were just my sourdough with olives added. A slight correction for salt but otherwise no alteration of the recipe. 

   I baked the olive loaves right alongside regular S.D. breads. The olive did not seem to get as much lift and did not brown as much. 

   I wasn't sure when to add the olives so I took half my dough after a 1 hour bulk ferment and mixed the olives in which was in the mixer on slow speed till it was all well incorporated. This did add more water content but I never did a thing about that.

Cutting open a loaf later revealed a nice bread. I don't eat olives but consensus is that it's fine. 

Any clues on the color?

Thanks

Kim

Norcalbaker's picture
Norcalbaker

TorRey food scale

Well the OXO scale I'm currently using is starting to act up.  I'm getting weird and inconsistent read outs.  I've gone through a Salter, 2 OXOs, and a Taylor scale in the past ten years.  When I add up the costs (nearly $200, not including battery replacements), I realize I could have purchased a good quality portable commercial scale with an AC/DC adaptor option.  So I'm looking at portable scales now.

Anyone have any experience with the TorRey L-EQ series scale? 

I'm open to any recommendations for a small size commercial quality scale.  Every home kitchen I've purchased lasts about two years.  They either stop working or they start giving crazy readings like -34g.  I want a scale that's accurate and still operating in five years.


zayantebread's picture
zayantebread

HELP! Giant caverns, dense outer crumb

Hello! Heavy lurker of TFL since January, first time posting!


A little background: I've wanted to take a stab at sourdough bread baking for a while and finally took the plunge in January, made my own starter, and began baking. I watched numerous videos on bread baking, read articles/blogs, and kind of started winging it. My first couple loaves were failures (too much starter, too long room temp proof). Following a different process (less starter, shorter room temp bulk, overnight fridge proof) my next few loaves were AWESOME! Loaf 5 I encountered what I'm dealing with now - huge cavern inside with dense crumb all around- fed my starter rye for the first time on the first refresh, thinking that's what happened there. Loaves 6-14 were great, even got a couple ears during the bake, tender consistent crumb, good flavor, good oven spring. I thought I was killing it! I've attached a couple photos of my best bakes.


Now, my past three bakes have been total failures, leading me to realize that I really have no idea what I'm doing. My successes thus far have manifested through pure luck, NOT my understanding of the process. I'm currently in an experimental phase where I'm baking everyday and changing one variable in each bake to see if it makes a difference. I'm currently in bread cavern hell, where the inside is a giant cave and the outer 1/2 - 1 inch is a dense chewy crumb. Pics attached. The flavor is nice, but overall epic fails. Is this indicative of over-bulk fermenting? Under proofing? Over proofing? I'm struggling with knowing when the bulk ferment is done. My good bakes bulk fermented for a shorter period of time (3-4 hours with S&Fs every 40 mins); these recent bakes for longer (5-7 hours), so I'm wondering if this is the culprit. I finger poke test for proof doneness (after about 12-16 hours in a cold fridge overnight) and the indentions fill in slowly to about half - sounds about right? 


My starter is an organic all purpose, 100% hydration, and doubles in 6-8 hours after refreshment.


Here's my most recent failure process:

1150 g organic all purpose

50 g dark rye (I've found just a little bit adds the flavor I want, without overpowering)

900 g purified water

223 g 100% hydration starter

38 g salt

1. Autolyse flour and water for 1 hour; 2. Add starter and mix, let sit 1 hour; 3. Add salt and mix, and perform first stretch and folds; 4. Perform stretch and folds once per hour, for 6 hours (which is what I'm doing differently than before after reading about other's methods); 5. Pour, cut, and pre-shape after a 6 hour room temp bulk; 6. Bench rest for 30 mins; 7. Shape and put in bannetons; 8. Into fridge for 17 hour overnight cold proof (fridge is quite cold); 9. Bake at 450, 25 mins with lid on, 25 mins with lid off. 


The main difference between my successful methods and failed methods is my bulk ferment time... but I've read so many methods that allow for a 6 hour bulk time. I'm in Northern California where the ambient temp is around 65F. Does this issue even look like a fermenting time problem? 


Over bulk-fermenting? Over-proofing? Under-proofing? What should I be looking for to indicate bulk ferment is done? Has my starter gone wacky? ANY advice is welcome!! I REALLY want to get this right, and bake consistently good loaves! 


**EDIT- I might also mention that i'm not getting much of a rise during bulk or in the banneton**

THANK YOU in advance!!!


inumeridiieri's picture
inumeridiieri

Semolina durum Baguette :-)

Baguette....I make 299 score...i'm tired :-)

Baguette 100% semola rimacinata di grano duro

Poolish 6 hours

Semola rimacinata di grano duro  250 g

Water 250 g

Yeast 3 g

Poolish at 20°C for 6 hours

Second dough

semola rimacinata di grano duro 500 g

Water 238 g final hydration 65%

Yeast 5 g

Good flavor :-)

Gaetano

P.S. Thanks to everyone for the advice that you give me

debmc's picture
debmc

Buying bulk in Michigan

Does anyone have a source for buying bulk hard winter red or white wheat berries in Michigan, near Ann Arbor or locally online.

Breadprof's picture
Breadprof

Bread from Switzerland

I was in Basel a couple years ago and had a great baguette shaped bread as a cheese sandwich from the basement market in a grocery store. It was whole grain and dark, with some white millet shaped grain in it. I would love to bake it back here in the US, but have no idea what it was. Suggestions? Thanks!!

Anonymous baker's picture
Anonymous baker (not verified)

No Knead & Mafalda Siciliana

Something different today. A No Knead yeasted bread with Biga and Tangzhong. And a Mafalda Siciliana. A traditional  Italian bread made with durum wheat. Thank you Gaetano for the recipe.

Pages