The Fresh Loaf

A Community of Amateur Bakers and Artisan Bread Enthusiasts.

Most bookmarked

Smo's picture
Smo

The Easiest German-style Spelt Recipe, Ever

Well, that's the idea anyway.  I've been working on this one for years and didn't want to post it until I felt that I'd mastered it.  That came sooner than expected this year, when I switched to using pullman loaf pans and things got immediately easier.

The goal of this recipe is to be something that I can bake every week for the rest of my life, no matter how crazy things get.  So far, so good.  The recipe features:

  • No kneading
  • No shaping
  • No sourdough starter maintenance
  • Flexible rise time
  • Short ingredient list
  • Authentic German crust, crumb and taste

I studied abroad years ago in southwestern Germany, where Spelt bread (aka Dinkelbrot) is very popular. I was given a recipe for a no-knead, 100% whole grain sourdough spelt bread while I was there.  Over the last few years I've been trying to perfect the recipe by making it simpler, more full-proof, and easier to fit into a busy lifestyle.  The last batches I've made are the closest I've come to reproducing the Dinkelvollkornbrot from my favorite bakery in Stuttgart [1].

Begin by adding (per loaf) 600g of whole grain spelt flour, 15g salt and 3g guar gum [2] (optional, see notes) to a mixing bowl. EDIT: I now use 20g of ground flax seed per loaf in lieu of the guar gum). Take your sourdough starter out of the fridge and mix it in too. I don't measure the starter but it's usually about half a cup [3]. Add 600g of hot water (I run my tap until it's hot) to the bowl and mix until combined. If needed, add extra water to hydrate all the flour without resorting to kneading - I usually end up adding 50-100g extra. But I would start around 100% hydration and go from there.

Once the dough is mixed, take a cup or so of it and put it back in your sourdough starter jar. Put it straight back into the fridge. It'll ferment and be ready for your next bake. As long as you bake at least once a month, this is all the sourdough maintenance you'll need to do with this recipe, no need to feed your starter.

Now, cover with a towel and go to work. Or go to bed. Or, whatever. Just give the dough 8-15 hours to rise. The dough will be waiting for you any time within that time period. How long you wait will effect on the level of sourdough flavor in the final product, but the effect is minor and I worry more about my schedule than the flavor. Whenever it's convenient, move on to the next step.

After the long rise, the dough should have risen quite a bit (maybe close to double in volume).  Optionally add 35g of sunflower seeds and 35g of pumpkin seeds per loaf to the bowl [4]. Stir well and remove large air bubbles. This should only take 1-2 minutes, don't get too enthusiastic and start kneading.

Now grease your loaf pans (I use an oil mister, because it's easy and fast) and divide the dough between the pans. It should be far too wet to shape, so don't even try. Let it rise about an hour before putting it in the oven (with the lid on, if you're using a pullman pan).

This step is where the pullman loaf pans really come in handy, because they have a lid.  The tight-fitting lid results in more predictable oven spring, which gives you a much bigger margin for error when proofing the dough. I have yet to underproof or overproof a loaf when using these pans.  Even when I was sure I'd screwed up, the loaves turned out fine. With regular loaf pans I found that the optimal window of time to put them in the oven was very, very short. See notes for more on this, plus tips on using a regular pan with this recipe [5].

Once the bread has proofed, put it in a 420 degree oven. I then bake it for an hour, in my oven at home[6].  Take the bread out of the oven, place onto cooling racks, and wait for it to cool.  For best results, wait overnight before starting on the loaf.  Then slice thin and enjoy! The bread will last a long time - at least 10 days. It's great for open face sandwiches with cheese, cold cuts, or other spreads.  Or for PB&J (I may love German bread but I'm still American...). Or, you know . . . butter. Open face butter sandwiches. Is there anything better?

I've also made a version with white spelt flour, for making grilled cheese and BLTs. That one's a work in progress.  I'm going to try adding potato water to soften up the crust next time.  And I have yet to master the rye version as well.  But this whole wheat spelt version is good and consistent for me now.

Here are links to the pullman loaf pans that I'm using, on Amazon:

Affiliate link (for those who aren't familiar, gives the link poster, AKA me, a little kickback at no extra cost to the purchaser)

Non-affiliate link

They also make a 13" long version, which would be more economical if you're trying to maximize the amount of bread made per dollar spent on loaf pans.  But I like the shape of the 9" loaves better.

Notes:

[1] Hafendoerfer, for those who are curious. If you *ever* get the chance to go there, do it! It might be the best bakery in the entire country of Germany. Definitely the best in Stuttgart.

[2] The guar gum improves the texture when used in small quantities. Using much more than this will result in an unpleasant gummy, bouncy texture. The loaf will be fine without it, but won't hold together quite as well.  EDIT: I now use 20g of ground flax seed per loaf instead.  It works just as well as the guar gum, plus it's good for you!

[3] By having a long initial fermentation, there's no need to have an active starter. It'll have several hours to wake up and get going. I've used starter straight from the fridge that hadn't been fed in a month, and the bread rose just fine. Using hot water also helps kick-start the fermentation.

[4] I *highly* recommend adding the seeds, they do a lot for the texture and flavor. They also tone down the fluffiness of the bread and make the crumb more authentically German - I found that my bread was rising a bit too much without them. If you omit them, you may find that 600g flour makes a bit too much dough for a 4x4x9 pullman pan.

[5] With a regular pan, I found it really hard to figure out the ideal time to put the dough in the oven to get a good rise. Overproofing results in a lot of oven spring, but then the loaf collapses in the oven. Underproofing results in the crust rising above the crumb, and a cavity between the two. Or weird shapes bursting out of the top of the loaf.  I found the sweet spot between the two to be short and hard to catch.

There may be other solutions to this problem - adding steam to the oven might help. Or you could put a sheet pan on top of regular loaf pans and put a skillet on top for weight. But the pullman pans work for me and I like the size of the loaves they make.  I spent years trying to figure out the proofing stage of this recipe and I finally feel like I've figured it out, thanks to the new pans.

[6] If I'm using a new oven, I'll bake for 45 minutes, then remove the covers off of the pullman pans and stick a probe thermometer into the center of one loaf. I then continue baking until the center reaches 205-ish degrees Fahrenheit (I live at 7000 feet elevation, so I actually go to 195, but at sea level you'd want 205). Once I've figured out the oven I don't use the thermometer anymore and I just set a timer.


Quantum's picture
Quantum

Sourdough Bagels (recipe!)


For my first blog post (on what my girlfriend refers to as "the bread facebook"), I'd like to share my recipe for sourdough bagels. I started with Hamelman's bagel recipe from Bread (a fantastic technical book, as I'm sure many of you know!), adapted for sourdough starter in lieu of commercial yeast. The end result is lightly sour and wonderfully chewy, and pairs exceptionally well with savory spreads. This recipe makes a dozen ~~120g bagels.

A note on ingredients: I used King Arthur brand Bread Flour (blue and white bag), and my sourdough starter is fed exclusively with King Arthur Whole Wheat (red and brown bag). Hamelman's recipe calls for a high gluten flour (e.g. KA Sir Lancelot), which I do not have ready access to--- I've instead added a small amount of vital wheat gluten to the recipe in order to bring the protein level of the bread flour up to that of Sir Lancelot. If you have access to high gluten flour, I'd imagine you can substitute the vital wheat gluten for an equivalent weight of high gluten flour.

I've tried to include as many photos as possible, but I'm limited to using my cell phone's camera so I apologize for any quality issues/the aspect ratio!


Preferment:

84g bread flour

84g water

171g 100% hydration sourdough starter


Bulk dough:

753g bread flour

20g vital wheat gluten

19g salt

1/2 teaspoon diastatic malt powder

377g water


The recipe also requires 4oz of malt syrup (or honey) per gallon of water used to boil the bagels prior to baking.

Mix the preferment ingredients in a plastic covered bowl, and allow to ferment at room temperature for 10-12 hours. After this period of fermentation, the preferment should be very bubbly--- you should see bubbles on the surface and gently knocking the bowl on a countertop should liberate more bubbles.

Dissolve the preferment in the bulk dough water in a large mixing bowl. Add the rest of the bulk dough ingredients and stir together to form a shaggy mass.

Knead for 20 to 25 minutes if kneading by hand--- when I first developed this recipe, I didn't have a stand mixer and kneaded this dough by hand exclusively. It's a stiff, strong dough, and is a heck of an upper body workout. I gifted myself a Kitchenaid model 7581 mixer, and used it to knead this batch of bagels (I've included some thoughts on its performance at the end of this post). Using a stand mixer, knead for 15-17 minutes on speed 1. The gluten should be very well developed, and the dough should feel strong and heavy.

Let rest a few minutes and form into a ball. Cover with plastic wrap and allow to rest at room temperature for 1 hour (it was a chilly day in the SF bay, and my kitchen was quite cold, so this particular batch of dough rested for an hour and a half). These two pictures show before and after--- note that the dough has not really visibly risen:

Scale and divide the dough into approximately 120g portions. When I scale the bagels, the portions I cut using a bench knife usually come off in a "log" shape--- the next step in shaping this log will determine the size of the hole at the center of the bagel. Option 1: roll the log out as is to a length of 10" to 12". Option 2: fold the log back onto itself (like a horseshoe) and then roll out to a length of 10" to 12". Option 2 stretches the gluten in the dough more than option 1, and will result in a bagel with a smaller hole (and a rounder bagel overall) since the gluten will snap back after forming the bagel, while the relaxed gluten in option 1 will yield a bagel with a larger hole. Note: shaping bagels requires a decent amount of work space--- I often just work directly on my (well cleaned) countertop.

Take the rolled out log and wrap it around your palm like so:

Now roll the ring of dough (palm down) on your work surface to seal the two ends of the bagel together:

Place each formed bagel on a sheet of parchment paper sprayed with Pam:

Note: the bagel in the right column and second row was formed as per option 1 above, while the bagel right below it was formed as per option 2.

Cover with plastic wrap, and allow to rest at room temperature for an hour (since my kitchen was cold, I again lengthened the rest to 90 minutes). Note the bagels have risen visibly, but just barely:

I've only ever tried this once, but at this point the bagels should pass the "float test"--- they should float in a bowl of cold water.

Place the sheet of bagels in the refrigerator and allow to cold ferment for 12-24 hours (the longer the ferment the better the flavor!).

Preheat your oven to 500 degrees Fahrenheit, and move a rack to the middle position. Bring a large pot of water to a boil, and stir in your malt syrup/honey (4oz of syrup/honey per gallon of water, I generally use 7-8 quarts of water).

Boil the bagels four at a time for 1-2 minutes (the longer the boil, the chewier the crust of the bagel--- I generally boil mine for the full 2 minutes). The bagels tend to sink at first, and can stick to the bottom of the pot if you're not careful. Stir them around at first to keep them from settling onto the bottom. The bagels should float by the end of the boil. Remove the boiled bagels to a wire rack placed over a baking sheet to drain.

While the next set of bagels is boiling, press the drained bagels into a plate of poppy seeds, sesame seeds, etc. My personal favorite topping is a sprinkling of kosher salt and fresh ground telicherry peppercorns. Place the topped bagels topping side down on a sheet pan.

Once all the bagels have been topped and placed on the baking sheet, put the sheet in the oven and bake (topping side down) at 500F for 10 minutes. Flip the bagels (topping side up now), and bake for another 6-8 minutes (or until bagels are golden brown.

Note the untopped bagels on the bottom row have browned quite a bit--- I like the color, but if the bagels brown too deeply for your taste, bake with a second baking sheet underneath the first.

The crumb looks great--- plenty of nooks and crannies for cream cheese! My favorite spread is a little butter mixed with marmite.

The bagels toast extremely well, and will keep fresh for a few days in a breadbox. They keep well in the freezer--- wrap in a paper sack and place in a plastic freezer bag. Thaw, toast and enjoy!

A special thanks to dmsnyder, whose San Joaquin Sourdough inspired me to experiment in naturally leavened breads.

A note re: my Kitchenaid Mixer's performance:

I know that KA mixers are somewhat... contentious... 'round these parts, but sadly a Hobart mixer is beyond the means of my PhD student teaching stipend. I ordered a refurbished Kitchenaid model 7851 7 quart stand mixer for just over 300 USD, and hoped that it would hold up to stiff low hydration dough. The mixer performed impeccably in this respect--- it was able to handle a full batch of bagel dough on speed 1 with no difficulties whatsoever, and the top of the mixer was not even perceptibly warm after 15 minutes of kneading. The mixer head itself was warm to the touch, but I would not call it "hot". I did try to knead the dough on speed 2 for a few minutes (the mixer manual warns not to knead dough at speeds higher than 2), but at points the mixer seemed to strain slightly, probably not enough to damage the motor in any way unless kneading for hours at a time. I should say as well that I have used my mother's 6 quart KA mixer to make this same recipe, and while it was capable of kneading the dough, the top of the mixer was quite warm afterwards and it seemed to strain even at speed 1. The more powerful motor in the 7 quart series mixers seems to make the difference. In short, the 7 quart series of KA mixers can easily handle a batch of a dozen bagels. 

GSnyde's picture
GSnyde

SF Country Sourdough – My Best Ever…Not Sure Why

They say everything happens for a reason, and I believe them.  But I can’t always identify the reasons some things happen.  Why was this bake of the San Francisco Country Sourdough (my version of pain de campagne) the best ever?   This was probably the 7th or 8th time I’ve baked it, but this one had that je-ne-sais-what like my best bakes of Tartine BCB and last week’s bake of Hamelman’s pain au levain.  Beautifully caramelized, golden brown, crispy crust; moist, airy-but-substantial crumb, with nicely gelatinized membranes; complex wheaty flavor with a hint of rye.

I guess I should compare this to other bakes of the same formula.

Here’s what was the same:

  • The ingredients and the basic technique (described below).

Here’s what might have been different:

  • My starter was very active (after last week’s near-death experience).
  • Both the primary ferment (3 ¼ hours) and the proof (2 ¼ hours) were on the long side.
  • My handling/shaping skills are improving, and I got a nice taut sheath.
  • I made a recipe-and-a-half so I could cold retard one loaf’s worth to bake tomorrow for some friends.

Whatever factor(s) made the difference, I hope I can do it again.

And excellent with some early Autumn barbecue.

San Francisco Country Sourdough (Sourdough Pain de Campagne) version 10-8-11

Yield: Two 750g Loaves; or Three Mini-Baguettes (235g each) and one 800g Loaf; or One 1000g loaf and two 250g baguettes; 0r Three 500 gram loaves; or…   

Ingredients

LIQUID-LEVAIN BUILD

100 grams   AP flour

24 grams  Whole Wheat flour

12 grams  Whole rye flour

170 grams   Water, cool (60 F or so)

28     Mature culture (75% hydration)

FINAL DOUGH (67% hydration, including levain)

640 grams   All-Purpose flour (83%)*

85 grams  Whole wheat flour (11%)**

45 grams   Whole rye flour (6%)

435 grams   Warm water (80 F or so) (56%)

17 grams   Salt (2%)

306     Liquid levain  (48%)   

* used CM Artisan Baker’s Craft (malted)

** used CM Organic Hi-protein fine whole wheat

Directions

1. LIQUID LEVAIN:  Make the final build 12 to 15 hours before the final mix, and let stand in a covered container at about 70°F

2. MIXING: Add all the ingredients to the mixing bowl, including the levain, but not the salt. Mix just until the ingredients are incorporated into a shaggy mass. Correct the hydration as necessary.  Cover the bowl and let stand for an autolyse phase of 30 to 60 minutes. At the end of the autolyse, sprinkle the salt over the surface of the dough, and finish mixing 5 minutes. The dough should have a medium consistency. 

3. BULK FERMENTATION WITH S&F:  3 hours. Stretch and fold the dough in the bowl twice 20-strokes at 45-minute intervals.  Place dough ball in lightly oiled bowl, and stretch and fold on lightly floured board at 45 minutes.  If the dough has not increased in size by 75% or so, let it go a bit longer.

4. RETARDED BULK FERMENTATION (optional):  After second S&F on board, form dough into ball and then place again in lightly oiled bowl.  Refrigerate 8-20 hours, depending on sourness desired and scheduling convenience.

5. DIVIDING AND SHAPING: [Note: if bulk retarded, let dough come to room temperature for 30-90 minutes before pre-shaping.]  Divide the dough into pieces and pre-shape.  Let sit on board for 30-45 minutes, and then shape into boules or batards or baguettes.

6. PROOFING: Approximately 1.5 to 2.5 hours at 72° F. Ready when poke test dictates.  Pre-heat oven to 500 with steam apparatus in place.

7. BAKING: Slash loaves.  Bake with steam, on stone.  Turn oven to 450 °F after it hits 500F after loading loaves.  Remove steaming apparatus after 12 minutes (10 for baguettes). Bake for 35 to 40 minutes total (for 750g loaves; less for smaller loaves).   Rotate loaves for evenness as necessary.  When done (205 F internal temp), leave loaves on stone with oven door ajar 10 minutes.

Happy baking!

Glenn

Submitted to http://www.wildyeastblog.com/category/yeastspotting/


WoodenSpoon's picture
WoodenSpoon

Rye Levain

I have been busily working away on my Rye levain formula and the one I just baked off this morning on one of the best yet. Recently I have started to shy away from my standard 100% hydration white or primarily white levain towards much firmer entirely whole grain levain starters. I still keep my chef at 100% hydration and I think that going from a cold wet chef to a warm dry levain to a warm wet final mix is really contributing to the flavor complexity.

Here's how I made it.

Levain build #1

  • 3g 100% hydration rye chef
  • 21g fresh milled whole rye
  • 10g warm water
  • 12 hr ferment at room temp

Levain build #2

  • 5g 50% hydration rye levain
  • 50g fresh milled whole rye
  • 25g warm water
  • 12 hr ferment at room temp

Final dough

  • 480g bread flour 70%
  • 170g fresh milled whole rye 25%
  • 45g levain 7.5% (5%rye, 2.5% water)
  • 55g rye chops 8%
  • 536g quite warm water (hold 36g) 79%
  • 13g salt 2%

First I mixed the flours and rye chops and hydrated them with all but 36g of the warm water and let it sit for 45 minutes. Then I added the salt and in a different bowl I moistened/mashed with a fork the 45 grams of firm levain in the remaining 36 grams of water and added that to the dough. After a quick mix with a wooden spoon to incorporate the salt I mashed the whole dough in my hands and as adding water to already partially developed dough isn't always the easiest thing to do. 

Once the dough came back together I gave it a firm two or so minutes of slap and folds followed by a twenty minute rest, then I gave it another quick set of slap and folds and a ten minute rest then another quick set and a fifteen minute rest then another quick set and an hour rest.

After an hour I have it a good stretching and folding in the bowl followed by a very quick slap and fold half an hour later and one more another half an hour later. 

By now the dough has been fermenting for around 3 hours and forty minutes. I gave it an additional 5 hours and forty minutes of room temp bulk fermentation shaped it and popped it in the fridge for 19 hours.

Around noon today I put the loaf in a 500 degree oven, poured hot water over my preheated lava rock and baked it for 55 minutes turning the oven down to 450 after the first two minutes.

This is one heck of a good loaf with a pretty prime aroma to boot. Earthy, hearty and lactic with that characteristic rye spiciness followed by a light acetic zing. So tasty.

dmsnyder's picture
dmsnyder

Pane Valle del Maggia

Pane Valle del Maggia

February 23, 2014

 Several bakers on The Fresh Loaf have shown us their bakes of “Pane Maggiore.” This bread comes from the Swiss Canton of Ticino, which is the only Swiss Canton in which Italian is the predominant language.

While the Ticino Canton has Lake Maggiore on its border, the name of the bread supposedly comes from the town of Maggia which is in the Maggia valley, named after the Maggia river which flows through it and enters Lake Maggiore between the towns of Ascona and Locarno.

I was interested in how this bread came to be so popular among food bloggers. As far as I can tell, Franko, dabrownman and others (on TFL) got the formula from Josh/golgi70 (on TFL) who got it from Ploetzblog.de who got it from “Chili und Ciabatta,” the last two being German language blogs. While Petra (of Chili und Ciabatta) knew of this bread from having vacationed in Ticino, she actually got the recipe from a well-known Swedish baking book, Swedish Breads and Pastries, by Jan Hedh.


 For your interest, here are some photos from Petra's blog of this bread as she bought it in it's place of origin: 

Pane Valle del Maggia. (Photo from the Chili und Ciabatta blog)

Pane Valle del Maggia crumb. (Photo from the Chili und Ciabatta blog)


After this bit of backtracking research, I ended up with four … or is it five? … recipes. I had to decide which one to start with. I decided to start with Josh’s version, posted in Farmers Market Week 6 Pane Maggiore.

 Josh’s approach used two levains, one fed with freshly-ground whole wheat flour and the other with white flour plus a touch of rye. I did not grind my own flour but followed his formula and procedures pretty closely otherwise. What I describe below is what I actually did.


Whole Wheat Levain

Wt. (g)

Baker’s %

Active liquid levain (70% AP; 20% WW; 10% Rye)

16

48

Giusto’s Fine Whole Wheat flour

33

100

Water

36

109

Total

85

257


White Flour Levain

Wt. (g)

Baker’s %

Active liquid levain (70% AP; 20% WW; 10% Rye)

17

50

KAF AP flour

28

82

BRM Dark Rye flour

6

18

Water

34

100

Total

85

240

 Both levains were mixed in the late evening and fermented at room temperature for about 14 hours.


Final Dough

Wt. (g)

Giusto’s Fine Whole Wheat flour

137

BRM Dark Rye flour

66

KAF Medium Rye flour

63

KAF AP flour

504

Water

659

Salt

18

Both levains

170

Total

1618


Total Dough

Wt. (g)

Baker’s %

AP flour

555

64

Whole Wheat flour

177

20

Rye flour

138

16

Water

746

86

Salt

18

2

Total

1618

188


Procedures

  1. In the bowl of a stand mixer with the paddle installed, disperse the two levains in 600g of the Final Dough Water.

  2. Add the flours and mix at low speed to a shaggy mass.

  3. Cover and allow to autolyse for 1-3 hours.

  4. Add the salt and mix at low speed to combine.

  5. Switch to the dough hook and mix to medium gluten development.

  6. Add the remaining 59g of water and continue mixing until the dough comes back together.

  7. Transfer to a well-floured board and stretch and fold into a ball.

  8. Place the dough in an oiled bowl and cover.

  9. Bulk ferment for about 4 hours with Stretch and Folds on the board every 40 minutes for 4 times. (Note: This is a rather slack, sticky dough. It gains strength as it ferments and you stretch and fold it, but you still have to flour the board and your hands well to prevent too much of the dough from sticking. Use the bench knife to free the dough when it is sticking to the bench.)

  10. Divide the dough into two equal pieces and pre-shape round.

  11. Cover with a damp towel or plasti-crap and allow to rest for 15-30 minutes.

  12. Shape as tight boules or bâtards and place in floured bannetons, seam-side up.

  13. Put each banneton in a food-safe plastic bag and refrigerate for 8-12 hours.

  14. Pre-heat the oven for 45-60 minutes to 500 dF with a baking stone and steaming apparatus in place.

  15. Take the loaves out of the refrigerator. Place them on a peel. Score them as you wish. (I believe the traditional scoring is 3 parallel cuts across a round loaf.)

  16. Transfer the loaves to the baking stone.

  17. Bake with steam for 13 minutes, then remove your steaming apparatus/vent the oven.

  18. Continue baking for 20-25 minutes. The loaves should be darkly colored with firm crusts. The internal temperature should be at least 205 dF.

  19. Transfer to a cooling rack and cool completely before slicing.

 I had some trepidation about baking at 500 dF, but the photos I had seen of the Pane Valle del Maggia were really dark. Also, it made sense that, if I wanted a crunchy crust on a high-hydration bread, I would need to bake hot. I baked the loaves for 33 minutes. They were no darker than my usual lean bread bakes. The internal temperature was over 205 dF. The crust was quite hard, but it did soften some during cooling. In hindsight, I could have either baked the bread for another 5 minutes or left the loaves in the cooling oven for 15-30 minutes to dry out the crust better.


I can tell you, these breads sure smell good!

When sliced, the crust was chewy except for the ears which crunched. The crumb was well aerated but without very large holes. Reviewing the various blog postings on this bread, all of the variations have about the same type of crumb. The high hydration level promotes bigger holes, but the high percentage of whole grain flours works against them. In any case, this is a great crumb for sandwiches and for toast.

Now, the flavor: I was struck first by the cool, tender texture as others have mentioned, although there was some nice chew, too.  I have been making mostly breads with mixed grains lately, so this one has a lot in common. It has proportionately more rye than any of the others, and I can taste it. The most remarkable taste element was a more prominent flavor of lactic acid than almost any bread I can recall. I really liked the flavor balance a lot! I would describe this bread as "mellow," rather than tangy. The dark crust added the nuttiness I always enjoy. All in all, an exceptionally delicious bread with a mellow, balanced, complex, sophisticated flavor.

Now, it wasn't so sophisticated that I hesitated to sop up the sauce from my wife's Chicken Fricassee with it! It did a commendable job, in fact.


I baked some San Joaquin Soudough baguettes while the Pane Valle del Maggia loaves were cooling.  

They had a pretty nice crumb, too.

Happy baking!

David

Submitted to YeastSpotting

zolablue's picture
zolablue

Sourdough Semolina Bread

I just posted the Semolina Sandwich Loaf ( http://www.thefreshloaf.com/node/4213/semolina-sandwich-loaf ) and wanted to share my experience making this sourdough version of Maggie Glezer’s.

This was really a nice little loaf with a great crust and also a very moist and beautiful crumb. It surprised me with the nice oven spring it had for such a seemingly small loaf.

The crumb has a beautiful yellow cast as well but the recipe uses AP flour in addition to the semolina (durum patent flour) so it was not as intensely yellow as the sandwich loaf which was 100% semolina flour.

I only proofed these loaves for 4 hours, rather than the 5 estimated by Glezer but I generally have a fast starter or it could have been the room temp that day. They were not large loaves and I goofed and preheated my oven to about 550 as I normally do but would not repeat that. I ended up baking them about 40 minutes but I did cover them at the end to keep them from getting even darker. Preheating the oven to the correct temp for this type of loaf would be much better.

I have to say again, this bread was wonderful. My neighbor who got the other loaf just loved it. I baked this bread the same day (last weekend) as the semolina sandwich loaf and it is still extremely moist. It was delicious last night used to sop up sauce from eggplant parmesan served with juicy grilled chicken (yum!).

This was, again, what I felt was a straight forward and rather easy recipe. Most of the time you spend is waiting but it was really fun to mix up and so easy to make into little loaves. I loved it and it you try it I hope you like it, too.

More photos here:

http://zolablue.smugmug.com/gallery/3506188#197819612

Sourdough Semolina Bread – Maggie Glezer, A Blessing of Bread

Skill Level: Expert

Time: About 20 hours (about 8 1/2 hours on baking day)

Makes: Two 1-pound (450 gram) breads

Recipe Synopsis: Make a sourdough starter and let it ferment overnight for 8 to 12 hours. The next day, mix the dough and let it ferment for 2 hours. Shape the dough and let it proof for 5 hours. Bake the breads for about 45 minutes.

For sourdough starter:

2 tablespoons (30 grams/1.1 ounces) very active, fully fermented firm sourdough starter, refreshed 8 to 12 hours earlier

1/3 cup (80 grams/2.8 ounces) warm water

About 1 cup (135 grams/4.8 ounces) unbleached AP flour

For final dough:

1 1/3 cups (225 grams/7.9 ounces) fine semolina flour

1 2/3 cups (225 grams/7.9 ounces) unbleached AP flour

1 1/3 cups (300 grams/10.6 ounces) warm water

2 1/4 teaspoons (11 grams/0.4 ounce) table salt

1 tablespoon (18 grams/0.6 ounce) mild honey or 1 tablespoon plus 1 1/2 teaspoons (21 grams/0.8 ounce) granulated sugar

Fully fermented starter

EVENING BEFORE BAKING

Mixing the sourdough starter: Rub starter into water until it is partially dissolved, then stir in the flour. Knead this firm dough until it is smooth. Remove 2/3 cup (135 grams/4.8 ounces) of the starter and place it in a sealed container at least four times its volume, to use in the final dough. (Place the remaining starter in a sealed container and refrigerate to use in the next bake.) Let the starter ferment until it has tripled in volume and is just starting to deflate, 8 to 12 hours.

BAKING DAY

Mixing the autolyze: In the bowl of a stand mixer, combine the semolina and AP flour. With the paddle attachment on low speed, stir in the warm water until well combined. The dough will look very granular and wet. Let the dough rest covered for 20 minutes.

Mixing the dough: Add the salt, honey or sugar, and starter to the dough and mix on medium speed with the dough hook for about 10 minutes, or until the dough cleans the sides of the bowl and becomes very extensible. If you did not weigh your flour to measure it, be prepared to adjust the consistency of the dough. The consistency will also be profoundly influenced by the degree to which the semolina was milled and its freshness. Add at least a tablespoon or two of water if the dough is very firm, or at least a tablespoon or two of flour if the dough is impossibly sticky and does not clean the sides of the bowl. The dough should feel very soft and tacky but be easy to handle and have a smooth sheen; it should clean the bowl at the beginning of kneading.

Fermenting: Place the dough in a large bowl and cover it with plastic wrap. Let the dough ferment for about 2 hours. It will probably not rise much, if at all.

Shaping and proofing: Line a large baking sheet with parchment paper or oil it, or flour two linen-lined bannetons. Turn the dough out onto a lightly floured surface. Divide the dough in half. Shape it into simple rounds or long shapes and position the loaves seam side down on the prepared sheet or in the bannetons. Cover well with plastic wrap and proof at room temperature. It should triple in size; about 5 hours.

Preheating the oven: One hour before baking, position an oven rack in the upper third position and remove any racks above it. Place a baking stone on it, if desired, and preheat the oven to 425°F (220°C/gas mark 7).

Baking: When the loaves have tripled and do not push back when gently pressed with your finger but remain indented, they are ready to bake. If you have proofed them in bannetons, flip each one onto your hand first, then flip it seam side down onto an oiled baking sheet or, if using a baking stone, onto a semolina-sprinkled peel. Score the loaves with a single-edged razor blade in a decorative pattern. Spray or brush them with water and bake for 45 to 50 minutes, until very well browned. After the first 30 minutes of baking, switch the loaves from front to back so that they brown evenly. When the loaves are done, remove them from the oven and let them cool on a rack.

dmsnyder's picture
dmsnyder

My sourdough starter routine: a FAQ

My Sourdough Starter Routine: FAQ

December 30, 2014


I get questions about how I manage my sourdough starter frequently enough that I decided to put the information in a single blog entry to which I can refer in the future. What follows applies to a sourdough starter/levain containing mostly white wheat flour. Mostly rye and mostly whole wheat starters are different beasts.

Please understand that this is my routine. It has worked well for me for a number of years. I am not presenting it as the only way to manage sourdough starters. It may not be the best way at all for some one else. But, as I said, it works for me, and here it is:

My starter was originally was purchased from KAF in about 2008. (See: Classic Fresh Sourdough Starter - 1 oz.).

Taking care of mother

I keep my "mother starter" in the refrigerator. It is fed at a ratio of 1:2:4 (Starter:Water:Flour). When feeding the mother, I mix 50 g starter, 100 g water and 200 g flour to make 350 g total. This is refrigerated imediately after mixing. I refresh the mother every 2 to 3 weeks. The flour feeding is a mix of 70% AP, 20% WW and 10% Medium or whole rye.

Getting active

When preparing to make bread, I generally refresh the starter as a liquid starter at a ratio of 20:50:50 (Mother starter:Water:Flour) using the same flour mix described above. This is fermented to peak activity at room temperature (generally about 12 hours). 

This refreshed liquid starter is then fed again according to the specific formula I am following. In other words, the degree of hydration, the flour mix, the ratio of levain:water:starter and the fermentation time and temperature are variable.  When posting a formula, I specify these variables. This may involve converting the refreshed liquid starter to a firm starter.

Ripening

How long it takes to ferment a starter before it is ready to feed again or mix in a final dough depends on four variables (at least those are the ones I can think of at the moment):

  1. What flours you put in the starter. For example, flours with whole grains ripen faster because of their mineral content.

  2. The ratio of seed starter:flour:water. If you introduce relatively more seed starter, it has a “head start” and will ripen faster. All other things being equal, a more liquid starter will ripen faster than a more firm starter.

  3. The ambient temperature. A warmer temperature speeds up metabolic processes, including fermentation, at least within the usual range of kitchen temperatures. (The Temperature/Metabolism curves for fermentation and acid production are beyond the scope of this FAQ.) This effect can be rather dramatic. As a consequence, any instruction for how long to ferment a levain without specifying the ambient temperature should be taken with a grain of salt. (In fact, adding salt to the levain is one way of slowing fermentation down, but that's another topic for another day.)

  4. The flavor profile you want for the bread you are making. A “younger” levain will generally be less sour. A more “mature” levain will have more acid and make bread that is more sour. (Assuming the formula for the bread is otherwise the same.)

 How can you tell how ripe a levain is?

There is a lot of confusion about the criteria to use in judging the ripeness of a levain. The most common criterion I see is how much it has expanded, and “doubled in volume” is most often the specific criterion. The problem with this is twofold. First, unless you are fermenting your levain in a graduated container or have marked your container yourself, doubling is hard to measure accurately. Second, I don't think doubling carries the same meaning for liquid as for firm levains. And, at no extra charge, here is a thirdfold: Depending on the flavor profile you want, doubling (even if you could measure it accurately) may be too much or not enough.

So, as implied, I use somewhat different criteria depending on the levain's hydration, and I do use a container that is graduated, and I do use a semi-transparent container, so I can view the internal structure of the levain, not just its surface. My container is also tall relative to its diameter and has relatively straight sides. It is more like a cylinder than a bowl. This provides support to the ripening levain that permits greater expansion.

My Sourdough Starter Fermentation Container

Ripeness criteria for a firm levain

A firm levain is one with a hydration level of around 50%. That is, it contains half as much water, by weight, as flour. A firm levain can expand in volume a lot more than a liquid levain. So, volume expansion is actually a useful criterion for ripeness. A doubling in volume is generally associated with enough yeast activity to raise your dough well, but it may not be ripe enough to have fully developed flavor. I usually let my levain triple or quadruple in volume before I mix it in the final dough. In addition to volume expansion though, I look for an extensive network of large and small bubbles throughout the levain. I can see these through the walls of the container. I look for a well-domed top of the levain. And, last but not least, I look for any signs that the levain has had a decrease in volume, which indicates excessive ripeness. This is indicated by a concave surface, rather than a dome.

There is a lot of wiggle room between “ripe enough to raise dough” and “peak of fermentation, just short of collapse.” A less ripe (“young”) levain will make a sweeter bread, one with more creamy flavor from lactic acid formation. A riper (“mature”) levain will have relatively more vinegar-like, acetic acid sourness. Besides the criteria already mentioned, the aroma of the levain tells you the relative prominence of lactic versus acetic acid. You could use your sense of smell alone to judge when your levain is at the point of maturity you desire, in order to achieve the flavor profile you want for your bread.


Firm Levain, just fed

Firm Levain, 10 hours after feeding. Note: Approximately doubled in volume. Full of bubbles. Domed surface. I regard this as a still "young" levain.


Firm Levain, after 10 hours. Note: Domed surface. Some bubbles on surface.

Ripeness criteria for a liquid levain

A liquid levain is one with a hydration level of around 100%. That is, it contains equal weights of water and flour. A liquid levain cannot expand as much as a firm levain. Quite simply, all those water molecules get in the way of connections between folds of the long gluten molecules that provide structure to a firm levain and a bread dough. Now, a liquid levain does expand as fermentation produces CO2 gas, but this forms bubbles that rise to the levain surface and pop rather than getting trapped in a gluten web and causing levain expansion. If you use a glass container or a semi-transparent plastic one to ferment your liquid levain, as it ripens you can see the internal structure of the levain become full of tiny bubbles – almost like a mousse.  On the surface, you see bubbles forming, faster and faster as the levain gets riper, until they actually form a froth on the levain's surface. The surface of the ripe levain often has a "wrinkled" appearance.

As with a firm starter, one can choose to use the liquid starter “young” or more “mature.” With a liquid starter, as with a firm starter, levain recession or collapse indicates that you have let your levain over-ferment.


Liquid Levain, just fed.


Liquid Levain, just fed.


Liquid Levain after about 9 hours fermenting at room temperature. Note: Bubbly interior.


Liquid Levain surface after about 9 hours fermenting at room temperature. Note: Bubbles forming. Surface just beginning to wrinkle. This would still be "young."

The consequences of levain over-fermentation

Over-fermentation implies any combination of several bad things. The yeast may have fermented all the free sugars they can get at. Reproduction and fermentation will both slow down. The levain may not be as potent in raising the dough to which it is added. The levain may also contain excessive amounts of metabolic byproducts, especially organic acids. A little acid is good for both flavor and gluten strength. Too much acid is bad for yeast growth. An optimally ripened levain has positive effects on gluten structure, but, over time, protease activity increases, and those enzymes will degrade gluten. (That's why a very over-ripe sourdough starter that hasn't been fed new flour for a long time gets more and more liquified.)

What's missing?

There is another important variable in my routine for sourdough starter feeding and use, and that is the manipulation of fermentation temperature. Temperature effects the rate of yeast and bacterial growth and metabolism dramatically. Different metabolic processes are favored by different temperature ranges. Temperature changes can change the flavor of your bread. However, that is an advanced topic which is beyond the scope of this FAQ.

 The one temperature manipulation I will discuss is cold retardation. I often refrigerate my levain, usually at the point that it is nearly fully mature. I do this for two reasons, primarily. The first is, quite simply, my convenience. If I have to go out (or go to bed) at the point that a levain is going to be optimally ripe and ready to mix into a dough, I will stick the levain in the refrigerator, maybe for a few hours, maybe for a day or even two. The other reason I refrigerate a levain is to make it more sour. Especially a firm levain will generate more acetic acid in a cooler environment.

If I have refrigerated my levain, before mixing it into the final dough, I will usually let it come to room temperature. Sometimes, I will let it ferment further at a warm temperature, for example 86 dF in a proofing box. It is appears almost over-ripe already when it comes out of the refrigerator, I usually use warmer water when I mix the dough, so the over-all dough temperature is no excessively lowered by cold levain.

 I believe I have addressed the questions I get asked most often about my sourdough starter care and feeding. As indicated, there are additional more advanced topics I have not addressed in this FAQ. Maybe I will another day. 

I hope this helps.

Happy baking!

David

RonRay's picture
RonRay

Yeast Water & Other Wee Beastie Bubbles (No Math)

Yeast Water & Other Wee Beastie Bubbles (No Math)

There is a Chinese proverb, of which, I am very fond:

The beginning of wisdom is to call things by their right names.

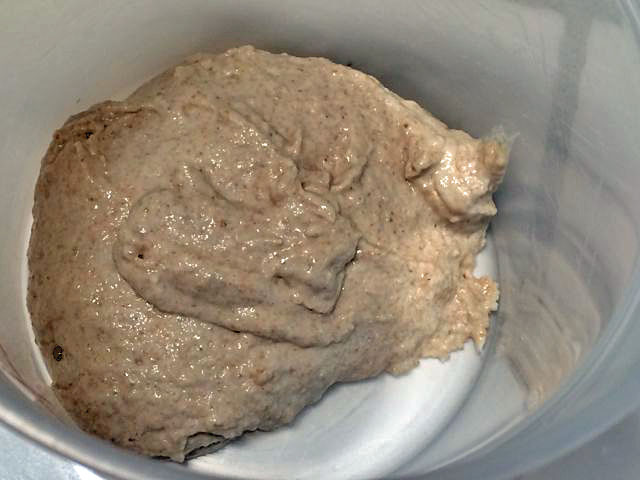
      a  Highly Active Culture  of  Apple Yeast Water


Having no delusions of being wise, I often go ahead and refer to things, for which, I have never found a proper name. However, I do try to state the meaning that I think they may deserve.

*** Some terms and the meanings I place on them when I use them.

Yeast Water (YW)... a specific instance of:
A quantity of nearly total water, which contains an active culture of microscopic life forms that will consume various nutrients and release carbon dioxide while doing so.

Yeast Water, Yeast Water Levain (YWL)... in general, intended, or already mixed with a gluten type flour:
A culture started from any type of YW that is mixed with flour and used in the same way as Sourdough Levain or Commercial yeast.

AYW, RYW, PYW, CYW, GYW, etc.... abbreviations for what is used to maintain the YW culture, such as:
Apple YW, Raisin YW, Prune YW, Clementine YW, Grape YW, etc. Used where the 1st letter's meaning should be clear to anyone.

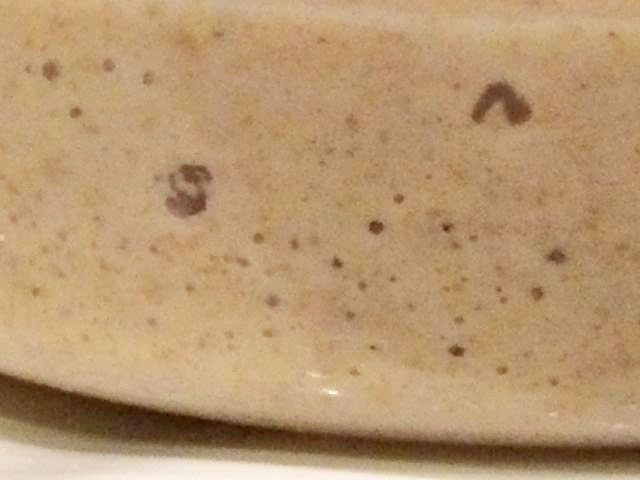
Dust, as in apple dust, raisin dust, etc....
The accumulation of particles on the bottom of a YW culture, resulting from small parts that the culture has reduced to separate "dust" parts.

Highly Active Culture... general usage.
A Yeast Water culture that shows large amounts of activity - CO2 creation - can be in the form of bubbles rising in the actual water of a YW jar, or in a levain, which would be judged exactly as one would judge a sourdough levain.

Strong YW... general usage
Only measurable by testing growth when mixed with at least a A-P flour level gluten. This would apply to most YW that is being stored in a fridge, although, if returned to room temperature, the indications of a Highly Active Culture may re-manifest themselves.

Wild Yeast... general usage:
Any of the countless species of eukaryotic micro-organisms (over 1,500 species currently described, according to Wikipedia [1]) excluding those used in Commercial Yeast and known as Baker's Yeast, as well as Brewer's Yeast - both of which are Saccharomyces cerevisiae, and have been used for thousands of years (See Wikipedia [1, 2] ) There is no earthly reason, that I can think of, which would justify your needing to remember any of those technical terms...

Wee Bonnie Beasties (WBBs)... my personal usage
Any of the Wild Yeast that I might find useful. Sorry, but as the writer, I do have some prerogatives.

*** General Thoughts about Sourdough and Yeast Water - as far as our usage here.

All I need to know, and therefore, all I care to touch upon here, is how do I understand the cultivation, care, and usage of Yeast Water (YW) to the extent that I get the levains that will aid me in making foods I bake, &or eat - I do eat banana levain without the baking step and occasionally drink some fermented beverages..

Think of these Wild Yeast, for a moment, as if they were humans. You can find different groups that like different music, or different foods, different climates, etc. There are different groups of Wild Yeast that like wheat, others rye, others apples, grapes, etc. I think you see the point. But, they all need a source of the foods that they can eat, or that their companions can convert into foods that they can eat, and in hard times, they will eat things that they would probably not prefer to eat.

Unlike humans, Wild Yeast and their companions don't normally have drilling equipment, and while they often can be transported by air currents, they do not have wings to pick and choose locations. So, if chance places them where there are the sugars, starches and whatever that is needed for these Wee Bonnie Beasties (WBBs) to survive and multiply, then there is a very good chance that they will do just that.

Those great survival places are, more often than not, on the outer surface of commonly grown food sources. The same ones that humans often like, and for the same reasons that the WBBs like them - they are good sources of sugars, starches, and flavors - and low sources of deadly compounds (the latter consideration does not necessarily apply to humans).

Now, let us consider where these few fanciful premises can take us:
1/ The world is full of concentrated sources of these WBBs.
2/ They are there for your finding and taking.
3/ With some trial and (perhaps,) error, you should be able provide a home and diet that will keep both you and your WBBs happy.
4/ They will rise your doughs, and uncomplaining will die so that you may bake your daily bread.
5/ It is not too likely that they will remain that happy, if you force them to change their ways.
6/ Your WBBs are happy and healthiest on their original diets, and if you shift the diet, there is a very good chance the new WBBs - that come in with the new food you provide - will take over and the originals will diminish, even disappear completely.

The last item - "6/" - means that Apple Yeast Water (AYW) can shifted into a sourdough (SD) and that SD into a banana levain (BL) and the BL into a sour-rye levain (SRL) and even converted back into an AYW... Assuming you had strange tastes in what you liked to spend your time doing.

*** The Skin Game...

None of this is new., and the methods of starting a sourdough culture are filled with examples of people using the facts - without necessarily connecting the dots. Nancy Silverton has pushed using grapes to start a sourdough culture [3]. Dan Lepard says to use raisins, currants, and whey. [4] In an hour you could no doubt find any number of other examples of "Helpers to get a sourdough started".

What most of these have in common is that they start a YW culture long enough to establish an environment to foster the growth of the WBBs found in wheat flour. In my first Apple YW culture [5] I used a ¼ tsp of potato YW to jump-start the apple YW fermentation.

You do not need to be a "health nut" to realize that the skins of most commercially sold fruit have been treated
with chemicals to kill "everything except humans" ( not sure about the "except' part of that statement ). So, if you feel you must start from scratch, and use the skins of your source item, and then I would say buy from a source of untreated fruits or vegetables. Once you have any Wild Yeast culture - Sourdough, or Yeast Water, you never need to use skins again, and there are other benefits, I find, to using only the pure flesh of the fruits. Although, I will admit the "garbage disposal" approach of skin, cores, and table scraps, etc. will work to create a YW culture.

*** Do Not Be Afraid to Experiment ...

If you do not try things, you will only have "book learning". I would think, that anyone, which only had book learning would be much the poorer for the lack of the real life complement . Book learning is great, but not to the exclusion of life's lessons.

*** Why Not Just Use a Sourdough Culture and Be Done With It?

Well, I don't know. Why do anything different? Why use Sourdough and not just commercial yeast? Perhaps to learn how to do new things, perhaps, of the increase the range of options that new methods might offer you. These types of decisions are personal choices - choices each of us have to make for ourselves.

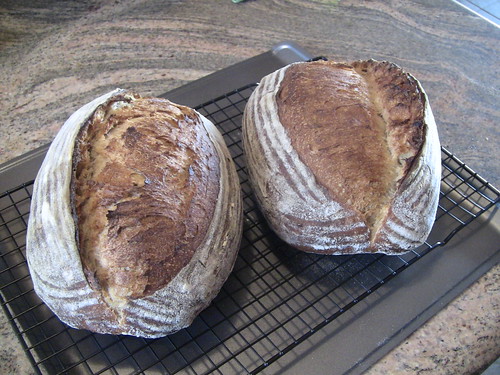
For me, there is also the fact that the general absence of the "Sour", as in sourdough, is desired at times. The fragrance from various YW levains is a worthy addition to the palette that I can use to paint the flavor of a bread, and the colors of different YW can add visual appeal to the baked goods - bread, or any other items.

In addition, there are differences in how individual types of YW levains behave. Some people have observed much faster rises with raisin YW (RYW) in certain cases, I find differences in the temperature effects on AYW, as compared to SD levains.

I also find there is the greater ease in the maintenance requirements for my AYW than there is for my SD culture. I love SD, and would never knowingly give it up. However, SD gives me one family of flavors and crumb colors, YW gives me a wider range of everything. I also have had what I consider as great results using a mixture of SD and AYW to create a bread with superior flavor, tang, color, and moistness - all based on my taste, of course, not necessarily to your taste.

But, I am not using my time writing this to play salesman. I could care less if you use Yeast Water, but two things have brought me to try to write this: First, I find - perhaps well intended - postings that are full of statements based upon fantasies (at best), and information that is only creating more "Baker's Legends" and secondly, I find more and more of my personal time being spent answering the same questions over and over. While this is a time consuming task, to the extent that I can write down these answers in a referenceable posting, the less future time that will be spent on those same answers.

*** How Does One Start a Yeast Water culture...

Well that depends on several things, but in general:

1/ Choose the type of YW you want initially. I would suggest picking one that others have had good results at starting. For that, I would say try one of these three types: Grape, Raisin, or Apple, although, feel free to try anything that turns you on.

2/ You will need to start from scratch only if you have no source of existing Sourdough, or Yeast Water cultures. Since all you need to jump-start a culture is a very small amount of any existing culture, I am sure anyone you know that has a culture could give you a part of teaspoonful of their culture to get you started.

3/ Starting with, or without, a jump-start culture:

a/ Take a clean glass jar that has a lid. I find short squat a POOR choice, and jars taller than wide a BETTER choice.

b/ Fill about one fourth of the jar's height with your raisins, or crushed grapes, or your apple slices.

c/ Add water that is chemical free. Fill that jar about half full. I find having the fruit filling only half the volume of water is convenient for the following reasons. Raisins initially sink and as the YW starts developing, raisins will start to form bubbles and then rise, grapes tend to be a mixed bag as to floating initially, while apple slices float initially, but when really depleted they often become "waterlogged" sink to the bottom. In any case, having a section that is more or less a clear water area offers greater opportunity to notice changes that start to occur in your YW culture. This is even more true when it is a fully mature and active culture.

d/ If you wish, you can add a small amount (½ tsp.) of honey, or sugar, but it is not necessary with sweet fruit at first, but would be with vegetables.

e/ IF Jump-starting ONLY:

e-1/ Using an existing YW: add a teaspoon full of the active existing YW to your new starting YW jar,
e-2/ Using an existing SD: ½ teaspoon of SD to cup of water, stir to dissolve the SD in the water and wait for half hour to get some settlement in the mixture. Then, extract a teaspoon of the top portion of the water mixture and add it to your new starting YW jar.

f/ Place a lid on the jar, and leave the jar out of direct sunlight, at room temperature (RT), or up to about 82ºF (27.8º C)

g/ Once a day (more often will not hurt) remove the lid, and stir to release any CO2 and to add oxygen to the solution. Some people find a vigorous shaking of the jar helps. It may, I have never tried it.

h/ If after 4 or 5 days, you do not see bubbles starting to forming, raisins or grapes floating, add another sugar or honey treat. If after 7 days you see nothing, throw everything out and find a new source for your fruit purchases. Start over.

*** After the Bubbles Flow...

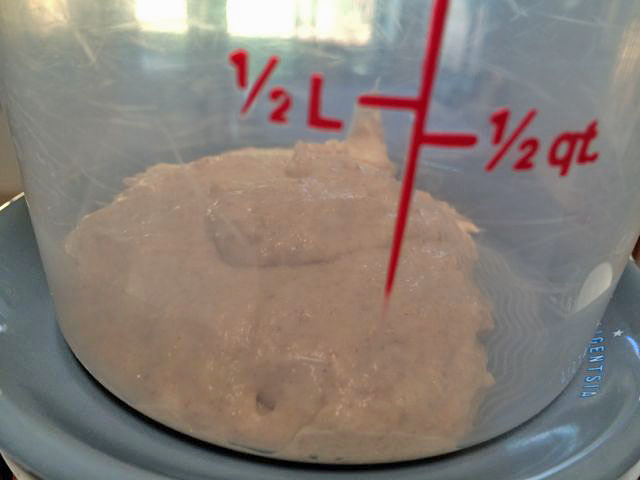
Once you have convincing evidence of the YW becoming active, you can make your first proofing test. After all, the only proof of a worthwhile leavening culture is in the rising of the dough. So make your first YWL (YW levain). I would do it something like this:

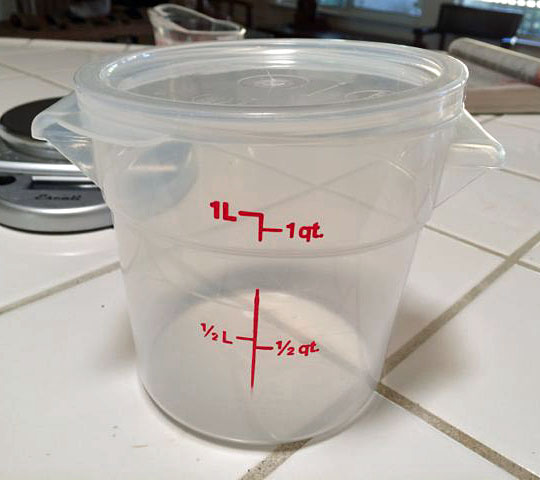
1/ Find a small glass container, something very much like a typical morning fruit juice glass, with close to vertical sides. The straighter the container's sides, the easier it is to judge how much the levain has risen.

2/ If you weigh the empty glass and record the weight for future reference, it might come in handy. Use your tap water to see about how much a quarter of a glass of water weighs. If it is about 40 to 50 ml (grams), or about 1½ ounces, that would seem a good enough amount. Empty the glass.

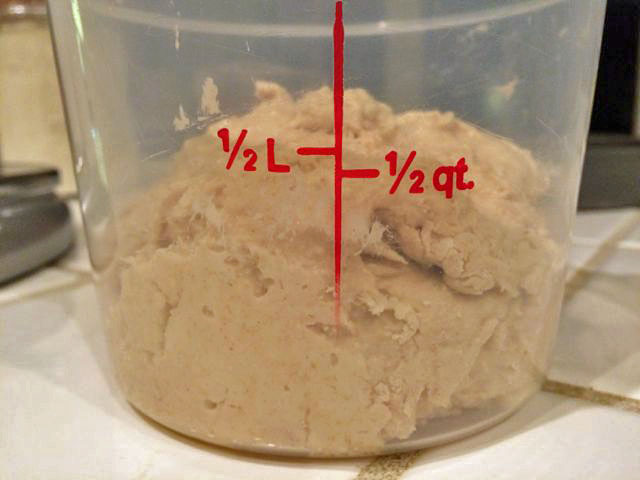
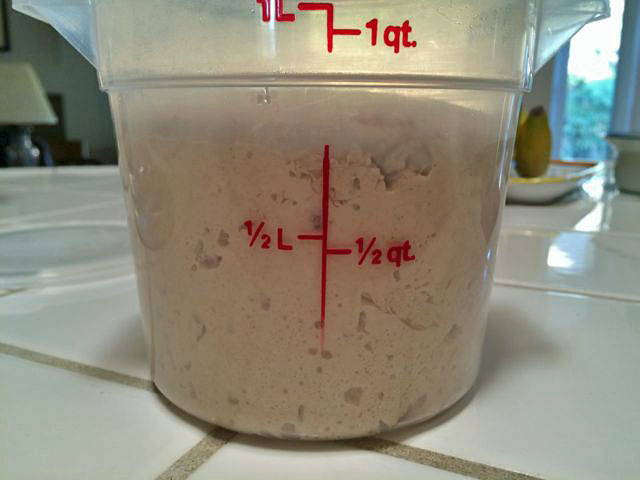
3/ Measure out something close to that weight in the YW from your culture (replace the same amount of water back into the culture) and also measure an equal weight of A-P flour. Combine the YW and flour in your "test beaker", mix the two ingredients and place a rubber band around the glass at the level of the mixture's top surface. Place it in a warm location where you can check for activity and place anything - like a piece of light cardboard on the top to cover the opening - to keep anything from falling in and to minimize evaporation from the mixture.

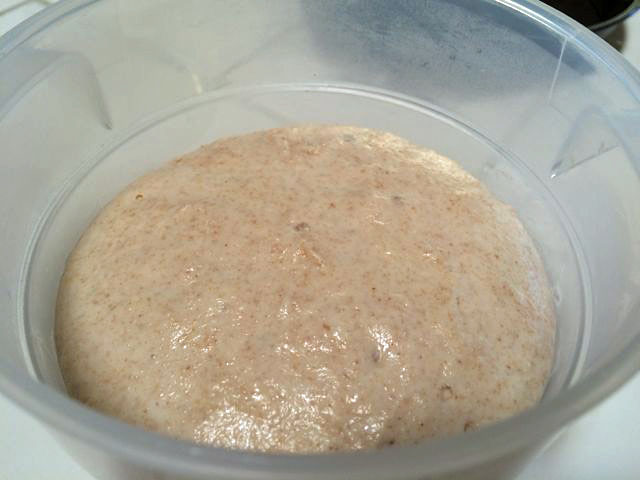
4/ check the level, as compared to the rubber band's location to see if it is rising. If it raises to a level equal to the twice as high as the rubber band in 4 or 5 hours you have a very active levain (and YW culture) if it has not risen at least half that much in 24 hours, then your culture is not ready to use yet. In between those extremes, you make your own judgment calls.

*** After Your Proof of Life on Mars...

Okay, you now are the proud owner of a Yeast Water culture. You have the information needed you make new types of YW, should you wish to. You should realize that the characteristics of your YW will take some time to know well, and that changing the way you feed it, or adding different types of materials into the culture will all change anything you have learned about it - just as switching the A-P flour in a White Sourdough levain to a diet of rye will make it radically different in its behavior, so too will switching from apples to prunes change the characteristics of your YW. Using certain fruits will make any YW worthless for use in bread making - these are a few: kiwi, pineapple, mango and papaya.
I strongly recommend you read the materials on TFL and elsewhere before making any changes in your culture's feeding and care. Here are a few places to start such readings [6, 7, 8, 9].

*** Apple Yeast Water (AYW)...

From here on, nearly everything is specifically meant to apply only to my AYW and SD cultures, although, I will touch on some of my observations that I made with other YW types. However, as I have said above, different YW types may have different characteristics, and often do.

So, for example, if you want specifics on RYW, search TFL on "teketeke" or "daisya". If you want info on AYW, search TFL on "hanseata" or on "RonRay" and if on a wider range, search TFL on "yeast water", &or the references listed at the end of this writing.

Of course, if you are looking for deep information on the nature of SD, search TFL of "Debra Wink", who knows more facts about sourdough WBBs than anyone I ever encountered.

*** Some Q & A that have been posed in the past...

= Q
...Now that I have my RYW proofed , should I just keep that and use it like I do my SD?
= A
...No, keep your yeast water away from flour, until you want to use it for baking...


= Q
...Okay, but why?
= A
...It appears that anything the grows and offers nutrients on its skin/surface/husk/etc. will attract wild yeasts, Labs, and who knows what else. different wee beasties will find different nutrient sources preferable to others. So, your raisin yeast water (RYW) will get competition from the beasties that love flour, and soon you will not have sweet RYW, but sourdough.


= Q
...You said you use 3 builds to make your YW levain. My SD works fine with one or two. Why use more.
= A
...I used the straight method on one of wao's YW breads and it took 16 hours to rise. With SD, generally, you've done refreshes and have a good feel for just how active the SD is. If, like many people, you keep YW in the fridge, until you want to use it; you have a very poor basis to know just how active it is. It is simple for me to take a small amount (10 to 20g) of highly active YW from my active culture and add it to an equal amount of A-P flour and in a few hours have proof positive of strong growth. Using that when it is between 60% to 80% risen and moving to Build #2 gives a strong growth and guarantees that the Build #3 will provide exactly what I planned for in rise times and volume of my breads. No 16 hour surprises anymore.

= Q
...Can I get a sour YW by keeping it in the fridge too long?
= A
...I can only tell you what I have experienced:
1/ If I start with my AYW & Flour, and use AYW (not tap Water) in all builds, I have never gotten a sour levain - even after a week in the fridge.

2/ If I start with my AYW & Flour, and use tap Water (not AYW) in all builds, I have never gotten a sour levain after 3-builds - even after a week in the fridge.
3/ If I start with my AYW & Flour, and use tap water (not AYW) in all builds, and then retain some of that levain to back slope a new series of builds (built on the old levain) I have started to get a sour by the 6th build. All 6 builds being built largely at 51ºF/10.6ºC in a wine bottle fridge.
In other words: One can convert an AYW Levain into a normal WSD by maintaining an initial YW Levain in the same manor as a sourdough culture is maintained. My guess is that the continuing refreshments of wild yeast in the flour, without any fresh YW allows the flour-loving wild yeast to take over the culture.
4/ If I start WSD (White Sourdough) Levain, and use my surplus AYW from the fridge, instead of tap water, in my builds, I can build a SD-AYW Levain that is both sour and has a beautiful fragrance and makes a sweeter, more moist loaf. It has become a favored method of mine.
5/ I have never found a condition where the sourness decreased with increased time - either in, or out of a fridge.
6/ THIS MAY BE of relevance... All of the above is with Apple Yeast Water and KAF A-P flour. Since we know that each type of flour is likely to have a different group of "favorite" wild yeast living off of it, all of these results might very well be different if the flour type changed. For instance, if you used Rye flour, I would not be at all surprised if you had different results. Thus, with your different formulae, you may well be creating different conditions than those that I have been dealing with.

= Q
...How do you know your AYW is slowing down, or needs food, and such?
= A
...I use the bubbles as a measure of the activity. A slow down, usually is for one of these reasons:
1/ The pressure got too high (because I tighten jar the lid too tight). If so, there will be swishing with foaming when the pressure is reduced by removing the lid.
2/ The water has gotten too alcoholic (I do not consider that "sour", but you might) and that water goes into the fridge to use in levain builds - other than the first build. If you cannot tell alcohol by smell, taste it.
3/ The WBBs want their sugar cube "fix" (I give one cube about every 4 to 7 days, and whenever I change water).
4/ The apple slices have little left to give. (depending upon the apple type, 8 to 10 days).
BTW I have 2 jars that have been maintained this way for at least five months, and never cooled, nor refrigerated.
5/ When the apple slices sink, you know the activity is very low. The slices float, when fresh, but as time passes they become more waterlogged, and need the bubbles to hold them up !!!
Now, I was talking about my AYW (apple yeast water in those points. But it should provide a background for any wild yeast culturing - with adjustments for the oddities by "beastie types"

Here is an image of the bubbles rising in my AYW culture. They are difficult to photograph, and often I need to use a magnifying glass to see them clearly. The streams of bubbles can be very small, fine, bubbles, but they start in the apple dust at the bottom and stream to the apple slices at the top. Of course, when a sugar cube is dropped in, it sinks into the apple dust at the bottom. So, there is a lot of sugars in the material at the bottom.

= Q
...What IS your favorite fruit water? Why is it your favorite?
= A
...Well, I would call it Yeast water, not fruit water - vegetables work well, too. When I was fairly new with YW experiments, I thought I liked Clementine YW best. But Apple YW was a close second choice.

Clementine lost out more for practical considerations: I crushed the sections and only added those parts and the juice. (I found the skins of citrus, if used in YW made tastes I distinctly dislike).

Of course, any source that is highly seasonal, is not a good choice for one's "standby" YW. Grapes, raisins, and Zante Currants are all reliable year round sources, as is/are potato flakes (instant potato). Some sources must be avoided, if it is bread you wish to use the YW in - such as the warning I posted elsewhere: "Certain fruits should not be used for yeast waters intended for leavening bread. They are those fruits (or vegetables) that contain Actinidain (or actinidin) kiwi, pineapple, mango and papaya. This protease enzyme breaks down protein. If you make a yeast water from these fruits, you can still use it as a meat tenderize, but NOT in your bread dough."

I discovered that prune juice worked well to make a YW, but turned out making a dense crumb that I didn't care for very much. It did make a bread that visually could pass for a very dark rye.

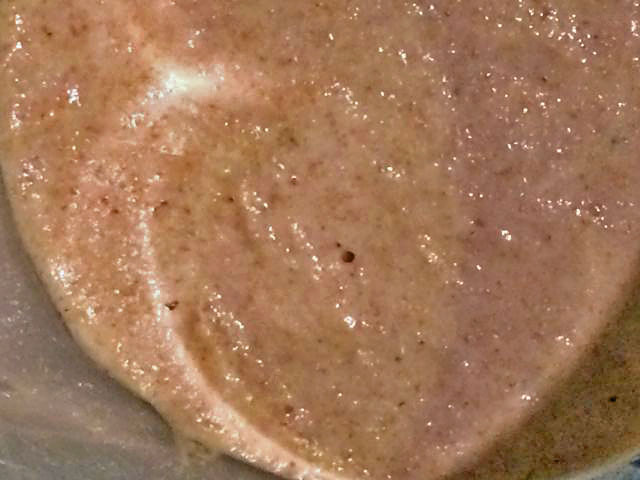
Which brings up the coloring agent aspect that YW can play. Clementine and apple give a very nice soft golden tint, as well as a nice fragrance.

For me, AYW won.

Before I give the final considerations, why apple won for me, let me shift to another consideration, and that is Starting vs. maintaining a Wild Yeast Culture.

In nature, it is the skins that usually hold the highest concentrations of wild yeast. The dusty film on the skins of grapes and blueberries are wild yeast. In the modern day world, fewer and fewer skins of fruit and vegetables that one buys in the market have not been treated in one way or another to kill or remove anything on the skins. So, it becomes a bit harder to start a YW from scratch, and potentially, much less healthy to add unwashed skins to the YW. Fortunately, the skins are not necessary in maintaining an established culture, nor are they necessary if you have any type culture existing.

Since, if you have any Wild Yeast Culture, you can start a different one by jump-starting the new one. Just as feeding a pure banana purée to SD can create a pure Banana levain, or feeding rye flour to SD can get a Sour Rye, likewise, adding a small amount of raisin YW (RYW) to a jar of skinned apple slices covered with water, will get you an AYW from a RYW in about 1, or 2 days.

Of course, if you once have an AYW culture, you have no need to ever use any skins. The WBBs will slowly build "apple dust" on the bottom of the jar's clear gold-tinted water in the middle area and floating apple slices on the top. The "apple dust" seems to be that greatest concentration of the wee beasties and while I maintain some always in the culture, it adds an extended moistness to a bread. I enjoy using the "discard" apple slices (when replaced by fresh ones in the culture) mixed with raisins, honey, brown sugar as a baked apple desert - much like my Banana levain gets used as a treat.

= Q
...How can you keep from dumping your apple dust when you change water, or use the AYW for levain?
= A
...I use a baster, just a common supermarket type, but the top squeeze bulb is smaller than most. Cleaning is not a problem, since it is only used for the AYW, and I fill a quart plastic container in the sink before using the baster to extract the AYW. As soon as the extraction is complete, I simple suck the baster full of clean water from the plastic pail, shake well and squirt it into the sink drain. Repeating that 3 or 4 times is all the cleaning required and the baster is allowed to drain/dry vertically in the rack at the sink's edge.

Surplus AYW is saved in tall jars that were once olive jars and kept in the fridge's door, and used it in Build #2s and #3s of levain builds. Thus, normally, this only requires me to need 10 to 20g of fresh AYW from the active culture's water - which is replaced at once with fresh water out of the same baster that had just extracted the used amount. That AYW, of course, is what I use to make the Build #1 of any new levain build.

There is no water loss from the active culture, except what I remove - as in the above use for new levain starts. Other than that, what gets removed is nearly all water when the water gets too high in alcohol, and that is what I use to form the fridge maintained surplus.

= Q
...So simple and it sounds like you really only have to attend to it once a week....or do you toss in a sugar cube sometime before you do what you have just done?
= A
...I enjoy watching the small streams of bubbles raising from the "apple dust" and racing up to the undersides of the floating apple slices. Several times a day, I generally pause to watch them for a second, or two. It is good to open the jar one or more times a day, and just mildly stir the apple slices - the parts exposed to the air are effected differently than those that are not. Stirring also ensures that the lid was not too tight - would not want too much pressure to build up in the jar.

Of course, to stir, is to shake off bits that become the "apple dust", as well as mixing the existing dust, thus, reducing the clarity of the AYW, so I generally do this as the last act of the day. This way the AYW has overnight to regain its clarity back before I see it in the morning.

I mentioned earlier, the signs of reduced activity in a culture, and when no other basis for the decline in activeness is found, I generally add a sugar cube. This addition, generally isn't more often than once, or twice a week, but that changes, depending on how active the culture is, and how fresh the apple slices are.


*** Some Concluding Thoughts...

Yeast Water is "just another leavening agent" It offers alternatives that can be used in baking leavened doughs. Potentially, every vegetable, or fruit could be used to create a Yeast Water, and each would have its own, often subtle, differences, but sometimes very marked effects on the baked goods. I strongly suggest you compare what you have known from your use of SD and commercial yeast to your new culture. Learn the differences, and how to use them. If you do not like what you find, shift to a different food source and ,thus, shift the type of YW you have, Do not assume they are all the same.

I hope to come back and offer links to more of the specific types of Yeast Water on TFL postings. But for now, I think this should help some of those interested in more information on the subject of Yeast Water Levains.

Updated:110517-10:50    The Yeast Water Examples with Photos TFL Links Only has been posted See link:

http://www.thefreshloaf.com/node/23597/yeast-water-examples-photos-tfl-links-only

Enjoy, and do not let your buns get burned.

RonRay

NOTE: A PDF of this document can be found at Google Docs by using the link below:

https://docs.google.com/viewer?a=v&pid=explorer&chrome=true&srcid=0B_MScoZfDZkwZDFkMmY5NWQtMTA0MS00OGE2LTllNzQtMDFkMzM1Yjg5OWZl&hl=en

*** Footnotes...

1. http://en.wikipedia.org/wiki/Yeast
2. http://en.wikipedia.org/wiki/Baker%27s_yeast
3. http://www.food.com/recipe/nancy-silverton-s-grape-sourdough-starter-316306
4. http://www.amazon.co.uk/Handmade-Loaf-Dan-Lepard/dp/1845333896/ref=sr_1_2?ie=UTF8&s=books&qid=1277986711&sr=1-2
5. http://www.thefreshloaf.com/node/20460/banana-saga-%E9%95%B7%E7%AF%87%E6%95%85%E4%BA%8B#comment-143439
6. http://originalyeast.blogspot.com/2009_03_01_archive.html
7. http://www.thefreshloaf.com/node/6012/baking-natural-wild-yeast-water-not-sourdough
8. http://www.thefreshloaf.com/node/20693/culturing-growing-and-baking-range-wild-yeasts
9. http://www.thefreshloaf.com/node/20460/banana-saga-%E9%95%B7%E7%AF%87%E6%95%85%E4%BA%8B
10. http://www.thefreshloaf.com/node/20693/culturing-growing-and-baking-range-wild-yeasts#comment-143857


dmsnyder's picture
dmsnyder

This miche is a hit!


We baked a miche the last day of the SFBI Artisan II (sourdough baking) workshop. This was one of the breads we mixed entirely by hand. The students' miches were scaled to 1 kg, as I recall, but our instructor baked a couple larger ones, using the same dough.

These miches were among the favorites of all the students for the wonderful texture of their crust and crumb and their flavor. I gave one of mine to brother Glenn, who has stopped reminding me in the past few days that I promised him the formula.

This formula is substantially different from the miche formula in Advanced Bread and Pastry. I blogged about the background of that miche last month. This one is more similar to contemporary versions such as that of James McGuire, Hamelman's adaptation of which is found in Bread.

The formula we used at the SFBI calls for mostly white flour, with a little whole wheat in the levain refreshment and a little toasted wheat germ in the final dough. From my reading, a high-extraction flour is preferred for miches. I had some of Central Milling's “Organic Type 85” high-extraction flour on hand, so that is what I used.


Total formula


Ingredients

Wt (g)

Baker's %

High-extraction flour

702

100

Water

515

73.33

Wheat germ (toasted)

18

2.5

Salt

15

2.08

Total

1250

177.91

Notes

  • The SFBI formula used 96.67% “Bread flour” and 3.33% Whole wheat flour. All the whole wheat flour is used in the levain. I used Central Milling's “Organic Type 85 Flour” for both the levain and the final dough

  • I did not use wheat germ since I was using high-extraction flour, but this ingredient did contribute to the great flavor of this bread as we made it in Artisan II.


Levain


Ingredients

Wt (g)

Baker's %

High-extraction flour

93.7

100

Water

93.7

100

Liquid starter

50

46.8

Total

237.4

246.8

  1. Dissolve the starter in the water and mix in the flour. Desired Dough Temperature: 78ºF.

  2. Ferment for 8-12 hours.


Final Dough


Ingredients

Wt (g)

Baker's %

High-extraction flour

586

100

Water

398

68

Wheat germ (toasted)

18

3

Salt

15

2.5

Levain

234

40

Total

1251

213.5

Procedure

  1. Dissolve the levain in the water. Add the other ingredients and mix thoroughly by hand. DDT: 75-78ºF.

  2. Transfer the dough to a clean, lightly oiled bowl.

  3. Ferment for 3-4 hours with 4 folds at 50 minute intervals. (I did this by the “stretch and fold in the bowl” technique.)

  4. Transfer the dough to a lightly floured board. Pre-shape as a tight boule.

  5. Cover and let rest for 20-30 minutes to relax the gluten.

  6. Shape as a tight boule and place, seam side up, in a floured banneton.

  7. Cover with plastic and retard overnight in refrigerator.

  8. Remove the boule from the refrigerator and allow to warm and complete proofing for 1-3 hours. (Watch the dough, not the clock!)

  9. 45-60 minutes before baking, pre-heat the over to 500ºF with baking stone and steaming apparatus in place.

  10. When the loaf is proofed, transfer the boule to a peel. Slash the boule as desired, and transfer it to the baking stone. Steam the oven and reduce the temperature to 450ºF.

  11. Bake for 20 minutes, then remove any water remaining in your steaming apparatus.

  12. Continue baking for another 40-50 minutes. (If you have a convection oven, switch to “Convection Bake” and reduce the oven temperature to 430ºF at this point. But see my tasting notes.)

  13. Remove the boule to a cooling rack, and cool thoroughly before slicing.

Notes on procedure

  • Traditionally, we were told, this bread is scored in a diamond pattern, but any scoring pattern that pleases you is fine. Just be aware that the diamond pattern tends to yield a flatter profile loaf than a simple square or cross.

  • This bread benefits from a very bold bake. The crust should be quite dark. It may look almost burned, but the flavor and crunchiness that is desired requires this.

  • This type of bread often improves in flavor very substantially 24 hours after baking.

    Crust

    Crumb


    Crumb close-up

Tasting notes

I sliced and tasted the bread about 4 hours after removing it from the oven. The crust had crackled nicely and was very thick and crunchy – the kind that results in crust flying everywhere when you slice it. The crumb was well-aerated, but without any really large holes. The crumb structure is similar to that I got with the miche from BBA made with this flour, but a bit more open. The crumb is chewy-tender.

The flavor of the crust is very dark – caramelized-sweet but with a bitter overtone where it is almost black. The crumb is sweet, wheaty, nutty and absolutely delicious. My note above notwithstanding, it's hard to imagine the flavor getting any better in another day.

I am enormously impressed with the flavor of the breads I have baked with Central Milling's “Organic Type 85” flour. I want more of it, and I want to try some of their other specialty flours, including those they mill for baguettes.

I will definitely be baking this bread again. I would like to make it as a larger miche, say 2 kg. Next time, I will lower the oven temperature to 420 or 425ºF when I switch to convection bake for the crust to be slightly less dark.

David

Submitted to YeastSpotting

dmsnyder's picture
dmsnyder

Philippe Gosselin's Pain à l'Ancienne (according to Peter Reinhart, interpretted by dmsnyder, with modifications)

Gosselin Pain a l'Ancienne

Gosselin Pain a l'Ancienne

Gosselin baguettes

Gosselin baguettes

Gosselin baguette Crumb

Gosselin baguette Crumb

Gosselin Pain Rustique

Gosselin Pain Rustique

Gosselin Pain Rustique Crumb

Gosselin Pain Rustique Crumb

Both Peter Reinhart's "Bread Baker's Apprentice" (BBA) and Daniel Leader's "Local Breads" contain formulas for "Pain à l'Ancienne," based on the explorations during the 1990's by several Parisian bakers of lengthening bulk fermentation to achieve improved flavor. Of course, these techniques could not have been used in the "old days" that the name of the bread implies. Bakers devoted to this new technique use modern refrigeration which was not available to their ancestors.

Reinhart based his version of pain à l'ancienne on that of Philippe Gosselin. In BBA, Reinhart describes Gosselin's method in very general terms and then says the formula he provides is modified to make it easier for home bakers. In January, 2003 Reinhart sent a message to an internet mailing list which contained a detailed enough account of what Gosselin told him to write a formula. For me, the original formula did not seem more difficult than the one Reinhart published. This is because I almost always bake on weekends when I can accommodate my activities to the original formula. So, I thought I would give it a try. My interpretation of Reinhart's interpretation is as follows:

Pain à l'Ancienne of Philippe Gosselin, as described by Peter Reinhart

Flour.......................500 gms

Water......................375 gms

Salt.........................8.75 gms-

Instant yeast...............5 gms

Mix the flour with 325 gms of ice cold water and refrigerate overnight.

The next day, remove mixture from refrigerator. Add yeast, salt and another 25-50 gms of cold water and mix thoroughly for 4-6 minutes.

Ferment at room temperature until doubled in bulk (up to 6 hours).

One hour before baking, preheat oven to 460F.

Divide into 4 equal piece and gently pre-shape into torpedos.

Rest dough 10 minutes.

Shape into baguettes by stretching to 12-14 inches, score and bake immediately with steam at 460F.

The breads I made today used the following modification and extrapolations:

1. I used 50 gms of Guisto's rye flour and 450 gms of KAF Bread Flour.

2. After the long "autolyse," I mixed the flour and water with 30 gms of additional water, the yeast and the salt. The autolysed dough had moderate gluten development already and didn't want to take in the additional water with hand stirring, so I did the best I could with a scraper, then mixed in my KitchenAid with the paddle for about 3 minutes, then the dough hook for another 3 minutes. I then transferred the dough to a 2 quart glass pitcher and used Hamelman's in-the-bowl stretch and fold technique - 20 folds, 3 times at 20 minute intervals over the first hour. I then let the dough rest, covered, until doubled.

3. Gosselin's instructions to Reinhart indicated the dough would take 6 hours to double. In my (warm) kitchen today, it doubled in 4 hours.

4. I emptied the dough onto a flour-dusted board and dusted the top. I divided the dough into 3 parts. I pre-shaped the two smaller ones into rectangles and folded each long side to the middle and sealed the seams. Those, I rested with the seams down for about 10 minutes then stretched into "baguettes" and placed them on floured parchment paper. The larger piece was just cut in half to make pain rustique, rested and similarly placed on parchment.

5. I baked at 460F with steam on a pizza stone. After 7 minutes, I removed the loaf pan and skillet and continued to bake for a total of 20 minutes. I then turned the oven off, cracked it open, and left the loaves on the stone for an additional 5 minutes.

Comments

These breads had a nice, crunchy crust and an open, tender, somewhat chewy crumb. The taste was classic sweet baguette - as good as I have ever made. My wife liked it, but said she preferred the taste of the Anis baguettes with sourdough added. No surprise, as we are both partial to sourdough breads.

I was concerned that the pre-shaping of the baguettes, which Reinhart does not call for in his adaptation of Gosselin's formula, would decrease the openness of the crumb too much. It was more open than I expected. I guess I have learned to handle dough gently enough. On the other hand, it would be worthwhile to try making baguettes with this method but just cutting the dough and stretching it, without any other shaping, to see if the crumb would be even more open.

If your baking schedule allows for Gosselin's method, I would certainly recommend you give it a try. In my hands, it makes very fine baguettes.

The pains rustique require no forming, and are essentially like ciabattas. Reinhart says this dough can also be stretched into a circle or rectangle and used for pizza. I have not tried that and would be interested in hearing from anyone who does so.

David

Pages