The Fresh Loaf

A Community of Amateur Bakers and Artisan Bread Enthusiasts.

Most bookmarked

not.a.crumb.left's picture
not.a.crumb.left

Champlain warm, cold bulk and cold retard experiment

Details are in the following thread..http://www.thefreshloaf.com/node/57222/warm-bulk-cold-bulk-and-then-cold-retarding#comment-416196

I wanted to know whether a warm , cold bulk combined and then a cold retard would possibly get me a more open crumb as I noticed this with recent ciabatta and baguette bakes.

The above thread has more detail with photos and Solano was trying something similar. My conclusion is that it is another way to time a bake and make it work but result wise from a crumb point of view it compares to my normal process with warm bulk and then straight retarding. I have to say though the oven spring was great...not sure whether to do with the cold bulk or not though...

mepnosis's picture
mepnosis

First attempt at sourdough, looking for feedback

This is my first attempt at sourdough.  The starter seems to be good and active.  I did twice daily feedings (half whole wheat, half unbleached bread flour) for 6-8 days.  It's now at a point where the starter doubles in size within a couple hours of feeding.

I used a tartine bread recipe I found on nytimes.  See attached image.  Had good flavor, though it didn't taste very "sour", maybe had just a bit more character than bread made from a poolish.  I'm pretty happy with the crumb, the crust is good too though perhaps I had too much flour in the proofing basket.  

Any feedback is welcome.

copynumbervariant's picture
copynumbervariant

Bulgur and Freekeh

5pm scald: 125 g bulgur, 210 g water, 3 g salt

6pm chill the scald

7pm autolyze: the scald, 270 g king arthur bread flour, 155 g water

9pm levain: 60 g 100% starter, 85 g bread flour, 85 g water

9pm refrigerate autolyze

7am take autolyze out of frige

8:30am knead levain and 8 g salt into autolyze

9am - 11:30am six sets of stretch and folds

3pm shape into banneton

6:30pm bake covered

6:50pm uncover

7:30pm done

Crumb was so gooey I worried. I tried flopping the dough from the banneton into the cast iron, instead of placing the cast iron on top of the banneton and flipping it over. The banneton has been getting burnt on the top from the latter. It flopped a little off-kilter. The serrated knife for scoring isn't great, I have to cut multiple times over the same place to get a deep score, and it stretches the dough around.


9pm scald 200 g freekeh with 600 g boiling water and 4 g salt (not all of it was used for bread)

9pm chill scald

9pm mix levain 50 g starter 60 g water 60 g bob's red mill whole wheat flour

9pm mix autolyze 350 g king arthur bread flour, 220 g water

8:30am knead together autolyze and levain, then knead in 9 g salt and 250 g freekeh scald

9:00am S&F

9:30am S&F

10:00am S&F

10:30am S&F

11:00am S&F

1:30pm S&F

3:00pm shape

6:45pm bake covered

7:05pm uncover

7:45pm done

There probably don't need to be that many stretch and folds, and they don't need to be so close together during a six and a half hour bulk ferment.

All the pictures of beautiful banneton patterns on here have been making me jealous, so I thought I must have been overdoing it with flour. I just did a handful of semolina this time, and the dough stuck, strangely not to the bottom but to two points halfway up the sides. Once out onto the peel, it spread in the direction of the sticking points, so I scored it with parallel cuts to expand it in the other direction. By that time it had already spread beyond the size of the cast iron. This was the first time I've used a peel as an intermediary between banneton and cast iron, and it will be the last. Slipping it off the peel caused the dough to bunch up against one side of the pan, where it burnt.

The green wheat taste of freekeh is interesting. It has a bit of astringency. Dry, it smelled like grain moths to me, but because it was a newly opened package, I thought I had probably been erroneously associating the smell of whole wheat with grain moths. Now I'm not so sure, though there aren't any moths or larvae in the freekeh.

ittehbittehkitteh's picture
ittehbittehkitteh

help with pan size!

I found a recipe that I want to try and am wondering what size pan to use. The original recipe calls for a 21 x 27 cm pan; when converted to inches this 8" x 10".  However I am having a very difficult time finding a pan that is 8" x 10" so what size pan should I use?


Below is the link for the recipe:


https://www.theinspiredpantry.co.nz/content/recipe/view/6/Ginger-Crunch

dablues's picture
dablues

Pizza Dough for 14 inch Pizza

Does anyone have a recipe for pizza dough for just one pizza 14 inch.  I don't make pizza enough to freeze dough.  Would appreciate it.  Thanks!

leftcoastloaf's picture
leftcoastloaf

Anyone (successfully) selling bread on the side?

Does anyone here successfully sell bread as a side-hustle? I love baking, and I love to eat what I'm making, but I bake much more than I could possibly eat, or should eat... Anyway, I've gotten a few compliments from friends and family that I could sell bread at the farmer's market or similar, but I have a full-time job that is currently paying the mortgage.

My question to the community here is, do you sell your bread/baked goods in addition to working a primary job, and what model do you use (subscription service, markets, etc)?

I actually only bake about 2-4 loaves a week currently, so I'm not sure how my time could scale being a one-man operation.

Elos's picture
Elos

Ambient room temp question

I’m about to purchase a 2/3 deck oven and am trying to get a handle on the room temp rise from the oven. The room is 450 sq ft. Decent HVAC in place but am thinking about adding a bit more of necessary. Thanks for the help. 

RoyalWithChees's picture
RoyalWithChees

My Sourdough Proofing Experiment

Intro:

Hello,

I am baking sourdough for nearly a year now. My Problem always was, that my breads turn our really flat, although i used the proofing times in the refrigerator from most recipes. But let me become a bit more detailed:

Dough: 900g AP flour 100g Wholegrain wheat flour + 200g 3-4h old levian + 720ml tabwarm water

Processing: Autolyse flour + water for 2h, add salt + leftover water mix and add levian fold/mix to incorporate. Bulk ferment at room temp. with 8 stretch and folds for 4h (every 30mins). Then toss out on the bench and preshape, devide in two. benchresting for 30 mins+ final shape.

Proofing: I used most recommended proofing times in the refrigerator: So around 12-16h.

Baking: Normal baking tray. Preheated oven at 275°C(527°F)for one hour. baking at 230°C(446°F). Loaf on hot tray. Created steam by using spraybottle on the bottom of the hot oven, on the loafs.

The Problem:

  Bread came out always flat and didnt opened up, where i scored them. Bread with my normal recipe


I tried to modify my proofing times. I tried to proof at roomtemp for 1 or 2h. But had no real improvements.

The Experiment:

So now to my experiment, because it always seemed like i overprooved my dough.

I made the same dough devided in 6 and prooved them differently (the rest of the procdedure was exactly like the one i normally used see above): For 45mins, 80mins and 120mins. And for each time one in the refrigerator and one at roomtemperature. I baked them directly out of the refrigerator and scored them all the same with one slice down the middle. I wrote the details on the pictures (important: Kühlschrank=Refrigerator, Raumtemperatur=Roomtemperature).

Here are my results:

overview:

Comparison between the loafs from the refrigerator to the ones proofed at roomtemperature:

Comparison between the loafs from the fridge:

Comparison loafs proofed at roomtemperature:

Crumb:

45min fridge loaf:

Crumb loaf proofed at room temp for 45 min:


Now my conclusion:

My sourdough seems to be more active than the ones most people have. Its almost like commercial yeast. I suscpected this already, because it was very hungry. I kept it in the fridge and it almost needed feeding everyday, like the normal roomtemp. sourdough starter.

Shape: The shape only was good for the loafs from the 45/80 loafs from the fridge. Means that i think everything above probably 90mins could get dangerous. The loafs proofed at roomtemperature, all were overproofed. Means that i will have to try really short times like 15-30mins.

Crumb: Didnt really improved for the refrigerated loaf. Maybe was a bit more uniform, but i will try to attach the pics for the other loafs, when i cut them open, if you are interested.

I will also try to bake normal size loaf most likely with a second(shaped) proofing for about 1h. And i want to try a run, where i refridgerate the dough after the stretch and folds over night. And then shape them.

Enough for one post. I will maybe post more pictures of my results :)


WatertownNewbie's picture
WatertownNewbie

Harvest Bread from FWSY

This is a simple bread to make and for rising involves only instant dry yeast (i.e., no sourdough starter).  My reasons for posting this in such detail are threefold.  First, perhaps a new baker might like to see what each step looks like.  (My bias I suppose -- photos helped me see whether I was on track when I was new to this craft.)  Second, experienced bakers who want a break from sourdough starter breads might be interested.  Third, this is a tasty bread and is very fast to make.  (For those used to long periods of waiting for sourdough stages to pass, this feels like baking in the fast lane.)

This bread uses a poolish that consists of all-purpose flour, water, and a tiny amount of instant yeast (barely an eighth of a teaspoon).

Those are combined in a bowl and then covered for an overnight (12-14 hours) at room temperature.

The goal is to reach a nice bubbly condition.

Along with the usual flour (all-purpose and some whole wheat), water, salt, and yeast, this bread includes wheat germ and wheat bran.  The first step of course is to weigh the various ingredients. [Note: Forkish uses 3/4 of a teaspoon of instant yeast, but I cut that back to 1/2 teaspoon based on prior experience with this dough.]

The dry ingredients are put together in my mixing tub (a 12-quart Cambro).  Water is added to the poolish and stirred a bit.  The dry ingredients are mixed with a whisk, and then the poolish/water is poured onto the dry ingredients.

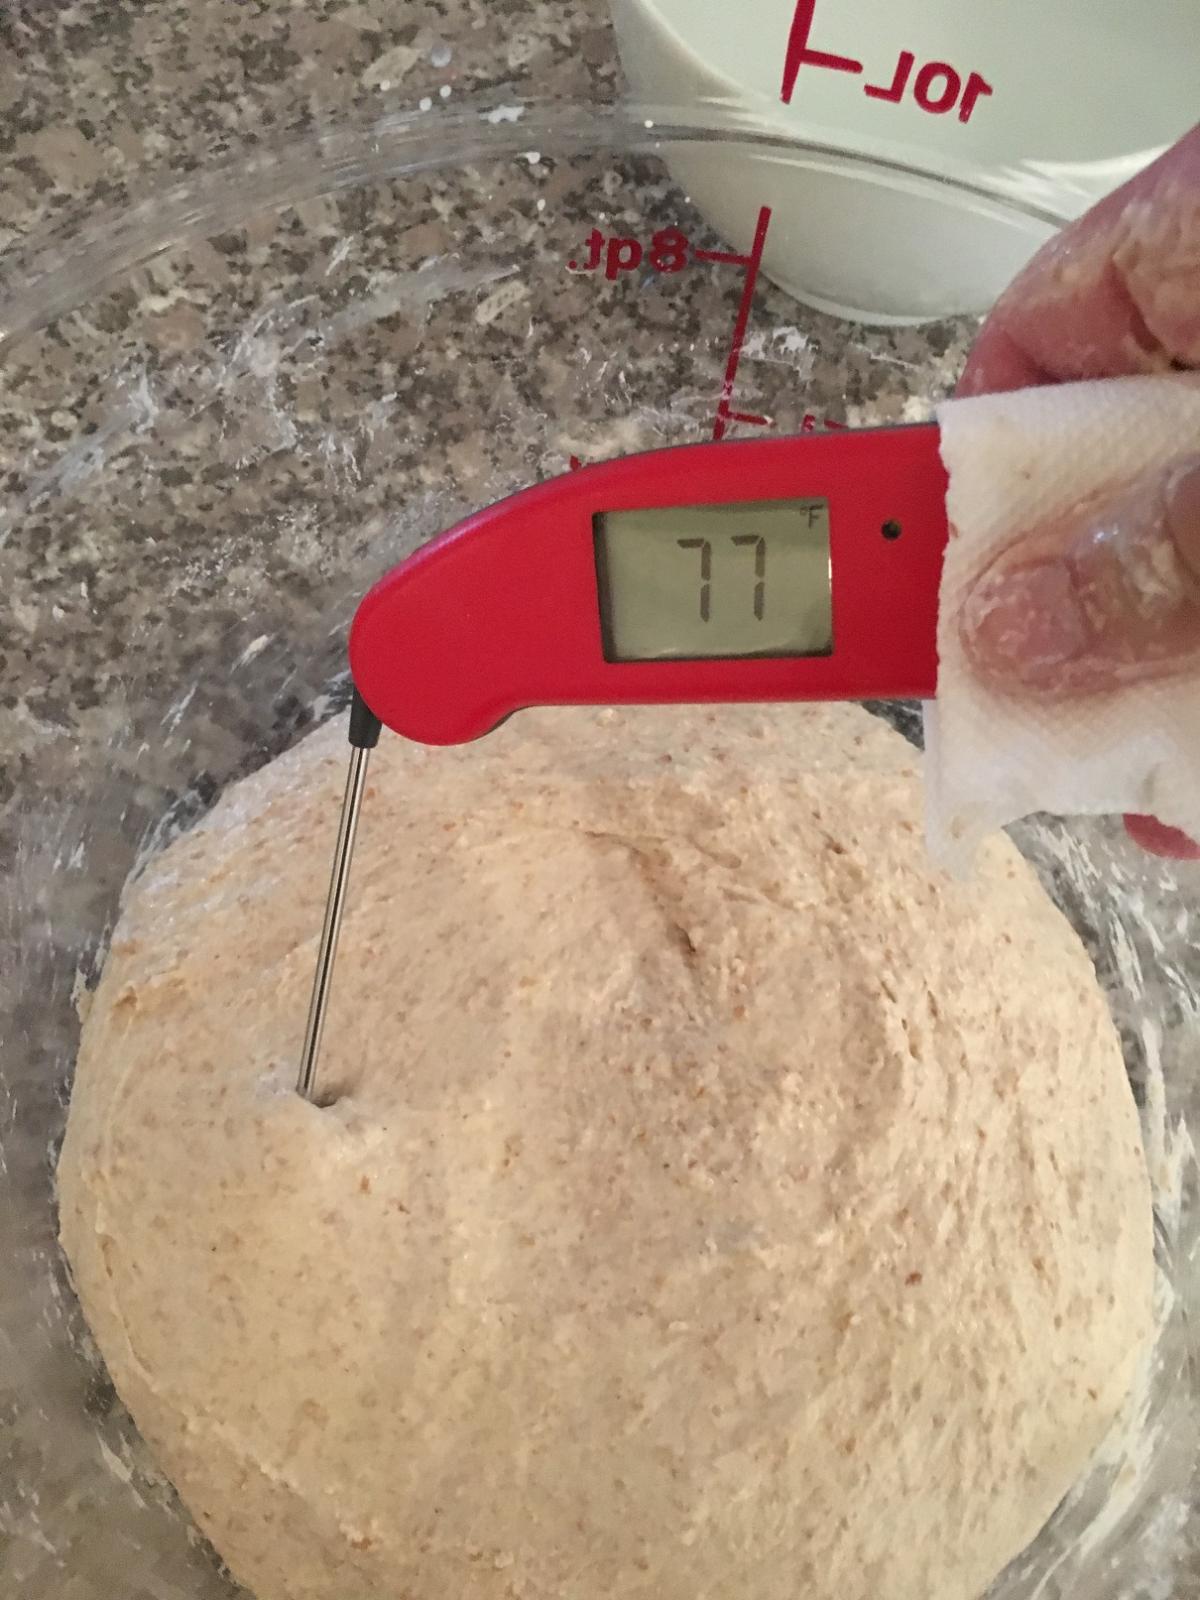
In the beginning I use a dough scraper to help distribute the water and poolish among the dry stuff, but eventually I switch to using my hand.  A nearby bowl of water for dipping my hand helps to keep too much of the dough from clinging, but this is a sticky mixture.  Perhaps eight to ten minutes of pretty vigorous kneading (a combination of Forkish's pincer, Wilson's tugging, and some pulling) is followed by  letting the dough rest for about three minutes and then another couple of minutes of kneading to make sure I like the feel of the dough.  (It has developed some gluten, exhibits elasticity, and hangs together when I pull.)  I then check the dough temperature and put the lid on for a thirty minute period.

After thirty minutes I check the dough from the top and the side and then do a set of stretch and folds.

After another thirty minutes it is time for another set of stretch and folds.  The dough is beginning to rise and show some bubbles.

Forkish suggests two S&F sessions, so now it is time to watch the dough during the remainder of the bulk fermentation.  After one more hour, the dough had risen and there were enough bubbles, and the surface was looking puffy and a bit jiggly.  Time to pour the dough onto the countertop.

Although Forkish rarely includes a pre-shaping, I like to include them, if only to promote some extensibility before final shaping.  I pre-shaped into rounds, let them sit under a linen tea towel for ten minutes, and then did final shaping (one a boule and the other a batard -- still learning how to make that shape).

The dough then went into bannetons, which were placed in large plastic bags, sealed, and left at room temperature to proof.

After a mere forty minutes (remember I said that this is baking in the fast lane) the loaves had risen noticeably and were ready for baking both visually and from the finger poke test.

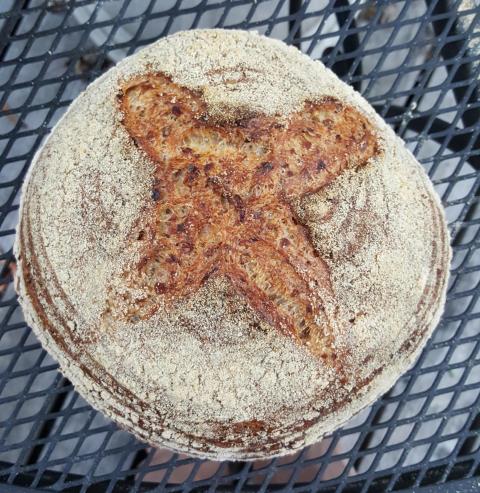
The batard went onto a sheet of parchment paper and after being scored was placed onto a peel and into the oven on a baking stone at 450F.  The boule was plopped onto my hand and then quickly cradled by both hands and placed into a Dutch oven, scored, and put into the oven at 475F.

The batard baked for forty-five minutes (with a rotation at twenty).  After thirty minutes I took the lid off the Dutch oven, and the boule continuted to bake for another twenty minutes.  The internal temperatures were about 207F.

The batard was a gift for a friend and weighed 718 grams.

We kept the boule, which weighed 870 grams.

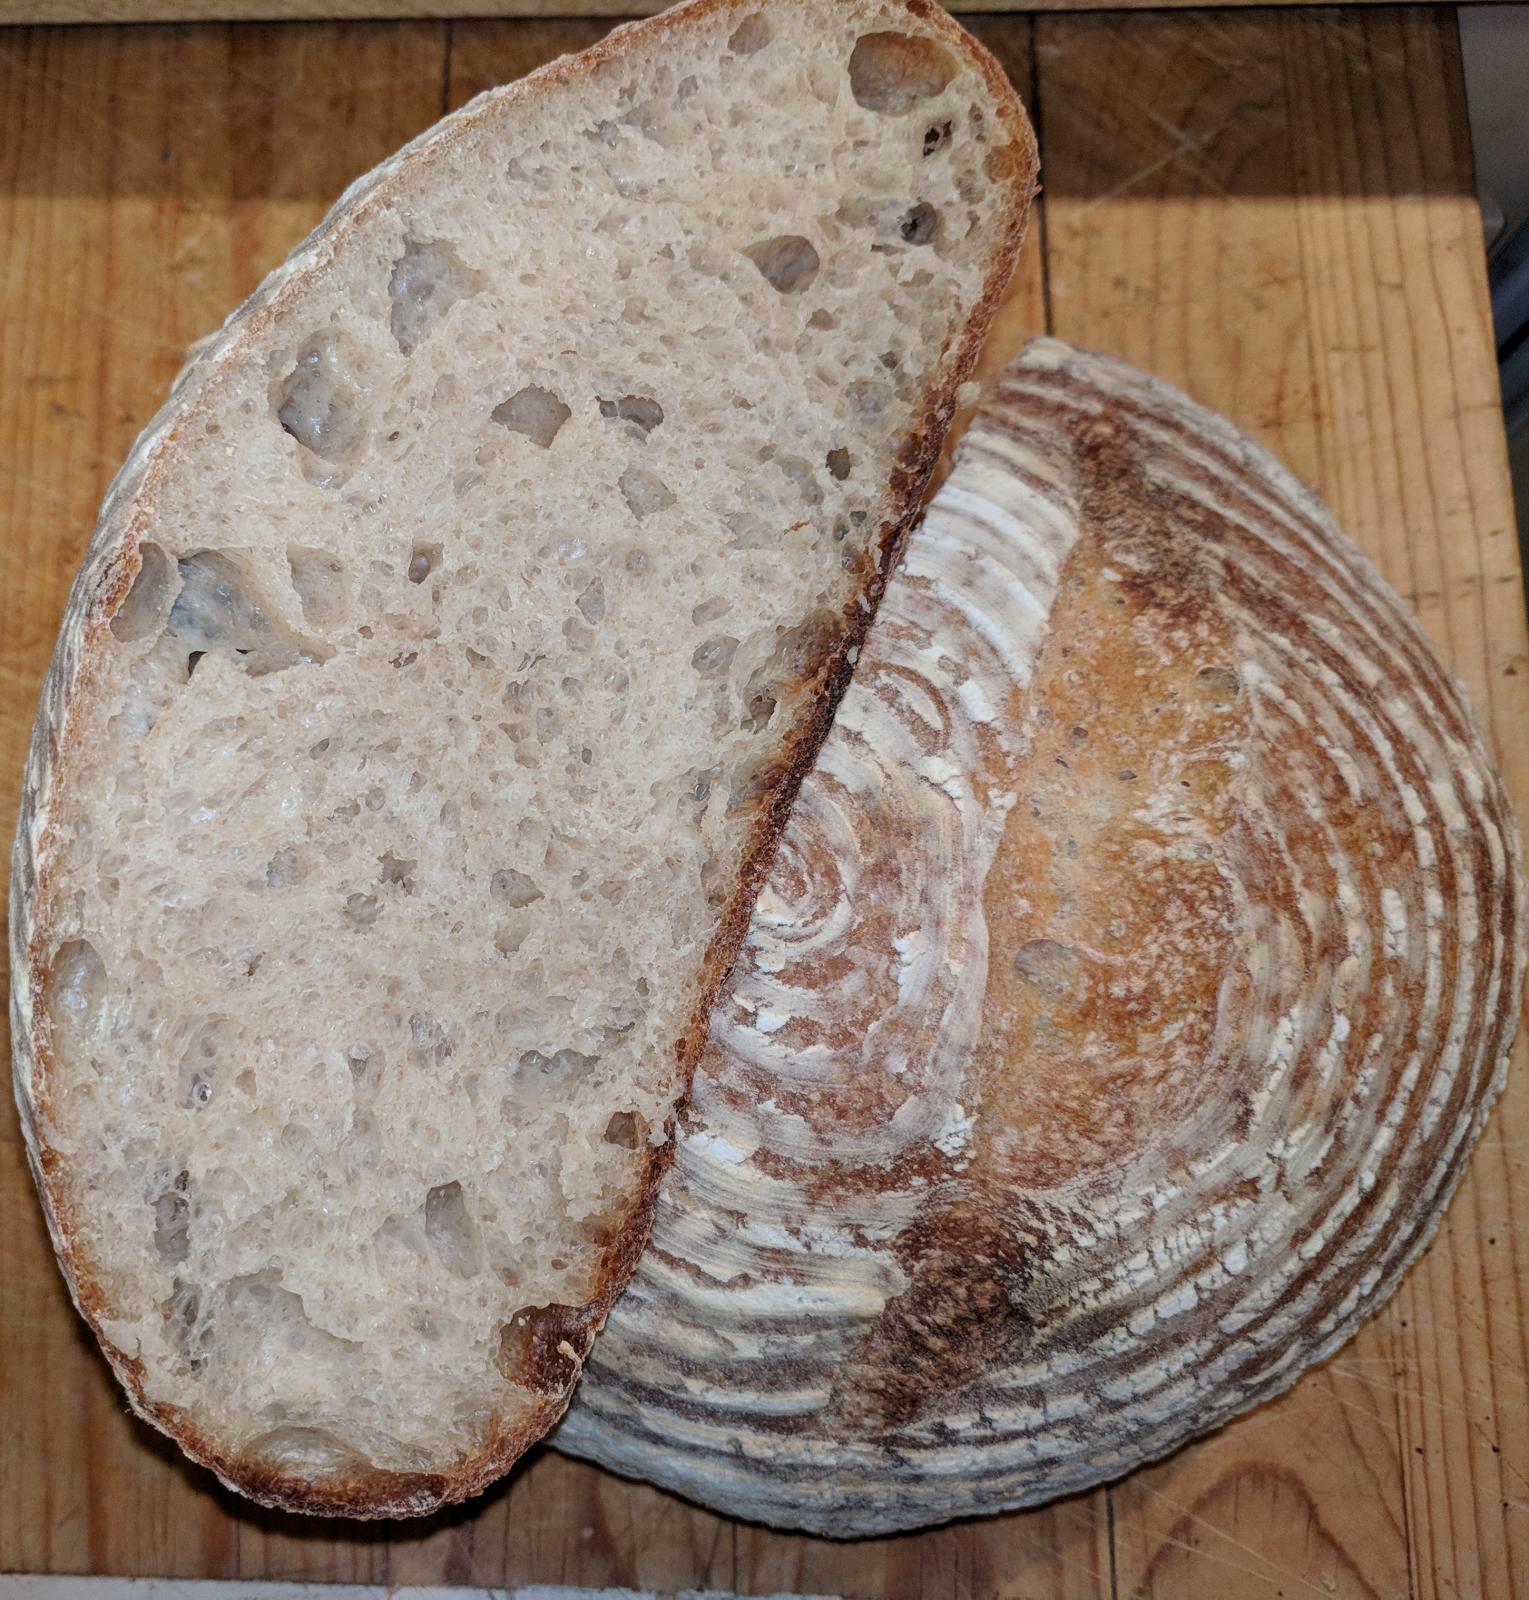
The crust is a little chewy, but not overly, and the crumb is light and tasty.  Yum.

The bread is great by itself as well as with butter, toasted, and with other toppings.  If you decide to make this bread, and especially if you are accustomed to the pace of a sourdough loaf, be alert and watch the dough during all phases.  I began a shade before 8:00 am and took the baked loaves out of the oven before noon.

mermidon's picture
mermidon

1st Trevor Wilson Low Hydration Sourdough

http://www.breadwerx.com/how-to-get-open-crumb-from-stiff-dough-video/


436g Bread Flour
24g Whole Wheat Flour
290g Water
10g Salt


Haven't baked in forever.


House temp 74F

All water from fridge 66F

Flours:KAF Bread and KAF WWW

 Finished weight 695g approx 24oz

Refriderated starter refreshed four times using KAF AP. Final build KAF Bread.


9pm-premix into fridge

12:50am-premix out on counter and levain built

9:40am-added 55g starter, not 50g. Probably accounts for dough progressing (I think) 30-45 mi minutes faster than recipe (but I kept to the listed schedule).  Haveing trouble with the ''rolling" so just did the 3 bowl spinning.

10:15-into new bowl. Dough slightly tacky and looks and feels great .

12:15-1st S&F

Oops, promised to take kids to Hotel Transylvania. Missed 2nd S&F. 

3:15-Do a late S&F, which was a mistake so close to end of bulk.  Stuck/deflated a bit. I think it is proofed, but decide to let it go the next hour due to the prior deflation, because previous loaves have been a bit under proofed, and wanting to stick to the plan.

4:15-Ugh, did I mess this up. Stuck and deflated some.  Didn't put flour down and dough stuck.  Bench knife worked but hard for me to shape like that . Attempted to preshape as a boule but pancaked and stuck

 4:45-Once I tore it onto a bit of flour, shaped following KAF shaping video . Think it was okay but not great . 

6:55-Preheat finished (20min) with rompertof preheated also   possibly over proofed? Stuck very badly to banneton liner despite rice flour . I thought I put plenty in.  Guess I need more . 


Baked 30min covered 15 uncovered internal temperature 212F.  Want slightly lighter crust next time . 


Next time

1. Lots more rice flour in banneton

2 . Flour on bench

3. Study prerounding techniques

4.  Stay with 'full' proofing

5.  Slight increase in dough amount?

6 .Wet hands helped


Pages