
Idli - Rev 4

as of 30 Oct 2022 [edited to change my fermentation temperature from 40°C to 37°C)
I have been making idli on and off for about 20 years, learning in each interval more about what not to do than anything else. There are lots of how-to posts, almost all of which have some "mandatory" action or ingredient that turns out to be unnecessary when you actually run the experiment. But the cacophony of opinions unsupported by data makes it really hard to sort out what is essential, what is optional, what is unproductive and what is provably detrimental. And while I am not done yet (as you can tell from what I offer below) I have a process that consistently produces good idli (and in the hands of a skilled practitioner very nice dosa) and in the process have assembled a lot of experimental data that illuminates what is unproductive. The technical literature is actually quite rich with quantitative and qualitative assessments that are very useful once you get past the vocabulary hurdles and translate the results back to a baseline formulation where comparisons can be made. Thus the following is offered for critique and pushback as you see fit. I am here to learn more than to teach. As has been pointed out to me on more than one occasion, what I really need is an Indian mother-in-law.
Idli
Ingredients:
Idli is a steamed dumpling made from a mixture of decorticated urad beans and short or medium grain (preferably parboiled) white rice that have been soaked, ground, and fermented.
The urad bean (Vigna mungo, black gram, urad bean, or black mapte bean), is grown in South Asia and available in your local Indian store whole with the black skin intact, decorticated whole (urad gota), and decorticated split (urad dal or sometimes white lentils). I prefer to use urad gota that is less than two years old since the bacteria that are responsible for the fermentation decline with age (or may be killed by heat sterilization or excess heat during shipping or storage) and the gota seems to retain sufficient bacteria longer than the dal does. The bacteria are associated with the urad and not the rice. My testing showed that I got better fermentation when I used urad gota than when I used urad dal (a preference confirmed by others as well).
Rice that is appropriate for idli needs to be a short or medium grain variety because it needs to have a high ratio of amylopectin/amylose. A long grain rice will not produce an acceptable idli as the rice starch (high in amylose and low in amylopectin) is not sticky enough to hold everything together when it is steamed (that is also why long grain rice is not sticky). Do not use basmati rice. A parboiled rice is the preferred rice to use. Ask for idli rice at your local Indian store. If you can’t get parboiled rice, use any short or medium grain rice that is suitable for sushi (it may be labeled as sushi rice).
Testing:
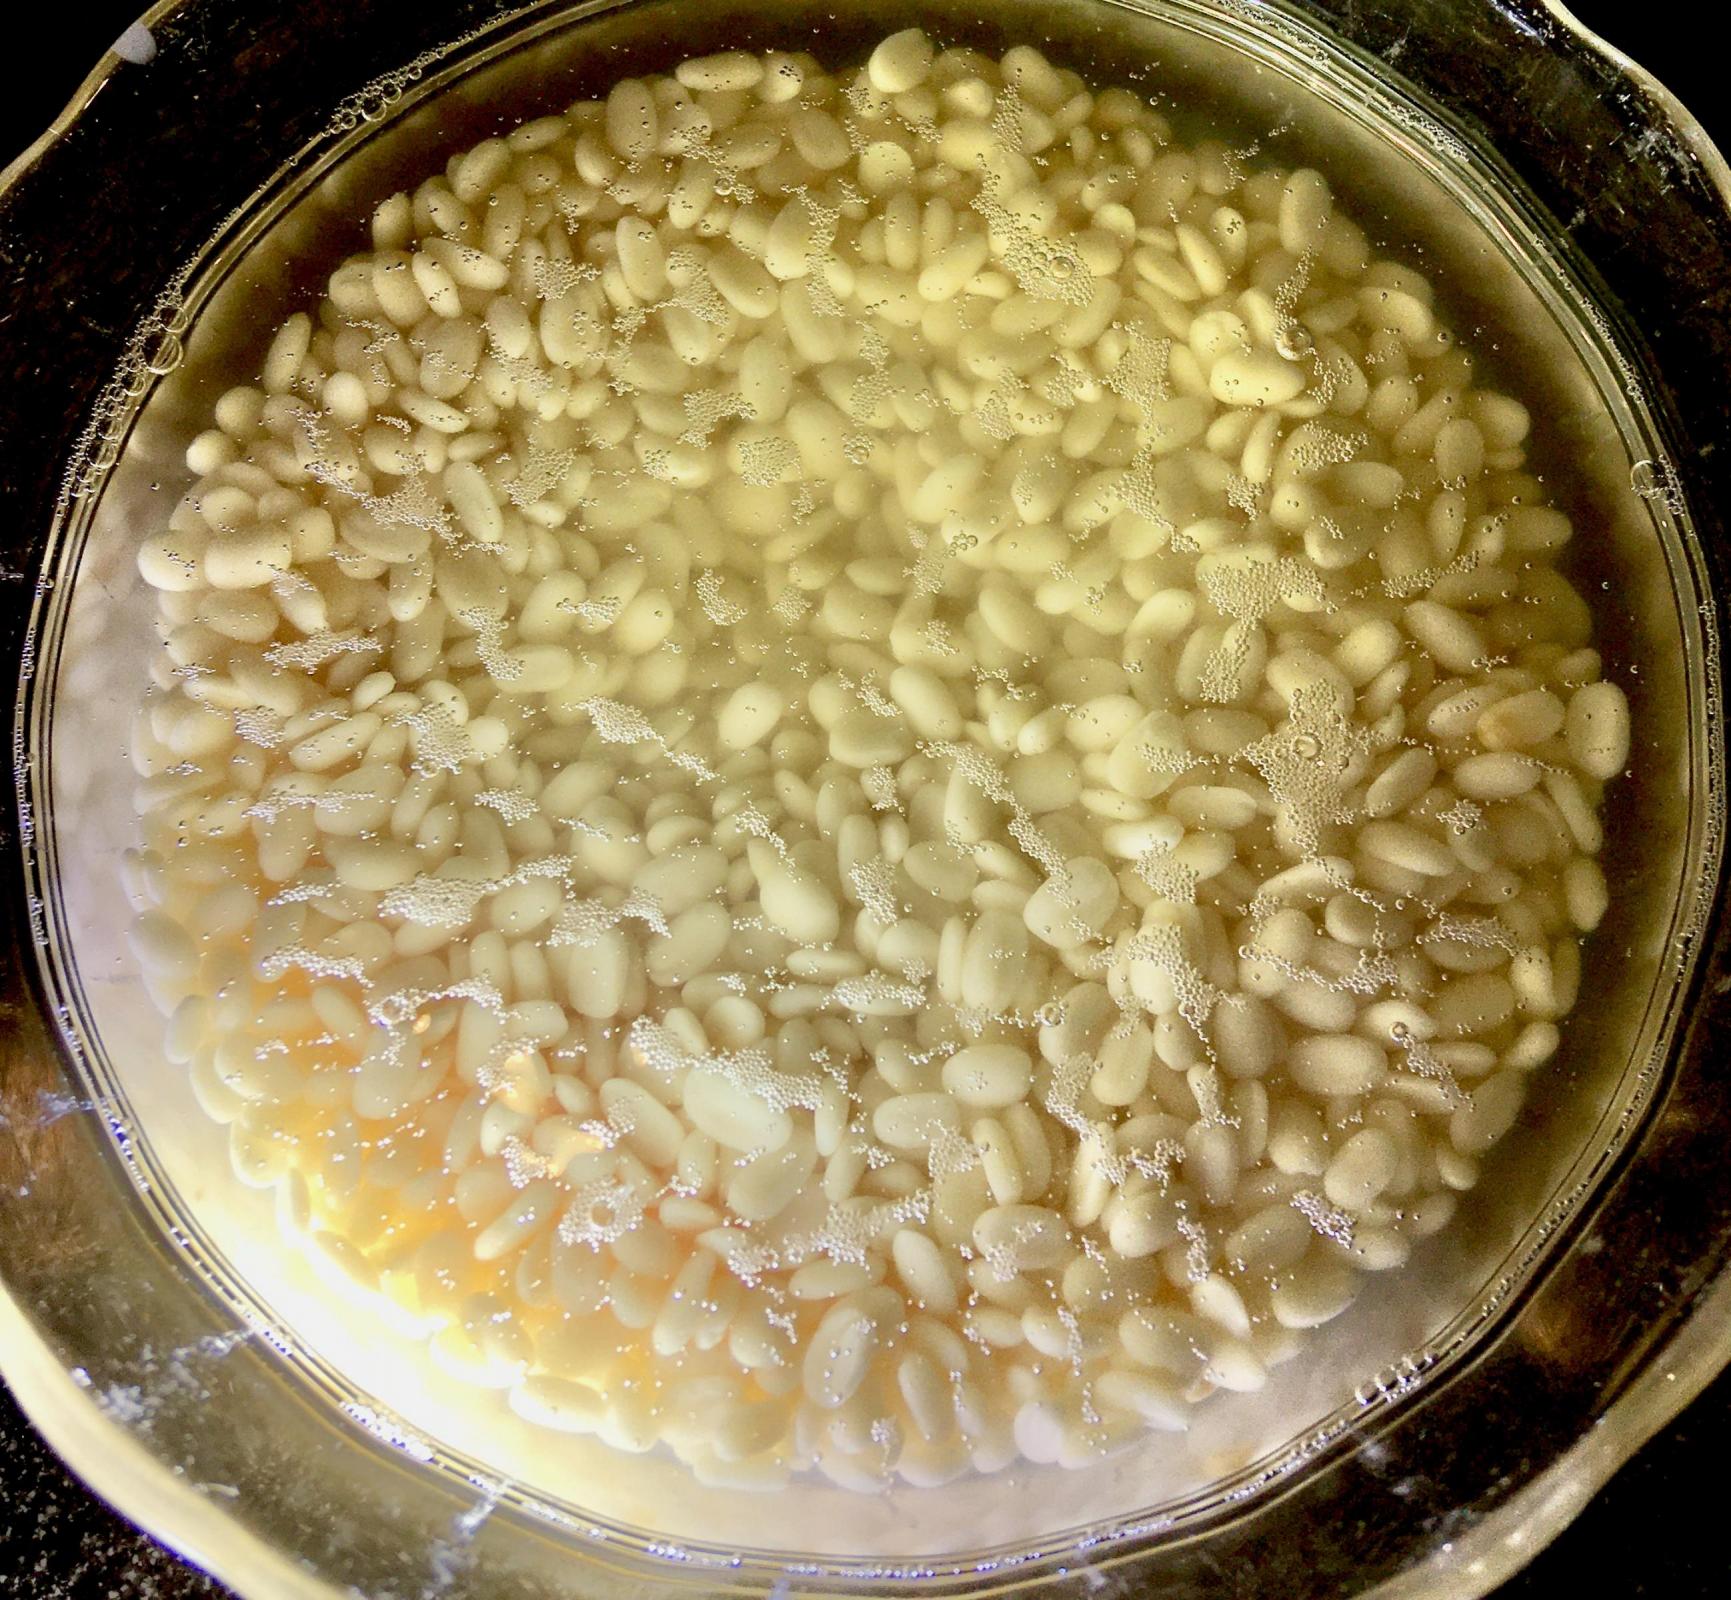
Because the age of the urad impacts the fermentation, it is prudent to check your supply to make sure that the bacterial population is robust enough to do the job for you. First look to see if there is a "use by" date on the package and try not to buy urad that is past that date. To test what you have, wash 3 teaspoons of urad and place it in a small cup or dish and cover it with at least 1 cm of water. Using a piece of paper towel remove any bubbles that are on the surface of the water including bubbles attached to the meniscus at the edge of the cup. Cover with plastic wrap and place in a warm spot (30-40°C) for 4 hours. If your urad is fresh you will find that there are fairly large patches of very small bubbles floating on the surface of the water. If there are no bubbles, or just a few patches of bubbles, your idli will not ferment well. If the bubbles cover less than 10% of the surface after 4 hrs @ 40°C you probably don’t have enough bacteria to complete the fermentation in a reasonable amount of time (13-15 hrs).
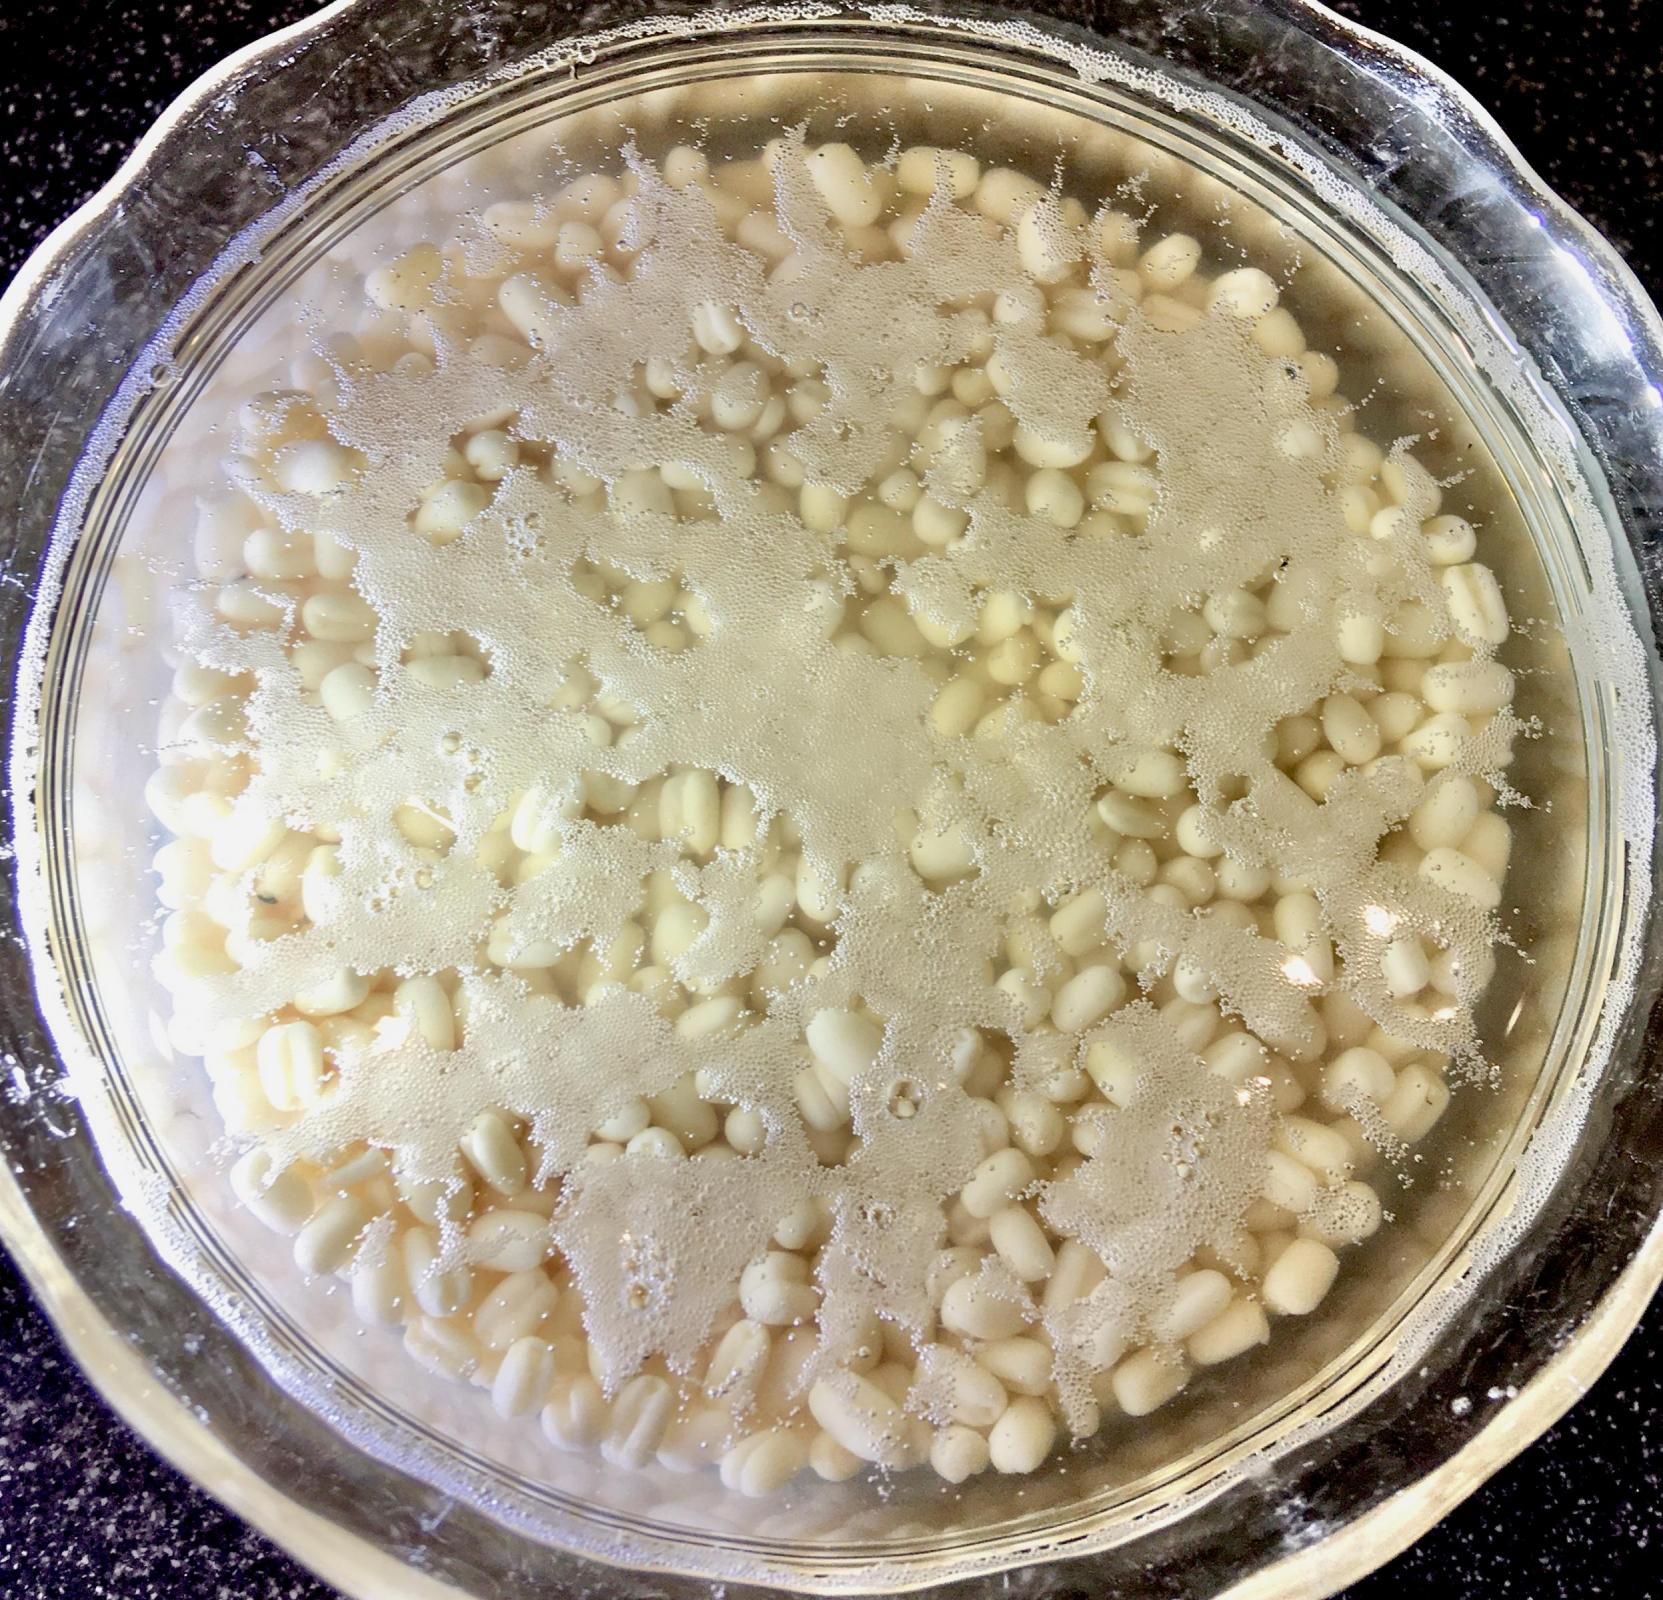
The photo on the left below (which you can blow up to full original resolution by right clicking on the photo and selecting "open in a new tab") is a batch of very old (over 10 yrs in the cupboard) urad dal after it had been soaked for 5 hrs at 99°F. You can see some bubbles on the surface indicating that it is not sterile, but also that it would take a long time to ferment a batch of idli. The photo on the right is a batch of urad gota from a package purchased about one year ago after it too had been soaked for 5 hrs at 99°F. In this case you see a nearly continuous film of small bubbles on the surface. This is the indication of a bacterially well-endowed and relatively fresh batch of urad gota.
Washing:
[Note: Rice will fully hydrate at room temperature in about 45 minutes and since it doesn't contribute any biological activity to the fermentation that is probably just a minimum time. It will become less resistant to grinding if it is left to soak longer. The urad will fully hydrate in about an hour in warm (40°C) water, and while the bacteria that drive the fermentation come from the surface of the urad, there appears to be no reason to soak for longer than the minimum time needed to just fully hydrate the beans. But since there are lots of bacterial species involved it is hard to say what an optimum soaking time is since some of the contaminants may have a combination of initial populations and growth rates that are large enough to compete with the bacteria we care about. Further experimentation is required to tease out the relative importance of a particular soaking time or perhaps an optimum combination of washing, soaking time and soaking temperature. As a result, the following is a process that I know works but can be confident is not optimum.]
There are many kinds of bacteria on the surface of the urad, some of which you would rather not have making flavor components for your idli, so wash the urad a couple of times, rubbing them between your hands to remove surface contamination, then add enough water to fully submerge the urad and let them soak until fully hydrated. Time is a function of temperature but at typical room temperature 15-25°C, 90 minutes enough, and at 40°C an hour is plenty.
Wash the rice a few times until the water runs clear to remove any surface starch that is left over from polishing then pour off the washing water and add back enough clean water to soak the rice.
Soaking:
Both the urad and the rice need to be fully hydrated before they are ground, so make sure that there is enough water in the soaking container to keep the urad and rice fully submerged for the full soaking time.
Grinding:
There is a debate about whether you should carry over the soaking liquids to the grinding process, with the advocates suggesting that there are bacteria in the soaking water that are needed for a proper fermentation. When I ran the experiment, doing it both ways (grinding using the soaking water and grinding using fresh water) the results demonstrated that you don’t need to use the soaking water as the fermentation was at least as rapid when using fresh water for the grinding process. This doesn’t mean you have to use fresh water, but it does mean that there is no apparent reason why you must.
When the urad and rice are done soaking, pour off the soaking water and transfer the urad to a sieve and rinse it under running water. Put a bowl on your scale and tare the scale; transfer the soaked urad to the bowl. The scale now shows you the weight of the dry urad plus the weight of water that was absorbed during soaking. Add water until the scale shows 4x the weight of the dry urad (for 64g of urad that would be 256g for urad + water). Transfer the urad and water to the grinder.
Now take the soaked rice and put it in the sieve and wash it and transfer it to the bowl on the scale after it has been tared to show zero and add water until the scale shows 2.25x the weight of the dry rice (for 192g of rice this is 432g for rice + water) then set the rice and water aside until the urad has been ground and transferred to the fermentation container.
With the urad and its soaking water in a wet grinder or a (high powered) blender, grind until they make a very smooth paste, (15-20 min for a wet grinder) adding a little additional water if needed (more likely for a blender than a wet grinder) so that the ground urad flows smoothly. You want the urad to be very smooth and creamy with no sandy or gritty feel. A blender may heat up the urad so using ice water may be necessary with powerful blenders and big batches and you don’t want the urad to get above ~110°F or you may kill off the bacteria or some of the enzymes that you want to ferment the idli.
To grind urad and rice together in one batch:
After the urad is smooth, add the rice and its soaking water and grind/blend until you reach your end point. That is not a very precise description of when to stop, but some people like idli to be somewhat grainy while others demand that it be perfectly smooth, and some people add part of the rice and blend until it is smooth before they add the rest and then blend until it is just right to have a more porous idli. Again, don’t run the blender so long that the temperature of the mixture rises above 110°F, using ice water or ice if required to control it. Transfer the resulting slurry to your fermentation container.
To grind dal and rice separately:
After the urad is smooth, remove it from the wet grinder or blender into your fermentation container. Then put the rice and the clean water you added to it into the wet grinder and grind until you have the texture that you want (about like fine cornmeal). Now transfer the ground rice to join the urad in the fermentation container and whisk them together until they are fully combined.
Fermenting:
When everything is done grinding, you can add salt (I use ~2% of the weight of the dry urad + rice or 1% of the weight of the batter) either before the fermentation or wait until it is done fermenting and stir it in. There is a theory that there are some bacteria in the mix that are slowed down by the salt, and some that actually grow faster when some salt is present (that would be the Leuconostoc mesenteroides which seems to prefer somewhere around 1% salt to maximize its growth rate). I have done it both ways and while I don’t see a huge difference between adding the salt before or after the fermentation, the consensus among the cognoscenti is that adding the salt before the fermentation is the preferred method when the temperature is high (because you will slow down the fermentation rate by adding salt) and add the salt after the fermentation when the temperature is cold when you don't want to do anything to slow down what is already a painfully long process (see the experiments with iodized and kosher salt in the comments below).
The temperature for fermentation needs to be above 30°C/86°F and up to 40°C/104°F (below 30°C/86°F the fermentation time is long but tolerable if you are patient, but 40°C/104°F provides a much more satisfying timeline as it should ferment overnight and be ready for breakfast though it is perhaps harder to find someplace that stays at a constant 40°C without some amount of external control or thermal management). I have tried fermenting as high as 45°C and found that the volume expansion was very small (~5% vs 30-40% at 40°C) so I am currently running a series of experiments to clarify what temperature seems to provide the best overall result. At the higher temperatures the principle lactic acid producing bacteria (Enterococcus faecalis) does in fact do its job and after 15 hrs or so the batter is appropriately tart without being sour.
There are two bacteria that are sequentially in control of the process. {for the details see Ref 9} The first one is Leuconostoc mesenteroides which makes both CO2 (making the batter foamy) and lactic acid (contributes to the tart flavor but does not supply all of the required acid). The second bacteria is Enterococcus faecalis which begins rapid growth only after the pH has been lowered to around 5.25 by the Leuconostoc and produces sufficient additional lactic acid to drop the pH to below 4.5 (I have measured pH as low as 4.2 before the batter became more sour than tart). When the Enterococcus faecalis has stopped producing lactic acid there is a third bacteria, Pediococcus cerevisiae, that can take over after about 24 hrs and contributes additional lactic acid to the batter making it unpleasantly sour and it is considered to be a spoilage bacteria thus limiting how long you should let the batter ferment.
The optimum temperature for idli fermentation probably varies over the cycle but not enough is known about the optimum growth conditions of the various constituents in a mixed culture to specify much more than a range of acceptable temperatures that produce good tasting idli. I have had success as low as 30°C and as high as 40°C and currently control to 37°C/99°F and consistently get good results so long as the urad has enough bacteria to adequately seed the fermentation (this may change when more test data is available).
The idli batter gets foamy and rises during the fermentation process. Leuconostoc mesenteroides produces dextran which stabilize the foam; it also produces the CO2 required to puff it up. There is no yeast in idli and the Leuconostoc mesenteroides is the sole producer of the CO2 that inflates the batter, slowing down when the Enterococcus faecalis has produced enough lactic acid to effectively become the dominant component of the mixture. So, when the volume increase seems to have stopped (it hasn’t but it seems that way), the batter should be at about pH 5.25, after which the Enterococcus faecalis continues to produce lactic acid. You may stop the fermentation and make idli at any point after the batter is as tart as you like it. Typically volume expansion is mostly complete by 9-18 hrs depending on temperature and the initial contribution of Leuconostoc mesenteroides from the urad to the mix.
While it is always gratifying to see a lot of volume expansion, there is a limit beyond which it is not terribly useful. You need about 20% volume increase to assure that there is sufficient CO2 in the batter to cause the idli to puff up when steamed (I have made acceptable idli with 5% volume growth), but beyond that too much CO2 will cause the idli to collapse in the middle of being steamed. So always stir down the batter before steaming until you have about 20-25% more volume than you had when you started the fermentation. This is most important if you add the salt before the fermentation since there is then nothing that demands that you stir the batter before loading the steaming pans. If you delay salt addition until after the fermentation is complete (or put half of the salt in before and half in after fermentation) the post-fermentation mixing in of the salt will partially deflate the foam and this will keep the idli from falling while steaming. You will learn how much batter to load into each mold so that the idli do not puff up and stick to the pan above. You will need to rotate the pans so that successive pans in the stack are offset by enough to minimize the inclination for them to become stuck to the pans above and below (I made some plastic spacers that increase the distance between idli steamer trays and thus avoid (usually) having idli stick to the pan above) but the thickness of the spacer is limited in some circumstances by how many trays you want to load since (I found) that if the spacers are too thick, the stack no longer fits on the rack without removing one tray.
Steaming:
After you have greased and loaded the pans, and stacked them as appropriate, put the rack into your steamer and steam for 10-13 minutes. Then take the lid off and remove the rack to somewhere that the idli can cool off enough to let the starch crystalize (about 10-15 min) so that you can separate the racks without ripping big chunks of idli that are stuck to the pan above. This will happen when you separate the pans too early. If you wait, the idli will separate cleanly and the pan will leave a dimple in the top of the idli in the pan below.
Serving:
Remove the idli from the steaming trays with a wet spoon, a small flat spatula or silicone scraper, or anything you can slide under the edge of the idli to get them out of the pans. Transfer the idli to a plate and serve warm with coconut chutney or sambar (or whatever your specialty is).
Bibliography:
- Agarwal, R., Rati, E.R., Vijayendra, S.V.N., Varadaraj, M.C., Prasad, M.S., and Nand, K., 2000. Flavour profile of idli batter prepared from defined microbial starter cultures. World Journal of Microbiology and Biotechnology 16 (7), 687-690.
- Desikachar, H.S.R., Radhakrishnamurty, R., Rao, G.R., Kadkol, S.B., Srinivasan, S.N. and Subrahmaniyan, V., 1960. Studies on idli fermentation. Some accompanying changes in the batter. J. Sci. Indust. Res. 19, 168-172.
- Nisha, P., Ananthanarayanan, L. and Singhal, R.S., 2005. Effect of stabilizers on stabilization of idli (traditional south Indian food) batter during storage. Food Hydrocolloids 19, 179-186.
- Purushothaman, D., Dhanapal, N. and Rangaswami, G., 1977. Microbiology and biochemistry of idli fermentation. Symposium on indigenous fermented foods, Bangkok, Thailand.
- Soni, S.K. and Sandhu, D.K., 1991. Role of yeast domination in Indian Idli batter fermentation. World Journal of Microbiol. Biotechnol. 7, 505-507.
- Sowbhagya, C.M., Pagaria, L.K. and Bhattacharya, K.R., 1991. Effect of variety parboiling and aging of rice on the texture of idli. Journal of Food Science and Technology 28(5), 274-279.
- Steinkraus, K.H., Van veen, A.G. and Thiebeau, D.B., 1967. Studies on Idli- and Indian fermented black gram rice food. Food Technol. 21, 110-113.
- Role of Leuconostoc mesenteroides in Leavening the Batter of Idli, a Fermented Food of India1. S. K. Mukherjee, M. N. Albury, C. S. Pederson, A. G. Van Veen, and K. H. Steinkraus; Appl Microbiol. 1965 Mar; 13(2): 227–231.
- Diversity and Succession of Microbiota during Fermentation of the Traditional Indian Food Idli. Madhvi H. Mandhania,a Dhiraj Paul,a Mangesh V. Suryavanshi,a Lokesh Sharma,a Somak Chowdhury,a Sonal S. Diwanay,a Sham S. Diwanay,a Yogesh S. Shouche,a and Milind S. Patole; Appl Environ Microbiol. 2019 Jul 1; 85(13). https://www.ncbi.nlm.nih.gov/pmc/articles/PMC6581174/pdf/AEM.00368-19.pdf
After notes:
You may note that I have not included any fenugreek in the idli even though many people do. I do not particularly care for the flavor and after a lot of experiments found nothing to support a claim that it is needed. I thought for a long time that it was essential for either bacterial growth or as a thickener or thixotropic agent. It turns out that the bacteria don't care and produce sufficient dextran to stabilize the batter foam.
The other practice which I now put in the category of wives' tales unsupported by experiment is that there is something about mixing the batter with your bare hands that contributes to successful fermentation. If your hands are clean enough to put into the batter, they don't have anywhere near enough bacteria to impact the fermentation, and if your hands have enough bacteria on them to make a difference, then you don't want to put them into a batter that may encourage the propagation of contaminants.
The water you use needs to be good enough to drink and should not have so much residual chlorine that it kills off the bacteria you depend on. I use reverse osmosis filtered water with an activated carbon pre-filter to get rid of any residual chlorine that comes from the municipal water supply but I have never had a case where I could definitively point to highly chorinated water as the cause of a failed fermentation.
There is some data suggesting that not all urad beans harbor exactly the same bacteria which may impact the fermentation process, including the effects of washing or pre-treating the ingredients, and intermediate milestones during fermentation such as when one bacteria shuts down and another one becomes dominant.


