The Fresh Loaf

A Community of Amateur Bakers and Artisan Bread Enthusiasts.

Most bookmarked

harmo's picture
harmo

Challenger Bread Pan question

Hi everyone,

I hope you're all well. This is my first post, so I was wondering if anyone here could answer a few questions about the Challenger pan.

I know people love the Challenger Bread Pan, but for over $600 Australian (factoring in the exchange rate and over $200 in shipping) I went in the direction of the cheaper alternatives. Namely the Brunswick Bakers Cast Iron Bread Pan, and the Brisbane Sourdough Max. Both available in Australia.

At roughly $130 Australian (delivered Australia wide) and $295 (delivered to ACT/NSW) respectively these are a fraction of the $600+ (delivered) cost of the Challenger. Yet, I'm still curious...

So I've started reviewing the pans that I have and run a few tests comparing them. However, the comparison of real-world specifications is incomplete if I don't include at least some of the specs from the Challenger as well. I won't claim to have used it, I'm just aiming to provide some accurate real-world specifications, and put them "side by side" for consideration.

Information I'm looking for:

1. Real world measured weights of both the lid and the base. The weights depicted online seem to be shipping weights, rather than the pan themselves.

2. Real world measured volume of both the lid, and base (only up to wherever the base meets the lid). What I'm really asking is "how many litres (or gallons in a pinch) of fluid fills this bake volume?". If you're hand washing your pan as directed, may I humbly ask you to measure the volume, whenever it is convenient? Naturally, you can dry/bake it afterwards to reduce the chance of rust.

I tried sending my quirky questions to the folks over at Challenger, but I haven't yet received any response. Anyone willing to satisfy my insane quest for unbiased, accurate information?

I've added a pic of the two loaf pans I'm looking at so far. To my knowledge no one has compared them yet. I will, of course, happily provide my findings when I've used them more.

I hope this is of interest to someone, any assistance will be credited accordingly.

Kind Regards... and happy baking!

Hamish.


Baytree's picture
Baytree

Dough won't hold its shape


Flat dough


MarjVelacruz's picture
MarjVelacruz

Milling High Protein Soft Wheat

Hi.


How do you mill a 11.5 %P SWW and convert to 9.5%P (max) flour?


Thank you.

The Roadside Pie King's picture
The Roadside Pi...

Steakhouse Rye with rye sourdough

Very nice bread, completed from converting the wheat sourdough starter to an active rye starter to out of the oven in less than 12 hours. The bread is soft and mildly sweet. The perfect vehicle for a nice spreadable butter, low lighting, and conversation! The flour makeup for this bake (for all intents and purposes) checks all the boxes for the C.B. clocking in at 48.3% whole stone-ground rye. 

 I started in the morning at 10:00 AM by feeding my already freshly, refreshed wheat liquid starter 1:1 with half AP flour and half rye. After four hours and a good rise, I fed the hybrid starter at 100% hydration with 100% rye flour. After three hours I could notice only very little activity. to my great relief, at the 3.5-hour mark the now (for all intents and purposes) 100% rye starter had doubled! 

 In truth, one could use a rye discard starter since there is plenty of commercial yeast to provide lift! (Which was achieved nicely!)  

 Please enjoy the pictorial record of my interpretation of what a before-dinner bread should look & taste like. Please feel free to share your true thoughts both good and critical. Additionally please feel free to use and share the formula freely! This formula here is the final draft and includes all the ingredients and steps used. The post in the C.B. discussion is the work in progress rough draft. 


nickelmore's picture
nickelmore

Oil Sprayer Advice

I searched and read all the posts about oil sprayers,  Most are old or very old and only most suggest the "Misto" sprayer.

They may have been better a few years ago.  The two I am returning splatters anything thicker than water.

So what is an pure amateur dabbling in this hobby cause I have a good mixer suppose to use?

Thanks,

Gluten-free Gourmand's picture
Gluten-free Gourmand

24-hour San Fransisco Style Sourdough Method

I have a method for making a really nice, lactic-acid-tang sourdough bread that was handed down to me from my dad.  He got the recipe from some neighbors who are farmers in Washoe Valley, Nevada, the List family.  I call it San Fransisco Style because it's nice and sour like that style of bread, but this recipe was actually a little different as practiced in Northern Nevada at a high altitude.  My dad always said he wished he could get a thicker crust like they do in San Fransisco.  I think that his thin, crisp crust was likely a result of the dry, high-elevation climate he baked in. I make it in Portland, Oregon and wish I could get the thin, crisp crust I grew up with in Nevada.

As for SF Sourdough proper, I know I had it as a kid growing up in the 80's.  San Fransisco was the nearest big city, about a 3 hour drive, and we would go there to do big city stuff, including getting some authentic SF sourdough bread.  I was pretty young though and I don't remember the bakeries we went to.  We'd always visit the wharf. What I do remember very clearly is my dad's sourdough he made every weekend, and the sourdough discard pancakes we'd have on Sunday.  I really missed this bread once I moved away and when I got into making sourdough about ten years ago, I was able to recreate this recipe gluten-free with a lot of help from kind people here on TFL including Mini Oven.  You can find my 24-hour sourdough recipe here on my blog: https://glutenfreegourmand.blogspot.com/2014/03/gf-24-hour-sourdough-bread-recipe.html

I'm now working on a version that gives the recipe more of the look of SF SD with a more "white flour" visual, though due to the practicalities of gluten free it's still about 60% whole grain.
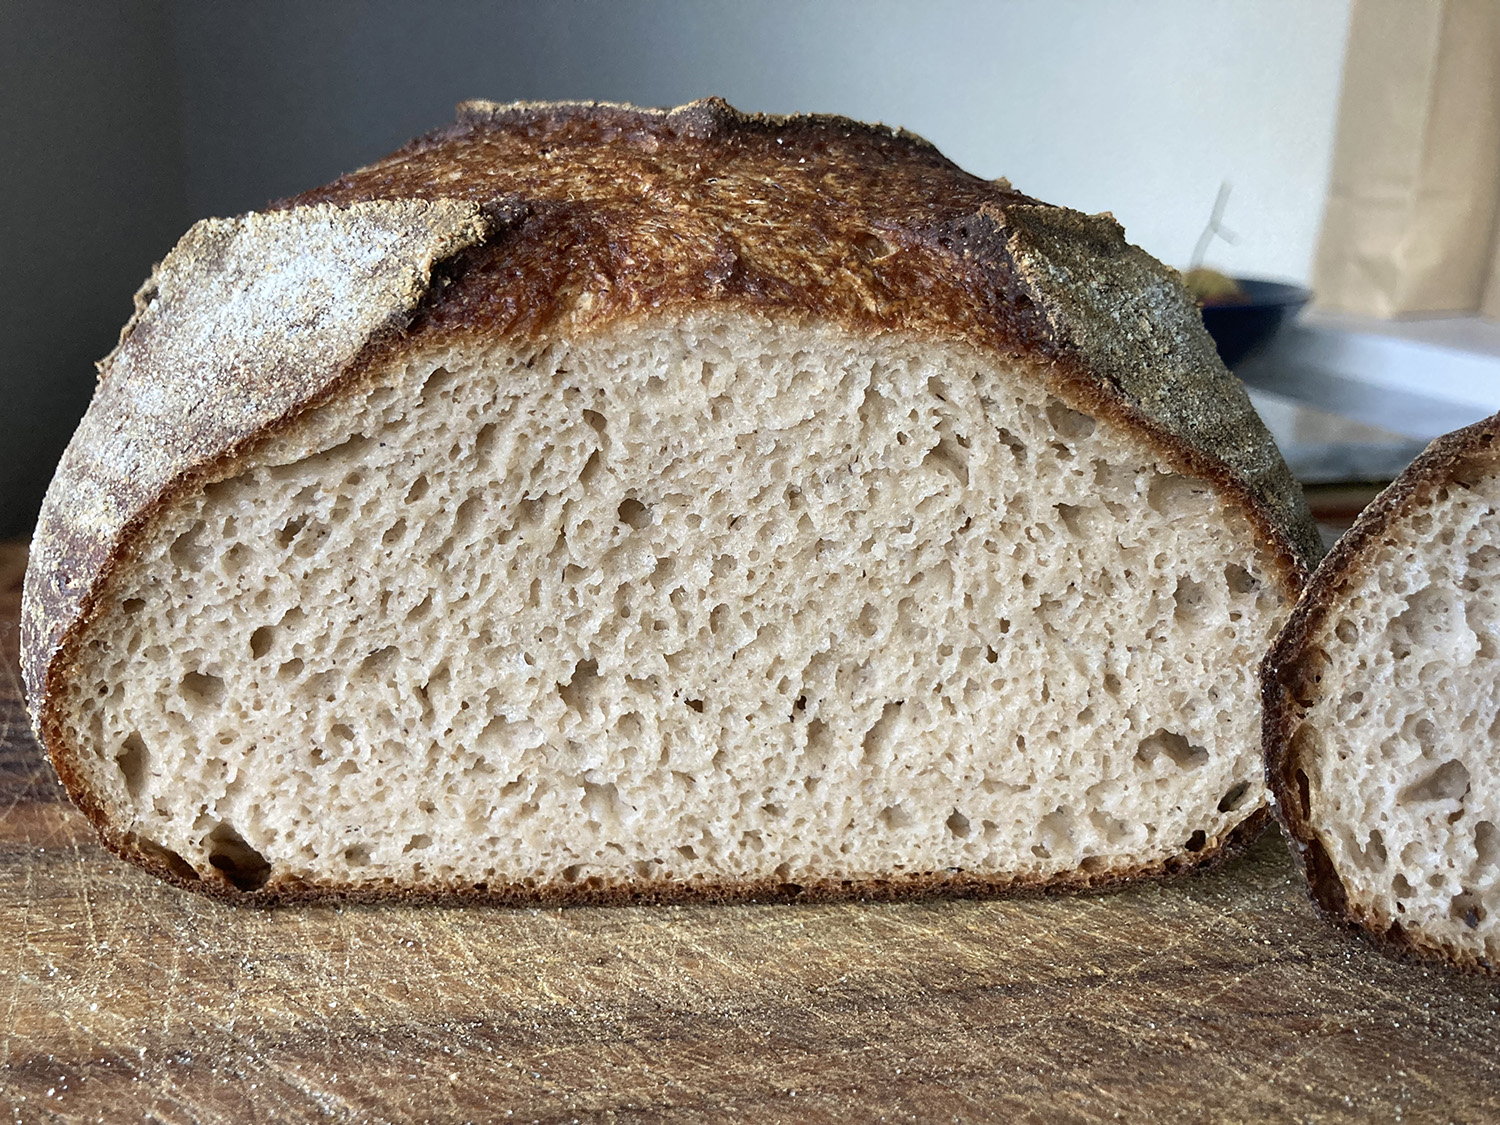
 

I mentioned this method in another thread and Paul (pmccool) and Alcophile asked me to post separately so it didn't get buried.  Keep in mind that all of this should be taken with a grain of salt because I have not made the wheat version of this bread myself, and it's been so long for my dad that he doesn't remember the nuances.  He did like my GF version when he tried it this spring though, and said it tasted right. (The texture is different, but palatable enough to my family members who eat wheat.) Here's roughly how I interpret the original wheaten version of the recipe as my dad baked it.

Starter:

My dad made a liquid white starter using commercial yeast, but I made my GF starter using the Ars Pistorica/Ian Lowe 3-day method with whole grains as outlined here: https://www.thefreshloaf.com/node/69051/sourdough-starter-ready-use-37-days

For this bread, I find that using the starter when very, very ripe works for me.  The idea is to slow down the bulk ferment considerably, so to my mind using the starter at peak is contraindicated.

The idea is to get the inoculation percentage right for your flour/temperature/conditions so that the dough doubles in volume in 12-18 hours.  For me this ends up being about 5% innoculation.

First Rise/Bulk Ferment:

Starter, 5-10% inoculation

Flour, about 66% of total desired flour weight (reserving the rest for the second rise).  My dad used unbleached AP flour.

Salt, about 2% of total desired flour weight

Water (room temp or cooler) to make a shaggy dough.  (The original recipe as written is all in cup measurements, but converted to grams it has this dough at just below 50% hydration. That seems really low to me but maybe the fermentation produces a lot of liquid)

Mix all together and ferment overnight, at least 12 hours, in cool conditions approximately 50-65°f.  In the winter we'd just let it sit on the counter in the kitchen and the house would get down to about 55° and that was perfect.  It shouldn't double until the temps warm up again the next day.

Second Rise:

Punch the dough down and turn it out onto a heavily floured bench. Knead the dough, incorporating the remainder of the flour or as much as needed to make a smooth, elastic dough, about 8 minutes.  Shape into a boule or divide and do multiple loaves.

Let the dough rise, anywhere from 1-4 hours as determined by activity of the dough and ambient temps.  Use a banneton, bowl, or whatever your normal method is.  Sometimes I even proof right-side up on the bench, covered, but it spreads out a bit more with this method.

Bake:

Once the bread has doubled in size, brush/spritz with water, score with a hashmark, and bake as you are set up for sourdough - I use a dutch oven or cloche.  The original instructions say to bake at 400° for 45 minutes with steam but again this was for high altitude, so I don't know if that needs adjustment for other climates.  Obviously altitude/climate/hydration/other conditions will affect the bake. I love this instruction: "Water in oven makes crisp French type crust."  In dry Nevada the steam water would have baked off in 15-20 minutes giving the steaming conditions of most normal sourdough bakes.

Hacks for sour flavor:

The original recipe comes with a bunch of hacks for making both the starter and the bread more sour, and I have some hacks of my own as well

1. Mix the starter with half water, half milk.  I haven't tried this one but I think my dad did this occasionally if he thought the starter was getting too mild.

2. Sub out half the water for milk in the recipe.  I've done all milk and it was incredibly sour - finally too sour for me. Half was good.  I can usually get a good sour with just water though.

3. This hack is mine. I monitor the sourness of the bread as it rises.  I suppose you could use a ph meter to be perfectly safe and to get consistent results, but I go by scent/taste.  I don't eat raw dough of course!  I don't know if it's because I'm using a high amount of whole grains, but I can overproof the dough a bit on the bulk and it's fine on the second rise.  I can get it more sour this way.  I think this is the same idea for white wheat flour: incorporating the extra flour before shaping buffers the extra acids and strengthens the gluten to prevent it from turning into goo.  The more you've overproofed on the first rise, the more flour you'd have to incorporate to strengthen it, so the more you're diluting the flavor. I'm sure there's a sweet spot in there somewhere.

4. I'm not sure if it's just a good hack for GF bread, but the original recipe calls for a little bit of sugar so I'm including it. I use a little sugar on the second rise to make sure the dough bounces back from overproofing if needed.  This helps me get a good second rise.  At 2%, it shouldn't affect the final flavor for wheat.  GF seems to need a little more, about 4%.
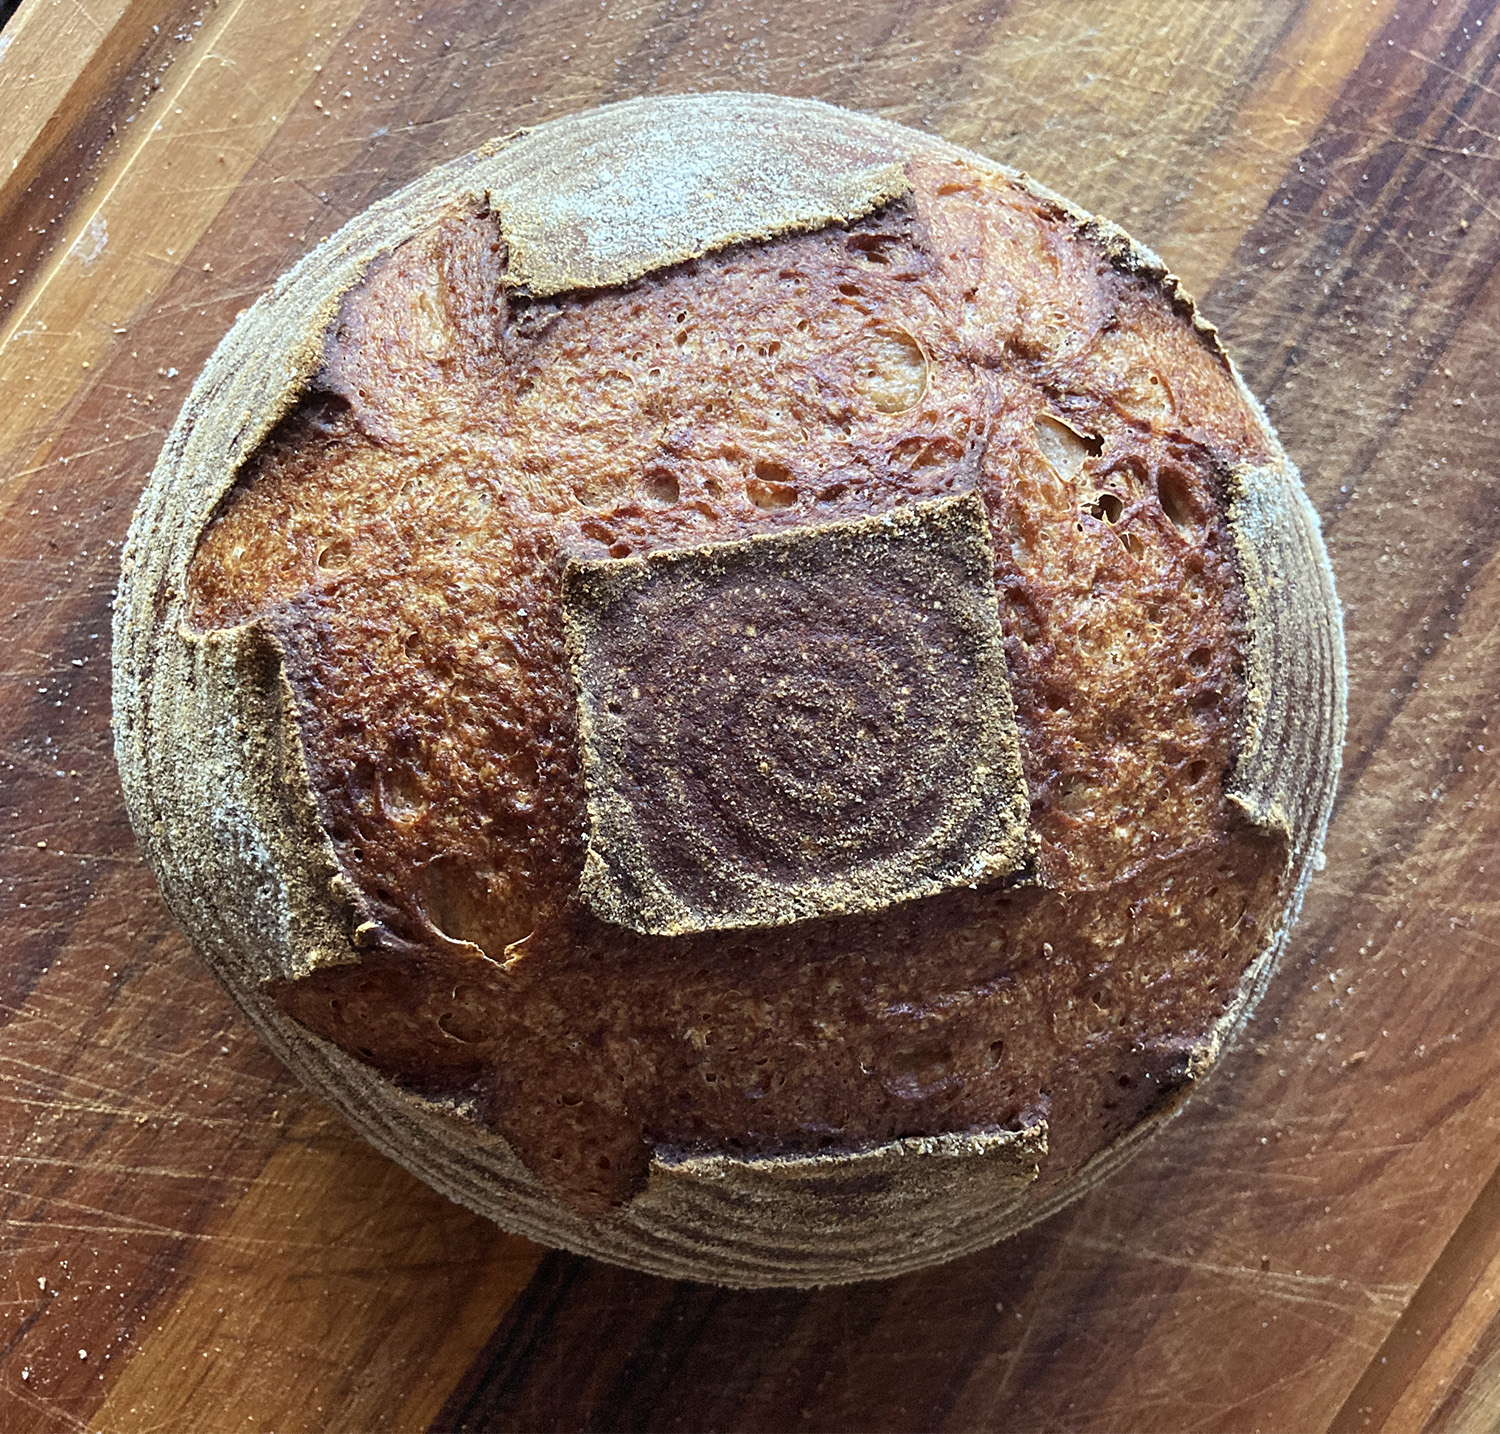
I'm curious to hear peoples' thoughts.  To me this is a very standard, traditional American method of making bread, with a double rise and kneading after bulk/before shaping.  A lot of recipes were like this when I was growing up, but the method seems to have fallen out of fashion. I think it has a lot of advantages - as long as you don't want an open crumb.  For Gluten-free bread, the advantage is to feed the yeast, but also to even out the hydration between the psyllium husk and the whole grains and to buffer the acid.  In GF it's the starches that turn to goo when overproofed, as there is no gluten to degrade. With wheat flour, I think the kneading after bulk serves a similar function, to feed the yeast and also to re-distribute liquid and buffer the acids with fresh flour. I think this method is a traditional American way to get good results on a second rise under various, uncontrolled conditions.

Gina

Benito's picture
Benito

100% Whole Wheat Sourdough Shokupan

I haven’t been able to definitively find out what the difference between shokupan and Hokkaido milk bread is.  What I think is correct is that shokupan has less sweetness to it than Hokkaido milk bread.  If that is the case then I think my recent formulas for Hokkaido milk bread with the decreased sugar probably are more like a shokupan.  For this bake I wanted to know whether or not I really needed the VWG in the dough or not.  I also decided that I would also shape differently for shokupans than Hokkaido milk breads to further differentiate them by look.

For 9 x 4 x 4” pullman pan


Overnight Stiff Sweet Levain fermented at 76-78°F 

14 g starter + 14 g brown sugar + 18 g water + 41 g whole wheat


Tangzhong prepared the night before and refrigerated 

28 g whole wheat + 142 g milk


Final Dough

184 g milk + 1 large egg (53 g) + 24 g sugar + 5.56 g salt + all Tangzhong 

+ all Stiff Sweet Levain + 337 g whole wheat flour + 1.91 g diastatic malt

+ 52 g butter


Pre-bake Wash 

• 1 egg beaten

• 1 Tbsp milk


Post-bake Wash 

• 1 Tbsp butter (optional)


Instructions

Levain

Mix the levain ingredients in a jar or pyrex container with space for at least 300% growth. 

Press down with your knuckles or silicone spatula to create a uniform surface and to push out air.

At a temperature of 76ºF, it typically takes up to 10-12 hours for this sweet stiff levain to be at peak.  For my starter I typically see 3-3.5 times increase in size at peak.  The levain will smell sweet with only a mild tang.


Tangzhong 

In a sauce pan set on medium heat, stir the milk and flour until blended. Then cook for several minutes until well thickened, stirring regularly with a spoon or heat-resistant spatula. Let cool in the pan or, for faster results, in a new bowl.  Theoretically it should reach 65ºC (149ºF) but I don’t find I need to measure the temperature as the tangzhong gelatinizes at this temperature.  You can prepare this the night before and refrigerate it, ensure that it is covered to prevent it from drying out.


Dough

In the bowl of a stand mixer, add the milk (consider holding back 10 g of milk and adding later if this is the first time you’re making this), egg, tangzhong, salt, sugar, diastatic malt and levain.  Mix and then break up the levain into many smaller pieces.  Next add the flour.  I like to use my spatula to mix until there aren’t many dry areas.  Allow the flour to hydrate (fermentolyse) for 20-30 minutes.  Mix on low speed and then medium speed until moderate gluten development this may take 5-10 mins.  Next drizzle in the melted butter a little at a time, or alternatively add room temperature butter one pat at a time.  Slow the mixer down to avoid splashing the butter at you. The dough may come apart, be patient, continue to mix until it comes together before drizzling or adding in more butter.  Once all the butter has been added and incorporated increase the speed gradually to medium.  Mix at medium until the gluten is well developed, approximately 10 mins.  You can consider resting the dough intermittently during this time  You should be able to pull a good windowpane, not quite as good as a white flour because the bran will interrupt the windowpane somewhat.  This is a good time to add inclusions such as my favorite black sesame seeds, that way they do not interfere with the gluten development.  If you add inclusions mix until they are well incorporated in the dough.


On the counter, shape the dough into a tight ball, cover in the bowl and ferment for 2.5-3.5 hours at 82ºF.  There may be some rise visible at this stage.


You can next place the dough into the fridge to chill the dough for about 1.5 hours, this makes rolling the dough easier to shape.  Remember, if you do so the final proof will take longer.  Alternatively, you can do a cold retard in the fridge overnight, however, you may find that this increases the tang in your bread.


Prepare your pans by greasing them or line with parchment paper.  


Lightly flour the top of the dough. Scrape the dough out onto a clean counter top.  Roll the dough out into a large rectangle.  We do want to degas the dough as this point as this will give us a finer crumb.  You will then do a letter fold of the dough and then roll it up into a boule shape to fit into your pan.


Cover and let proof for 6-8 hours at a warm temperature.  I proof at 82°F.  You will need longer than 6-8 hours if you chilled your dough for shaping. I proof until the top of the dough comes to within 1 cm of the top edge of the pan.


Preheat the oven to 350F and brush the dough with the egg-milk wash.  Just prior to baking brush with the egg-milk wash again.


Bake the loaves for 50 minutes or until the internal temperature is at least 190ºF, rotating as needed to get even browning. Shield your loaf if it gets brown early in the baking process. After 50 mins remove the bread from the pan and bake a further 10 mins by placing the loaf directly in the oven on the rack with the oven turned down to 325ºF. You can brush the top of the loaf with butter if you wish at this point while the bread is still hot to keep the top crust soft.

martino's picture
martino

French Bread—Reinhart

Okay.

So Reinhart’s French bread is becoming the bane of my baking existence.

I’ve made it several times. It comes out leaden, heavy, and almost colorless.

I’ve baked other breads with success. I’m not a rookie. I weighed the ingredients. I have a proofer—so the rise temp is good.

I am using regular (non-organic) King Arthur flours.

The loaves come out… okay. They have a decent, though not very hole-y, crumb. If you put them under the broiler to brown a bit more, they don’t get golden: they get black spots.

My questions are:

Is this entirely a shaping thing? (The loaves seem more prone to sideways expansion than upward.)

The bread is lean. Am I not getting any browning because of the lack of sugar? Is that due to under-proofing? Or over?

Should I try dough improver?


Gadjowheaty's picture
Gadjowheaty

"Rustikale Mischbrot" - closed crumb

It doesn't matter whether it's a highly hydrated wheat levain, or this, which is a rye-spelt-wheat mixed bread from Ploetzblog.  I cannot for the life of me get an open crumb and I don't know why.  Something somewhere in my process is killing it, I think.  I don't know if I have gorilla hands during shaping, or where it is - and massive and variegated alveoli aren't really the end goal, but the ability to do them as desired would be a skill I'd like to recapture.  I say "recapture" because it's weird but I used to be able to do it, many years ago, when I first came on here.  

Anyway, here's the formula:

sourdough (sauerteig)

400 g rye flour 1150

400 g water (50°C)

80 g starter

8 grams of salt


pre-dough (poolish)

100 g wholemeal spelled flour

50 g water (cold)

1 g fresh yeast (I use .33 diy)


main dough

whole sourdough

entire pre-dough

460 g wheat flour 1050

200 g water (35°C)

13 grams of salt

Mix the sourdough ingredients and leave to rise at room temperature for 12-16 hours.

Mix the pre-dough ingredients into a very firm dough and leave to mature at room temperature for 12-16 hours.

Knead all ingredients for 5 minutes on the lowest setting and 6-8 minutes on the second setting to form a smooth, sticky dough (dough temperature approx. 26-27°C).

Leave the dough to rest at room temperature (approx. 20°C) for 60-70 minutes. Stretch and fold after 30 minutes.

Round the dough tightly and place in a floured proofing basket with the open end facing down.

Leave to mature for 75 minutes at room temperature.

Bake with seam side up at 270°C (250°C) falling to 210°C for 75-80 minutes with steam.

Preparation time on baking day: approx. 4 hours

Total preparation time: approx. 16-20 hours

By way of reference, here's his.  First, I wonder why mine is so much darker?  I used Central Milling's T85 for the T1050 wheat of the recipe, my own 85% yield bolted spelt, and KA medium rye.  Seems much, much darker to me.


Ilya Flyamer's picture
Ilya Flyamer

Ruchmehl bread

Made another bread with all ruchmehl - a Swiss "semi whole" wheat flour. Used some quite old unfed rye starter from the fridge (maybe around 25 g?), 450 g ruchmehl, 330 g warm water, 11 g salt. Mixed with a hand mixer and spiral attachments until moderate gluten development. Did three folds about 30 min apart, then left at around 28ºC for a few hours, until nicely grown and airy. Preshaped, and then shaped into a batard, left to final proof overnight on the balcony. Baked in the morning on steel 230ºC around 15 min with steam, then 210ºC without steam until good colour.


Again the ruchmehl gave a rather open crumb! It has 14% protein, higher than any flour easily available here. It makes a very nice strong dough. I can see why the Swiss bakers like baking with it.

This time the flavour is clearly a little more tangy (I guess due to low inoculation with unrefreshed starter and long bulk), but still delicious, and the texture is great. Very pleased with this bread, and I think I might just keep using this flour for everyday sourdough bread. Flavourful and so easy to use. I might compare to some German Type 1050 at some point, should be the most similar flour available afaik.

Pages