The Fresh Loaf

A Community of Amateur Bakers and Artisan Bread Enthusiasts.

Most bookmarked

resolute155's picture
resolute155

Recipe Source and/or Favorite Mash/Scald Breads

I love 100% whole-grain bread with no additives - simply flour, salt & water.  No surprise, but I have found that mash/scald breads to be the best of these types of breads.  I still can't believe no sweeteners have been added!

I have seen recipes scattered about, but really only two good sources for multiple mash/scald recipes:

  • Peter Reinhart's book 'Whole Grain Breads' where he prefers mashes.  Mash: lower-temperature water (165 F) water added to grain for three hours.
  • Stanley Ginsberg's book 'The Rye Baker' where he generally uses scalds.  Scald: higher-temp/boiling water added to grain for 2-24 hours.

My two favorite recipes:

  • Vollkornbrot, from Reinhart's WGB book (rye mash)
  • Mountain Oat Rye, from Ginsberg's RB book (oat scald)

Does anyone have any other good sources for mash/scald recipes ('good' simply defined as multiple recipes)?

Does anyone have any other good/favorite mash/scald recipes outside of the two above books?

(I did find this post, which seems to be the best of the bunch: https://www.thefreshloaf.com/node/24237/celebrating-rye-breads)

Thanks!

Kooky's picture
Kooky

What type of fineness should be expected?

Hello,

I am a Salzburger owner and I'm considering buying a second mill just so I can get a standard baseline for what fineness mills operate at.

Of course, the Lee mill is in its own category, but for a standard granite or corundum mill, what fineness do you get with your best description?

Does the grain feel quite gritty, even at your finest settings before the burrs touch? I have two sieves, coarse and fine, I do not know their specific numbers, every batch I mill I run through a coarse sieve which gets giant particles. If I sift my fresh flour through the fine mill I can lose half the weight sometimes, but it's basically pastry flour at that point with no discernible texture.

The other factor here is the wheat itself, I'm sure wheats vary greatly in bran percentage.

Anyway, I have been wondering this for a while and figured I'd post this before I drop hundreds on yet another mill.

Regards

Isand66's picture
Isand66

Butler’s Gold Whole Wheat Sourdough Bread


 I wanted to try  another new grain I purchased from Barton Springs Mill called Butler’s Gold Whole Wheat.  The whole wheat berries are harvested from a small farm in Texas.  It’s supposed to be a good neutral flavored whole wheat perfect for mixing with other stronger flours.  I decided to use this exclusively and only mixed it with a small amount of BF.  I did use KAF BF in the Levain so overall it ended up being a  50% WW bread.  I milled the Butler’s Gold berries to a high extraction sifting and milling twice.

I was very happy with the final outcome on this one.  The Butler’s gold flour had a nice buttery earthy taste profile and the crumb was moderately open.  I really enjoyed using this to make some grilled cheese sandwiches and it made some nice toast as well.

Formula

Levain Directions 

Mix all the levain ingredients together for about 1 minute and cover with plastic wrap.  Let it sit at room temperature for around 6-7 hours or until the starter has almost doubled.  I used my proofer set at 76 degrees so it took around 5 hours for me.  Either use in the main dough immediately or refrigerate for up to 1 day before using.

 Main Dough Procedure

Mix the flour and water (leave about 50 -70 grams to add after the first mix), together in your mixer or by hand until it just starts to come together, maybe about 1 minute.  Let it rest in your work bowl covered for 20-30 minutes.  After 30 minutes or so  add the salt, starter (cut into about 7-8 pieces),  and olive oil, and remaining water as needed and mix on low for 5 minutes.   Note: If you are using the Ankarsrum mixer like I do, add your water to the bowl first then add in the flours.  After your autolyse add in the starter, salt, remaining water and mix on low to medium low for 15-20 minutes.

Remove the dough from your bowl and place it in a lightly oiled bowl or work surface and do several stretch and folds.  Let it rest covered for 10-15 minutes and then do another stretch and fold.  Let it rest another 10-15 minutes and do one additional stretch and fold.  After a total of 1.5 hours place your covered bowl in the refrigerator and let it rest for 12 to 24 hours.

When you are ready to bake remove the bowl from the refrigerator and let it set out at room temperature still covered for 1.5 to 2 hours or if using a proofer set at 80 degrees for one hour.  Remove the dough and shape as desired and cover with a moist tea towel or plastic wrap Sprayed with cooking spray and let rise at room temperature for 1 1/2 – 2 hours.  (I use my proofer set at 80 F and it takes about 1 hour to 1.5 hours).

Around 45 minutes before ready to bake, pre-heat your oven to 500 degrees F. and prepare it for steam.  I have a heavy-duty baking pan on the bottom rack of my oven with 1 baking stone on above the pan and one on the top shelf.  I pour 1 cup of boiling water in the pan right after I place the dough in the oven.

After 1 minute lower the temperature to 450 degrees.  Bake for around 35 minutes or until the breads are nice and brown and have an internal temperature around 200-210 F. 

Take the bread(s) out of the oven when done and let them cool on a bakers rack for as long as you can resist. 

The Roadside Pie King's picture
The Roadside Pi...

Question for open discussion. Who, or what discipline of bread making do you follow?

This could be fun? Maybe? Who knows? 

Please explain in one short paragraph, who & what style of artisan bread making influences you the most. 

As for me.

 I fancy myself a student of Prof. Raymond Calvel's Improved mix. What is the improved mix some of you may be asking. Allow me to explain. At the very dawn of the industrial revolution our French baking compatriots took to electric mechanical mixing technology like a duck takes to water. This time and labor saving device was to the detriment of that artisan hand made dough/flavor the French were known for. Enter Prof. Calvel, the father of the improved mix. Prof. Cavel's mantra is that one should use mechanical mixing to the least amount possible to archive the time and labor saving. 
 That being said, I personalty, would be a big fan of totally by hand artisan baking. However I am a lazy SOB. 


Kind regards,

 Will Falzon

Benito's picture
Benito

Rosemary Black Pepper Potato Milk Rolls

We had some friends over for dinner and had to have some nice soft rolls to go with my chicken with artichoke hearts and sun dried tomatoes.  I decided that I wanted something with rosemary since the chicken dish has rosemary in it.  So I prepared a mashed Russet potato and added rosemary and black pepper to taste.  Of course the mashed potato had butter and milk as well, make sure that the butter and milk are hot when adding it to the mashed potato for the best smooth texture.

Pan 7.5 x 11.5” = 4 rolls by 6 rolls about 37 g each x 24

egg wash: 1 yolk and 1 tbsp milk, beaten…


Cook Tangzhong mixing flour and milk constantly until it becomes a thick roux.  Let cool before adding to final dough.  Or add to cold milk and egg to cool it down.


Blend room temperature butter and flour together and set aside to incorporate after the dough is well developed.


Whisk together dry ingredients flour salt and yeast. 


To mix by hand, add the salt and yeast to the wet ingredients (milk, tangzhong and egg) to dissolve.  Next add the flour and mix with a silicone spatula until no dry flour remains.  Rest 10-20 mins.  Next perform French folds until the dough is well developed.  Smear the blended butter/flour onto the dough and then fold to incorporate and then perform further French folds until well developed.  Gradually add the mashed potato and knead to incorporate it well into the dough.  Form into a tight ball and place in a bowl covered with plastic or a damp cloth and place in a warm place until doubled (about 1hr 30 mins).  Alternatively, you could mix the mashed potato and butter and then add the mixture to the developed dough until well incorporated.


Butter a large baking pan.  Punch the dough down and then divide into 12 equal portions.  Form each into tight boules.  Place in the buttered baking pan seem side down.  Cover them and allow them to fully proof about 1 hour to 1 hour and 20-30 mins, they should pass the poke test.


After about 30 mins of proofing time, whisk your remaining egg and milk and then brush the small boules.


About 30 mins prior to end of final proof preheat the oven to 350°F. 

Immediately prior to baking brush the dough again with the egg and milk mixture.


Bake the rolls uncovered for 30 minutes or until the internal temperature is at least 190F. Cover if your rolls get brown early in the baking process.


Remove the bread from the oven but not the pans, brush the tops with butter while hot, and then let cool for 10 minutes before pulling the bread from the pans. You may need to slide a butter knife down the sides of the pan to loosen the bread, but I have found parchment paper to be unnecessary.  Sprinkle with fleur de sel if you wish after brushing with butter. 


My index of bakes.

ShadyRoomBot's picture
ShadyRoomBot

Panettone breaking apart

Hello, I've tried this panettone recipe a couple of times


Ingredients (first dough )

115g pasta madre

400g panettone flour 

200g water

125g sugar

90g yolk

120g unsalted butter

-----------Fermentation until it triples in size which takes about 16h  at 20 C---------------------------------------------

Ingredients (second dough )

All of the first dough

100g panettone flour (super high protein flour)

110g sugar

50g honey

160g yolk

6.5g salt

215g unsalted butter

350g dried fruits

----------------Fermentation in mold which takes about 12 h  at 20 C-----------------------------------------------------

Baking at 180 C for about 50 min

The problem is that when I hang it upside down the panettone breaks apart, I don't know what the problem could be, I've tried decreasing the amount of dried fruits but it still breaks when hung upside down.

My theory is that I should add more gluten to the flour, decrease the fermentation time and let it be in the oven a bit more.

I'm a beginner at this so sorry if I didn't give enough data, will provide more if needed. Thank you for your time!

ideal2545's picture
ideal2545

Refining home milled flour to T80 / T85

Hi All,

I recently purchased a Komo Mill and I'm excited to start using it. I am planning to pick up the sifting attachment once its back in stock.

I know that its not possible to sift down to AP/Bread flour but I was wondering if its possible to sift to T80 / T85 since those styles are a bit more 'rustic'. I know that those numbers have to do with Ash percentages but I have to imagine there is an extraction % equivalent?

Of course we dont have home based labs to test if its close to T80 but I was curious if anyone has managed to get close to it, maybe through taste/touch or using some extraction % calculation based on starting weight /  final sifting result?


Thank you!

Jon

Benito's picture
Benito

Sweet Potato Milk Rolls

We are seeing some friends in our building tonight for dinner and I offered to bring some rolls. We are still here in Florida and without my starter so these were made with IDY. I wanted to bring something that wasn’t just a milk bread so decided to add mashed steamed sweet potato to the dough. I couldn’t find purple sweet potatoes anywhere near me so went with the regular orange ones. I didn’t measure the amount of sweet potato that I added. I added it after the dough was well developed after adding the butter/flour paste. I just added the sweet potato gradually until I liked the colour of the dough.

Also, note that I made these without the assistance of a stand mixer, these were fully hand mixed, a lot of slap and folds to start the day.


Pan 7.5 x 11.5” = 4 rolls by 6 rolls


Tangzhong

25g  - King Arthur AP flour

125g -  milk 

The classic ratio in tangzhong 1:5

Final dough

371 g KA AP flour and 29 g to mix blend with butter when mixing by hand

50 g granulated sugar

150 g 1% milk

1 egg

29g room temperature butter,  mix with 29 g of flour

6.06 g  instant yeast

7.74 g salt

All of the tangzhong mixture


egg wash: 1 yolk and 1 tbsp milk, beaten…


Cook Tangzhong mixing flour and milk constantly until it becomes a thick roux.  Let cool before adding to final dough.  Or add to cold milk and egg to cool it down.


Blend room temperature butter and flour together and set aside to incorporate after the dough is well developed.


Whisk together dry ingredients flour salt and yeast. 


To mix by hand, add the salt and yeast to the wet ingredients (milk, tangzhong and egg) to dissolve.  Next add the flour and mix with a silicone spatula until no dry flour remains.  Rest 10 mins.  Next perform French folds until the dough is well developed.  Smear the blended butter/flour onto the dough and then fold to incorporate and then perform further French folds until well developed.  Gradually add the mashed sweet potato and knead to incorporate it well into the dough.  Form into a tight ball and place in a bowl covered with plastic or a damp cloth and place in a warm place until doubled (about 1hr 30 mins).  Alternatively, you could mix the sweet potato and butter and then add the mixture to the developed dough until well incorporated.


Butter a large baking pan.  Punch the dough down and then divide into 24 equal portions.  Form each into tight boules.  Place in the buttered baking pan seem side down.  Cover them and allow them to fully proof about 1 hour - 1 hr and 20-30 mins, they should pass the poke test.


After about 30 mins of proofing time, whisk your remaining egg and milk and then brush the small boules.


About 30 mins prior to end of final proof preheat the oven to 350°F. 

Immediately prior to baking brush the dough again with the egg and milk mixture.


Bake the rolls uncovered for 30-35 minutes or until the internal temperature is at least 190F. Cover if your rolls get brown early in the baking process.


Remove the bread from the oven but not the pans, brush the tops with butter while hot, and then let cool for 10 minutes before pulling the bread from the pans. You may need to slide a butter knife down the sides of the pan to loosen the bread, but I have found parchment paper to be unnecessary.  Sprinkle with fleur de sel if you wish after brushing with butter. 

My index of bakes.

happycat's picture
happycat

Steamed bao, shredded beef & homemade pickle

Inspiration

I was away from my Toronto place for 7 months, living alone, working on projects and losing 55 pounds. When I came back, I was ready to get back into baking!

Last weekend we made onion soup and I made baguettes to hold up the broiled gruyere cheese on top. We roasted then pressure-cooked beef neck to make the broth which left us with lots of tasty beef bits. The beef seemed like a great filling for a steamed bun. I remember eating bao at a Toronto place... they were delicious but horribly expensive. As usual, that inspired me to make my own.

Beef filling needed some pickled vegetables, so I pulled out my mandolin and ripple blade earlier this week and sliced up carrots, cucumbers, red onion, celery, red cabbage and pickled them in vinegar, garlic and spices for a few days. I managed to use the mandolin extensively without a single injury :)  My wife mixed some pickled ginger in mayo to provide a spread. She also seasoned the beef with black bean sauce and other stuff and I sneaked in some lime juice to bring it alive.

Today, I made the bao.

Method

I used the steamed bao recipe from another TFL member. It worked perfectly. This is an enriched dough with milk, oil and sugar and it uses two rising agents: yeast and baking powder. Fun!

https://www.thefreshloaf.com/node/38282/chinese-steamed-buns

Process

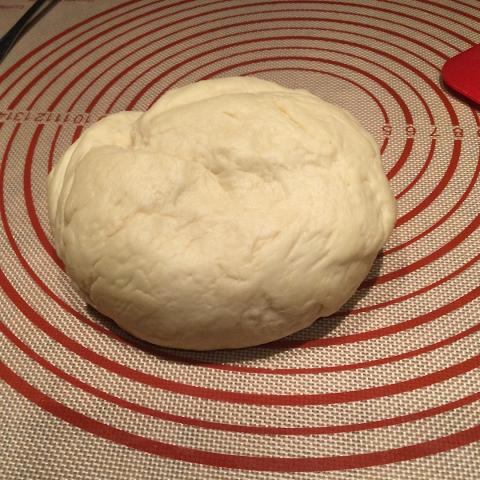
A lovely enriched dough, hand kneaded and proofed.

Divided into 20 pieces of 30g each. The dough was somewhat firm. Not tacky at all.

Rolled a little thinner than 1/4 inch. These were springy fellas so I rolled some a few times because they shrank back a bit. That's an iPad 2 on a stand. Makes a wonderful timer and recipe display with the text enlarged.

Here I've smeared half with canola oil to prevent sticking after they're folded, then used a chopstick to fold them. The chopstick isn't really needed.

Here's 20 of them after proofing inside a giant ziploc bag for about an hour. Each dough is on a piece of parchment paper.

Here they are in a steamer basket before steaming. I had two rice cookers for steamers and cranked through several batches. The waiting bao didn't overproof at all.

Here they are after 9 mins of steaming, Fluffy!

Will they open up? Yes! Yay!

Conclusion

Making these was very simple and cheap. We agreed that these were the best bao we'd ever had by far. At the bao place we"d been to, our 20 bao would probably run $180... with filling of course, My cost? A tiny fraction?

We enjoyed these way more than tacos or fajitas I've made in the past (scratch, not kits!). The bao is so soft and tasty. I suppose I should add a crumb / shred shot. Maybe tomorrow if I remember.

I froze the bao we didn't eat to have later. Portion control is the secret to getting and staying skinny. This cat is no longer fat!

Next Steps

I'd be tempted to mess around with malts and flour. For instance, adding some of my homemade rye malt for flavour, or using some cake flour to fluff them more. I'm also tempted to use the recipe to make a closed bun with stuffing inside. These were so tasty they are worth more experimentation.

EDIT: These reheat well out of the freezer with resteaming.


The Roadside Pie King's picture
The Roadside Pi...

Happy Thanksgiving!

Fresh rolls for my big sister's table.


Pages