January 26, 2024 - 4:50pm

Savory Tuna melt crescent moon

Nice edge decoration.


Share
Nice edge decoration.


Hi all!
I got a new machine for Christmas, after my first machine finally started dying after 20+ years of use. Hubby thinks a bearing is going since it makes very loud noises during kneading.
So, I got a new one, and am about to start using it. The problem I am wrestling with now is that my old machine called for oil in all recipes, and the new one calls for butter. But, it also says to not use fresh dairy if using the delay start option. Ok, so can I use oil instead? Seriously - the booklet says nothing about what to do if you want to use the delay option! Bah!
So, I turned to the trusty internet to see if I could substitute oil for butter. The problem is, I am reading advice ranging from - sure, do a 1-1 substitution, to use 3/4 the amount of oil.
My new machine is the Cuisinart Compact Bread Machine, CBK 110. Does anyone here have experience using this machine, and successfully substituting oil for butter?
I am very grateful for any help anyone can offer! Thanks!!

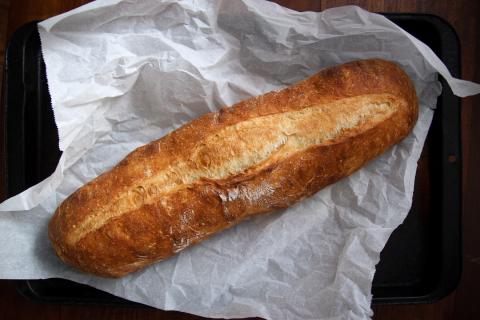
Made a simple enriched Italian bread that is very versatile. My mom made this a lot growing up. One of my favorites for sure. This loaf was about 1000 grams. Hydration was around 73%, enriched with 5% olive oil, 3% sugar, and 2.6% salt and about 1% IDY.

Hi there
Has anyone experimented with adding a bit of yeast to their sourdough formula. I remember doing it once and the crumb turned out incredible. I haven't done it since because I'm a bit of a purist and I feel it's cheating. I can't remember how much yeast I added. My formula is 50g starter, 500g flour, about 65-70% hydration. I want to experiment again because I haven't been able to get a crumb I'm happy with.
LL

I’m reading the Sourdough Mania by Anita Sumer and came across her talking about sweet starter.
she says it’s 20% starter, strong white flour, 40-45% water and 25% sugar.
I go to one of her enriched recipes, let’s say her brioche and she needs 245g of her sweet stiff starter.
To build it, she does it this way:
day 1 10g starter, 50g strong white flour, 20g water and 12g brown sugar.
After it doubled, add 90g strong white flour, 40g water and 23g brown sugar.
Im just not understanding this math. I’m doing something wrong and I know it.
For a long time I have been trying to get good oven spring and good ears in my loaves.
I have tried all sorts of things, concentrating mainly on developing strength of the dough, adding steam to the oven and slashing correctly.
Results have been disappointing until recently.
I posted a while back showing two loaves made from the very same batch, strengthened and proved in exactly the same way. But I cooked one in a dutch oven and the other right next to it on same shelf.
The results were eye opening. The one cooked in the dutch oven sprung with fantastic ears. The one next to it developed no ears at all.

This helped me to understand that it wasn’t the strength of the dough, the time I gave it to ferment, the way I slashed or any of the myriad other variables that was the problem.
It was simply the amount of steam in the bake.
This frustrated me because both my ovens have steam settings which I have been tinkering with. But the outcomes were never satisfactory.
After more tinkering I have discovered some interesting things.
Injecting steam into the oven is a good thing but what’s more important is keeping it there. So if your oven has good ventilation, it’s quite likely you won’t be able to generate enough steam to give the moisture necessary for good spring.
Luckily, one of my ovens has a setting called ‘moist fan baking’. Moist fan baking shuts off the vent in a supposed effort to make the bake more economical. But for me, it’s a sure fire way to keep steam in the oven.
Whilst the results aren’t quite as dramatic as the oven spring from a dutch oven, they are a significant improvement from bread baked in exactly the same oven but with the vent open.
If you’re wondering why I don’t simply use a Dutch oven all the time, for me it’s simple. They are cumbersome, require asbestos oven gloves and take up so much space in the oven you can only bake one loaf at a time. Whereas with a decent stone, I can bake three loaves on that stone, thereby reducing oven use by two thirds.
The loaves pictured below were baked for 10 mins at the highest steam setting (3) at 130 which is the highest it will go (It’s a setting normally reserved for custards etc). This setting still vents the steam though. I then switched to moist fan baking for 25 mins where I’m able to whack up the heat to 230.

Next batch I will try Moist fan baking for the whole bake but use the boiling tray of water at the bottom for the steam creation. I won’t be able to create steam via the oven because I’m not on a steam setting, I'm on Moist fan baking. Very frustrating!
So my conclusions thus far after many years of obsessing about spring and ears is this. For sure, take care of your surface tension, your ferment time, your slashing. But none of this will mean anything unless you’ve got a reasonable way of trapping steam around the loaf. All ovens are different and if yours vents well, you will still bake nice bread but it really won’t spring or get ears. Well mine certainly don’t anyway!
Spraying the loaves as they go into the oven also helps.
I believe starting on a lower oven temp also helps (130-150) but I still need to experiment on that.
Or you could just forego the pretty risen loaves altogether and do a focaccia instead! No ears needed, comes out great every time.
Any alternative/extra thoughts gratefully received btw. I’m no expert but years of failure have led me these conclusions and I wanted to share. Cheers.


Experimenting with over proofing.
By deliberately over proofing, I have found that I can get a superlight, uniform crumb that is soft and delicious, with a crisp crust.
I am still experimenting with this. with my regular sourdough I make a 750g-800g batch which would normally give me 2 x 800g ish loaves. I baked the first loaf in my large stainless steel stewpot with a glass lid. It went wild and totally filled my pot.
so today I further divided the second half of the same batch between 2 small loaf tins. This gave me the crusty beauts depicted.
My plan is to mix a slightly larger batch size, and divide it into 3, instead of 2 so that the loaf in the pot will be smaller and hopefully give me two larger tin loaves.
Comments and ideas are welcome.
Recipe: 550g water 200g starter 150g WW flour 650g Blue Jacket bread flour 20g salt.
Preamble:
Bought an Ankarsrum a while back.
I’m using the roller and scraper, adding water first, etc. I’m pretty happy with it.
Some of the breads I’ve made have been really fine.
But some—notably enriched breads, like dinner rolls—have been tough. And that only sometimes. Thanksgiving rolls were maybe the best I’ve ever made. Christmas—same recipe—tough.
I made the (sourdough) dinner rolls from THE PERFECT LOAF the other day. The rise was beautiful, and the rolls are too. But they’re so, so dense. They taste wonderful; they’re just dense.
That recipe of course gives guidelines for mixing with a Kitchen Aid or similar. So I had to wing it. I went with about 6 o’clock for 10-12 minutes, I think.
I then shaped as you would a pizza dough ball and baked.
Am I mixing too long/too fast/toohard?
Or is it all in the shaping?
Is there somewhere a conversion guide from KA-Ank? Such a thing sure would be helpful.

I have a bread machine, make Unold, model 68511 "Backmeister". I suspect, but am not certain, this is in fact a re-branded Zojirushi BBCC-V20 "Home Bakery Traditional". Zojirushi doesn't sell in the EU.
The machine is broken. I had to buy a 3mm three-wing screw-driver (like a Phillips screwdriver, but with only three wings, just like the Mercedes star) to unscrew the two screws that are on the bottom only to make our life more difficult, and after unscrewing the four rubber "supports", which are kept by normal Phillips screws, and taking away the bottom, I had access to the gear box. Overall, and if we except the three-wings screws, the machine is very easy to open to have access to the gear.
This machine has two paddles. As it is usual, the paddle on the right, near the motor and the keyboard, takes the motion from the motor. Coaxial to the gear of the right paddle is another gear, and this gives the motion to the left paddle.
The picture shows the opened bottom of the bread machine, the left side of the machine is on the left side of the picture.
I removed both gears with a 8mm wrench. I got rid of the remnants of the two belts, which decomposed in some twine and some goo. They were easy to get rid of, but I still have to clean well the goo in the grooves of the left gear.
I found online some replacements belts, which cost €17 the large belt, and €16 the small belt, and are sold for this specific model.
So far, so good, the machine appears to be repairable.
My questions are:
a) Are the transmission belts "standard" for bread machine in general, or is it really adviceable to buy specific belts for the specific model?
The larger gear is marked: XBM638-T5 >PA66+30%GF< 2
The smaller gear is marked: XBM638-T4 >PA66+30%GF< 2
What do these numbers mean exactly? Can I use them to buy the belts at a generic hardware store?
b) If by visual inspection the teeth on the gears appear OK, should I reuse the same gears, or does it make sense to always change the gear together with the belts (I ask just for doubt's sake).
c) Is there a nice and practical way to eliminate the goo? It seems something like melted rubber. I think I am trying with softening it with some hot water and then cleaning with a toothpick.
OK, these are the questions. My main motive in any case was to make the future forum readers with the same problem aware that opening an Unold 68511 Backmeister is not big fuss and repairing it should be fairly easy, but maybe there are cheaper options. This might also apply to Zojirushi BBCC-V20.

It takes only 55 g of rusbrot's Thermophilic-SD starter to produce a 100% whole grain (freshly milled) loaf of bread based on 500 g of flour. Note that the suggested amount is 100-120 gr of starter.
The bread pan is WINCO's square steamer (7x6.5x3.875 in3). It fits perfectly in the Zojirushi. (Ending Dough Temp-205F)
Making a loaf takes only 4.5 hr from assembling ingredients and milling to a loaf out of the Zoji! This loaf includes solod that is scalded and cooled prior to mixing the main dough.

The slices will be nice and wide- perfect for those who love to cut a sandwich in half before eating it. :)
The foodgeek recipe is here. (The 12 gr of AP flour due to a mistake in my water measurement; the old dough ball is optional- I just had a leftover piece).
Thermophilic Sourdough Starter (400% hydration) takes only 24 hr.
In a jar, mix
40 gr crushed diastatic rye malt (I mill the whole rye malt berries from a hobbyist brew supplier)
10-15 gr of solod (fermented red rye malt; get the real thing!)
200 g water (60C)
Hold this in a water bath at 50-53C for 24-30H.
You don't have to put plastic film over the surface as the YT shows. Just shake the contents of the bottle every few hours.
(1/17/24 Edit- Note comments below on size of jar- choose a jar with limited airspace above solution surface or use the plastic film as suggested in the YT. The mixture did not overflow the jar over the 24-30 h process.)
See it done here.