The Fresh Loaf

A Community of Amateur Bakers and Artisan Bread Enthusiasts.

Most bookmarked

Thegreenbaker's picture
Thegreenbaker

Yeasted Apple Cinnamon Cake.


It got a little mangled as I didnt line the tin and it stuck. :S But, How delicious.

I have always wondered what I would do to make a cake minus the raising agents! Some one posted I think on here their version, it was I think Nectarine? I may be delusional so who knows.

I found the recipe, and made the cake and it is almost gone (and it isnt even 24 hours old!


The original recipe can be found here

I made a few changes to it.

Makes One (9-inch) Cake
2-1/4 cups all purposeflour, but I used bread flour.....it was all I had on hand!)1/2 cup Muscovado sugar 2 teaspoons yeast1/2 teaspoon salt 1/2 cup milk 1/3 cup Sunflower oil/Rice bran oil (an oil that is good for you and has a high smoke point) 2 large eggs 2 sweet eating apples , cored and diced.1 teraspoon cinnamon Topping1 sweet eating apple, peeled cored and sliced2 tablespoons Muscovado sugar1/3 teaspoon cinnamon Method

In large bowl, combine 1 cup flour, sugar, undissolved yeast, and salt. Heat water, milk, and oil until very warm (120o to 130oF).

Gradually add to flour mixture. Beat 2 minutes at medium peed with an electric mixer. Scrape the bowl occasionally.

Add the eggs and 1/2 cup of flour. Beat for 2 mins at high speed (I had to lower my speed as the gluten was getting worked and the flour was winding up my beaters!)

Stir in the remaining flour to make a stiff batter. I had to add en extra 1/4 cup to do so.

Stir in the chopped up apple pieces.

Grease and line a cake pan, arrange the apple slices in bottom and sprinkle with sugar and cinnamon. Pour in the batter and spread it out evenly.

Leave it to rise in a warm place for 1 hour...ot until it doubles in size.


Above the batter has just been poured into the pan


Here, ready to bake.


You might like to do as the recipe suggests with the apple slices and place then on the top of the cake instead. I found the cake bottom burned exposed in the oven, but I liked how the apples embedded themselves in the cake on the bottom (which became the top)


So you could do it my way and cover the cake with parchment thats been well greased to stop it from burning.


Place into a preheated oven at 190 degrees oven for 45 mins until it is cooked in the middle. Test as per usual cake testing. I turned the oven down for the last 15-20 mins to 180 degrees celcius as it was burning.

remove and cool. Its lovely warm, but Delicious cool! With butter, or even golden syrup and cream!

YUM YUUUUM!

tattooedtonka's picture
tattooedtonka

Bread Bowls with Panera Bread Broccoli Cheese Soup

After seeing some of the posts of bread bowls, I figured I would give it a whirl.  I made 4 White bread bowls, which were actually full size boules.  And made Broccoli Cheese Soup from a Panera Bread recipe I found online.

Here are 3 of the 4.  My youngest had little patience in waiting for me to get photos of them all, she was digging in while I was still posing my bowls.  Overall it was a huge hit.  My eldest daughter and I are huge soup fans, my wife is much more finicky with soups.  I got the nod of approval on this one though.  I would higly recommend it to others.

Panera Bread Broccoli Cheese Soup Recipe  

Ingredients:
1 tablespoon butter, melted (for cooking onions)
1/2 medium onion, chopped


1/4 cup melted butter
1/4 cup flour
2 cups half-and-half
2 cups chicken stock or bouillon
1/2 pound fresh broccoli
1 cup carrots, julienned
salt and pepper to taste
1/4 teaspoon nutmeg
8 ounces grated sharp cheddar 

Sauté onion in butter. Set aside. Cook melted butter and flour using a whisk over medium heat for 3-5 minutes. Stir constantly and slowly add the half-and-half (this is called making a roux). Add the chicken stock whisking all the time. Simmer for 20 minutes.

Add the broccoli, carrots and onions. Cook over low heat until the veggies are tender for 20-25 minutes. Add salt and pepper. The soup should be thickened by now. Pour in batches into blender and puree. Return to pot over low heat and add the grated cheese; stir until well blended. Stir in the nutmeg and serve

TT

Kurt's picture
Kurt

Has anybody here jumped from hobby to business?

I've been considering exiting the corporate rat race and opening a sandwich shop.  Not a franchise but a small, artisan-type of place where I can bake bread and have a deli case, maybe pizza, too (maybe wine, too-too).  Probably crazy but it's what I dream about.  I've no business experience nor professional baking experience but I've been gathering data from SBA to learn more about the business side.  My wife's friends' family own a local bakery so I'll be asking to volunteer there very soon.  I've cooked and baked at home for ten years, enjoy it and receive very positive feedback from family (of, course - they have no choice :-) ) and friends.

I'm in no hurry and will never jump without a full awareness and a (business) plan to succeed.  Not interested in getting rich - just (1) being happy pouring my energy into this passion of baking and making people happy via good food (yup, I'll have liability insurance in case I fail in that latter aspect) and (2) supporting my family.

Anybody take this plunge, live to tell about it and willing to share your experiences?

-Kurt

Thegreenbaker's picture
Thegreenbaker

50/50 Whole wheat & White Treacle sandwhich loaf.

Today I had a little triumph.

My oven has been broken for 5 days and finally the oven repair man came to replace the element....yesterday....

So, after testing the oven with lentil Pie and Steak and red wine pie (for the hubby) last night. I was ready to make some bread today.


I had made a poolish, but after a bit of a busy/mixed up day, it had been left out for too long and I decided not to use it. I had made it way too wet as it was anyhoo.


So, I threw together a half Wholewheat and half white loaf. Indending it to be a sandwhich loaf as I have missed toast ovwer the past week! *pouts* I decided that I might try adding a teaspoon (heaped) of treacle into the mix thinking it would be nice with the whole wheat. So, I did.

The whole recipe went

2 Cups strong whole wheat flour (about 12 %)

2 Cups strong white flour (about 11.6%) both organic.

3 tablespoons olive oil

2 teaspoons active dry yeast.

1.5 teaspoons salt

about 2 cups luke warm water. (I began with 1.5 cups but then had to add 1/4 cup extra, then a 1/4 cup extra on top....it was then a liiiitle sticky which was alleviated when I kneaded it with more flour)


I mixed the whole wheat and the white flours together in a bowl. added the salt and mixed again.

I then dissolved the treacle and yeast in the water (1.5 cups)...left it for about a minute then poured the oil into the water mixture.

Poured the whole lot into the flour and mixed adding extra water as I went until it came together.

I then kneaded the dough (with extra flour as I'd added a little too much water) for about 10 minutes...perhaps a little more....

and left it to rise for an hour in a warm place.

Then gave it another knead (its a sandwhich loaf) and placed it back in an oiled bowl covered to rise for another hour.

I shaped it and rolled it in seeds then left it to rise for 45 minutes in a warm place (covered)

Placed it in a preheated oven for 50mins at 190 degrees celcius.


What I do for my sandwhich loaves is I own two loaf pans (well 4 but they are 2 pairs in different sizes)

I use the spare loaf pan as a lid while rising and for the first 10-15 mins in the oven.

It works a little like the la cloche and keeps the surface moist so that it has as much chance of springing as I can give it.

Usually it works alright, but tonight.....

It worked a treat.


This is by far the best sandwhich loaf I have made :)


The only thing I'd change is making it 100% whole wheat if I were to keep the treacle in it, or omit the treacle and use honey or nothing.

I didnt score it so it tore, but, I kind of like the tear....it says to me I made a good bread that wanted to rise. It looks rustic aswell :)

And below is the crumb shot. Very nice for a sandwhich loaf :) Lets hope I keep repeating these happy results!


maxamilliankolbe's picture
maxamilliankolbe

First attempt at new pizza dough recipe and first photo post

pizza

pizza2

pizza3

Hello, everybody! This is my first photo post (gee, I hope it shows up...) and also my first attempt at making a new pizza dough. I received Crust and Crumb by Peter Reinhart for Christmas (I was ecstatic!!) and this was my first bake. I made both of the doughs he included in the book for the same night, and both were by far the best pizza dough I've ever made! We especially love NJ (NY) style pizza so are looking for something that approximates it. These pictures are of the Pizza I recipe. The Pizza II recipe I didn't get a picture of, well, frankly, because it was gone by the time I got around to taking pictures!! Pizza II was closer to NJ style (we think), which is why it was gone so quickly, but the Pizza I crust was noticeably more tender. Both began with a poolish, however Pizza I, a much more wet dough much like ciabatta, was allowed to rise for 3 hours before retarding overnight in the fridge. Pizza II was much more firm and was allowed to ferment for 1 hour, divided, and ferment (I'm guessing that's what you'd call it) again for another hour before rolling out and baking. Pizza II was by far the simpler of the two. I guess I can't complain if that's the one my husband likes the best! The crust in the pictures is very tender and light with some nice holes in the crust around the edges. It ended up quite thin everywhere else, which was wonderful. Unfortunately we aren't big outer crust fans -- why eat just a bready outer crust when it, too, can have sauce and cheese on it?? Just our philosophy. Oh, and no, we do not eat next to the Christmas tree. It just looks nice. And I love Christmas! I'd be glad if anyone has any ideas on other crust recipes that would be similar to what you can get at a pizzeria in NJ or NY... man, they just have the best pizza. I do have a tip, though... Don't drool on the computer looking at the pictures. It's not good for the keys. :)

Fenrir's picture
Fenrir

Wet dough questions

Hey guys,  I'm not sure if this is the right place to ask for advice, but here it goes.  I'm getting back into baking bread and had a few questions.  I've seen a bit about the window pane test and a few other tests, but I'm having trouble establishing earlier if my dough is too wet.  If its supposed to be that wet I'm having a bit of trouble handling it, if I wet my hands or the area to keep the dough from sticking I'm afraid of making it too wet too the point I feel like the dough will never come together, even with some folding. If I flour the area I'm afraid of making it too dry.  I know this is a bit general, but any advice?

JMonkey's picture
JMonkey

ACME baguettes from Glezer's Artisan Baking

I've only had the pleasure of visiting San Francisco twice, and both times it was on business. But I made sure to stop by the ACME Bread Co. store at the Ferry Building to pick up a small boule of that famous local sourdough, or perhaps a walnut or olive levain.

I'd never tried their baguettes, however, and, since I've recently been very much in the mood for a baguette, and since I'd not made a single recipe from Maggie Glezer's well respected Artisan Baking, this seemed like a natural for the weekend.

I was mightily impressed. The flavor was excellent, just as good if not better than the single step baguettes I made last week. If only I'd gotten ears all over the bread like the one at the top of the bottom loaf!

The recipe makes 2 lbs of dough, which gets split into two 8 oz. baguettes and a 1 lb boule. But I just divided it into three and make three 10+ oz baguettes. Because I shaped my last baguettes a bit tool long for the stone and had them drooping off the ends, I erred on the other side, and made these a bit too short, so they ended up looking a bit more like sub rolls than baguettes ... but heck, I called them baguettes, so baguettes they are!


I was particularly impressed by the crumb, which I got a good shot of the next day, as I made sandwiches. The internal structure was remarkably open given that the overall hydration is just a notch above 66%, a hydration at which the dough is very easy to handle.


It's an unusual dough in that it uses two different pre-ferments: a poolish and a pate fermente (also known as old dough). It's worth the trouble though.

Old dough

  • Instant yeast: 1/4 tsp
  • Water at 110 to 115 F: 1/2 cup
  • Unbleached all-purpose flour (I used Giusto's Baker's Choice):3/4 cup or 115 grams
  • Salt: 1/4 + 1/8 tsp or 1 gram

Sprinkle the yeast in the warm water and let it dissolve, which takes about 5-10 minutes. Mix the flour and salt, then add 1/3 cup of the yeasted water (reserve the rest -- you'll need some for the poolish). Mix it and knead it for about 5 minutes. Let it rise for about 3 hours, and then pop it in the fridge.

Poolish
  • Instant yeast: 1 Tbs of the yeasted water
  • Flour: 1 cup or 150 grams
  • Lukewarm water: 2/3 cup or 135 grams
Mix it all together until everything is hydrated, cover, and let it sit for about 12 hours. Bubbles will be popping at the top and it'll look a little wrinkly when it's ready. My house is cold (around 55-60 at night), so I let it go for about 16 hours.

The Final Dough
  • Flour: 2.25 cups or 340 grams
  • Instant yeast: 1/4 tsp
  • Lukewarm water: 3/4 cup + 2 Tbs or 180 grams
  • All the poolish
  • All the old dough
  • Salt: 1.75 tsp or 9 grams


Step One: Autolyse
Mix the flour and the yeast together. Then, add the water to the poolish so it will come out easily from the bowl, and pour it into the flour. Stir it up until everything is hydrated, then knead it a few times to ensure everything is well combined. Cover and let it rest for about 20 minutes.

Step Two: Mixing
Break up the old dough, then add it along with the salt. Knead until you get a smooth dough that can pass the windowpane test, which is about 10 minutes or so. Cover and let it rise for about 3 hours, until it has at least doubled and you can see large bubbles. Give the dough a good stretch and fold at 20 minutes, 40 minutes and 60 minutes. Then let the dough rise for the remaining 2 hours.

Step three: Pre-shaping
Before you begin, pre-heat the oven to 450 F. If you've got a stone, make sure it's inside and also place a steam pan on the bottom rack. Glezer recommends you form it into a stubby batard. I just formed a boule. Either works, I'm sure. Let it rest for 30 minutes. This seemed like a long rest to me, but it made a big difference in my being able to easily shape the dough.

Step four: Shaping
This is where she asks you to shape the baguette. I wish I could describe how to do it, but really, you need to see photographs. Essentially, you pat it gently into a rectangular shape and then fold the top long side into the middle, and seal it, gently, but firmly. Do the same for the bottom. Then pull the top completely over the bottom and seal. Finally, with a rocking motition of your hands, start in the center, and gently, but rapidly, move outwards, stretching the dough to its proper length.

Let it rise for about 30 to 60 minutes. When it's ready, the dough will slowly spring back from a gentle nudge with your finger.

Step five: Scoring and baking
Score the baguettes with a blade at a 45 degree angle, with slashes that run primarily down the length of the loaf. Bake with steam at 450 F for about 25 minutes, until the inside of the loaf reaches at least 205 F. Let cool 30-60 minutes before devouring.
bwraith's picture
bwraith

100% Whole Grain Sourdough Hearth Bread

100% Whole Grain Hearth Breads

100% Whole Grain Hearth Breads - Crust

100% Whole Grain Hearth Breads - Crumb

After following the recent adventures of JMonkey with 100% Whole Grain Sourdough and working on answering some of the questions concerning whole grain sourdough breads posted by Ron, Shai, and Taygirl, and wanting to make some bread my wife, who is more of a "true believer" in whole grain breads, would be happier to eat, I've decided to do some experimenting again with whole grain hearth breads. Just to be up front about this, I'm not a "true believer". I'm happy to have some "Work Horse Sourdough" or even a white "Pane Casarecio di Genzano" or a "Sourdough Pagnotta" or a "Thom Leonard CF" or the like in smaller quantities, and just eat other foods to get the nutrients and fiber from the bran and germ that might be missing due to indulging in less than 100% whole grain breads. Nonetheless, when my granola eating friends give me that disapproving look, I just feel guilty if I can't come up with a good 100% Whole Grain Sourdough Hearth Bread to settle their doubts.

With the caveats mentioned above, I still thought this bread had good flavor and texture. My wife was especially happy with it and asked me to keep a small quantity of it on hand at all times in the freezer, along with other favorites. The only other time she has made such a request was for the Sourdough Focaccia, which is an addiction, not a healthy choice.

I made this bread in two different ways. The first is a one-step approach with a very long somewhat cool rise from a very small amount of starter added directly to the final dough ingredients. The second is a two-step approach with an overnight levain allowed to somewhat more than double in volume and a soaker of the remaining whole grain flours that are combined in a final dough with salt and a little malt syrup the next day for a faster warmer final rise. Note that to satisfy the "100% whole grain true believers", I have gone to the trouble of making a whole wheat starter, which I did by taking a tiny amount of my white flour starter and feeding it repeatedly over the course of the past week with exclusively whole wheat flour. Given that I feed the starter 1:4:5 (starter:water:flour by weight) every 12 hours, there is still about 1 billionth of a part of white flour in it. Sorry, I just didn't have time to get it any closer to pure whole grain. However, I then dilute it by a factor of about 100 in the dough, so the final dough is 1/100 billionth white flour or so, just in the interests of full disclosure.

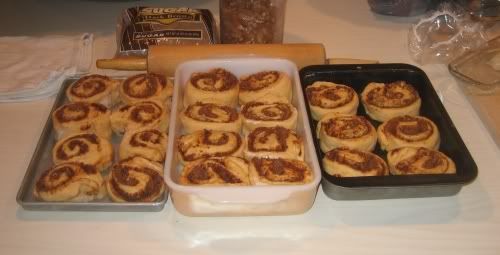
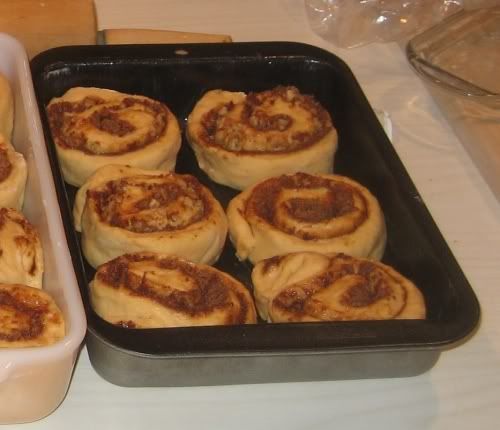
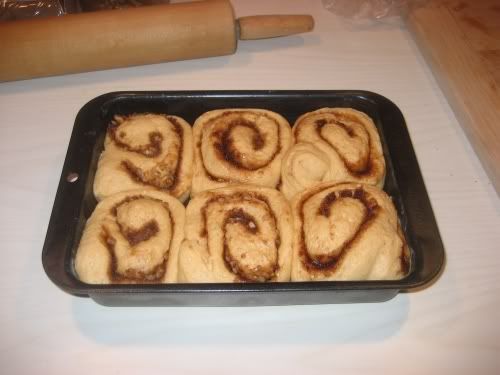
I have spreadsheets for both the two-step version (html, xls), and the one-step version (html, xls). Photos of the process, including a nice pair of roast chicken and some roast yams, later mashed, covered with marshmallows, and allowed to brown in the oven. Kids love those marshmallow covered yams, let me tell you.

Version 1 Mixing and Initial Rise

Version 1 Dough:

  • 15g 80% hydration whole wheat starter (you can probably substitute any whole grain starter, or a white flour starter if you don't mind going a little below 100% whole grain).
  • 41g whole rye flour
  • 141g whole spelt flour
  • 383g Wheat Montana Prairie Gold (high protein white whole wheat flour)
  • 375g Wheat Montana Bronze Chief (high protein red whole wheat flour) or just combine the whole wheat flours and use whatever whole wheat flour(s) you like.
  • 10g organic barley malt syrup
  • 18g salt
  • 758g water

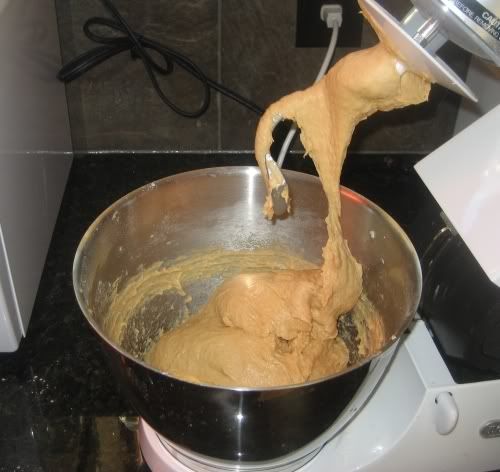
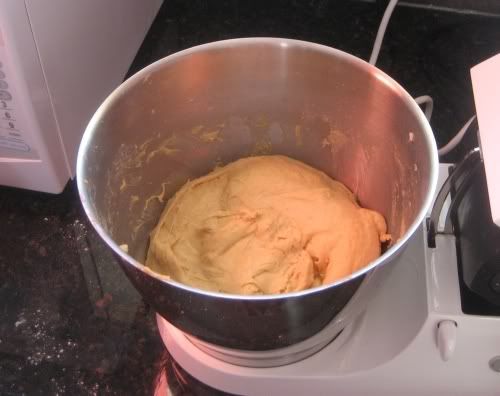
Mixed at 9:55PM with DLX mixer on medium/low for 8 minutes, then folded a couple of times and dropped in covered rising bucket for the night. It started at 74F after mixing and dropped to 70F over a few hours. It was at about 69F the next morning.

Version 2 Levain and Soaker

Levain:

  • 15g 80% hydration WW starter (same notes as above)
  • 41g whole rye flour
  • 141g whole spelt flour
  • 146g water

Mixed at 10:15 PM and let rise overnight, covered, at 70F down to about 69F.

Soaker:

  • 375g Wheat MT Prairie Gold (same notes as above)
  • 375g Wheat MT Bronze Chief (same notes as above)
  • 604g water

Mixed at 10:25PM and allowed to rest overnight at 70F down to about 69F.

Version 2 Mixing

Version 2 Dough:

  • Levain
  • Soaker
  • 10g organic barley malt syrup
  • 18g salt

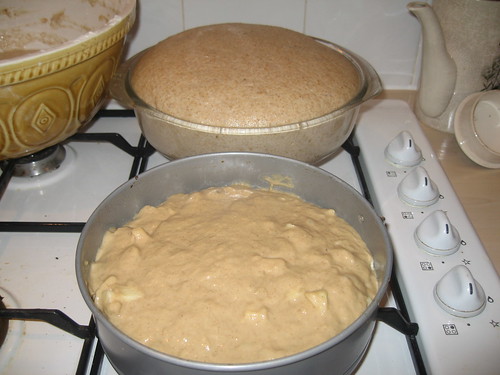
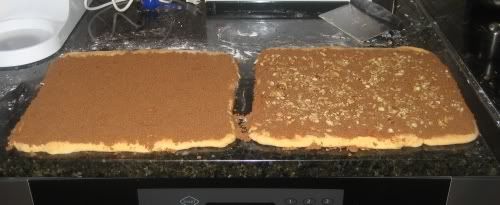
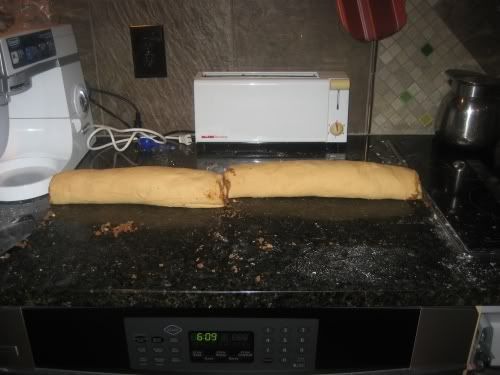
The mixing of Version 2 was done at 7:30 AM. I spread soaker out on wet counter like a big pizza using wet hands. Paint levain onto soaker using a spatula. Paint organic barley malt syrup over levain. Roll up and fold a couple of times. Spread out like a pizza again. Spread salt evenly over the dough. Roll up and fold a couple of times. It was mixed in DLX mixer at medium/low for 8 mintues, folded a couple of times and placed in a covered dough bucket to rise. The dough bucket was put in my "proofing cabinet", a spot above my coffee machine that sits at about 76F in the winter. I knew that if I want to bake "Version 1" and "Version 2" together, I would need to speed up the rise on "Version 2" a little to get them to coincide. So, Version 1 was left in a cool spot at 70F for the morning, while version 2 was placed in the proofing cabinet to get a boost.

Version 1 and Version 2 Folding

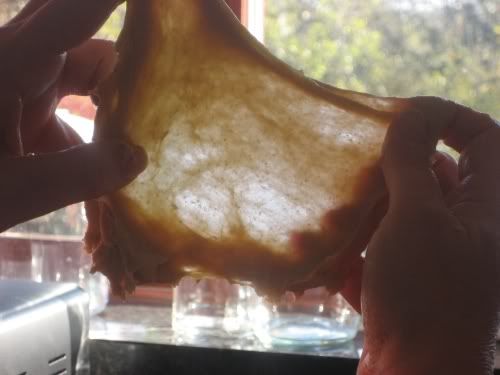
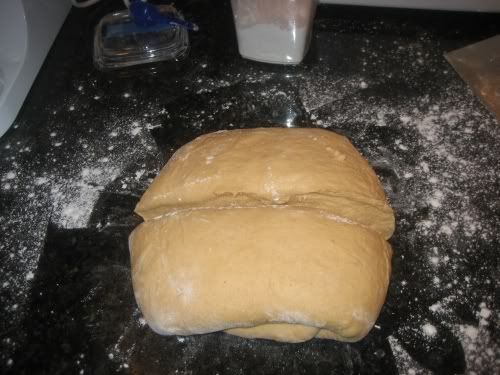
At this point both versions are in their respective rising buckets, one in a warm spot, the other in a cool spot. I folded both of them about once per hour during the remainder of the bulk fermentation for a total of 3 folding sessions each. All the folds were typical of the description in Hamelman's "Bread". I pour the dough out on a lightly dusted counter with the smooth side down, fold each side in toward the middle, from the north, east, west, and south, brushing off any flour after each fold, and then turn it back smooth side up and drop it back in the rising bucket. The remainder of the bulk fermentation, measured from the point Version 2 was mixed (7:30AM), was 3.5 hours.

Shaping

At 11:00AM, both loaves were shaped into batards. Each one is about 17 inches long, and both were placed in a half sheet in couche cloths smooth side up, put in a Ziploc "Big Bag", and allowed to proof for another 2.75 hours, until 1:45 PM. The ambient temperature of the kitchen was still about 70F. Version 2 therefore proofed at an average temperature of about 74 or 73F as it started at 75F and dropped to room temperature during the final proof, while version 1 proofed at 70F the whole time.
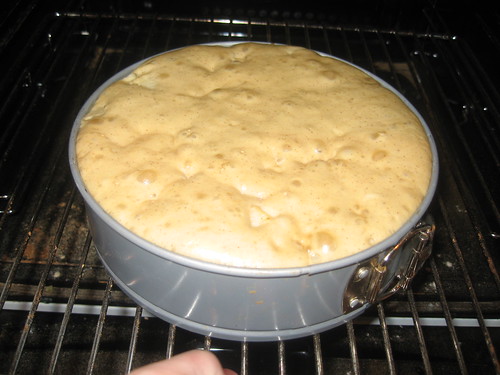
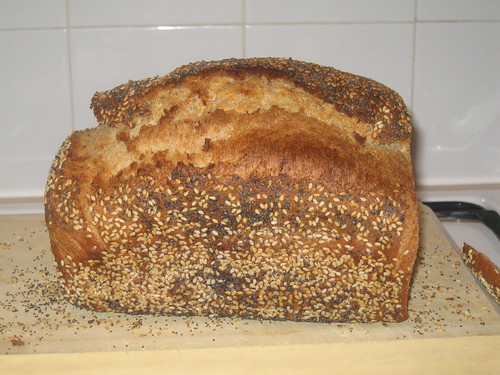
Slash and Bake

The loaves were turned onto a peel, slashed, and put in my brick oven. The hearth temperature was about 425F and I sprayed a few ounces of water on the loaves and into the oven chamber with an orchid mist sprayer, and sealed the oven with a wet towel covered door. In a kitchen oven, bake at 425F for a few minutes with steam, then drop the temperature to 375F and allow to fully brown. The final hearth temperature was about 375F after 45 minutes of bake. The loaves had browned, the crust seemed done, and the internal temperature was about 209F.
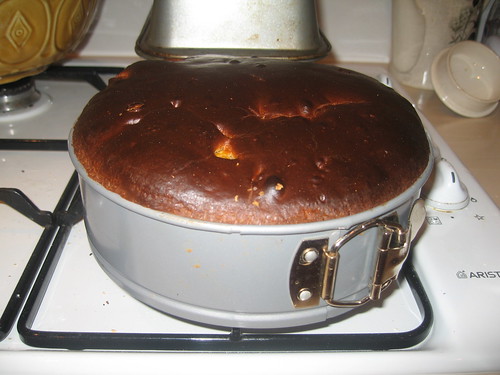
Cool

The loaves were allowed to cool completely.
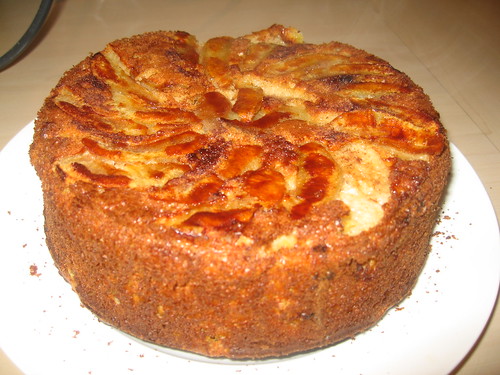
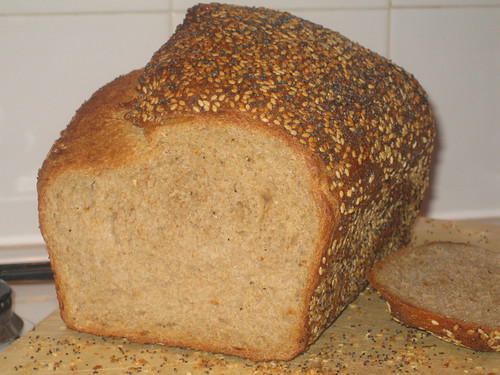
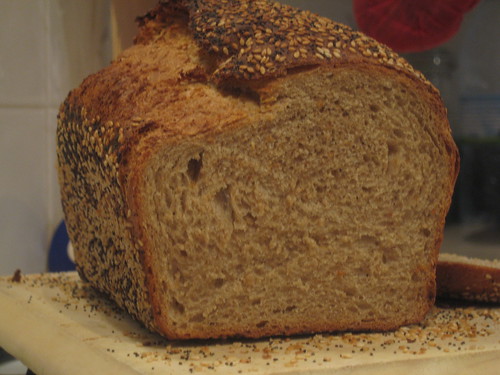
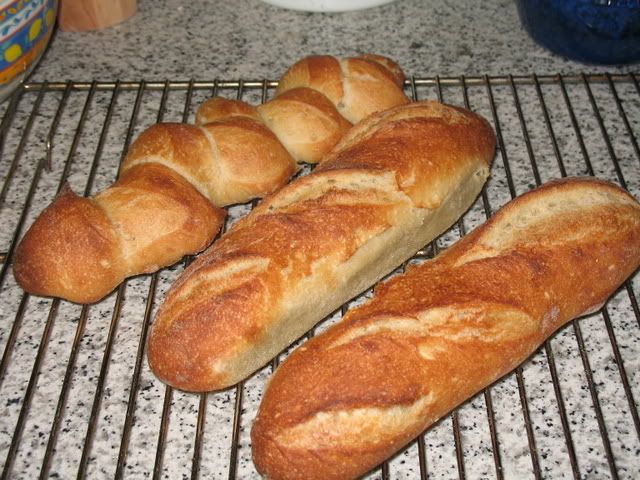
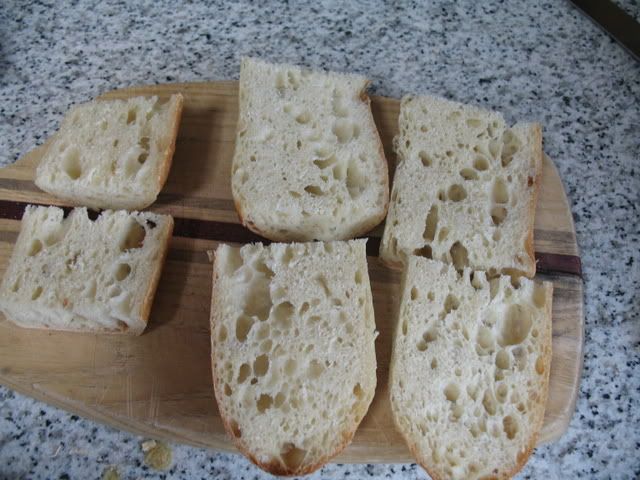
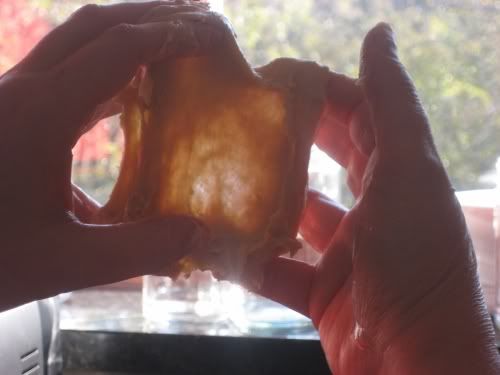
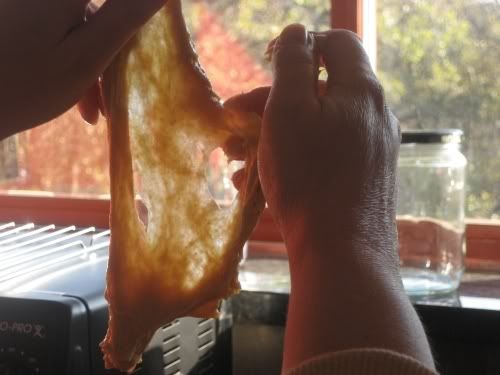
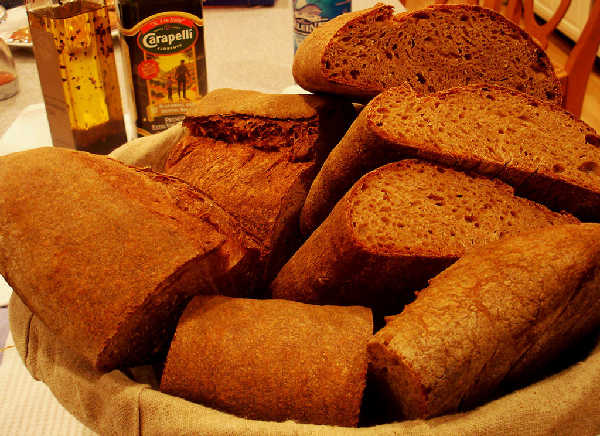
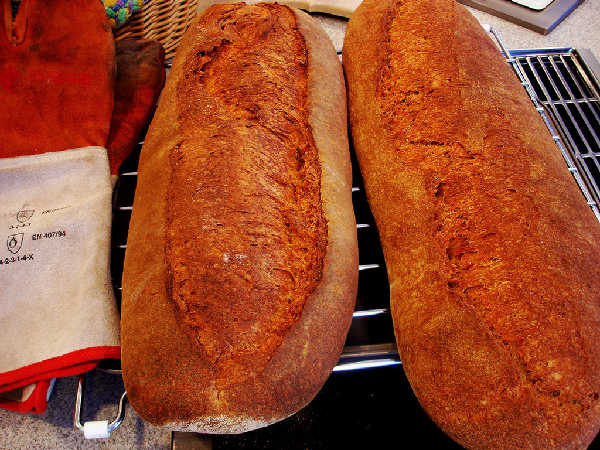
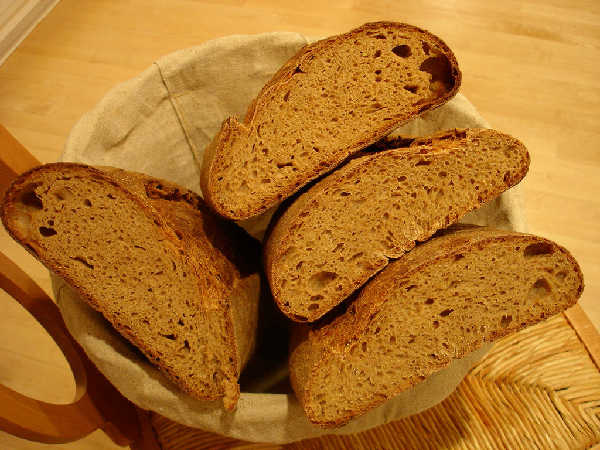
Results

The crumb is somewhat soft, but not fluffy, the holes are irregular and mostly small, but the crumb is open for a whole grain bread. It doesn't feel dense or heavy when you chew it. The crust is crunchy and fairly chewy with a good toasty flavor. The sourdough flavor of these loaves was mild and the crumb clearly had the characteristic nutty sweetness of spelt in it, even with just 15% spelt. It was hard to tell the difference in flavor between version 1 and version 2, but version 2, with the levain, seemed slightly more sour. Also, version 2 had a wetter, more proofed feel at both shaping and slashing time, even though both had increased in volume almost exactly the same amount. When I shaped version 2, it was harder to shape, as it was more gloppy, and it ended up being longer and flatter after shaping. However, the crumb texture, the crust, and the flavor were virtually identical after baking. Version 1 held its shape better and sprung in the oven, while version 2 seemed to spring up very little but did spread out a lot during baking. Although version 2 was flatter, the crumb was slightly more open. The Whole Wheat Sourdough Sandwich Bread I blogged a while back had a slightly lighter and softer crumb, even though the method was almost identical to version 2 with the levain. I suspect this is because in the sandwich bread version, the loaves were raised and baked in pans at slightly warmer temperatures and allowed to proof a little longer. Also the hydration was slightly higher in the sandwich bread.

Some Thoughts

I have had better luck with one-step versions and with two-step versions where I only allow the levain to just double and no more and with two-step versions with about 10% fermented flour, as opposed to this "Version 2", which had 20% fermented flour in the levain. I think that delivering the extra acid in a riper levain that constitutes 20% or more fermented flour causes a breakdown in the gluten structure of the final dough. This may be why Peter Reinhart's recipes in his whole grain book recommend using instant yeast with the larger levains in his recipes, which works well as many of us have verified. However, if you want to do a sourdough only recipe, my experiences so far point toward doing long slow rises from tiny inoculations, as in the one-step method, or if you are doing a two-step method with a levain, then only allow the levain to rise by double and not more before refrigerating or combining with the final dough. You won't get a big flavor boost from the levain the way you would with a riper levain, but it does allow for a convenient break in the timing, as the levain and soaker can be refrigerated for a day or two, and the the bread making process can be resumed at a convenient time.

KipperCat's picture
KipperCat

Sweet Potato Pecan Cinnamon Rolls

Sweet Potato Pecan Cinnamon Rolls

My Entry in Bread Baking Day #04, Bread with Spice http://bakinghistory.wordpress.com/2007/10/18/bread-baking-day-04/

I’ve been wanting to make these ever since I saw Floyd’s beautiful sweet potato dinner rolls. There were only two left when I went to take a picture. These are a decadent treat, great for special occasions. Here’s the finished dough. Even this gloppy dough will make a nice windowpane if the gluten is well-developed.


Here’s me just starting to tease the windowpane from the dough. An earlier attempt obviously failed, but showed the dough was getting close.

I scraped the dough into a sort of ball, and left it to rise. It rose quickly, and was probably a bit overproofed in the next picture.

The dough was still quite soft, so I did a set of envelope folds to the dough, then cut it in half to make it a bit easier to work with.

Each half was rolled into a square, buttered, and topped with brown sugar, cinnamon and pecans.

The left roll was rolled a little loosely, which is why half of the rolls don’t make a pretty spiral pattern – I had to tuck in the loose dough as I placed them in the pan, resulting in an extra little loop. You can see it very plainly in the baked rolls.

Here are the rolls tucked up in their pans. I only baked one pan, the others went into the freezer for a holiday morning treat. The rolls might have risen higher if I hadn’t overproofed the first rise. I don’t know, but they were ready to go in the oven.


Sweet Potato Pecan Cinnamon Rolls

Time – based on my equipment, my kitchen – YMMV!

Soaker - 30 minutes to 24 hours

Final Dough – 30 minutes (including rest)

Primary Fermentation – 90 minutes

Forming Rolls and Final Fermentation – 3 hours

Baking – 35 minutes


Soaker

1¼ cup milk, scalded (heated to about 185F)

1 tablespoon lemon juice or vinegar

200 grams WW pastry flour

100 grams WWW flour

Final Dough

All of soaker

1 sweet potato, roasted, cooled, and peeled

4 tablespoons unsalted butter cut into pieces

2 eggs

1 1/2 tsp. Ground cardamom or ground seeds of 12 pods (optional)

1/8 teaspoon ground nutmeg

2 teaspoons salt

2 ½ teaspoons instant yeast

450 grams AP flour

Filling
8 ounces light brown sugar, about 1 cup packed
1 tablespoon ground cinnamon
2 tablespoons melted butter

1/2 cup chopped pecans

Icing

4 tablespoons soft butter (or cream cheese)
3 tablespoons milk
5 1/2 ounces powdered sugar, about 1 1/2 cups

Prepare Soaker Put flour into bowl of stand mixer. Stir the lemon juice into hot milk, and pour over flour. Mix well. Cover and let rest for 30 minutes to 24 hours. Refrigerate if soaking for more than a few hours. (A long soak will yield a softer roll.)

Prepare Dough and Filling Add all remaining ingredients to soaker, and mix with paddle until thoroughly combined. Let rest for 15 minutes. Knead with dough hook until smooth and satiny, with a nice windowpane. This will be a soft, gloppy dough. Cover dough and let rest until doubled..

Butter your baking dishes. Turn the dough out onto a lightly floured work surface and divide in half. The dough will be extremely soft at this point, so do a couple of envelope folds (one each direction.) Divide the dough in half, and let rest a few minutes if you’ve folded. (Meanwhile, prepare the filling. Combine the brown sugar, cinnamon and salt in a medium bowl. Mix until well incorporated. Set aside until ready to use.)

Form Rolls Gently shape the dough into 2 squares. Roll each into a 12-inch square. Brush the dough with the melted butter, leaving 1/2-inch border along the top edge. Sprinkle the filling mixture over the dough, leaving a 3/4-inch border along the top edge. Sprinkle the pecans over the filling. Gently press the filling into the dough. Beginning with the edge nearest you, roll the dough into a tight cylinder. Firmly pinch the seam to seal and roll the cylinder seam side down. Very gently squeeze the cylinder to create even thickness. Using a serrated knife, slice the cylinder into 1 1/2-inch rolls; yielding about 16 rolls. Arrange rolls cut side down in the baking dish; cover tightly with plastic wrap and store in the refrigerator overnight or up to 16 hours.

Baking When rolls are ready to bake, place in a cold oven and set to 350. Bake until interior temperature reaches 190F, about 15 to 30 minutes. I checked in my toaster oven at 20 minutes, and they were already at 212F!

While the rolls are cooling slightly, make the icing by whisking the butter in the bowl of a stand mixer until creamy. Add the milk and whisk until combined. Sift in the powdered sugar, and whisk until smooth. Spread over the rolls and serve immediately.

For frozen rolls, place in buttered pan and let thaw in refrigerator overnight. Remove the rolls from the refrigerator and place on the middle rack in an oven that is turned off. Place a shallow pan on the rack below the rolls and fill 2/3-full of boiling water. Close the oven door and let the rolls rise until they look ready to bake. They should be more than slightly puffy; This should take 30 to 45 minutes.

Turn the oven on to 350F and bake until golden brown, or until the internal temperature reaches 190F on an instant-read thermometer, somewhere between 15 and 30 minutes.

NOTES

After the first few, I got a bit careless cutting the rolls. So I ended up with 22 instead of the 16 I expected. The two in the first picture were cut at about 1 inch instead of 1 ½ inch.

If you’re uncomfortable working with a sloppy dough, go ahead and add more flour during the mix. Be sure to keep the dough soft though, as too much flour will affect the rise and tenderness.

I omitted the cardamom, but only because I didn’t have any. A lack of powdered sugar meant no icing either.

I hope you enjoy these as much as we did! Even my sweet potato adverse husband loved them.

dcbakerman's picture
dcbakerman

baker's mark or bread stamps

Has anybody heard or seen these?  They are from ancient russian times as well as england and other european countries.  There are two types.  One that you bake you bread on (leaving a small imprint on the underside of the loaf) and a tool that looks like a normal stamp but you press it into the side of a loaf before it goes in the oven.  I am looking for the first type.  I have thought about finding a jeweler to make them for me but not sure.


http://whirlwind-design.com/madbaker/marks.html

This is a website to give you guys something to see.

Let me know if you can help thank you.

dcbakerman 

Pages