The Fresh Loaf

A Community of Amateur Bakers and Artisan Bread Enthusiasts.

Most bookmarked

dmsnyder's picture
dmsnyder

Pizza Bliss

I like pizza quite a lot, but my wife loves it. She told me last night that Pizza is the one food she can “over-eat.” I could not start to list the foods I will predictably over-eat given the opportunity, but my wife has this super-human self-control. So this confession tells you that pizza is really special to her.

I've made some pretty good pizze and some not so good. Last night I made the best pizza I've ever made by a long shot. In fact, I do believe it was the best pizza crust I've ever eaten.

The crust was based on the “Overnight Pizza Dough with Levain” from Ken Forkish's Flour Water Salt Yeast. I say “based” because, while the ingredients and procedures were pretty much as Forkish prescribes, the timing of many steps was different. Some of those differences were planned, and some were …. accommodations. I'm not going to claim that the crust turned out so well because of my baking genius, but I am going to try to capture what I ended up doing so I can do it again … on purpose next time.


Total dough

Wt (g)

Baker's %

Levain


10*

Caputo 00 flour

980

98

Giusto's fine whole wheat flour

20

2

Water

700

70

Salt

20

2

Total

1720

172

* Percent of total flour that is pre-fermented.


Levain

Wt (g)

Baker's %

Mature, active levain

25

10

Caputo 00 flour

100

80

Giusto's fine whole wheat flour

25

20

Water (90 ºF)

100

80

Total

250

190


  1. Dissolve the levain in the water.

  2. Add the flours and mix thoroughly.

  3. Ferment at room temperature until expanded by 2 to 2.5 times. (Note: Forkish specifies fermenting for 8 to 10 hours. My levain was ripe in 6 hours. So, I went to step 4.)

  4. Refrigerate overnight or for up to 2 days.


Final dough

Wt (g)

Caputo 00 flour

900

Water (90-95 ºF)

620

Fine sea salt

20

Levain

180

Total

1720

  1. Take the levain out of the fridge 1-2 hours before mixing the final dough.

  2. Mix the water and flour to a shaggy mass and allow it to rest, covered, for 20-60 minutes (autolyse).

  3. Sprinkle the salt over the dough and add 180 g of the levain divided into 4-6 pieces. Mix using the “pinch and fold” procedure described by Forkish.

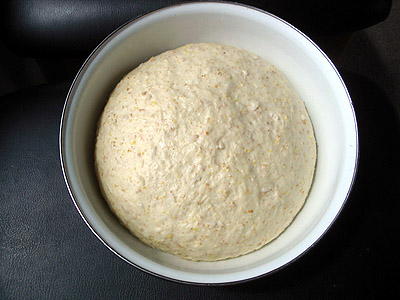
  4. Bulk ferment for 5 to 14 hours, or until the dough has expanded 2 to 2.5 times. Do stretch and folds at 30 minute intervals 2-4 times . Then just let the dough ferment undisturbed. (Note: I know this time range (5 to 14 hours) sounds absurd. Forkish's instructions are to ferment overnight for 12 to 14 hours, but my dough had doubled in 5-6 hours and was very bubbly. If I had let it ferment for another 6 to 8 hours, I would have had soup.)

  5. Transfer the dough to a well-floured board. Dust the dough and your hands with flour. Divide the dough into 350 g pieces. (You will get 4 pieces of 350 g and one that is larger.

  6. Shape each piece into a fairly tight ball and place them in ZipLoc-type sandwich bags with a tablespoon of olive oil in each.

  7. Refrigerate for at least 2 hours and for up to 3 days.

  8. When you are ready to make your pizza/e, 2 1/2 to 4 hours before shaping the pizze, take the number of dough balls you will need out of the fridge. Let them warm up at room temperature for 1 1/2 to 2 hours. The balls should expand by a third to a half.

  9. Put the dough balls back in the fridge for the last half hour to an hour before shaping them into pizze. This is because the dough is a bit more elastic and less fragile when cold.

  10. Take one ball of dough at a time out of the fridge. Shape it. Top it. Bake it. Enjoy!


This “in and out of the fridge” stuff may seem unduly complicated. It happened because we changed our minds about going to a concert a couple times before finally deciding to stay home and make pizza. See, if we had decided to go, there wouldn't have been time to make pizza and eat it beforehand. But, in hindsight, this procedure makes a lot of sense. A longer fermentation improves flavor, but retarding the dough in the fridge was needed to prevent over-fermentation. The warm-up in Step 8. just completed the fermentation to an optimal degree. I could have just let the bulk fermentation go a bit longer – say about an hour – and then not needed Step. 8 and 9 at all.

This dough was a delight to shape. It had just the right balance of elasticity and extensibility. When baked at 500 ºF for 10 to 11 minutes, the edges puffed up beautifully. They were crackling crispy. The dough under the toppings was moderately chewy but not at all “tough.” The most remarkable feature was the flavor. It was mildly sour but very wheaty, sweet and complex. It was astonishingly delicious. My wife, who often leaves pizza crust un-eaten, actually left the center part un-eaten and ate the outer crust in preference.

How much of this was the procedures and how much the use of 98% Caputo 00 flour? That's hard to answer. I suppose I need to make this dough again using a good AP flour to find out.

I made two 10 or 12 inch pizze. One was a classic Pizza Margherita made with olive oil, fresh mozzarella, fresh, locally grown San Marzano-variety tomatoes which were par-boiled, skinned, seeded and cut into strips and fresh basel leaves from our garden, added after the pizza was baked.


The other pizza was topped with a heavy spread of good olive oil, fresh, finely chopped rosemary and fleur de sel. After baking, the top was rubbed with a cut San Marzano tomato which was then hand-shredded and spread over the pizza. (Note to self: Lose the salt, if you don't want Susan to complain. Substitute thinly sliced garlic.)


Well, we do have 3 pizza dough balls left, including a 380 g one. I am going to make a potato pizza that's been on my “to bake list” for a few years, ever since I first read about it in Leader's Local Breads then again in Maggie Glezer's Artisan Breads.

Yum!

Happy baking!

David

Submitted to YeastSpotting

zolablue's picture
zolablue

Pierre Nury’s Rustic Light Rye - Leader

This is a new recipe I made from Daniel Leader’s book, Local Breads, for a Parisian loaf of Pierre Nury’s who is a recipient of the prestigious Meilleur Ouvrier de France award, as noted in the book.This is a very rustic light rye considered to be his signature loaf and is compared to Italian ciabatta.

It was very interesting to make and loads of fun although my timeline didn’t quite match Leader’s description of what would take place in the amount of time noted.I have made notes below in the recipe for how this worked for me.

This is delicious bread!I will definitely bake this loaf again.The recipe is so simple I see it as almost a no fail bread.The flavor is very good and I would describe it so far as the most tangy bread I’ve made to date keeping in mind my sourdoughs are very mild.I think it is really an outstanding flavor and toasted it is wonderful with a real depth of flavor.

The crumb is beautiful and very moist and almost spongy.It is very open like a ciabatta which just seemed so odd to me after such a long, overnight rise.

Here is the recipe for those of you who might like to give it a try.

Pierre Nury’s Rustic Light Rye – © Daniel Leader, Local Breads

Makes 2 long free-form loaves (18 ounces/518 grams each)Time:

8 – 12 hours to prepare the levain

20 minutes to mix and rest the dough

10 to 12 minutes to knead

3 to 4 hours to ferment

12 to 24 hours to retard

20 to 30 minutes to bake

Levain:

45 grams - stiff dough levain(45%)

50 grams – water (50%)

95 grams – bread flour, preferably high-gluten (I used KA Sir Lancelot) (95%)

5 grams – stone-ground whole wheat flour (5%)

Prepare levain by kneading and place into a covered container.Let stand at room temperature (70 to 75 degrees F) for 8 to 12 hours until it has risen into a dome and has doubled in volume.*

Bread dough:

400 grams – water (80%)

450 grams – bread flour, preferably high-gluten (I used Sir Lancelot) (90%)

50 grams – fine or medium rye flour (I used KA medium) (10%)

125 grams - levain starter**

10 grams – sea salt (I used kosher)

Mix:

Pour water into bowl of a stand mixer.Add the bread flour and rye flour and stir until it absorbs all of the water and a dough forms.Cover and autolyse for 20 minutes.

Knead:

Add the levain and salt.By machine, mix on medium speed (4 on a Kitchenaid mixer) until it is glossy, smooth and very stretchy for 12 to 14 minutes.***This dough is very sticky and will not clear the sides of the bowl.Give the dough a windowpane test to judge its readiness by gently stretching a golf-ball sized piece until it is thin enough to see through and not tear.If it tears mix for another 1 to 2 minutes and test again.To get maximum volume in the baked loaf, make sure not to under-knead.

Ferment:

Transfer dough to a lightly oiled container and cover.Leave to rise at room temperature (70 to 75 degrees) for 1 hour.It will inflate only slightly.

Turn: (stretch and fold):

Turn the dough twice at 1-hour intervals.After second turn, cover dough and leave to rise until it expands into a dome twice its original size, 1 to 2 hours more.****It will feel supple, airy, and less sticky.

Retard:

Place the container in the refrigerator and allow the dough to ferment slowly for 12 to 24 hours.It will develop flavor but not rise significantly.Two to 3 hours before you want to bake, remove from refrigerator and let stand on the counter, covered.It will not rise and will feel cool.

Preheat oven:About 1 hour before baking heat oven (with baking stone) to 450°F.

Shape loaves:

Scrape dough onto floured counter and coat the top of the dough with flour.Press the mound of dough into a rough 10-inch square. Cut dough into 2 equal pieces (18 ounces/518 grams each).With floured hands, lift up one piece from the ends and in one smooth motion, gently stretch it to about 12 inches long and let it fall in whatever shape it may onto parchment paper.Repeat with the remaining piece of dough, spacing the two pieces at least 2 inches apart.(No need to score.)

Bake:

Steam oven as usual.Immediately after shaping, slide loaves, on the parchment, onto the baking stone.Bake until crust underneath the swirls of flour is walnut-colored, 20 to 30 minutes.

Cool:

Cool on wire rack for about 1 hour before slicing.Don’t be surprised by the long troughs running through the crumb.This is part of the bread’s character.

Store:

Store loaves with cut side covered in plastic at room temp for 3 to 4 days.For longer storage, freeze in resealable plastic bags for up to 1 month.

http://zolablue.smugmug.com/gallery/4189134#244767439

NOTES:

*Leader says to allow the levain only to double in the amount of time noted.My starter more than tripled in less than 6 hours so at that time I mixed the dough.I think this may have slowed my fermentation way down since my starter had not fully risen and collapsed but I find I am always at odds with Leader’s instructions on firm starters.

**The levain recipe calls for ingredients which make up more than is needed for the dough recipe which I find problematic only because it bugs me.I want instructions for making the amount I need for a recipe and not to have any levain as leftover.He does this in some recipes and not in others so to me that is another flaw in their editing.Just make sure you weigh the proper amount for the dough recipe.

***I used a DLX mixer at about medium speed for roughly 10 to 12 minutes.

****My dough did not rise more than about 25% (if that) in the container in more than three hours after fermentation started.Again, I think that was due to using my levain too soon.I chose to place the dough in my pantry overnight to rise instead of the refrigerator since it had not doubled as it was supposed to by that time.My pantry is very cold at 62°F now as it is on an outside wall and this allowed a good spot for the dough to ferment overnight instead. It rose to just over double by the time I was ready to bake it.That fermentation took about 17 hours total.

In the 15 years since I first tried Brother Juniper's Struan Bread, I've tasted a lot of great bread, but I still don't think I've tried anything that makes as great toast as Struan Bread does. Nor have I tried any bread is so universally enjoyed: everyone who tries it agrees that this bread makes killer toast.

It isn't bad for sandwiches either.

I have to admit though that this bread occasionally gives me nightmares. Click "Read More" to learn why.


The Nightmares

When I was in high school I worked in the Brother Juniper's bakery and cafe. For the most part I worked on the slicing machine, but I also helped scale and shape the loaves. Oh yes, and top the loaves with poppy seeds.

The poppy seeds. The poppy seeds are what give me nightmares.

I have no idea how many pounds of poppy seeds we went through a day, but I know we made as many as 500 loaves of Struan Bread, each one covered with hundreds of poppy seeds. Those seeds would get everywhere: in your hair, under your fingernails, in your clothes, everywhere you can imagine. Even a few places you can't imagine: I recall a number of times pulling poppy seeds out of strange places (like my book bag for school or a clean pair of pants) and wondering "How in the world did poppy seeds get in there?!?

I still avoid poppy seeds most of the time, though I'll admit they are wonderful on top of this loaf.

About Struan Bread

Struan Bread (properly pronounced "STRU-en bread", but most people I know call it "STRON bread") is a harvest bread. I believe the story is that Peter Reinhart read something about a traditional bread that Irish villagers baked into which they threw a little bit of everything they were harvesting. Struan Bread as we know it is an attempt to capture the spirit of that loaf.

Regardless of the origin, this bread is wonderful. One is certainly free to experiment with including different or additional grains. I've done so a bit and the bread has turned out quite good, though I don't think any of them have be as excellent as the combination found in the original recipe (reproduced below).

Oh yeah, I need to add that this recipe is roughly the recipe found in Peter Reinhart's Bread Baker's Apprentice. I believe he includes versions of it in most of his other baking books (Crust & Crumb and Brother Juniper's Bread Book come to mind). If you don't already have one of his bread books on your shelf you owe it to yourself to pick one up.

Struan Bread

Makes 1 large loaf or 2 small loaves

Soaker
3 tablespoons polenta
3 tablespoons rolled oats
2 tablespoons wheat bran
1/4 cup water

Dough
3 cups unbleached bread flour
3 tablespoons brown sugar
1 1/2 teaspoons salt
1 tablespoon instant yeast
3 tablespoons cooked brown rice
1 1/2 tablespoons honey
1/2 cup buttermilk
3/4 cup water

topping
1 tablespoon poppy seeds

Mix together the ingredients for the soaker. Cover and allow to soak for at least half an hour or as long as overnight.

In a larger bowl, combine the dry ingredients, then stir in wet ingredients and soaker. Add more flour or water until the dough can be formed into a ball that is tacky but not sticky. Place the ball of dough on a clean work surface and knead it for 10 to 12 minutes, then return it to the bowl. Cover the bowl with plastic wrap and allow the dough to ferment until doubled in size, approximately 90 minutes.

struan bread

Remove the dough from the bowl, degas it gently, and split it for two loaves or shape it as is for one. Place the loaves in greased bread pans, spritz or sprinkle water on top, and sprinkle a handful of poppy seeds on top.

struan bread

Cover the pans loosely with plastic and allow the loaves to rise until doubled in size again, approximately 90 minutes.

struan bread

Bake these loaves at 350 for 40 to 60 minutes, until the internal temperature is around 190 degrees. When ready the loaves will be quite brown on top and will make a hollow thud when tapped on the bottom.

struan bread

struan bread

Doesn't that look good? Trust me, it is WONDERFUL! Try it, it is worth the work!

Related Recipes: Maple Oatmeal Bread

Struan Bread

PDLarry's picture
PDLarry

Nostalgia

Grew up eating this stuff. Custard buns. My cousin who now lives in Hong Kong sent me a recipe and I was able to make some... tears.

a_warming_trend's picture
a_warming_trend

Sourdough Batards with Rosemary and Cream Cheese

Hello, Fresh Loafers! I haven't posted a formula in awhile, and I think that this one for 76% hydration batards with rosemary and cream cheese is nice and reliable. 

Ingredients:
550 g all-purpose or bread flour (substitute in 70 g whole wheat if you're going for country-style)
410 g cool water
100 g 100% hydration active white starter
12 g salt
6 g non-diastatic malt powder (sub brown sugar or honey if necessary)
1/4 tsp black pepper
1-2 tablespoons of fresh, very finely chopped rosemary (I used 1.5)
40 g cream cheese
40 g pate fermentee (optional)

Method:
1) Feed your starter/mix your levain such that you have 100 g of active starter by the time you want to mix your final dough.
2) Mix flour and water in a food safe container with a lid, and autolyse for 1-10 hours (I like a very long autolyse when I'm able to plan for it; it often works out that I allow my starter to ferment while autolysis is happening!)
3) Add starter, rosemary, cream cheese, pepper, salt, malt, and pate fermentee to the flour + water mixture. Pinch and squeeze until combined, and then stretch or slap-and-fold for 3-4 minutes.
4) Stretch-and-fold every 30 minutes for 2 hours.
5) Allow the dough to rest at room temperature until increased about 20% in size, between 30 minutes and 2 hours, then transfer the container to the refrigerator.
6) Retard in a refrigerator no warmer than 45 degrees F for 8-24 hours (the longer you retard, the more open your crumb will ultimately be, and the tangier the loaf; I was only able to retard for 8 for the batards below).
7) Remove the container from the refrigerator. Sprinkle flour over the top of the dough and spread over the top, then gently loosen the dough from the sides of the container, allowing flour to fall around the dough. Flip it onto a work surface so that the floured side forms the bottom of the loaves.
8) Carefully cut into two equal pieces. Gently pull each piece into a long oval.
9) Allow to rest for 5-10 minutes. (I am not big on pre-shaping, so these ovals are quite loosely formed.)
10) Shape into batards using whatever method you are most comfortable with. One day soon, I will share pictures of my method of batard shaping -- it's the one I'm most consistently successful with as a novice home baker!
11) Allow the loaves to proof in a couche seam-side up for 45 minutes to 1 hour, or until increased roughly 40-50% in size. Watch carefully at this stage!
12) Optional: Transfer the couche to the freezer for 10 minutes. This step is not absolutely necessary, but I find that the "freezer trick" helps with both oven-spring and ease of scoring.
13) Score and bake the loaves at 475 degrees F for 15 minutes with steam, then 20-25 minutes without steam. For small batards such as these, I love to bake on the stone, with a turkey roaster lid creating the steam. For some reason, the crust I achieve this way is thinner and crispier than the crust I achieve using a dutch oven.

Rosemary is a slightly divisive herb, but I find that those who like it really, really like it. This bread is great as a side for a hearty meal, eaten straight with olive oil, or, my personal favorite: A smear of apricot jam.

Enjoy!

And some bonus photos of loaves created since the last time I posted: 


Kjknits's picture
Kjknits

Sourdough english muffins

I used some of my starter that would have been discarded last night during refreshment to make some english muffins.  I found this recipe about 3 years ago on the KAF Baking Circle.  It was submitted by a user going by the name chard.  It makes great english muffins!

engmuff2


The texture is similar to Wolfermans, not big "nooks and crannies", but a little meatier.  I know a wetter dough would create larger holes, but I like them this way.  I used semolina on the parchment while they rested, and the flavor it gives to the bottom of the muffin is fantastic.  Other than only using 2 cups of flour for the whole recipe, I followed the amounts and ingredients exactly.

Sourdough English Muffins

Makes about 12

1/2 C starter (mine is a 100% hydration white starter) 

1 C milk

2-3/4 C AP flour

1 TBSP sugar

3/4 tsp salt

1 tsp baking soda

Semolina or cornmeal, for dusting

Combine starter, 2 C of flour and milk in a large bowl.  Stir to combine, cover with plastic wrap, and leave out for 8 hours or overnight.

After the overnight rest, add remaining flour (I didn't add any), sugar, salt and baking soda and mix well.  Turn onto a lightly floured surface and knead for 4-5 minutes.  Roll out to 3/4" and cut with a biscuit cutter into rounds.  You can reroll the scraps, but you may need to let the dough rest before cutting more muffins from them.  Place muffins on a piece of parchment dusted with semolina and let rest for 45 minutes.

Spray griddle or skillet lightly with spray oil.  Heat to medium and cook muffins for about 6-8 minutes on each side, or until browned on the top and bottom and cooked through.  These have great griddle spring and rise quite a bit during the "baking".

Split with a fork and enjoy with your favorite topping!  I don't even toast them if I want to eat them right off the griddle--they don't have that raw taste that storebought english muffins have.

Enjoy! 

mrjeffmccarthy's picture
mrjeffmccarthy

Seed Monster Sourdough

Naturally Leavened seeded sourdough with chia, golden flax, and hemp seeds. Crusted with everything topping. Nutritionally dense and packed with flavor. 

Soaker

60g hemp seed

60g ground flax seed

60g chia seed

360g h20 @210F

Dough 

580g bread flour (I used locally milled) 

144g whole wheat (I milled my own hard red winter wheat) 

22g wheat germ 

557g H20 (77%)

17g salt  (2.4%)


110g active sourdough starter (100% hydration) 


Everything Topping 

Combine the following- 

Equal parts dried onion, dried garlic, poppy seeds, sesame seeds, fennel seeds

Salt to taste (A good amount of quality flake salt or coarse kosher salt)

Fresh ground black pepper to taste

Prepare the Soaker: 

Mix the chia, hemp, and ground flax seeds together in a vessel large enough to hold them and the water. Heat the water to 210 F and pour over the seeds. Mix together and let stand 1 hr or overnight. 

Prepare the dough: 

Mix flours and germ to combine. Scale the water and pour 10-20 g of it over the scaled salt. Set salt/water aside. Add remaining water to flour and mix to create a shaggy dough. Autolyse 30 min to 1 hr. 

Add starter to dough and mix to combine. Once the starter is incorporated, add the reserved salt/water mixture. Mix to combine. 

Mix the dough to develop gluten. I use my kitchen aid stand mixer with the hook on medium speed, takes 6-7 minutes to reach full development. 

Bulk ferment for 3-6 hours depending on your temps. Stretch & fold dough every thirty minutes for first 1 1/2 hours. Add seed soaker during second set of folds. Fold once every hour or so until dough has  risen 30-50% 

Scale dough, pre-shape and shape as desired, I do two 950g loaves because that's what fits into my combo-cooker dutch ovens. Pre-shape should sit at least 20 minutes before shaping. You can either evenly sprinkle your tea-towel lined banneton with the everything topping or if you make enough roll the whole loaves in the topping before you place into the banneton. Cold proof loaves overnight in the fridge. 

Next day preheat oven with combo cooker lids (larger part) inside as hot as your oven will go. My goes 550F. Preheat at least 1 hour. When oven is ready take the dough from the fridge, turn it out into the combo cooker base which is lined with parchment or sprinkled with semolina. Slash loaf as desired. Bake covered at 550F for ten minutes. Lower oven temp to 450F and bake additional 15 minutes. Remove lid and bake until desired color is reached and internal temp of loaf is at least 205F. Takes about 5 minutes in my oven. Cool at least 2 hrs before slicing. 

Enjoy!  


pjkobulnicky's picture
pjkobulnicky

Steel-cut Oat Bread

Steel-cut Oat Bread


Makes two large loaves. 


Steps1  evening before bake day


1. Refresh 100% starter to yield +200 grams for the next morning.  Overnight room temps can be 60F.  Use 50 gm whole wheat, 50 gm AP, 100 gm H2O and 30 gm natural leaven at 100% hydration.

Steps 2 - 12 , bake day AM.  Work at 70F

2. Pour 600 gm boiling H2O over 300 gm steel cut oats in a pot or bowl with a lid or cover.  Stir the oats once and  cover. Let steep 45 minutes.

3.  (45 minutes later) Pour the steel cut oats and associated water into a large sieve  set over a bowl. Let drain about 30 minutes but capture and reserve the water. After 10 minutes use the accumulated water.

4. Into your bulk dough bowl, add the oat water and enough other water to yield 650 gm. 

5. Add to the bulk dough water, 200 gm starter and whisk to incorporate.

6. In a small bowl add 50 gm of remaining oat drainage water (add more water if necessary) to 25 gm kosher salt.  Set aside.

7. Add 1 kg AP flour to water and starter in bulk dough bowl. Mix by hand or on a work surface until all flour is moistened. Dough may be rather stiff.

8. Let dough autolyse for 30 minutes. 

9. Add salt and associated water to dough by hand. When the salt-water is incorporated, do a set of stretch and folds. Return to bowl and let rest 30 minutes. Do another set of stretch and folds. Let rest 30 minutes. 

10.  Add the oats.  Turn the dough out on to a wet work surface. Stretch the dough into a large rectangle. Incorporate the oats using letter folds. [Sprinkle 1/3 of the  steel cut oats on to the middle 1/3 of the dough. Fold an end 1/3 of the dough over the oats. Sprinkle another 1/3 of the oats over the middle and fold the final 1/3 of the dough over the middle. turn the dough and sprinkle 1/2 of the remaining oats over the middle. Fold the end over the middle, sprinkle the remaining oats over the middle and fold again.]  Give the dough a few kneads to ensure good distribution of the oats. Return the dough to the bowl. Cover and rest at 70F until doubled ( maybe 3-4 hrs.)

11. Turn the dough out on to a lightly floured surface. Divide in half. Form into balls and let rest 15 minutes.  Shape into logs (for oval loaves) or rounds (for boules) depending on whether you are baking in round or oval dutch ovens (or oval Romertopfs , as I do).  Roll smooth (non-seam)  surface of shaped doughs into rolled oats to cover the surface and place seam side up into appropriately shaped forms. Let proof about 1hr 30 minutes at 70F. 

12. At the 1 hr, 30 minute mark, place dutch ovens into oven and preheat to 500F for about 30 minutes.  Remove dutch ovens, turn loaves out onto dusted work surface, score, place into dutch ovens, cover and place in the oven.  Lower oven temp to 475F and bake 30 minutes. Remove dutch oven covers and bake for 25-30 minutes uncovered at 450F. Let cool completely.  While they can be eaten as soon as completely cooled, the loaves will hold perfectly, uncut,  1-2 days as the moisture from the steel-cut oats permeates the crumb.


FlourChild's picture
FlourChild

Tortas de Aceite

Our family traveled to Spain this past Spring, and Sevilla was our favorite city on the trip, we were there during Semana Santa.  We particularly enjoyed the Tortas de Aceite- yeast-leavened olive oil wafters laced with sesame and anise.  This version is a little different than the standard torta in that it is leavened with sourdough and uses star anise instead of anise seed.


A view of the courtyard in Sevilla's Alcazar, the Royal Palace.


Tortas de Aceite Recipe


Levain  Baker's   %  
 Sourdough starter, 60% hyd.6g  Total flour200g 
 KAF AP30g  White flour100% 
 Water, room temp18g  Hydration60% 
     Salt0.7% 
Main Dough   Levain flour10% 
 Unbleached AP, 10% protein180g  Sugar6% 
 Sesame seeds, toasted1Tb + 3/4 tsp  Olive oil27% 
 Sugar1 Tb     
 Salt1/4 tsp     
 Water, room temp108g     
 Levain32g     
 Olive oil54g     
        
Topping      
 Star anise1 piece     
 Granulated sugar2 tsp + 2 Tbs     


Night Before:

Mix levain, allow to ferment ovenight at 68-70F.  It should rise but not yet be fully mature.


Next Morning:

Weigh flour into mixing bowl and coat a 3-4 cup bulk ferment container with olive oil.

Use spice grinder to grind toasted sesame seeds, salt and main dough sugar until fine.  Stir into flour.

Add 32g levain (the rest is for perpetuating the culture), water and oil to the flour mixture and mix until combined, then knead by hand about 10 minutes.

Transfer to oiled container and cover. 

Ferment until dough has doubled, about 5 hours at 81F.

Using olive oil to grease work surfaces and dough, stretch and fold 3 times in first 3.5 hours, then allow to rise.  Ready when rounded peak reaches a little past 2 2/3 cups.


Afternoon:

Divide and pre-shape into 12 rounds.  Place on oiled sheet pan and rest one hour, covered.

In spice grinder, grind star anise with 2 tsp sugar until fine, then scrape into bowl.

Preheat oven to 450F, placing rack in middle of oven.  Prep a half sheet pan with silpat or parchment.

Spread 2 Tbs granulated sugar on a plate.

Flatten dough balls slightly, then sprinkle the top with 1/4 tsp of the anise-sugar mixture.  Spread mixture over dough disc with fingertip.

Shape six discs into pizza-like tortas about 3 1/2 inches in diameter, then turn face down in sugar plate to coat with sugar. 

Place six tortas on one half sheet pan and bake 8 minutes, then rotate and bake 3-5 more minutes, until nicely caramelized.

Repeat with remaining six tortas.


Editing to add notes:  

Don't be tempted to add the anise into the main dough- it has potent anti-bacterial and anti-fungal qualities and will kill off every discernable trace of sourdough culture (did this with my first go at these).

These re-heat and re-crisp beautifully in the toaster.


Dough Rounds:


Flattened Discs with Anise-Sugar Mixture:


The Shaped Tortas:


Plaza Nueva at Sunset:


Sevilla's Cathedral:


Torta Crumb:

More Tortas:


Looking for Tapas:


txfarmer's picture
txfarmer

Sourdough 100% Whole Wheat Oatmeal Sandwich Bread - whole grain breads can be soft too

A while ago, I posted about how to make "shreddably soft" sourdough sandwich bread (see here). I got some questions regarding whether the same thing can be achieved with whole grain breads. Well, yes and no. The more whole grain flour there is in the dough, the lower the gluten is, so 100% whole grain breads won't be exactly AS SOFT AS the white flour one. However, with the right formula, and proper handling, 100% whole grain breads like this one CAN be very moist and soft - even shreddably so.This one is made using just sourdough starter, extra delicious when the rich flavor of ww is combined with the slight tang of sourdough.

First of all, there needs to be enough ingredients in the formula to enrich and moist the crumb. This bread is adapted from my all time favorite whole grain bread book "Laurel's Kitchen Bread Book" , in addition to oil, honey, and sourdough levain, oatmeal is soaked in boiling water the night before to add moisture to the final dough, which contributes to the soft crumb. My adaption to the formula is to chagne the dry yeast to sourdough, and increased hydration a tiny bit.

Secondly, ww doughs have lower gluten level, which means while you still have to knead it really well (to full developement), the windowpane you achieve won't be as strong as the white flour one. This also leads to a denser bread, which means for the same tin, you will need to add more dough to get the same volume. Since ww flour absorb more water, but absorb it slower, so it really helps to autolyse, and autolyse longer (40-60min) than for white doughs. It's easier to overknead a ww dough (in a mixer) too, so be very careful - for that reason, I usually finish kneading by hand.

Thirdly, it's also easy to over fermentate ww doughs. I kept the levain ratio in this dough pretty low, and made sure when it's taken out of fridge for proofing, the temperature is relatively warm(~72F). I found if it takes too long for the dough to finish proofing (once I left it by the window, where it's only 68F, it took 10hours instead of 6 hours to finish proofing), the crumb gets rough, and the taste gets unpleansantly sour.

Finally, the ww flour I used here is King Arthure WW, I have used other ww flour before, but KAF gives me the most consistent result.


Sourdough 100% Whole Wheat Oatmeal Sandwich Bread (Adapted from "Laurel's Kitchen Bread Book")

Note: 15% of the flour is in levain

Note: total hydration is 89%, higher than usual because of the oatmeal soaker

Note: total flour is 375g, fit a 8X4 loaf pan. For my Chinese small-ish pullman pan, I used 330g total flour. For KAF 13X4X4 pullman pan, I have not tried it myself, but I would suggest using about 600g of total flour. Obviously for pullman pans, you can bake with or without lid.

- levain

ww starter (100%), 16g

water, 26g

ww bread flour, 48g

1. Mix and let fermentation at room temp (73F) for 12 hours.

- soaker

rolled oats (I used old fashioned), 53g

boiling water, 240g

salt, 8g

2. Mix and cover for 12 hours.

- final dough

ww flour, 319g (I used KAF)

water, 60g

oil, 30g

honey, 38g

all soaker

all levain

3. Mix together everything, autolyse for 40-60min.Knead until the gluten is very developed. This intensive kneading s the key to a soft crumb, and proper volume. The windowpane will be thin, but NOT as strong as one would get form a white flour dough. For more info on intensive kneading, see here.


4. Bulk rise at room temp (73F) for 2 hours, the dough would have expanded noticably, but not too much. Fold, and put in fridge overnight.

5. Divid and Rest for one hour.

6. Shape into sandwich loaves, the goal here is to get rid of all air bubles in the dough, and shape them very tightly and uniformly, this way the crumb of final breads would be even and velvety, with no unsightly holes. For different ways to shape (rolling once or twice, i.e. 3 piecing etc) see here.

7. Proof until the dough reaches one inch higher than the tin (for 8X4 inch tin), or 80% full (for pullman pan). About 6 hours at 72F.

8. Bake at 375F for 40-45min. Brush with butter when it's warm.

Nice and soft crumb from both the 8X4inch tin (rolling once) ...

Baked another one in a small pullman tin (rolling twice, 3 piecing, baked without lid)


Excellent ww flavor enhanced by sourdough, without any hint of bitterness. Stays soft and moist for days.


So, yes, 100% whole wheat breads can be soft, like THIS

Sending this to Yeastspotting.

Pages