The Fresh Loaf

A Community of Amateur Bakers and Artisan Bread Enthusiasts.

Most bookmarked

The Fresh Loaf Baker's Handbook

The Fresh Loaf Handbook is a distillation of some of the baking wisdom of The Fresh Loaf community.  

Use the content navigation on the right to find your way around.

Floydm's picture
Floydm

Sweet Potato Rolls

I made this recipe up last night. We thought they were great, so I think I'll make them again for Thanksgiving.

The sweet potatoes give the rolls a beautiful orange color. They also give off a nice earthy smell. You don't taste them very much, though they do keep the rolls soft and supple.

I made mine too large, more like hamburger buns than rolls. Next time I'll divide the dough into smaller pieces.

Sweet Potato Rolls
makes 12 to 18 rolls

1 sweet potato, baked
1 cup milk
1/2 cup white or brown sugar
3-4 cups all-purpose flour
2 teaspoons instant yeast
2 teaspoons salt
1/2 teaspoon ground cinnamon
1/8 teaspoon ground nutmeg

Bake the sweet potato for approximately 45 minutes at 375. Remove the oven and let cool.

Combine the sweet potato, sugar, and milk and stir to make a paste. Mix in 2 cups of the flour, the salt, the yeast, and the spices until thoroughly combined. Add more flour a quarter cup at a time. Mix in after each addition until you have a dough that is tacky but which you can handle with wet hands. When you hit the proper consistency, remove from the bowl and knead by hand for 5 to 10 minutes.

Set the dough aside to rise in a covered bowl for 45 minutes to an hour. Divide into a dozen or so pieces, shape, and then again allow to rise until they have roughly doubled in size, another hour or so.

I suspect they would be lovely if coated with an egg wash. I did not do so, but I may next time.

sweet potato rolls

Bake at 375 for approximately 20 to 25 minutes until they are beginning to turn brown.

sweet potato rolls

sweet potato rolls

txfarmer's picture
txfarmer

Croissant with Sourdough Starter - TXFarmer VS. TX summer

In my last croissant post(see here), I said I am practicing once or twice every week to perfect my lamination skill. It's been more than a month, and my croissant fever is getting hotter -- sadly, what's heating up faster is TX temperature. If you look up "mission impossible" or "self punishment" in the dictionary, you might see the following picture (28C is about 82F):


However, making croissant in warm weather is "mission difficult", not "mission impossible", the following are some tips I learned in the past month, I hope they will be helpful to my fellow warm weather TFLers.

1) Avoid direct sunlight. My kitchen has huge windows, and the counter space that's large enough to roll out the doug is right by the window. Under direct sunlight, the temperature could shoot to 90F in no time. My husband jokingly calls me "cold blooded" since my hands are always freezing cold, however, the few times when I was rolling out dough under the sun, my hands quickly warmed up -- so did the dough. Not a good thing. Lately, I have figured out the optimal schedule: Sunday at 5pm, mix dough and put in fridge for 2 hours; make butter block during that time; at 7pm enclose the butter and do the roll out. The temperature at 7pm is uaually still 28C (hence the picture above), but since the sun is on the way down, it won't keep heating up. After that just follow the schedule and do two more folds, usually I am done by 9:30 or 10pm. Next morning I usually get up early to run, so I do the final roll out before/during/after the run. 5am is the coolest time of the day, which is still around 24C/75F, but that's the best I can get. Usually by 7:30am, after resting a few times in the fridge, I can finish shaping. I usually freeze half for later, and put the other half in fridge until after work to bake.

2) Use the right butter. Not all European style butter are created equal, even if they have the same butterfat content. I have tried 4 or 5 different brands, when it's cooler (like a month ago), most of them would work, but now, only Plugra gives me consistent results, other brands are simply too melty.

3) Use the right rolling pin. I use a heavy duty metal rolling pin to make up for the lack of arm strength. However, lately, when it's this warm, I find it's necessary to put the pin in fridge along with the dough. At first I put it in freezer, thinking "the colder the better", nope. It was too cold for the first two folds, butter simply broke between dough layers, creating uneven crumb. Now I put it in fridge for the first two folds (when butter layers are still thick), freezer for the last fold and final roll out (when butter layers are thin and easier to melty but less likely to break).

4) Only work on the dough a few minutes a time, and put it in fridge more often than you would expect. That's the most important thing. When it's this warm, time is not on your side. Several times I tried to push my luck and roll the dough for a bit too long - warm dough == melty butter, never fails. This is where practicing comes in handy - at first I can't roll out much in the 3 to 5 min time span (longer for the first two folds when butter layers are thicker, shorter time for later folds and rolling out), which means the whole process drags on forever since the dough has to be in and out of the fridge many times. However, as I practice more, 3 to 5 min is more than enough for me to roll out the dough completely. For the last fold and final roll out I still let the dough rest in fridge once during rolling just so it's relaxed and easier to roll, but for the first two folds, it's all done in one shot.

Other than dealing with the warm temperature, I am also adjusting the formula to get more flavor. I replaced the poolish in previous attempt with 100% white starter. Since there's still dry yeast in the final dough, I though it would be an easy switch - not so. Starter is more acidic than poolish, which made the dough too soft. I then mixed it longer and reduced hydration slightly. Got the even layers with no butter leakage, however, the crumb is not open enough, indicating that the dough gluten is still too weak (shown in the following picture).

So I changed the AP flour to Bread flour, KAF bread flour at that, which has very high protein level. To my surprise the rolling out was not as impossible as I expected (or maybe I have practiced enough so it seems easier?), but the crumb became a lot mroe open (shown below).

The formula I am using now is as following:

Bread flour (KAF), 362g

milk, 130g

sugar, 67g

salt, 10g

osmotolerant instant yeast (SAF gold), 3.55g, 1tsp+1/8tsp

malt, 3.55g (I used a tsp of barley malt syrup)

butter, 22g, softened

100% white starter (fed with bread flour), 320g

roll-in butter, 287g

1. Mix everything but the rolling butter, knead until gluten starts to form. In my KA mixer, 3min at first speed, 4 min at 3rd speed.

Then following the procedure illustrated here.


Other things I have noticed:

1) For the final roll out, while it needs to be as thin as 3mm to 5mm, don't go over board and roll it too thin, other than it will look like this - not bad, but not as open as possible

2) Don't squish any parts of the dough during shaping, here I must've pressed down the tip a bit too hard, look at the thick top

3. Don't roll the croissants too tight during shaping, it will explode as following, even when proofed fully (no leaking butter during baking)


 My ideal croissant has very open, but even crumb with honeycomb holes, and thin walls. Still not quite there yet, but heading in the right direction. The addition of starter in the dough adds another dimension of flavor. When I brought some to my coworkers, who has no knowledge about yeast/starter, they all much prefer the starter version.


Sometimes I would make some chocolate ones, those are always gone first.


The temperature is still rising here in TX, let's see how far into the summer I can keep up this crazy croissant project.


Sending this to Yeastspotting.

What is commonly known as Italian Bread in the states is something like French Bread but typically softer. The dough typically contains some olive oil and dairy to soften things up, and instead of steaming the oven to maximize crust you brush the crust with water before placing it in the oven which keeps it softer and chewier. It is the perfect spongy bread for mopping up pasta sauces, and quite good on its own.

This is based on the recipe from Bernard Clayton's New Complete Book of Breads. I used a preferment: he does not. I'm not sure if it made a difference or not, but the way I made it turned out quite good.

Italian Bread

Makes 2 large 2 pound loaves
Preferment:
1 cup water
1 cup bread or all-purpose unbleached flour
1/2 teaspoon instant yeast

Dough:
All of the preferment
5 cups bread or all-purpose unbleached flour
1/2 cup nonfat dry milk
1 tablespoon malt syrup, malt powder, brown sugar, or sugar
1 tablespoon salt
2 teaspoons instant yeast
1 tablespoon olive oil
2 cups water

To start the preferment, mix together the flour, water, and yeast in a small bowl and cover with plastic wrap. Leave out at room temperature for at least 4 hours and as long as 16 hours.

To make the dough, mix together the preferment, water, olive oil, yeast, salt, malt powder, and dry milk in a bowl with 2 more cups of flour. Mix thoroughly. Mix or knead in the rest of the flour a half a cup as a time until you have a slack dough but one that is no longer sticky. Total mixing time should be in the ballpark of 10 to 15 minutes.

Place the dough in a well-greased bowl and cover with plastic wrap. Allow to rise at room temperature until at least 2 times in size, approximately 2 hours. Punch the dough down and let it rise again for half an hour.

Remove the dough from the bowl and divide it in half. Shape the dough into a ball or log, cover with a damp towel, and allow it to relax for another 20 minutes.

Shape the dough into its final shape. Cover again and allow to rise for another hour until doubled in bulk.

Meanwhile, preheat the oven and baking stone, if you are using one, to 425 degrees.

Right before placing the loaves in the oven brush or spray them lightly with water. Place them into the oven and bake for 20 minutes before rotating them. Bake them another 20 to 30 minutes or until the internal temperature of the loaf reads 200 degrees. Remove from the oven and allow to cool for at least a half an hour before serving.

Italian Bread

Related Recipe: Rustic Bread

Italian Bread

zolablue's picture
zolablue

Semolina Sandwich Loaf

I’ve been so curious about semolina flour.I didn’t understand much about it and there doesn’t seem to be a lot of information regarding it.After reading as much as I could find in various bread books I decided I had to take a stab at it.So last weekend I baked this yeasted sandwich version along with another sourdough version. (I will post that one separately.)

I found the perfect, fresh durum patent flour at Heartland Mill which has been such a great source so far in providing harder-to-find flours.The shipping and handling is a bit steep but so far I can’t find a local source for this particular semolina or the wonderful Golden Buffalo high-extraction flour that is so perfect for the Thom Leonard Country French.

http://www.heartlandmill.com/

This bread showed the most incredible oven spring that I snapped a couple photos while still in the loaf pan for perspective to show just how high that thing ballooned.The first time I opened the oven to rotate the pan I actually gasped.Then I broke into laughter.You all know that feeling!:o)

It is such a beautiful loaf in so many ways but also very delicious and moist.This is a big keeper recipe for me and I remain intrigued by the nutty, sweet flavor of semolina.If you are looking for a very tender and flavorful sandwich loaf this is a great choice.Another plus is the recipe is quite easy and very quick.I think from beginning of initial fermentation to pulling the baked loaf from the oven was just under 4 hours.

It also makes delicious toast and, for me, the beautiful saffron colored crumb is just outstanding.

Excerpted: Leader told how he received an urgent phone call the night before he left Altamura telling him that his guide had forgotten to show him this bread – a straight dough semolina loaf made by Altamura bakers specifically for sandwiches.A loaf was quickly delivered to his hotel room and he expressed gladness when he saw the gorgeous red-gold loaf with a delicate crust and even golden crumb.He said it was unlike any sandwich bread he’d tasted and how his customers would love its rich wheat flavor and olive oil perfume.The small amount of sugar gives this bread great tenderness. As he mentions this recipe is a great introduction to the unique character of semolina flour.I agree.

More photos can be seen here:

http://zolablue.smugmug.com/gallery/3505682#197785385

Semolina Sandwich Loaf – Daniel Leader, Local Breads

Time:8 to 12 minutes to knead; 1 1/2 to 2 hours to ferment; 1 to 1 1/2 hours to proof; 35 to 45 minutes to bake

Makes:1 Sandwich loaf (31.2 ounces/885 grams)

300 grams (1 1/2 cups/10.6 ounces) water, tepid (70 to 78 degrees) – 60%

5 grams (1 teaspoon/0.2 ounce) instant yeast – 1%

500 grams (3 1/4 cups/17.6 ounces) fine semolina (durum) flour – 100%

15 grams (1 tablespoon/0.5 ounce) granulated sugar – 3%

50 grams (1/4 cup/1.8 ounces) extra-virgin olive oil – 10%

10 grams (1 1/2 teaspoons/0.4 ounce) sea salt – 2%

Mixing the dough:Pour the water into a large mixing bowl or the bowl of a stand mixer.Add the yeast, flour, sugar, olive oil and salt and stir with a rubber spatula just until a rough dough forms.

Kneading – By hand:Lightly dust the counter with semolina flour.Scrape the dough out of the bowl and knead it with smooth, steady strokes until it is very smooth, shiny, and elastic, 10 to 12 minutes.

By machine:Use the dough hook and mix the dough on medium speed (4 on a KitchenAid mixer) until it is very smooth, shiny, and elastic, 8 to 9 minutes.

Fermentation:Transfer the dough to a lightly oiled container with a lid.Cover and leave to rise at room temperature (70 to 75 degrees) until it inflates into a dome, reaching double; 1 1/2 to 2 hours.

Shaping loaf:Grease a loaf pan (8 1/2 x 4 1/2) with oil.Lightly dust the counter with semolina flour.Uncover the dough and turn it out onto the counter.Form the dough into a pan loaf.Nestle the loaf into the pan, seam side down, pressing it gently to fit.Lightly dust the top of the loaf with semolina flour and cover the pan with plastic wrap.

Proofing:Let the loaf rise at room temperature (70 to 75 degrees) until it crowns just above the rim of the pan, 1 to 1 1/2 hours.

Preparing oven:About 15 minutes before baking place rack in middle of oven.Preheat oven to 375°F.

Baking:Place the loaf on the middle rack of the oven.Bake until the loaf pulls away from the sides of the pan and the crust is a deep golden brown, 35 to 45 minutes.

Cooling and storing:Remove loaf from pan and allow to cool, right side up.Cool bread completely before slicing, about 1 hour.Store the cut loaf in a resealable plastic bag at room temperature.It will stay fresh for about 3 days.For longer storage, freeze in a resealable plastic bag for up to 1 month.

dmsnyder's picture
dmsnyder

Scoring Bread: An updated tutorial


What is scoring?

Scoring” is the word used to describe the cuts made in a loaf of bread before it is baked. Some breads are not scored. For example many loaves baked in pans are not. However, almost all free-formed “hearth breads” are scored.

When is scoring done?

Scoring is generally performed just prior to loading the loaves in the oven. French rye breads (pains de siegle) are sometimes scored right after shaping, before proofing.

Why are breads scored?

Intentionally creating a weak spot on the surface of the loaf prevents the loaf from bursting at weak spots created during shaping.

The type of scoring performed controls the direction in which the bread will expand during “oven spring.”

The pattern of cuts made, the angle at which they are made and the depth of the cuts influences the rate of expansion and the formation of an “ear” - a raised flap of crust at the edge of a cut.

The pattern of cuts can create a pleasing visual pattern on the surface of the loaf. While there are some very traditional patterns, for example for baguettes, the baker can use the scoring pattern to identify the type of bread or to create an unique pattern that identifies the loaf as coming from his or her oven.

The effects of scoring on loaf shape are discussed in more detail below.

What do you use to score bread?

The blade used to score bread is often referred to as a lame (pronounced “lahm.”) This is simply a French word with means “blade.” Breads may be scored with straight or curved razor blades, either held in the hand or mounted on a handle. Scoring may be performed with other sharp, straight blades, even with a straight razor. Some bakers prefer serrated blades.

For some types of scoring, a straight blade is preferred. Straight bladed knives are preferred for cuts made with the blade held perpendicular to the loaf's surface. This sort of cut is generally used for round loaves (“boules”). For other types of scoring, a curved blade works better. Curved lames are generally used for long breads like baguettes which are scored with cuts parallel to the long axis of the loaf.

Video on Choosing a Blade: http://youtu.be/vF7eFluzHXc

How are the cuts made?

The scoring stroke should be firm, rapid, smooth and decisive. For the beginner, it may help to take “practice swings” or to visualize the movements and totally focus one's attention before making the cuts. Understanding the functions of scoring and the effects of the variables described can help, but there is no substitute for experience. In this respect, scoring bread is no different from an athletic skill or any other art or craft. (Tourist: “Please, sir, can you tell me how to get to Carnegie Hall?” New Yorker: “Practice, practice, practice.”)

The cuts should generally be 1/4 to 1/2 inch deep. A wet, sticky dough requires a more shallow cut than one would make in a dryer dough.

Scoring a boule (round loaf)

The angle the blade of the knife makes with the surface of the loaf is important in determining how the cut will open up. If you want the cuts to spread equally from the cut and to open quickly, as is traditional with round loaves (boules), the knife should be held vertically – at 90 degrees to the surface of the loaf.

Video on Scoring a Boule: http://youtu.be/gnL7mvR9wFg


Besides the “tic-tac-toe” pattern, boules can be scored with diamond patterns, simple crosses or much more elaborate and creative patterns.

Miche scored with a diamond pattern

Scoring a long loaf (bâtard)

If you want the cuts to spread more slowly and create an “ear,” as is generally desired with long loaves (baguettes and bâtards), the knife blade should be held at a shallow angle with the surface of the loaf, at about 20-30 degrees or so. Many find using a curved blade helps make this type of cut. The blade is held with the concave surface facing up (away from the loaf). A flap of dough is created that will lift up to create an “ear” as the loaf expands and, by lifting gradually, slows the expansion of the loaf. This prolongs the time during which new areas of dough are exposed to the direct heat of the oven and results in greater overall expansion – a larger “bloom.”

Video on Scoring a Bâtard: http://youtu.be/UC5HLCWAyMo


Bâtards


Baguettes

The effect of scoring on loaf shape

Michael Suas, in his book "Advanced Bread & Pastry," provides some information about how scoring patterns influence loaf shape. Scoring is not just to make a visually pretty design on the top of a loaf. It is also how the baker controls the direction in which the loaf expands. This impacts the shape of the loaf cross section (rounder or more oval), the height of the loaf and, for a boule, whether it stays round or ends up more oblong.

According to Suas, long loaves like bâtards and baguettes are traditionally scored parallel to their long axis. This may be a single long cut or multiple cuts that are almost parallel and overlap somewhat (for ¼ to 1/3 of their length, generally). This pattern promotes sideways expansion of the loaf, resulting in an oval cross section when the loaf is sliced.


Baguette showing overlapping cuts, almost parallel to the long axis of the loaf

For breads with high-rye content which have lower gluten and less oven spring, the traditional objective is to encourage a higher rise in the oven spring resulting in a rounder cross section. This is achieved by "sausage" or "chevron" cuts.

"Sausage cut" on the left. "Chevron cut" on the right.

Boules are scored in a variety of patterns with differing effects on how the loaf expands. The common "tic-tac-toe" pattern and a simple cross will direct the expansion upward. More complex patterns like diamonds result in a relatively flatter loaf.

One of most interesting effects is that scoring a boule with multiple parallel cuts encourages expansion at a right angle to the cuts. This results in an oblong loaf shape.

 Two boules scored differently. Note the effects of the scoring pattern on the final shape of the baked loaves.

What's the point of an ear? Controlled bloom!

This topic is not about the auricular anatomy of elves (or Vulcans). It's about scoring breads.

Scoring loaves creates a visually pleasing pattern, and it helps control the expansion of the loaf as it bakes.

What Suas called "the classic cut" is parallel to the long axis of a baguette or a bâtard. The cut is made with the blade at a shallow angle to the surface of the loaf. The cut should be shallow - about 1/4 inch deep. Paradoxically, this shallow cut results in the flap lifting better than a deeper cut would, thus forming a nice "ear." Hamelman (pg. 80) points out that "a deep cut will simply collapse from its own weight."

The angle of the blade is important. "If the angle is not achieved and the cut is done with the blade vertical to the loaf, the two sides of the dough will spread very quickly during oven spring and expose an enormous surface area to the heat. The crust will begin to form too soon - sometimes before the end of oven spring - penalizing the development of the bread. If the cut is properly horizontal, the sides of the loaf will spread slower. The layer of dough created by the incision will partially and temporarily protect the surface from the heat and encourage a better oven spring and development." (Suas, pg. 116.)

These photos illustrate nice "ears," but they also show that the bloom occurred slowly, as it should. Notice that the color of the crust in the opening has 3 distinct degrees of browning, decreasing from right to left. The darker part on the right obviously opened first and was exposed to the direct heat of the oven for longer. If the bloom occurred too rapidly, it would have a more even coloration.

In summary, in order to achieve an optimal bloom in baguettes and bâtards, one must attend to 3 variables when scoring them:

  1. The cuts should be almost parallel to the long axis of the loaf.

  2. The blade should be held at about a 30 degree angle to the surface of the loaf.

  3. The depth of the cut should be shallow - about 1/4 inch.

Variable shading of the bloomed crust confirms that the desired slow but prolonged opening of the cut during oven spring occurred.

A final word

This tutorial focused on the mechanics of scoring, but the other steps in bread making impact the behavior of the cuts you make and the final appearance of your loaves. In fact, every single step, from your choice of ingredients and their proportions – your formula – to how you steam your oven plays a role in how your cuts will open. Your best looking loaves will result from a series of choices that are mutually dependent, where how you score a loaf takes into account the other choices you have made about the formula, mixing, fermentation, shaping, proofing and baking.

Happy baking!

David

txfarmer's picture
txfarmer

Poolish Croissant - the pursuit of perfection


In the past 1.5 months, this is what I have been doing in the kitchen, once, or even two batches every week. I have occasionally made croissants before, however, this time I really want to get the techinques down. My idea of a perfect croissant: golden flaky high on the outside, crisp layers and honeycomb like crumb inside, and of course, buttery rich taste. Using European style butter (Plugra), in TX warm weather, with no professional equipment (no sheeter here!), it's a process that requires patience, thorough understanding for each step, a lot of attention to details, and insane amount of practice. I am nowhere near "perfect" yet, but heading in the right direction, here are some lessons learned in the process.


First, the following are resources that helped me a great deal, many thanks!

1)"Advanced Bread and Pastry". This book has a whole chapter on viennoiserie, the formula I am used is adapted from it. However, the formula and procedures require quite a bit of changes in a home kitchen.

2)Hamelman's formula from here. while I didn't use his ingredient ratios, but his procedure is much more suitable for a home kitchen, comparing to what's in AB&P.

3)Ralph from this thread. The whole thread is helpful, but Ralph's input was extra enlightening to me. I emailed him asking for the formula he uses in the shop. Since his posting was from over a year ago, I really didn't expect a reply, but he did write back! I really appreciate his insight and generosity.

4)Many enlightening posts from TFL, especially andy's post here.


Since I made many mistakes along the way, and learned a lot form each of them, I am writing them all down below. Warning, it's long. I mean looooooooong.


Poolish Croissant (Adapted from AB&P)

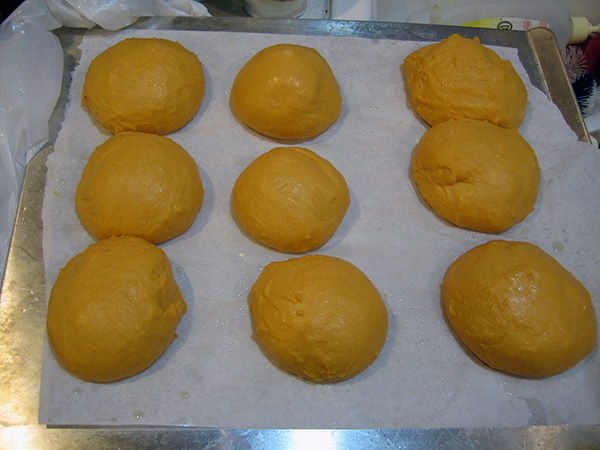
*I get about 12 standard sized croissants from each batch, with some small rolls from scraps.


- Poolish

AP flour (KAF AP), 160g

water, 160g

instant yeast, 1/8tsp


1. mix and ferment 12 to 16 hours.

- Final Dough

AP flour (KAF AP), 362g

milk, 135g

sugar, 67g

salt, 10g

osmotolerant instant yeast (SAF gold), 3.55g, 1tsp+1/8tsp

malt, 3.55g (I used a tsp of barley malt syrup)

butter, 22g, softened

poolish, all

roll-in butter, 287g

NOTE 1, there are two poolish croissant formulas from AB&P, one for hand rolling, one for sheeter. The sheeter one has less liquid and less rest time between folding and rolling, the hand rolling one has much more liquid and more rest time. I find drier dough would give a more well defined cleaner crumb structur, but it's harder to rol out; wetter dough would be easier to roll out, but the crumb would be more sticky and less layered. What I try to do is to adjust the liquid amount so that it's dry, but still possible to roll out without messing up the layers. In the end, this amoutn is closer to the sheeter formula (the hand rolling one is way too wet for me), but with a tad more liquid.

NOTE 2, the original formula uses bread flour. As Andy mentions in his post, contrary to conventional belief, croissants need a strong dough to rise well and create layer in the end. Since the formula was meant for machine rolling, it can afford to use BF, however, 10 years of marathon running gave me strong legs, not arms, I had to change it to AP flour, otherwise butter would melt and leak when I struggle with the strong dough. Note that Hamelman's formula I quoted above is meant for home bakers, and it uses AP; while Ralph's formula (which he emailed to me) uses BF, but it's meant for shop production. I have seen recipes that uses mostly, even all, cake flour. It never ends well. The final product is usally small and bread like, with less rise. The crumb structure is not layered. IMO, those recipes are sacraficing the crumb structure for the ease of handling


NOTE3, this is probably the most important lesson in terms of ingredients. The industry standard for rolling in butter is apparently 25% of the dough weight, which comes out to be about 45%of flour weight. Andy says it's about the same over the pond. However, I have found that in a home environment, when the rolling is less even and efficient, more rolling-in butter is needs for a well defined crumb. The less butter to use, the thinner the butter layers are, which means easier for the butter to melt into the dough or leak out. I have increased the roll-in butter ratio to 55% of the flour weight, about 30% of dough weight, which gives me much more consistent good results. I know many have said more butter would cause butter to leak out during final proof or baking - it's simply not true. Butter leakage during proofing is caused by proofing temp being too hight, and butter leakage during baking is caused by under-proofing, neither is related to the amount of roll-in butter. With 55% of roll-in butter, zero butter is leaked during proofing for me, minimal leaks during baking - sometimes none at all.

NOTE4, I use  Plugra European style butter for most of my croissants. Have also used Kerry Gold occasionally. Both taste great. I would suggest to stick to a good European butter, different brand handls a bit differently. My Chinese baking friends can buy "butter sheets" which are 100% butter with high melting point. Those are much easier to handle, but I have not found any here in US, if anyone knows a resouce pelase let me know. In fact if anyone knows why we don't have such a thing here, I am curious to know as well. Those are made in New Zealand and Europe.


1. Mix everything but the rolling butter, knead until gluten starts to form. In my KA mixer, 3min at first speed, 3 min at 3rd speed. The dough is not very smooth, but not sticky. Pat flat and put in fridge for at least 2 hours, or overnight.

NOTE5, some recipes ask for a thorough kneaded dough, some ask for no kneading at all. I think the objective is to have a strong dough with well developed gluten structure AT THE END. All the rolling, folding, even relaxing in the fridge would strengthen gluten, so it's not a good idea to knead the dough too well in the beginning. It will make rolling near impossible (if you don't have a sheeter).


NOTE6, some recipe would ask for some bulk rise time at room temperature. I think it's not suitable for home bakers. Bulk fermentations strengthen the dough, which means one would need to play with knead time, and rolling technique to accomodate the added dough strength. Furthurmore, there are a lot of resting in my procedure because the dough would get too tight or too warm. With a bulk rise, I am risking over fermentating, which would cause the final proof and oven spring to be weak.

2. Cut the roll-in butter into pieces, put between two sheets of plastic or wax paper. Use a rolling pin to tap the butter until it's soft enough to roll, roll between the two sheets until it's a 7.5X7.5inch square. Put in fridge.

NOTE7, this is a good time to learn how your butter behave. How long does it take for it to get soft? How long until it's melty? That's the guideline for later.

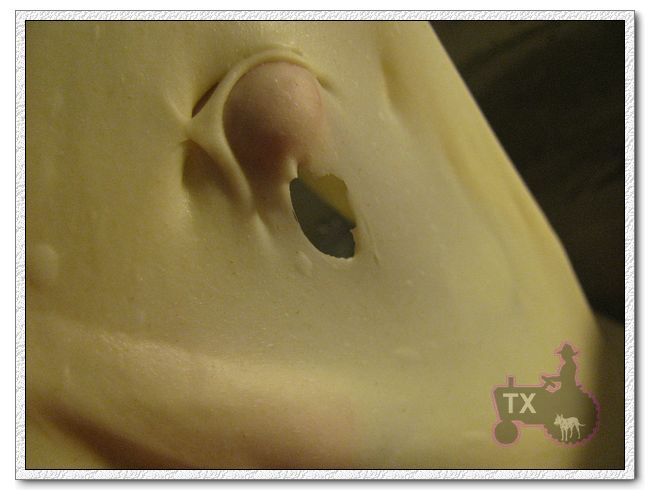
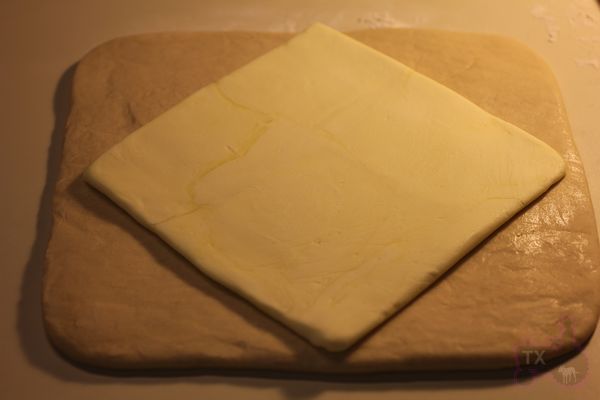
3. Roll the dough out until it's double size of the butter sheet, 11X11inch in this case. Tap butter until it's roll-able, and the texture is similar to the dough. put the butter in the middle of the dough as following, fold up dough and seal the butter. Pay attention to corners and edges, you don't want spots where there's no butter.


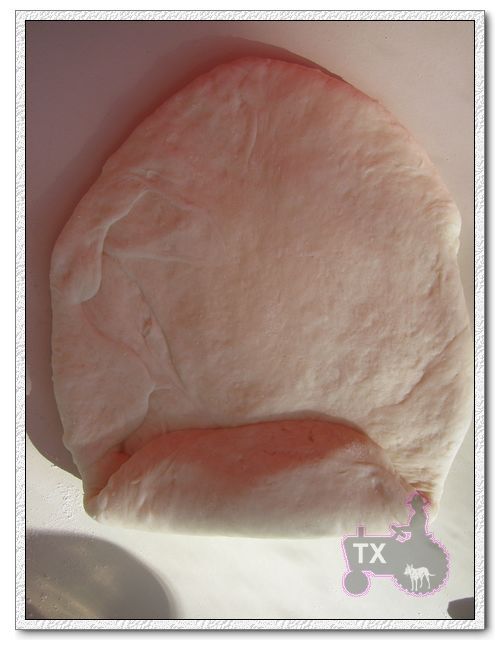
4. Roll out into a 8X24inch rectangle, do your first fold as following:

NOTE8, as Ralph emphasized in his posting: don't trap the dough! Before folding, cut the edge off to expose the layers before folding that side into the crease of the dough, that way there's no "extra trapped dough".

NOTE9, even though at this stage, it doesn't seem important to roll the dough out into specified sizes, but you will get better results if you do. The reason is simple: if your dough piece is smaller at this step, you will have to do more rolling in the later steps. Later steps would have more layers of butter, which means it will be harder to roll out evenly. Roll out the dough to the size now.

NOTE10, pay attention to corners and edges. Every imperfection would be magnified 27 times because you are folding 3 times.


5 Put in fridge and rest for 1 hour. Take out dough and repeat the rolling and folding 2 mroe times, which gives 3 folds in total.

NOTE11, I had the misconception that the more folds, the more layers, the flakier it will be. Wrong. With too many folds, butter layers would be thinner and thinner, and it will be more likely for the butter to melt and leak. Even with perfect rolling, too may layers would mean smaller honeycomb "holes" in the crumb. With no sheeter and TX weather, I find 3 folds sufficient, any more it's risky.

NOTE12, 1 hour is "MINIMAL" resting time. I often have rested longer since I was doing something else. There's no harm in resting a bit longer. During final fold, I sometimes have to rest it in the middle in order to roll out to the desired size. Sometimes when it's way too warm (the curse of TX, at one point I was rolling out croissant while hubby was eating watermelon in a tshirt), I would also rest in the middle to avoid butter melting. It's always better to be overly cautious. Allow you self more time than your expect.


6. Put in fridge and rest for at least 90min.Roll out to 9X36inch, 1/8inch thickness.

NOTE13, I don't have such a big counter space, niether do I have such a big fridge, so I cut the dough in half, which means I have 2 pieces, each one is 9X18inch.

NOTE14, Rest often. Rest when there's any indication of butter getting too warm, or the dough getting too elasticy. There's no harm in resting too much.

NOTE15, Use enough flour so the dough don't stick.


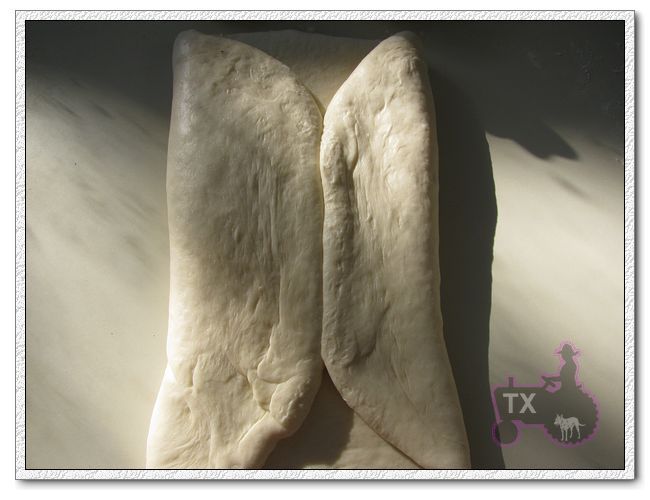
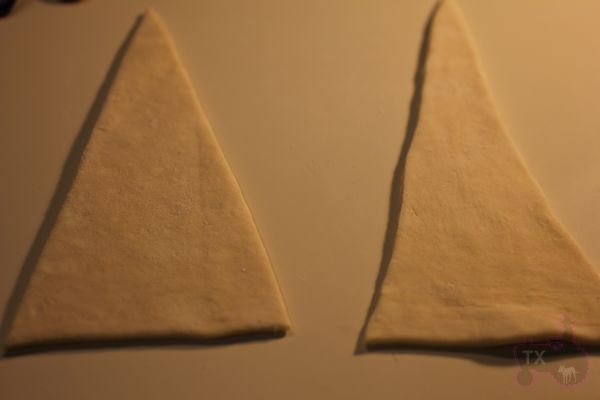
7. Cut into triangles, 4.5inch wide at the base, 9inches tall(the one on the left). Don't hesitate to cut off inperfect edges if you want a pefect crumb. Fridge and rest the triangle pieces, then strech them into 10inch high(the one on the right), this will creat more layers.


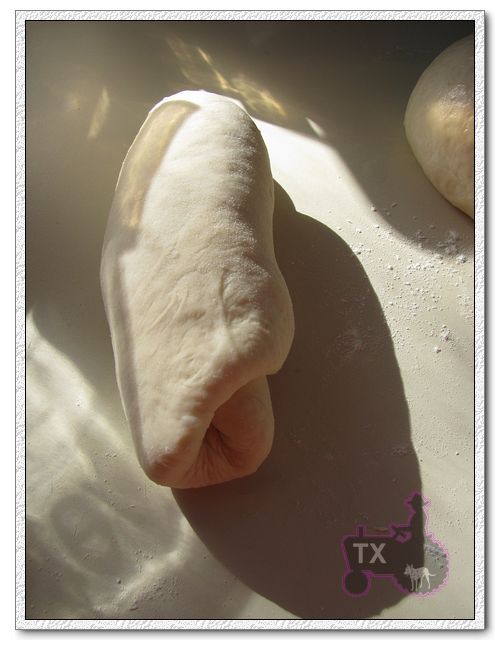
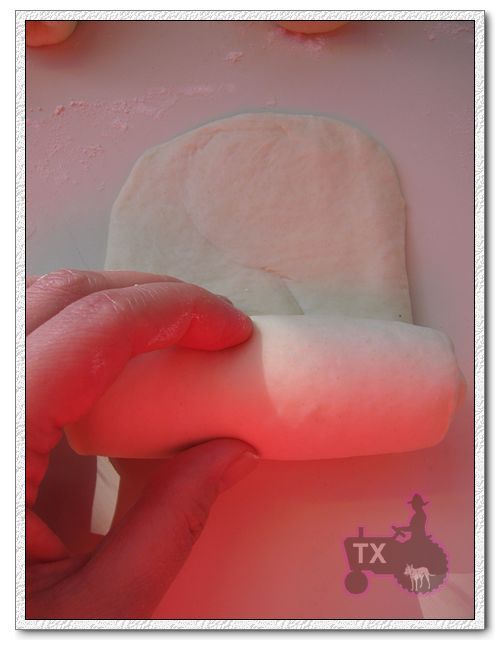
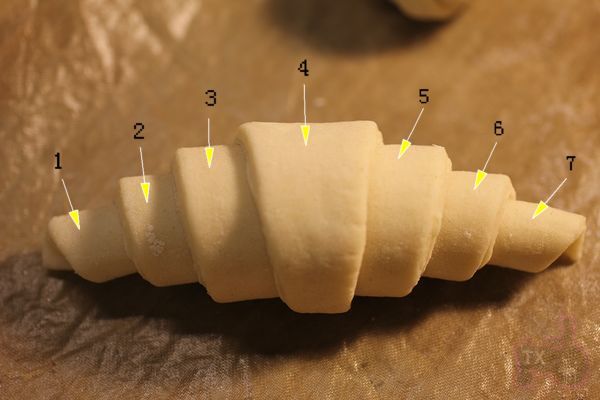
8. Roll up fairly tight, stretch out the tip with one hand when you roll the bottom with the other hand. You should get 3 rolls, and 7 little steps, wich the tip underneath.

NOTE16, this is the straight shape, if you want a curved shape, you will need to cut a slit in the base before rolling, and roll to the outside as you start from the base. See Hamelman's formual link.


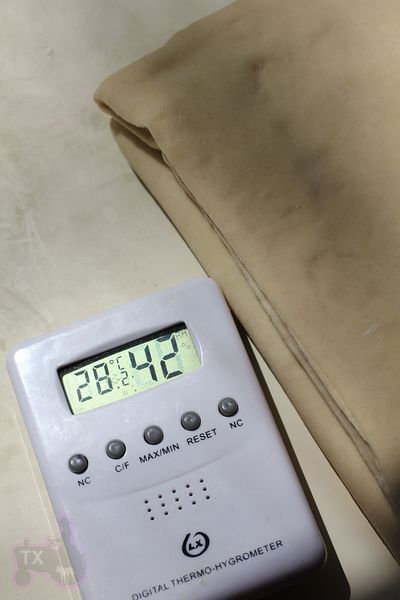
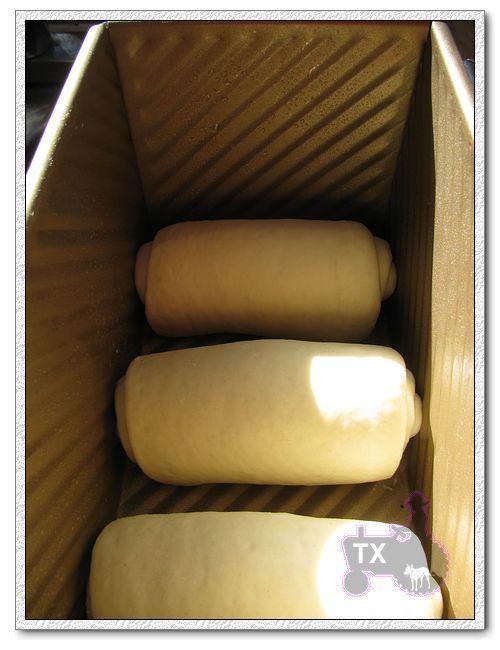
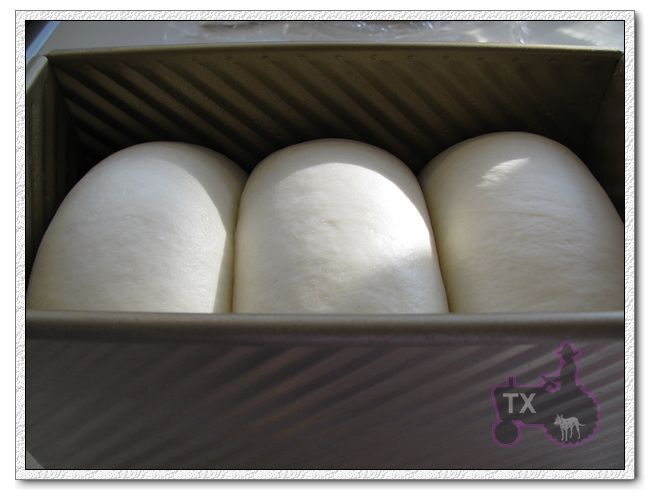
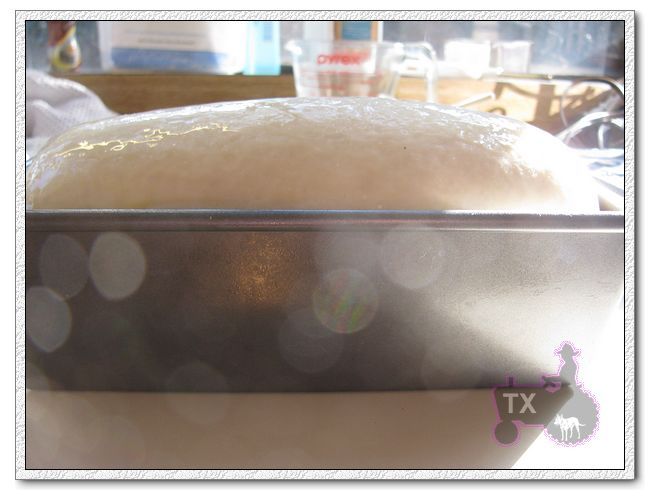
9. At this point, you can proof right away, fridge overnight and proof next day, or freeze (defrost overnight in fridge before proofing). Brush with egg wash (1 egg beaten with 1 TBSP of water), then proof @ about 80F until very soft and jiggly. About 3 hours for me. Brush another layer of egg wash after proofing.

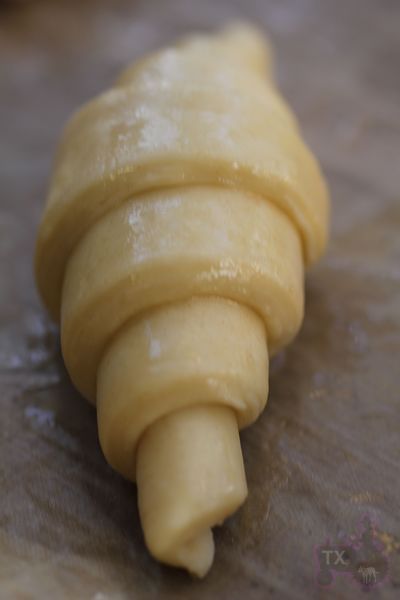
NOTE17, don't proof warmer than 80F, the butter might leak otherwise.

NOTE18, don't under proof, otherwise butter will leak during baking. I have yet to overproof these. They have to be REALLY soft and jiggly. The layers will be very obvious at the end.

NOTE19, the egg wash before proofing would reduce the requirement on proofing humidity.

NOTE20, I have a madeshift proofing box made from foam box, a temperature sensor and control from pet shop, and a light bulb, works great.


10. Bake at 425F for 10min, 375 for 15min.


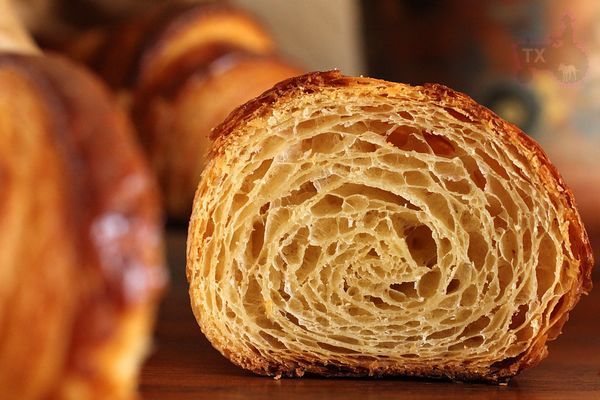
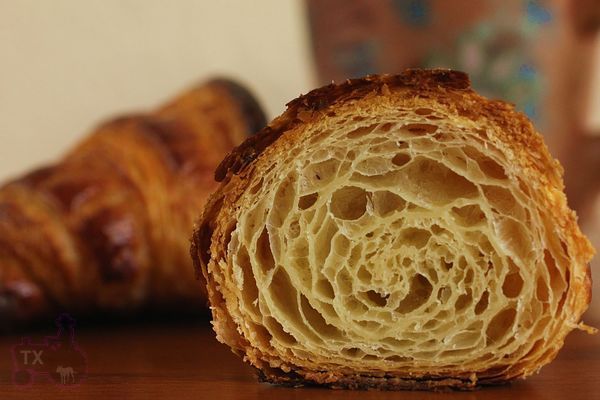
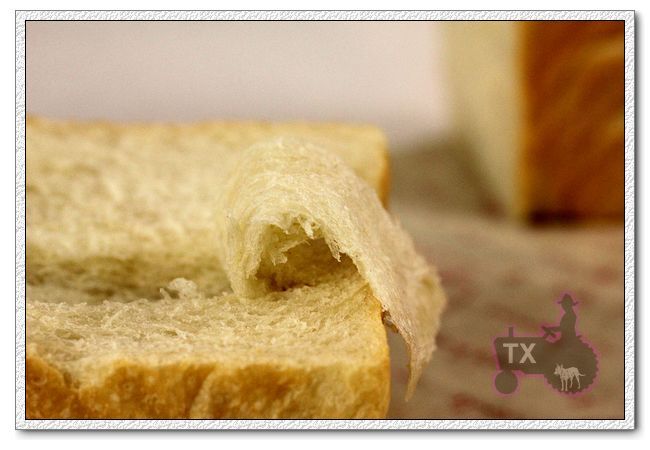
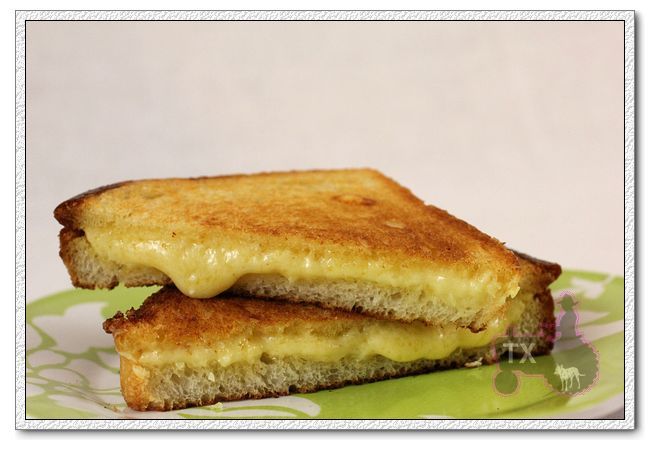
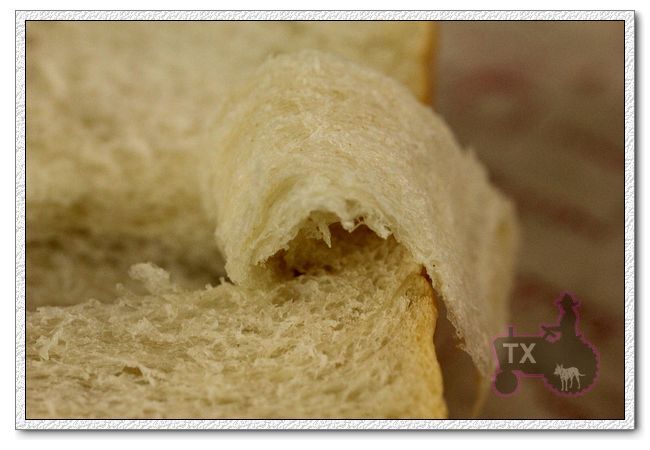
Honeycomb enough? Not really, but getting there.They should be more well defined, and the wall of each cell should be thinner.


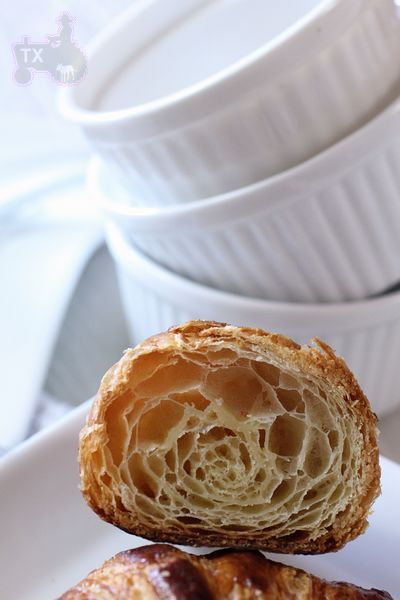
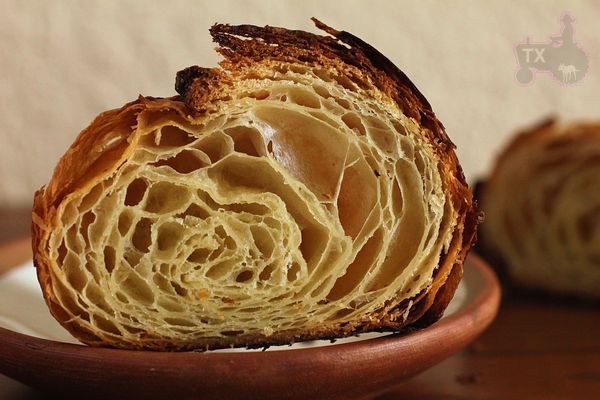
For this one, I didn't cut off the imperfect edge before rolling up , which made the center too doughy.


I don't even know whether a "perfect" croissant can be achieved in a home kitchen, especially a warm TX home kitchen, but I will keep trying. In the mean time, my family, friends, and coworkers are loving me for feeding them such delicious breads.


Sending this to Yeastspotting.

txfarmer's picture
txfarmer

Sourdough Pan de Mie - how to make "shreddably" soft bread

After posting about some soft Asian style breads, I have gotten more than a few private messages regarding how to make very soft sandwich loaves. I was a little suprised since my impression was that most TFL-ers here prefer a good crusty lean hearth loaf, and soft "wonder breads" are being looked down to. I guess there IS always a need for soft breads: elders and kids who don't have strong teeth, spreaded with a little jam for delicate tea sandwiches , or just because you like the taste and texture. Soft breads are not equal to tasteless wonder breads either, they can be flavorful, "bouncy", and full of body.


Pan de Mie is a slightly enriched bread, just like most soft sandwich breads. That little bit of sugar, butter (you can replace with oil), and milk powder (you can replace with milk, and take out water accordingly of course), only 5% each, are enough to make the crumb very soft. For even softer results, you can increase these ratios to 10% or even 15%, or/and add other enriching ingredients such as cream, cream cheese, buttermilk, cottage cheese, etc.  However, adding too much, you are getting into broche territory though. This verion is raised purely with sourdough stater, but you can get good results using commercial yeast as long as the ingredient ratio is reasonable, and you do a good job at kneading/fermentation/shaping. However, since pan de mie has a very subtle taste, that bit of sourdough tang really enhance the flavor, I would highly recommend using it.


Sourdough Pan de Mie (my own)

Note: 19% of the flour is in levain

Note: total hydration is 65%

Note: total flour is 280g, fit a 8X4 loaf pan. For my Chinese small-ish pullman pan, I used 260g total flour. For KAF 13X4X4 pullman pan, I would suggest using about 450g of total flour.

- levain

starter (100%), 15g

milk, 24g

bread flour, 46g

1. Mix and let fermentation at room temp (73F) for 12 hours.

- final dough

bread flour, 227g (I used half KAF bread flour and half KAF AP flour for a balance of chewiness and volume)

sugar, 14g

butter, 14g, softened

milk powder, 14g

salt, 5g

water, 150g

2. Mix together levain, flour, milk powdr, sugar, and water, autolyse for 30min. Add salt, mix until gluten is developed, add softened butter, and knead until the gluten is very developed. This intensive kneading s the key to a soft crumb, and proper volume. We've all heard of windowpane test, but what's important is how STRONG the said "windowpane" is, which is a measurement of how strong the dough is, and how uniformed the gluten structure is. The following the a picture of my windowpane test on this dough, notice that it's thin, but so strong that it doesn't tear even when I wear it as a glove and my finger is poking at it.

When I finally poke through, the edge of the hole needs to be very smooth.

Yes, it can be done by hand. I have regularly kneaded dough to this stage by hand, it just requires a bit of patience and practice. Of course it's easier with a mixer. In my KA pro6, this dough took 13 to 15 min of mixing at speed 3 or 4 (I know, I know, it violates the KA mixer manual. If you are worried, don't do it, just mix at speed 2, it will take (quite a bit) longer. I have been using this "illegal" method for 2 years now, the mixer has not complained.), doughs with more fat would take longer, different dough size would also affect the time. Do note that it's very possible to over-knead, especially with a mixer, even a couple more minutes after the stage above, the dough would deterioate quickly, it takes a few trial and error to get it perfect. I would suggest to touch and feel the dough every few minutes even you do use a mixer, so you get a good sense of how the dough changes. This intensive kneading technique is quite useful, not just for soft sandwiches, but also for brioche, or other enriched breads. However, for lean hearth loaves, I don't knead at all, I stretch and fold, to get the open crumb. I think different breads demands different techinques.

3. Bulk rise at room temp (73F) for 2 hours, the dough would have expanded noticably, but not too much. Fold, and put in fridge overnight. I find the crumb would be more even and soft if dough gets a full bulk rise - that is true even when I use dry yeast with this dough.

4. Divid, rest for one hour, then Shape into sandwich loaves, the goal here is to get rid of all air bubles in the dough, and shape them very tightly and uniformly, this way the crumb of final breads would be even and velvety, with no unsightly holes.

For the 8X4loaf pan, I first roll out the dough into pretty thin, getting rid of bubbles in the mean time. Fold two sides to middle (see picture below), then roll up like a jelly roll, and put in the pan seam side down.


However, I much prefer the pullman pan method. First divide the dough into 3 or 4 pieces depending on pan size, roll each piece into oval, and roll up. After resting for 10min, roll out each piece into long oval again(along the seam), and roll up again, tighter than the first time. Put the pieces seam side down in the pan. By rolling twice, the crumb will be more even and "pore-less".

5. Cover and rise for about 6 hours at 73F. For pullman pan, the dough should be 70%full

For 8X4loaf pan, the dough should be about one inch over the edge

6.  Bake at 375 for 45min. Immediately take the bread out of pans, and cool.

Looking at the crumb shots below, you can see the difference between two shaping methods, the "double roll" really make the crumb more even and pore-less:

Of course, the "pore-less" crumb is more about aesthetic, with either shaping method, the bread would be shreddably soft.

Makes a great grilled cheese:

Or as I tend to do, just tear pieces off and snack on


Sending this to Yeastspotting.

Debra Wink's picture
Debra Wink

The Pineapple Juice Solution, Part 1

You know what they say... Life is a journey. But have you ever been pulled down a path that you otherwise would have walked on by? That's what happened to me when I started playing with sourdough. I didn't even like sourdough, or so I thought until about seven and a half years ago. I was watching the food network one day, and Daniel Leader appeared as a guest on Cooking Live. He was demonstrating how to make a sourdough starter from nothing but flour and water. How fascinating! I had no idea you could do that. Bread science was nowhere in the curriculum when I went to university almost 30 years ago, let alone sourdough. But for someone with a microbiology degree and a passion for baking, sourdough is the perfect marriage of two loves. I had to try it for myself. And so began the journey. The path so far has taken some surprising twists and turns, and led to meeting many interesting people along the way. Including Peter Reinhart, who has been nothing but gracious and supportive throughout, and who is ultimately responsible for getting me to sit down and record this story in my own words. Now, back to the beginning...

In early 2002, I was a member of the King Arthur Baking Circle, a message board for baking enthusiasts. With this brand new interest in sourdough, I found myself reading all of the threads under that category. In March another member, Pat Doucette began posting of the difficulties she was having in getting a starter going. She had tried a few different recipes with no success. Now she was following the formula in The Bread Baker's Apprentice and... still no luck. Newly armed with all of the advice that she was getting from others on the forum, she started over. And once again, she got results that were nothing like the book describes. But a pattern was becoming clear. On the second day, her seed cultures would fill with bubbles and expand to over three times the starting volume when minimal growth was expected. And then do nothing on the third and fourth days when they were supposed to be expanding more and more. They came on strong and then died at the same point each time. A pattern holds a clue, so I offered to do the procedure myself and see if I could reproduce what she was seeing. I followed the directions to the letter and, lo and behold, my results duplicated Pat's perfectly. I may be the only person on the planet who would be excited about this, but it gave me something to study and troubleshoot. There was something unexpected going on at the microbial level. Living things are funny that way, and microorganisms don't always follow directions.

One by one, other people on the message board began to speak up and post that they had experienced the same thing. In fact, it seemed that many more saw that scenario than the one described in the book. This phenomenon had nothing to do with local strains of lactobacilli and yeast as some had surmised, because Pat was making starter in Massachusetts and I was in Missouri. Others chiming in represented various regions of the country from coast to coast. This pattern is apparently quite common. We ran the gamut of theories on why yeast were coming on like gangbusters, only to quit and become non-responsive. We tested each theory by trying different flours at various points, increasing the feeding frequency, changing the hydration and water source, cooling it down, and anything else that anyone thought might help. But in the end, nothing fixed the problem, and the results weren't making much sense to me.

At that point, I had to do what microbiologists do when things don't add up---go back to the microscope and take a look. That meant packing up my starters, taking them to work, and having to answer all the curious questions about what I was doing and why. But the microscope answered a few of my questions, and that day proved to be the turning point. No wonder things didn't make any sense! We were operating on the assumption that we were growing yeast. What I found was that there were no yeast or lactobacilli to be seen anywhere in all the activity of day two. Not a single one. But it was like a three-ring circus in there---different kinds of bacteria, some round, some rod-shaped, some motile, some not. Some were spinning, some were twirling, some flipping or zigzagging, and some were just darting back and forth across the field. What were these bacteria, and which one was responsible for all the gas?

I knew, from having made so many starters by now, that this pattern does turn into sourdough if given more time. So, I looked at cultures each day in the process, comparing them to my established starter which was yeasty and stable. Everything quiets down in there and yeast emerges a few to several days later. They don't appear to be coming from the air as many people believe, because it happens even in a covered container. But if they are already in the flour as the more reliable sources say, then why couldn't I find any? Obviously, there was more to this than just a symbiotic relationship between lactobacilli and yeast gradually increasing in number, good guys out-competing bad---the usual explanation. It was evident that there are many more bacterial and fungal species present in flour than just sourdough lactobacilli and yeast. But where were the good guys? Why weren't they growing? It was time to close the cookbooks and open the textbooks.

I turned to a large, newly updated food microbiology tome, and was disappointed to find only two brief paragraphs on sourdough, and not much more on yeasted breads. So it became a challenge to find the information, mostly borrowed from chapters on wine, beer, dairy, and other food fermentations that share something in common with sourdough. I was able to narrow down the gas producer to a Leuconostoc species. The tip-off was reading that almost 90% of spoiled doughs are caused by Leuconostoc mesenteroides or Leuconostoc dextranicum. When I started searching for more on the genus, I found Leuconostoc mesenteroides is considered the primary agent in the fermentation of an Indian steamed bread called idli. (Spoilage is a subjective thing from culture to culture.) After soaking grains for a day and then grinding them with water into a paste, there is a 15-24 hour fermentation during which the idli batter increases in volume by about one and one half to three times---the same as our wild day two growth.

Leuconostocs are also occasional spoilage bacteria in wine making, "but they undergo little or no growth during the alcoholic fermentation and tend to die off because of competition from yeasts. Nevertheless, these bacteria are capable of abundant growth in the juice and, if yeast growth is delayed, they could grow and spoil the juice or cause stuck alcoholic fermentation."[1] Many microorganisms produce characteristic aroma compounds, and so smell is also an important clue. I had previously described an unamended, all-white seed culture as smelling like sour milk with a hint of rotten cheese. Then I learned that some leuconostocs are added to dairy fermentations (such as cultured buttermilk, and cheeses like Gouda, Edam, blue cheese and havarti) for their carbon dioxide and aroma compounds. Together, these pieces all fit what we were seeing, and according to the chapter on fermented vegetables, leuconostocs are quite common in nature and found routinely on all kinds of produce and plant material. So, we can expect them to be present on grains and in flour.

Knowing how bland a flour-water mixture starts out, and seeing how the microscopic picture becomes more subdued as the sourness increases, it was apparent that the shift in populations and activity are tied to changes in acidity. pH is a fundamental factor in microbial growth. Some like it neutral while others need more acidity or alkalinity, but each species has its own pH range. The reason that the starters had become quiet on day three was because the pH had fallen and the gas-producing bacteria were no longer growing. Even though I still wasn't sure what these bacteria were, it was clear that whenever the gas-producing one or ones grew, the starter would subsequently become still and take longer to finish---sometimes by several days. I reasoned that the best solution might simply be to keep them from growing. And since they stop growing as the pH drops, why not add an acidic ingredient to the mixture to lower the pH and inhibit them from the outset?

It was May now and Evan Shack had entered the picture. Unaware that this was already a hot topic, he began posting to the message board seeking help after having just tried to make starter and getting the same result that we had. Evan was interested in learning the science behind it, and he and Pat were both eager to get to the bottom of the problem, so they volunteered to do some testing. Soon after we joined forces, Gary Wray contacted me and we invited him to join our little task team. With so many different recipes to choose from, it was clear that there are several approaches to making starter. But we needed to pick a direction to focus our problem-solving efforts. And because so many people on the message board were loyal fans of The Bread Baker's Apprentice, the group decided the goal would be to use that formula, altering it as little as possible, and make it proceed as described in the book. The fix should be simple, with ingredients readily available at home or in the average grocery store. Our choices for the acids were ascorbic (vitamin C), citric (sour salt), tartaric (cream of tartar), acetic (vinegar), lactic (yogurt), and mixed acids (fruit juices).

For our first trial we chose ascorbic acid, because it is readily available in the vitamin supplement section, known to be beneficial, and widely accepted in bread-making. Pat and I used vitamin C tablets that we had on hand. We crushed them and mixed the powder with the flour and water on day one. And much to our amazement... it worked! No gassy bacteria, and we were both growing yeast on or before day four, where it had been taking about seven days. But I discovered a little problem with supplement pills, which is that some are buffered without being labeled as such. I was not getting the pH to drop in mine even though I kept adding more and more vitamin C. When I took a closer look at the bottle, I found two ingredients listed which together, formed a buffer system that was keeping me from reaching the pH I was aiming for. Pat's vitamin C was not buffered and her starter took off in only three days.

Buffer problems aside, neither one of us enjoyed the task of crushing pills. And whirring them in a blender with the water only worked so-so. We also had no idea what the best dose would be. Gary and I both had ascorbic acid powder, so we did another experiment testing different doses ranging from 1/8 to over 1 teaspoon mixed with the 4.25 ounces of flour on day one. It was a fun experiment to do. With the jars lined up next to one another, they looked like perfect stair steps as the starters began to rise. It was easy to see which doses were most effective by how fast and how high the cultures rose. For me, the most active jars were the ones with 1/4 and 1/2 teaspoon of ascorbic acid powder. For Gary, the best results came from 1/2 and 3/4 teaspoon, and so we settled on 1/2 teaspoon as the recommended dose. While the ascorbic acid worked quite well, and may be the ingredient of choice for purists or professionals, the average person must go a little out of their way to find or mail-order it. So we decided to press on.

All of the acids that we tried, inhibited the gassy bacteria effectively, but sour salt (sometimes found with canning supplies) was so strong that it was hard to measure the tiny amounts accurately. Cream of tartar (found in the spice section) was too weak, and required an impractical amount to effectively lower the pH. We dismissed lactic acid because we didn't want to deal with dairy or go to the trouble of draining yogurt for the whey. And vinegar was so highly inhibitory to yeast in the doses required to lower the pH, that it was no solution at all. That left fruit juices. I tested the pH of various juices and made a list for the group to try---apple cider, orange, lemon, grapefruit and pineapple juices seemed like the most suitable candidates based on wide availability. But whenever trying a new juice or acid, I had the group run a negative control alongside---a duplicate to the test in every way, except using plain water. This would show whether changes in the result were due to the ingredients under evaluation, or to chance or variation in experimental conditions. Time after time though, the control jars followed the familiar pattern, while the test jars proceeded by the book.

While the trials were under way I went back to basics, monitoring the changes in acidity and examining seed cultures under the microscope every day. I recorded pH readings, growth measurements and observations at the beginning and end of each 24-hour feeding cycle. After a number of runs, I gathered my notes to compare and look for patterns. (My pH paper was only sensitive to the nearest 0.5 increment, so readings are approximate.) I found that when I acidified the day one mix to 4.5, it stayed at 4.5 until I fed it again on day two. If I didn't add more acid at that time, the freshly fed starter would read 5 and the gassy bacteria grew on day two and followed the oh-so-familiar pattern. If I acidified the day one mix to 4, it stayed at 4 until I fed it on day two, after which it read 4.5. The gassy bacteria did not grow and the culture started producing its own acid as other lactic acid bacteria were increasing in activity. During the second 24 hours, the pH dropped to 3.5 and the starter tasted really sour. Yeast usually appeared the day after. When I acidified the day one mix to 3.5, I actually got some yeast growth on day two. I'm not sure that this is the best way to go, though. I've only done it once with citric acid and yeast were not as vigorous the next day as I had hoped to see them. More testing could be done. But the key points here are that the gassy bacteria grew at or above pH 5, not at or below 4.5, and the cultures I was growing all failed to produce acid of their own in the first 24 hours. That is important because a day one flour-water paste measures about 6---quite inviting to leuconostocs. And even more importantly, in all my trials I have never seen yeast before a starter gets sour, but it usually follows very soon after.

I was hoping orange juice would perform well, since it is a good source of Vitamin C and a staple in many homes. But, it turned out not to be acidic enough to meet the group's objective, which was to use it only on the first day. However, Orange juice and apple cider do work well if they are used in place of the water for two or three days. Pat was the first to try pineapple juice, which has a lower pH than most other juices, and just happens to come in handy 6-oz cans (exactly the right measure for day one). She liked it so well that she stopped testing anything else and started recommending it to others. Almost everyone who tried it was thrilled with the results, and so pineapple juice became the solution that stuck. While the group's mission was accomplished, the story doesn't end here. But the rest will have to wait until next time, so please stay tuned...

References
1.
Doyle, Michael P., Larry R. Beuchat, and Thomas J. Montville. 2001. Food Microbiology Fundamentals and Frontiers, 2nd ed. American Society for Microbiology Press, Wahington, DC.

-------------------------------
This article was first published in Bread Lines, a publication of The Bread Bakers Guild of America.
Vol. 16, Issue 1, March 2008

The Pineapple Juice Solution, Part 2 | The Fresh Loaf

Mini Oven's picture
Mini Oven

Mini's Favorite 100% Rye Ratio

I've been playing with rye loaf ratios (starter/water/flour) and I came up with one using any amount of rye starter that when refreshed is a paste (100% hydration) and as it ferments loostens to a thick batter.  I was looking for basic numbers (like 1/2/3) and I found them they're  1/ 3.5/ 4.16.   It makes Rye so much easier!  The starter should be generously refreshed 8-12 hours before and mixed into the dough just before peaking and in a 22°c room (72°F) the dough ferments 7-8 hours before baking.   Dough should not be folded or shaped 4 hours before going into the oven.

Basic Ratio> 1 part starter: 3.5 parts cold water: 4.16 parts rye flour    

4 tablespoons bread spice for 500g flour    Salt 1.8 to 2% of flour weight

Hydration of dough aprox 84%.  Handle dough with wet hands and a wet spatula.  Combine starter and water then the flour, stir well and let rest covered.  Add salt about one hour after mixing and any other ingredients.  If room is warmer add salt earlier.  Three hours into the ferment lightly fold with wet hands and shape into a smooth ball.  Place into a well floured brotform or oiled baking pan.  Cover and let rise.  Don't let it quite Double for it will if conditions are right.  Before placing in the oven, use a wet toothpick and dock the loaf all over to release any large bubbles.  Bake in covered dark dish in cold oven Convection 200°C or 390°F (oven can reach 220°C easy with the fan on.)  Remove cover after 20 to 25 minutes and rotate loaf.  Reduce heat by simply turning off convection and use top & bottom heat at 200°C.   Remove when dough center reaches 93°C or 200° F.

All kinds of combinations are possible including addition of soaked & drained seeds and or cooked berries or moist altus and whole or cracked walnuts or a little spoon of honey.

How it works:  I have 150g rye starter at 100% hydration.  I figure for water: 150 x 3.5 gives the water amount or 525g.  I figure the flour: 150 x 4.16 gives 624 g Rye flour.  For salt:  2% of 700g (624g + aprox. 75g in the starter) makes salt 14g or one level tablespoon of table salt.

This amount of dough took 1 1/2 hours to bake and included moist rye altus.  It was baked in two non-stick cast aluminum sauce pans (20cm diameter) one inverted over the other .  The rounder of the two on the bottom.  No steam other than what was trapped inside.  Top removed after 25 minutes.  It has a beautiful dark crust with a light shine.  Aroma is heavenly.


Pages