The Fresh Loaf

A Community of Amateur Bakers and Artisan Bread Enthusiasts.

Most bookmarked

ananda's picture
ananda

Two Large Boules and a Spicy Ginger Cake

Already the freezer stock of bread is running low, but the supply of Bacheldre Dark Rye and Gilchester Pizza Flour is just about exhausted.   There was enough to make a refreshed Rye Sourdough, but the wheat levain needed to be switched over to an alternative flour for its second refreshment to build up the amount needed to make these 2 loaves.   The rye sour had one refreshment from stock; the wheat levain had two refreshments.   There is still some Gilchester Farmhouse flour [c.85% extraction] in the cupboard, so I built this into the final formula for the bread, and used it in the Ginger Cake described below.

Two Large Boules

Alison found some Marriage’s Organic Strong White Flour for me on Saturday, so the levain build was complete, and I could start dough mixing this morning [Sunday].   Here is the recipe, formula and method:

Material

Formula [% of flour]

Recipe [grams]

1. Rye Sour dough


Bacheldre Dark Rye

4

60

Water

6.67

100

TOTAL

10.67

160

2. Wheat Levain


Gilchesters Organic Pizza & Ciabatta  Flour/ Marriage’s Organic Strong White Flour

26.67

400

Water

16

240

TOTAL

42.67

640

3. Final Dough


Rye Sour [above]

10.67

160

Wheat Levain [above]

42.67

640

Marriage’s Organic Strong White Flour

53.33

800

Gilchesters Organic Farmhouse Flour

16

240

Salt

1.8

27

Water

45.33

680

TOTAL

169.8

2547

Overall Pre-fermented Flour

30.67

-

Overall Hydration

68

-

Wholegrain: White

30:70

-


Method:

  • Autolyse flours, water and rye sour for 1 hour
  • Add levain and form dough.   Add salt and develop.
  • Rest for 15 minutes, then mix a further 10 minutes.
  • S&F after 1 hour.   Bulk Proof 2 hours.   Knock back after 1½ hours, gently.
  • Scale and divide.   I made 1 boule @ 1000g and 1 just over 1500g.   Carefully mould dough pieces.
  • Proof upside down in bannetons for c.3 hours.
  • Tip out of the bannetons, cut the top of the loaves and bake in a pre-heated oven with steam.   I baked the 1.5kg loaf for 1 hour and the 1kg loaf for just less than 45 minutes.
  • Cool on wires

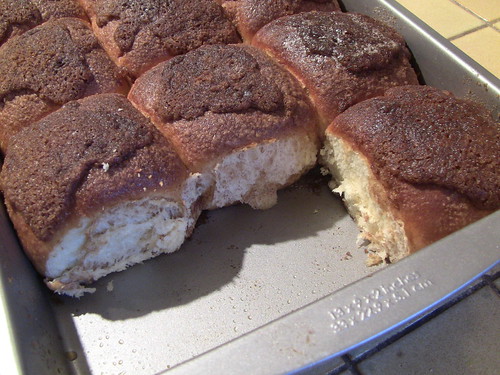
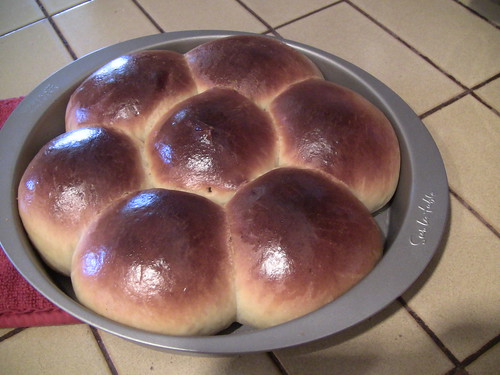
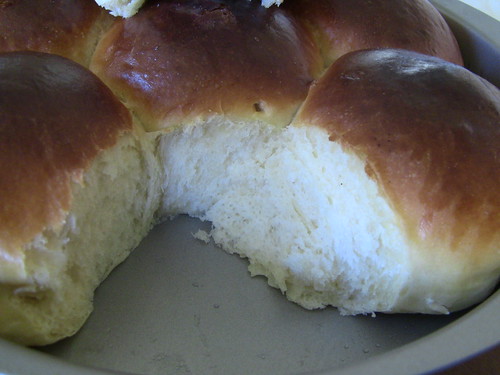
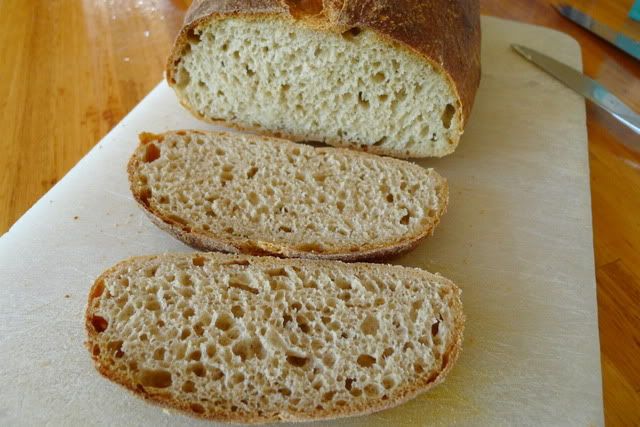
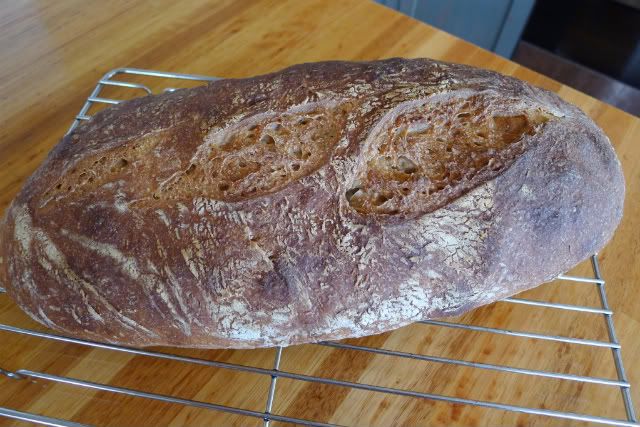
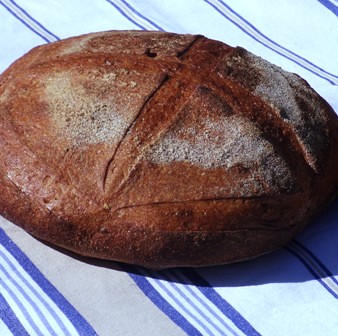
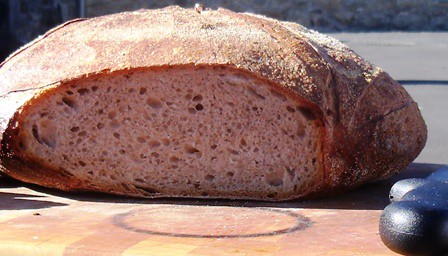
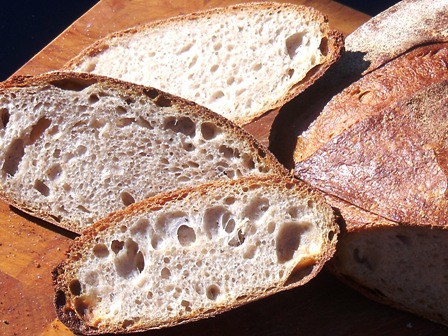
The steam has given these loaves a lovely shiny appearance.   They are quite bold and have expanded well around the cuts.   The crust has a few cracks appearing.   The crumb gives evidence of well developed dough and proper attention to fermentation.   We are both looking forward to a week of enticing sandwiches for lunch.   Photographs shown below:


Spicy Ginger Cake

The British contingent here may have come across Dan Lepard’s “Honey and Treacle Cake” in The Guardian Weekend Magazine on Saturday.   I’m quite a fan of these “blended” Ginger cakes, and one of my students made Dan Lepard’s “Whisky Ginger Cake” [see his website for this one] in the Confectionery exam last Monday…and it really is loaded with alcohol too!

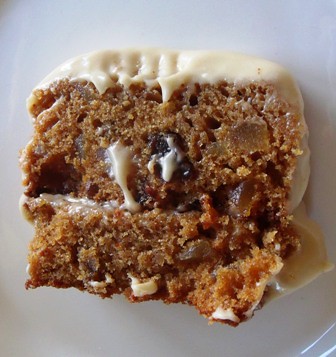
Alison saw this article and decided it was a healthy option because it had no refined sugar in the recipe!!?   Well, this is my take on it, although the Mascarpone and Orange Icing  is down to Alison.   It’s very spicy and full-on ginger.   The finished cake texture is exactly how I like to eat cake; you decide for yourselves.

Recipe, formula and method are shown below.   I’ve made a good few changes to the recipe published in the Guardian, so I’m happy to list it below as my own take.

Material

Formula [% of flour]

Recipe [grams]

Organic Honey


125

Blackstrap Molasses

154.3

70

Ginger Syrup


75

Butter

86

150

Black Peppercorns


7

Cloves

16

7

Mace


7

Ginger Powder


7

Eggs

86

150

Orange Zest

0.6

1

Gilchesters Organic Farmhouse Flour

100

175

Baking Powder

5.7

10

Stem Ginger [diced]

172

220

Dried Fruit


81

TOTAL

620.3

1085

It is not so clear in the table above, but I have tried to show the formula in relation  to constituent parts, so 16% is proportion of spice, and 154.3 is proportion of syrups, both to flour.   Fruit is 172% of flour; this could perhaps be lower 

Method:

  • Gently heat the sugars, butter and whole spices to 80°C in a pan.
  • Lightly beat the egg
  • Sift together the flour, baking powder and ginger powder.
  • Strain the syrups off the whole spices.   Add zest plus dry ingredients and fold to form a smooth batter.   Fold in the egg.   Fold in the fruit.
  • Scale equally between 2 loaf tins.   Bake at 160°C for 40 minutes
  • Cool on wires.

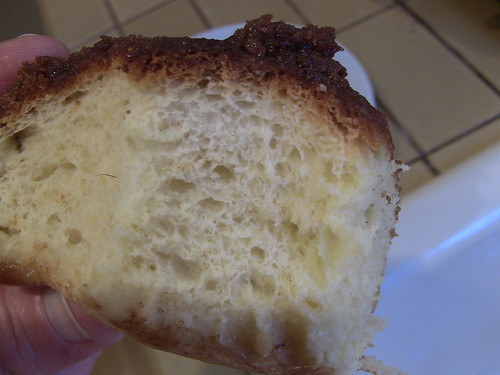
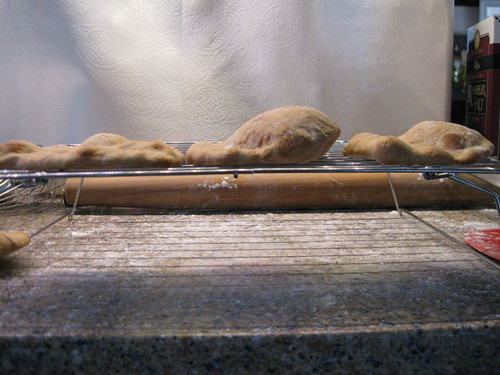
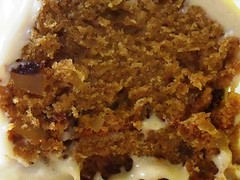
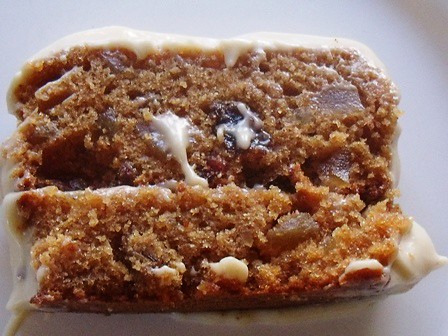
Photographs of the finished crumb are shown.   Lovely cake, but neither of us ever really eat much of the stuff; let’s hope it will keep the week in the fridge?

Best wishes

Andy

GSnyde's picture
GSnyde

Cinnamon Buns Hawaiian-Style

Since we got back from Hawaii a few weeks ago, we’ve been craving Hawaiian sweetbread.  When we were there we bought a local bakery’s cinnamon sweetbread, pull-apart buns coated with cinnamon sugar--not gooey sticky buns, just barely sinful.

When there, I tried the Hawaiian sweetbread recipe in this post (http://www.thefreshloaf.com/node/21175/hawaiian-portugese-sweet-bread#comment-148186).  It was very good, and totally true to the local sweetbread we’ve often enjoyed.  Very much like the “poor man’s brioche” in Reinhart’s BBA.

Today, I decided to go for Hawaiian-style cinnamon buns.  I used the same dough recipe.  I divided the dough into pieces of about 85 grams each.   I made seven of them into plain sweetbread buns without cinnamon sugar.

They are soft, tender, shreddable and delicious.  They will make good teriyaki chicken sandwiches tomorrow.

The other 12 buns were brushed with water, rolled in cinnamon-sugar, and placed in a buttered baking pan, each with a dollop of butter-cinnamon-sugar glaze on top.  They were baked at 375 F for about 25 minutes.  The glaze was too dry to run down the sides of the buns, but it makes a nice crispy sugary crust on top.

They are delicious!  And not as guilt-inducing as “real” cinnamon rolls.

Tasha, of course, snoozed through the whole thing.

Hope you all enjoyed the day the world didn’t end.

Glenn

amolitor's picture
amolitor

Corn Muffins


I am on a quest to duplicate, or at least create a reasonable facsimile, of the Arizmendi/Cheese Board corn-blueberry muffins. I have The Cheese Board Collective Works which does not contain this recipe, to my irritation, but which can serve as a useful guide! My most recent attempt is documented here:

Preheat oven to 425. Thoroughly oil or butter a muffin tin. This makes 6 large or 9 medium muffins.

Mix dry ingredients in a bowl:

  • 1 cup flour
  • 1 cup cornmeal (relatively fine stuff)
  • 1 tsp salt (scant)
  • 1 1/2 tsp baking powder
  • 1/2 tsp baking soda
  • 3 T white sugar
  • 1 T brown sugar

In a separate smaller bowl, mix these:

  • 1/2 cup plus 2T milk
  • 1/2 cup yogurt
  • 1 tsp maple syrup

Cut in to the dry ingedients:

  • 4 T unsalted butter

Whisk in to the milk/yogurt combination:

  • 1 egg

Make a well in the center of the dry ingredients and pour in the well-stirred liquid ingredients. Mix gently, just to moisten the dry ingredients evenly. Portion evenly between the greased muffin tins, bake for 25-30 minutes.

NOTES:

These are not the Arizmendi corn muffin, but they're not far off. They're slightly salty, and not short enough. Next time: reduce salt to 1/2 tsp, and increase butter to 6T and/or use sour cream instead of yogurt. The yogurt used was low fat, which probably did not help. Anyways, go up to 5-6 tablespoons of butter, depending on how fat your yogurt/sour-cream is.

Also probably increase leavening a little to compensate for increase shortening, say 3/4 tsp soda and 2 tsp powder.

Also, 2T sugar, 2T brown sugar.


rossnroller's picture
rossnroller

Why did I stray so long? Shiao-Ping's 'House Miche' Revisited

I have a must-try list of sourdough breads and other goodies that I'm constantly working my way through, yet the list never seems to get any shorter. Trouble is, you guys on TFL keep posting irresistible pics, and the recipes go straight on to my list (and waistline).  O the trials of the home artisan bread baker! And of course, we wouldn't have it any other way...

When I'm not trying new breads, I fall back on my trusty repertoire of favourite breads that I do again and again. I'm sure we all have these, tweaked to personal taste. Every so often, I realise I haven't done one of my faves for way too long. So it was with Shiao-Ping's 'House Miche': I baked this again recently after somehow neglecting it for months, and it was like revisiting an old friend - familiar, but stimulating as well. I couldn't quite remember how it turned out (too many loaves ago), but I just knew it was a standout. Well, memory duly refreshed, felt I wanted to share this one with y'all. Blame it on the crumb:


And yeah, it's not a miche. I prefer batards - and the beauty of home baking is that you are free to customise as you please. I also like to take the option of adding a proportion of rye to the dough.

This crumb is spongy, which I really like, with a cool mouthfeel, nice structure and elasticity, a lovely creaminess about it, and nutty flavour tones that develop in depth and complexity the day after the bake. The crust has character, but is not so robust as to be tooth-endangering (conscious of this at the moment, having recently needed a crown due to chomping over-zealously on a pizza and breaking a back molar that had been sending me warning signals that all was not right for many months...dental phobics have unlimited capacity to ignore such signals).

This 'House Miche' - er, batard -  is an old friend that I'm going to make more effort to stay in touch with from now on. Well worth inviting to your table, if you haven't already.

Thank you again, Shiao-Ping!

Cheers
Ross


wassisname's picture
wassisname

Bauernbrot

*Edited to add formula.  Pretty sure this is what I did.  Now that I look at it again it could probably stand some tinkering.

I’d heard that freshly ground coriander seeds were altogether different from the prepackaged powder, but… Wow!  Now I get it.  And, as for what freshly ground coriander does to a hearty rye, I have not the words.  But I do have the bread.

This is a half whole rye, half whole wheat loaf.  I fed my WW starter with rye to build it up with a long, long fermentation time, leaving it with loads of flavor but not much leavening power.  A bit of instant yeast solved that problem.

The result was just what I’d hoped, a hearty loaf with an aroma that is permanently imprinted on my brain.

Oh, and I generally avoid using traditional names for my bread (I just don’t have the energy to argue over “authenticity”) but since I tested this one on actual Germans, who did seemed pleased with the result, I’m going for it on this occasion. 

Marcus

Startergrams   
Dark Rye Flour150100% Mix 3-4 min
Water11577% Ferment at least 12 hrs
Initial Starter5033%  
total315   
     
Finalgrams   
Starter31534% autolyse flour and water 20 min
Whole Wheat Flour50054% mix all 
Dark Rye Flour42546% Alternate kneading/resting 10-12 min
Water64069% Ferment 1 1/2 hrs
Salt161.73% shape (2 loaves)
Instant Yeast121.30% Proof 1 hr
Ground Coriander121% bake w/ steam
total1920  475F 8 min
    425F 40 min
Finishedgrams   
Whole Wheat Flour50047%  
Dark Rye Flour57553%  
Water77672%  
Salt161.49%  
Yeast121.12%  
Ground Coriander        121%  
total1941   
     
Initial starter contribution   
Whole Wheat Flour2957%  
Water2175%  
total50   
     
% of flour in starter3%  
starter as % of finished dough16%  
     
salt in tsp2 3/4   
yeast in tsp2 1/4   

dmsnyder's picture
dmsnyder

SFBI Miche - another variation - and a SFBI Sourdough

This weekend, I baked another miche using the formula from the SFBI Artisan II workshop I attended last December. The SFBI formula and method can be found in my previous blog entry: This miche is a hit!

I amended the formula and methods as follows: For this bake, I used my usual sourdough feeding mix of 70% AP, 20% WW and 10% dark rye for the levain. The Final Dough was mixed with about 1/3 Central Milling "Organic Type-85 malted" flour and 2/3 WFM Organic AP, which is also a Central Milling flour. The SFBI method does not include an autolyse, but I did one. (Mixed the water, liquid levain, toasted wheat germ and flour and autolysed for an hour. Then mixed in the salt and proceeded.)

The bread flavor was the best yet, to my taste. I tasted it about 18 hours after baking. I had left it on the counter, wrapped in baker's linen overnight before slicing. This is the sourest miche I've baked. I like the sour tang and the flavor of the flour mix I used a lot.

SFBI Miche crumb

I also baked a couple loaves of one of the sourdoughs we made at the SFBI workshop. This one uses a firm levain fed at 12 hour intervals at 40% (by levain weight) of the final dough flour weight. After last week's trial of different methods of forming bâtards, I wanted to try the method portrayed in the KAF videos ( See Shaping) I think this method will become my method of choice.

The other loaf, which had an essentially identical appearance, was gifted to a neighbor before I took the photos.

SFBI "Sourdough with 2 feedings and 40% levain" crumb

This bread is meant to be a French-style pain au levain with little sour flavor. My wife's assessment sums it up pretty well: "It's just good bread."

Happy baking!

David

fminparis's picture
fminparis

Tips and Techniques for Bread Baking

Having baked well over a thousand breads over the years, I thought I’d write some things I’ve discovered while baking baguettes, batards, and boules.  I’ve used techniques from many people – Bernard Clayton, Greg Patent, Julia Child, Peter Reinhart,  Jim Lahey, others.  I still change and experiment but, for better or worse, here are some things I’ve discovered. I’m not here to argue; just presenting.  Take it or leave it.

 1) I don’t bother with no knead bread.  I don’t want to have to decide the night before whether I will want bread the next night.  Total time for me is 4 hours, from entering the kitchen to taking the loaves out of the oven.

 2) Best hydration for my boule is 70%; for baguettes 65%.  The baguettes have less water so they can be rolled and shaped. I don't overdo the boules with water because I like them high, not spread out.

 3) For best consistency, use a good, accurate  scale.

 4) I never found the need for a poolish.  No argument, I’ve done it with and without and don’t find a difference.  I don’t bake sourdough.

 5) The best kneading is with the Cuisinart, metal blade. One minute is all it takes. I find that the bread is, in all ways, a better, more consistent product than with a standing mixer and dough hook. I never tried all hand kneading - no patience for that.

 6) Autolyse is necessary.  After adding flour and yeast and processing for a second or two to mix, pour in warm (90’) water slowly while running the processor.  After a few more seconds shut off and let sit 20 minutes so flour can absorb the water. With  a spoon spread the dough around the bowl. Then  sprinkle salt over dough, so you don’t forget to add it.  After 20 minutes, process for one minute.

 7) Immediately after kneading, dump dough out and do stretch and fold. I used to flour a large wooden cutting board.  Now I just smear a little olive oil on surface of table - no need for messy flour all over. Dough won’t stick at all.

 8) If making baguettes or batards, after dumping out dough and doing stretch and fold (oiled table), divide dough, form balls and then allow each to rise in a separate oiled bowl covered by plastic wrap, rather than dividing after first rise.

 9) Best shaping for baguettes is by following: 

 http://techno.boulangerie.free.fr/09-ReussirLeCAP/03-lesFormesEnVideo.html    

 Other good stuff there also. Unfortunately, batard demo doesn’t work.

 10) I bake my boules in a La Cloche which is very convenient, with parchment paper round on the bottom.  I used to use a parchment covered cookie sheet with a pot turned upside down over the boule and that was fine.  The important thing for me is to allow the final rise to take place on the surface I’ll be baking on, so that there is no deflation moving it from one location to another. Slash, cover, bake. If I wanted to slide it onto tiles, I would let it rise on parchment covered cookie sheet, then use cookie sheet as a peel and slide paper and  dough onto tiles. Paper would slide smoothly and easily. I give 32 minutes covered, then 20 minutes uncovered turning loaf 180 degrees halfway through (my oven).

 11) My baguettes I bake on the same parchment covered cookie sheet that they have risen on with an aluminum "disposable" roasting pan turned upside down. Slash, cover, bake. I give 30 minutes covered, then 20 minutes uncovered switching loaves halfway through (my oven). Same remarks as boule if use tiles.

 12) I never found any difference whatsoever between using a heated cover or cold cover and since the cold one is more convenient to handle, that’s all I use.

 13) If bottoms burn, use two cookie sheets. One can be left in the oven.

 14) I never tried using a cold oven so can’t comment. I preheat to 450’ and bake at 450’.

15)  Give boule 1 1/2 to 2 hours to cool. Give baguettes an hour.


hanseata's picture
hanseata

Korntaler - Crunchy Bread from a "Floury German Kitchen"

STARTER
10 g rye starter, 100% hydration
60 g water
100 g bread flour

SOAKER
115 g whole rye flour, or medium rye
120 g whole wheat flour
30 g flaxseeds
30 g millet
4 g salt
210 g water

FINAL DOUGH
all soaker and starter
105 g bread flour
6 g salt
60 g dried soybeans
40 g water, or more as needed


DAY 1

Mix together all ingredients for starter. Cover, and let sit at room temperature for 14-18 hours.

MIx together all ingredients for soaker. Cover and let sit at room temperature.


DAY 2

Pour boiling water over soybeans and let soak for 15 minutes. Drain, let cool, and chop coarsely. Dry on kitchen paper towel, and toast slightly at 170 C/325 F for ca. 20 min. Let cool.

Combine all dough ingredients, mix on low speed for 1-2 minutes, until ingredients come together, then 4 minutes on medium-low speed. Let rest for 5 minutes, then continue kneading for another 1 minute.

Ferment sough for 3-4 hours, or until it has grown 1 1/2 times its original size.

Shape dough into boule, place into banneton, seamside down, and proof for ca. 2 hours, or until it has grown 1 1/2 times. (Preheat oven after 1 hour.)

Preheat oven to 250 C/500 F, including steam pan.

Bake bread at 240 C/475 F for 10 minutes, steaming with 1 cup of boiling water. Reduce heat to 220 C/425 F, and bake for another 10 minutes. Remove steam pan and rotate loaf 180 degrees. Continue baking for ca 20 minutes more (internal temperature at least 93 C/200 F). Bread should sound hollow when thumped on bottom.

Let cool on wire rack.

The recipe was adapted from Nils Schöner: "Brot - Bread Notes From A Floury German Kitchen".

pixielou55's picture
pixielou55

Good Shortbread

Hi

I bought some Shortbread made in Scotland and want to make something that good (I think the brand is Walker). Very dense and full of butter. I have been looking online and see some very different recipes:  1 says only use brown sugar, many call for about 2-1/2 cups cornstarch (?? - can that be right - they call it corn flour, is that different?), others have the 4-2-1 ratio and some call for salt, some not.

I'm dying here at work thinking about trying to recreate those wonderful morsels! Any TAT recipes would be appreciated.

Thanks

Nancy

tc's picture
tc

Pita SOS!

I've made pitas about 3 times now and having a puffing problem. The first time I got pockets, however they were very thin on the top and thick on the bottom. Second and third times I got uneven puffing and also  no puffing at all. I tried raising the oven temp - from 400, to 450, to 475. Using yeast bought a month ago, works fine in rising the dough and in my other breads. I preheated for 2 hours or so this last time, to make sure the oven was thoroughly hot. Using tiles that are always in the oven. Tried rolling and hand shaping the dough to be very thin as recommended by others on the forum. No dice. What am I doing wrong? I follow the recipe, using whole wheat and AP. The big difference I can see is the first time, I made 7 "large" pitas and the second and third times I made several smaller ones.   Is it possible that somehow there's uneven temperature in the oven, or on the tiles? Sometimes even in the same batch some pitas have a pocket while others don't or just look lumpy.


Side view of problem pitas.

Pages