The Fresh Loaf

A Community of Amateur Bakers and Artisan Bread Enthusiasts.

Most bookmarked

ramat123's picture
ramat123

Handling 80% rye dough

Hi All,

I am working to improve my rye skill (baking lots of rye loaves for the last few months).

I am trying to understand how to handle wet (80%) rye dough (e.g. Hamelman's Vollkornbrot rye bread) which is very very sticky and can't find tips or videos for that.

Do you have tips or you know any videos that might help?

(BTW, the results are very good after struggling..)

Thanks a lot,

David Zonsheine

dmsnyder's picture
dmsnyder

Whole Wheat Bread from BBA made with "fine" whole wheat flour.

The 100% Whole Wheat Bread from Peter Reinhart's The Bread Baker's Apprentice has been one of my favorite breads for years. I love it for it's delicious honey-wheat flavor. However, it often comes out with a dense, cake-like crumb. In April, I tried making this bread using a more intensive mix, as demonstrated by txfarmer. (See Light and fluffy 100% Whole Wheat Bread) I did, indeed, achieve a less dense, more open crumb. But I felt there was some loss of flavor due to oxidation of carotenoids. 

It is difficult to make a 100% whole wheat bread with a light, airy crumb. The pieces of bran in the flour act like little knives, cutting the gluten strands that give bread crumb its “structure.” I had heard of flour mills that grind the bran to a finer consistency after it has been separated during the normal milling process and then add the fine-ground bran back in, along with the other wheat components that re-constitute “whole wheat” flour. The smaller bran particles do less damage to the developing gluten during mixing.

Central Milling makes such a flour, and brother Glenn recently got some for me at CM's Petaluma warehouse. Today, I used CM's “Organic Hi-Protein Fine” whole wheat flour to make the Whole Wheat Bread from BBA. I followed the formula and procedures in my April 2, 2011 blog entry with one exception: I only mixed the dough for 12 minutes at Speed 2.


The first difference in the bread was the wonderfulness of its aroma. I can't say it was different in quality, but it just filled the house as never before. When the bread was cool and sliced, the crumb structure was even more open than I got with intensive mixing. The bread is chewy like a good white loaf and not at all cakey or crumbly. The flavor is delicious. I can't really say it is better than the flavor I've gotten with either home-milled flour or KAF Organic Whole Wheat flour, but the combination of crumb structure, texture and flavor was remarkable.


I am now eager to try using this flour with other breads, for example the Tartine "Basic Country Bread." Stay tuned.

David

Submitted to YeastSpotting

txfarmer's picture
txfarmer

Light Rye Sourdough with Goji Berry and Pine Nuts - full of good stuff

Sending this to Yeastspotting.

Click here for my blog index.

Often used in Chinese cooking, Goji berries are known to have all kinds of health benefits. I often have dried Goji berries on hand to make soup, congee, or even tea with.They are good for me and pretty looking, but don't really have any strong taste, so I combined them with pine nuts in this loaf to jazz up the flavor.

Light Rye Sourdough with Goji Berry and Pine Nuts
Note: makes a 730g loaf

- levain
medium rye, 136g
water, 110g
rye starter (100%), 7g
1. Mix together and leave at room temp for 12 hours.

- final dough
bread flour, 295g
medium rye, 23g
water, 207g
salt, 8.5g
levain, 245g
dried Goji berries, 57g, soaked in water for 20min then drained
pine nuts, 57g

2. Mix together flour, water, and levain, autolyse for 20 to 60min, add salt, mix @ medium speed for 3-4 min until gluten starts to develope. Add Goji berries and pine nuts, mix @ slow speed until evenly distributed.

3. Bulk rise at room temp (~75F) for about 2.5hrs. S&F at 30, 60, 90min.

4. Shape into batard .

5. Proof face down in basket until the dough spings back slowly when pressed, about 90min in my case.

6. Bake at 450F with steam for the first 15min, lower the temperature to 430F, keep baking for 30 min.

My rye starter is VERY fast, please adjust fermentation schedule to fit your own starter if you decide to give it a try.


Goji berries add visual interests, while pine nuts made it so fragrant.


Nutty and fragrant, it's perfect with some PB.

SallyBR's picture
SallyBR

Cracked-Wheat Sandwich Bread, from Bread Bible...

I was hoping to make TxFarmer's version, with sourdough starter, but ran into "unexpected problems"   -  had to pick another recipe, as I was set on cracked wheat and absolutely wanted to make a sandwich type bread this past weekend


this recipe turned out excellent, I must make TxFarmer's sourdough soon too...


I include a photo, and you can find the whole recipe and my thoughts of it by jumping here, if interested...


http://bewitchingkitchen.com/2011/08/23/cracked-wheat-sandwich-bread/


ananda's picture
ananda

Pane Nero di Castelvetrano and my new Oven

Pane Nero di Castelvetrano and my new Oven

In my previous post, here: http://www.thefreshloaf.com/node/24641/tumminia-and-pane-nero-di-castelvetrano I told the tale of running through the village to find an alternative oven, having blown up my own early in the bake cycle for my first attempt at the Pane Nero di Castelvetrano.   The result was a minor miracle, given the circumstances, but not one yielding a particularly dark crust, implied as pre-requisite in the real loaf.

Subsequently, I dismantled the old electric oven and found that the wiring point where the mains lead enters the cooker was completely melted through.   I weighed up a couple of alternative solutions.   Firstly, to call out an Electrician to repair the wiring and re-assemble the cooker safely?   I figured that the oven just wasn’t up to the job, and that the same situation would only happen again soon, with further risk of setting fire to the kitchen.   Not a good idea!

Alternative Two was therefore necessary.   I’d better find a new oven.   A good trawl through E-bay, and I’d found a great solution.   I needed an oven with a much better specification to cope with bread baking, that wasn’t going to cost a small fortune.   Given that the expensive ovens all have fancy features which I have no use for, there was no point me buying something with “all mod cons”.   So, I happened upon a SMEG oven, some years old now, yet brand new and unused, if you get my drift?   It had been displayed in a Showroom, but certainly never turned on.   The oven door still had the protective plastic covering attached, and everything arrived pristine…by Courier on a pallet, just a couple of days later!

I had fitted the oven and it was up and running by teatime, but didn’t use it that evening.   Yesterday [Saturday] we stayed in and watched back episodes of MadMen on the dvd player on my pc to take us to the end of Season 3.   I cooked Fassolia, and baked a tray of Spanokopita for a really tasty meal.   Yes, I did make my own filo pastry too!

Anyway, I set to, and baked another Pano Nero di Castlevetrano today, to see if I could test out the new oven.   The formula is the same as before.   I made 1.15 times the quantity in the last post, giving just over 2 kg of dough, which I divided into a 600g loaf and a loaf just short of 1400g.

First revelation; the oven will pre-heat to 280°C!   I replaced the old 3 bricks with 3 firebricks left over from building the wood-fired oven.   These are really heavy, and I am not going to keep them in the oven like I did with the ordinary bricks in the old oven.   Other than that, the set up was the same.   I pre-heated the oven for 1 hour with the fan, then another half hour without the fan at 250°C, before cranking it up to 280°C again ready for baking.

I used boiling water poured onto hot stones for steam, and kept a steady supply going for 10 minutes, with the oven set at 250°C and the fan switched off.   Then I dropped the heat back to 235°C and kicked the fan in for convection for the rest of the bake.   For the last 10 minutes, I switched over to top heat only, with the fan off, and the oven door just slightly ajar.   This was an attempt to darken the loaf top.   Personally, I would have fired the small loaf some more.   However, Alison is less fond of well-fired loaves, so the pictures show what is actually a bit of a compromise.   I managed to go completely over the top with the big loaf, and had to scrape off the layer of charcoal on the top, just to rescue it from oblivion.   Hence, no pictures of this loaf, sorry!

Wow, it’s so good to have a good oven in the kitchen to bake on, although I need to pay more attention in order to know exactly how it works!

Meantime, my brother is visiting in a couple of weeks’ time.    We have a mission to set up the wood-fired oven so it functions well and without hindering other peoples’ lives [the smoke situation!!!]   If we enjoy as much success as I have with my new SMEG, then I’ll be very happy indeed!!!

All good wishes

Andy

Nate Delage's picture
Nate Delage

A crusty success - 72% Hydration 50/50 AP/Bread flour

Hi to everyone on TFL! I've been lurking here for a while, trying to absorb as much information as I can. I finally feel like I have some success worth sharing.

I've been practicing baguettes for some time now and the past few weeks I've been more determined to make small tweaks and hopefully improve the results.

My most recent attempt used 50% KA AP and 50% KA bread flour. This gave me the best combination of chew and crisyness to the crust.  I've been reducing my hyrdration (I started at 78% originally) and I've more or less settled at 72%. I was worried the lower hyrdration wouldn't yield an open crumb, but that hasn't been an issue. The lower hyrdration has made the dough much easier to work with and my scoring results are improving. Though I'm waiting for a proper lame to arrive in the mail. I'm still waiting for the grigne that let's me hang the bread from my fingertip!

I start with a short bulk fermation, using cold water so the dough never really 'explodes' with gas. I just autolyse for 30 min they stretch and fold every 20min for about 2 hours.

Then it's into the fridge for ~20hs. Once I take it out of the fridge I let it warm up over 1 hours time, stretching and folding a few times. Then a pre-shaping, bench rest, final shaping and a 25min proof. I think I'll try a longer proof next time.

The baguettes are all 250 grams and just fit in the oven at 18", so they are quite thin. This time I let my oven (and stone) warm up for almost an hour, which made a huge impact on the bottom crust. It was nice and thick, but not burned.

I spray the oven with a water bottle ever few minutes during the first 10min of baking. Another trick I've been using (mentioned on TFL frequently) is to leave the bread in the oven for another 5min once they've finished baking. This helps ensure a crisp crust.

I've been lusting for a mixer, but the stretch and fold approach works so darn well I'm not sure if I can every justify the cost. The oven stone was worth it though!

Here are some pictures:


tmarz's picture
tmarz

Anyone from the south (US) make pies? Chocolate pies?

I watched the movie "The Help" and loved it! but I was also inspired by the food. Yes I grew up eating some traditional souther fare... but I am from NW US sooo... it wasn't as common. However I was inspired by the chocolate pie (with out the special ingredient!). All the chocolate pies I have had were like pudding pies. I browsed the internet and came across a couple recipes and decided on one. i didn't like the texture as much either I baked it a hair too long, or it had one too many eggs.

for the filling I did:

1 1/4 cups sugar

5 Tbl cocoa

2 tbl flour

1/2 cup milk

3 eggs

1/3 cup of butter.


It just felt to eggy to me (texture-wise). Maybe I will try two eggs and 1 yolk. I thought I would petition the group to see if any of you have made one or have a traditional recipe. I think the texture I want is like a silky smooth fudgy brownie... if that is possible.

Thanks

Tyler


bob13's picture
bob13

Baking in a Big Green Egg

I have read where people actually use their BBQ as an alternative brick oven.  It seems folks have had success with the ceramic komado style smoker grills (like the Big Green Egg or Primo) to bake pizza and bread dough.  Has anyone really done this and what were the results?  This could be a very cost effective way to bake pizza and bread without having to build a brick oven.  Any thoughts form the pros here at the fresh loaf?  I know it is some what off topic for the bread site, but it is close to a brick oven and maybe some of you have ideas for me.  Thanks for any and all suggestions.


Bob

lumos's picture
lumos

IV : T55 Trial I – ‘Baguette’ That Didn’t Become

 So, this is the first report on my trial of T55 flour my daughter brought back from Paris.  I used to use Shipton’s T55 years ago for a while, but this is the first time I’ve ever used T55 actually made in France….though it’s just a supermarket’s own brand flour, so definitely not the highest quality one.  But to be fair, the supermarket my daughter bought it from was Monoprix, which, according to Wiki, is “considered an up-scale chain and its business model was the inspiration for Waitrose,” in spite of its very un-assuring name :p,  so hopefully it’s at least not the lowest of the lowly, bog-standard flour. ::fingers crossed::


 The first thing I noticed when I opened the bag was how yellowy the colour was and also it looked less smooth?/less fluid?/a bit more sticky? (sorry, can't find a good way to describe) than other white flour I use.

< (from left to right) Waitrose Organic Strong,  Monoprix T55, Waitrose Canadian Very Strong>


I ‘d always thought Waitrose Organic had creamier shade of colour than other flours I’d used (except for Waitrose's Leckford Estate flour which had even creamier shade), but compared to the T55, it looked more pinkish in comparison,  which was a surprise.

The biggest reason I wanted authentic French T55 was to find out how much difference it would make in my baguette, both taste and shape (both outside and inside) and to use the experience as my future bench mark when mixing UK flours to improvise.  So I proceeded with my regular poolish baguette recipe, of which formula I posted in my last blog.

The only change I made this time was replacing all the flours (Strong, Plain and WW) in the formula, except for small rye in the poolish, with T55 and also omitting wheatgerm completely, because I wanted to see how pure T55 tasted.

The instant I added water to the flour to make poolish, I noticed it’s very different. For a short while the flour didn’t ‘dissolve’ as easily as the strong flour (Waitrose Organic) and looked a bit like when I added water to Dove’s Pasta Flour I blogged about before which contained Durum flour. A bit grainy and more lumpy, similar to when you mix water into semolina......just for a short time initially.

After a few more stirring, the flour and water mixed well but it looked a bit more ‘fluid’ than my usual poolish, most likely because T55 (10.5%) is much lower in protein than my Strong (12.9%) .

When mixed well, I  left it to ripe at room temperature, as in the above mentioned formula.  After 7 hrs, I saw the poolish reached its peak, so I proceeded with the rest of the formula. Again, when I added all the ingredients and poolish,  I noticed immediately the dough was much softer than my usual mix. When I did S&F, again it was much softer to touch and more extensible. In utter desperation a few years ago for not being able to obtain T55 very easily here,  I had once attempted making a baguette only using UK plain flour which had a similar protein level as this T55, but it felt different from that. This time, it was extensible but there was a kind of strength in it, like a ‘core’ which 100% plain flour dough didn’t have. I thought, ‘Aha! This is how T55 make a difference in resultant baguettes!’ and put the dough in the fridge for long, cold retardation for 21 hrs, as usual.  

After 21 hrs……The dough hadn’t gained as much volume as my usual improvised-flour dough. Looked very flat and had hardly any large bubbles on the surface which I always see a few of them with my regular baguette dough after the cold retard.   And when I turned it out onto the worktop, it just spread just like a very high-hydration dough, almost like this video by Peter Reinhart.

So there was just NO WAY I could shape this into baguettes with the state of gloopy dough.  I contemplated for a while if I should do extra sets of S&F until the dough was strong enough, but I knew from my past experiences it would only give you the crumb with uniform texture without much big airy holes to speak of, unless you do another long, cold retardation after shaping,  which was not an option at the time.

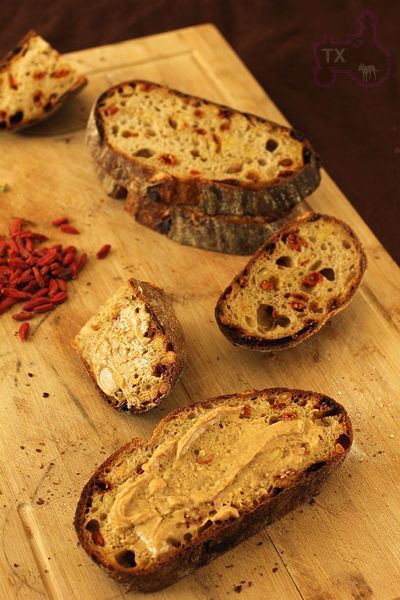
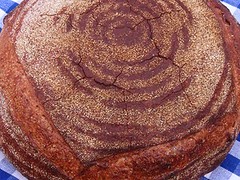
So in the end, this is what it ended up as. A ciabatta with baguette-ish crumb….or a baguette who wanted to pretend it was a ciabatta, whichever you prefer to call. :p


(Hope nobody notices a half-bitten piece I discreetly put back among them....)


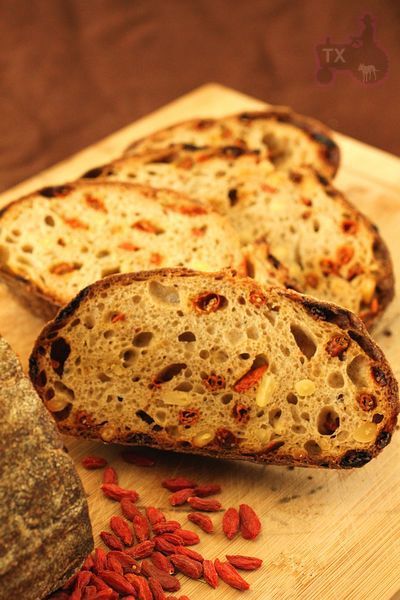
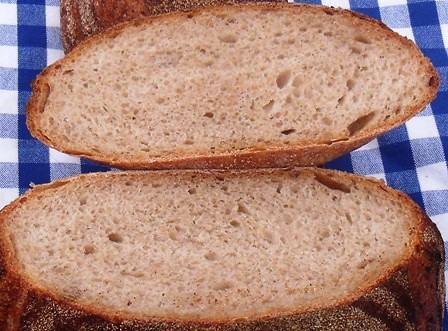
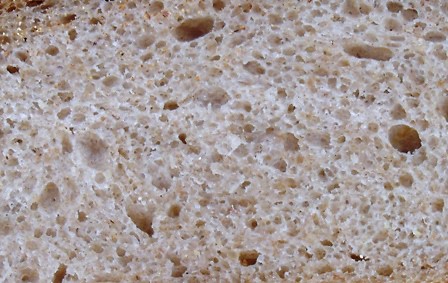
The crumb wasn't open nor did it have larger holes I would've liked, obviously because 1) I didn't slash the top because it was going to be like a ciabatta, 2) the hydration was not high enough to be a ciabatta with typically open crumb with lots of BIG holes because it was supposed to be a baguette......::sigh::

Sorry, it’s such an anti-climax.  But I must say the flavour was AMAZING! It had such a deep and more complex flavour than my usual UK flour baguettes, especially the crust. And the aroma which came out from the oven during baking was quite different, too: more wheaty and nutty.  Also the crumb had much darker colour, which I associate with really good baguettes. And the most interesting thing is its saltiness.  Even I added exactly the same amount of salt as usual, the saltiness was a little more predominant compared to my regular baguettes…or many other baguettes I’ve had  before. It’s not actually ‘saltier,’ in anyway,  the amount of ‘saltiness’ you taste is the same. But for some reason ‘the saltiness’ stood out.  It really brought back the memories of excellent baguettes I had in the long past and reminded me its lovely saltiness, Yeah….a gooooooood baguette was always salty, never sweet. I’d forgotten that……

lumos

Chiesa_Dan's picture
Chiesa_Dan

Hamelman's semolina bread (sourdough)

Hi,

yesterday i baked my first try at Hamelman's semolina bread, the sourdough version. I increased the durum to about 70%, but the levain was all white flour still. The loaves were retarded for 18 hours at 4ºC and in an effort to not get very big holes, i degassed the dough as much as possible prior to shaping. Before mixing, i did an autolyse of about 20 min. and then mixed 2,5 min. on medium speed on a Kenwood machine.

Baked right out of the fridge in my WFO, with steam for the first 10 min., for 45 min.

Overall very good flavour and aroma, just slightly sour, but balances with the sweetness of durum flour. Next time i'll try 100% semolina, since the crumb was still too gummy for what i would like in a semolina bread; had no problems whatsoever with shaping or rising or oven spring, so i suppose it will not go terribly wrong then.

Here are a couple of pics:


Good baking to all,

Daniele.

Pages