The Fresh Loaf

A Community of Amateur Bakers and Artisan Bread Enthusiasts.

Most bookmarked

dmsnyder's picture
dmsnyder

Bread in the spirit of FWSY

12 September, 2014

 One of the attractions of Ken Forkish's Flour Water Salt Yeast bread baking book is that a concerted study of it will teach you how the important variables of ingredients, time and temperature can be manipulated to produce different flavor profiles and how, keeping most methods constant, you can develop procedures that accommodate to your own schedule and still produce a variety of outstanding breads.

Well, that's the theory. In fact, most of us don't have complete control of ambient temperature, one of the most important variables controlling fermentation. That means results can be very different from those Forkish describes. Nonetheless, if you do understand the basic principles, you can juggle the variables you can control to obtain really outstanding breads using Forkish's formulas and methods.

 In my Central California kitchen, about 9 months of the year, the temperature is significantly higher than it was in Forkish's Portland, Oregon kitchen when he developed his formulas. As a result, fermentation proceeds very much faster than described in the book. An “overnight” bread from FWYS will get way over-fermented if left overnight at room temperature. I have successfully followed Forkish's times only in Winter, when my kitchen temperature runs 65-68ºF.

 On top of that, my personal time demands do not always fit with the schedules Forkish describes in any of his recipes. So, sometimes … well, almost always … , I end up using Forkish's basic approach, but use my ability to control time and temperature to make it work for me. For example …

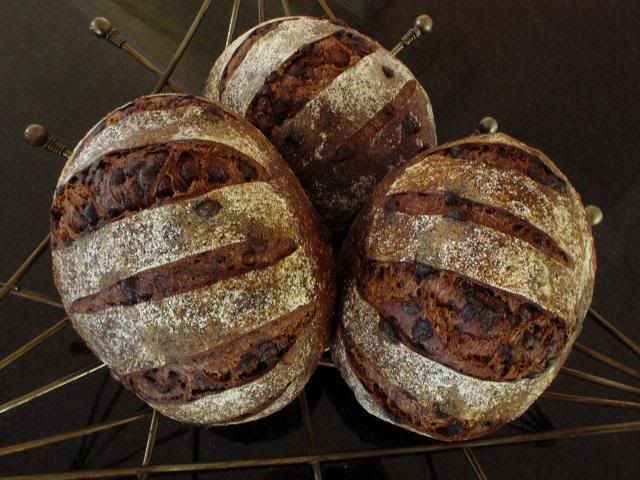
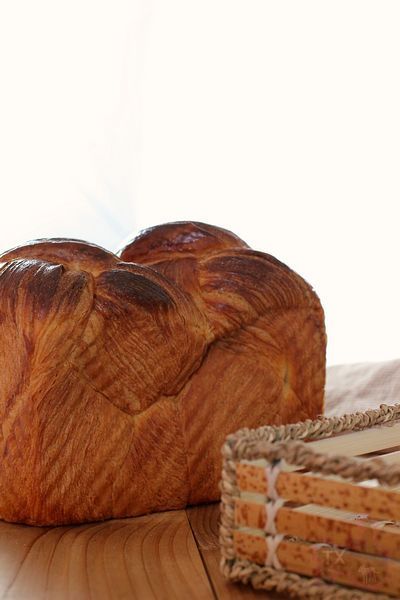
Today, I baked a couple loaves based on Forkish's “Overnight Country Blonde” formula. It calls for a final levain feeding at 9 am, mixing the final dough at 5 pm, letting it ferment at room temperature overnight, shaping the loaves at 8 am the next morning and baking at noon. I kept the formula (ratio of ingredients) and most procedures the same but altered the time and temperature a lot. Here's what I actually did:

 Three days before baking, at 10 pm, I activated my refrigerated stock starter by mixing 30 g of starter (50% hydration) with 75 g water and 75 g flour (a mix of 70% AP, 20% WW and 10% medium rye).

 Twelve hours later, I fed the levain as follows:


Levain ingredients

Wt (g)

Baker's %

Mature liquid levain

50

50

AP flour

200

80

WW flour

50

20

Water

200

80

Total

500

230


  1. In a medium-size bowl, dissolve the levain the the water. Add the flours, and mix thoroughly.

  2. Transfer to a clean bowl. Cover tightly.

  3. Ferment until moderately ripe. (In my 78ºF kitchen, this took about 6 hours. The levain was tripled in volume. It had a domed surface. In the transparent, plastic container, bubbles could be seen throughout the levain.

  4. Cold retard at 40ºF until the next morning.


At about 8 am the next morning, I took the levain out of the refrigerator and let it warm up on the counter. At about 10 am, I proceeded to mix the final dough as follows:


Final Dough ingredients

Wt (g)

Levain

216

AP flour

804

WW flour

26

Medium Rye flour

50

Water (90ºF)

684

Salt

22

Total

1802


  1. In a 6 L Cambro(R) container, mix the water and flours to a shaggy mass. Cover and let stand for 20-60 minutes. (Autolyse).

  2. Sprinkle the surface of the dough with the salt and add the levain in chunks.

  3. Mix by folding the dough over itself while rotating the container, then complete the mixing by the “pinch and fold” method described by Forkish. Wet hands in water as necessary to reduce dough sticking to hands. (I wet my hands very liberally and frequently. My dough weighed 1820g at the time I divided it, implying that using wet hands added 18g of water to the dough. This increased the final dough hydration from 78% to 79.8%.)

  4. Bulk ferment until the dough has increased in volume to 2.5 times with stretch and folds 4 times at 30 minute intervals at the beginning of fermentation. (This took 2 1/2 to 3 hours, in my kitchen.)

  5. Divide the dough into two equal parts. Pre-shape as rounds. Cover with a damp towel and let rest 15-20 minutes.

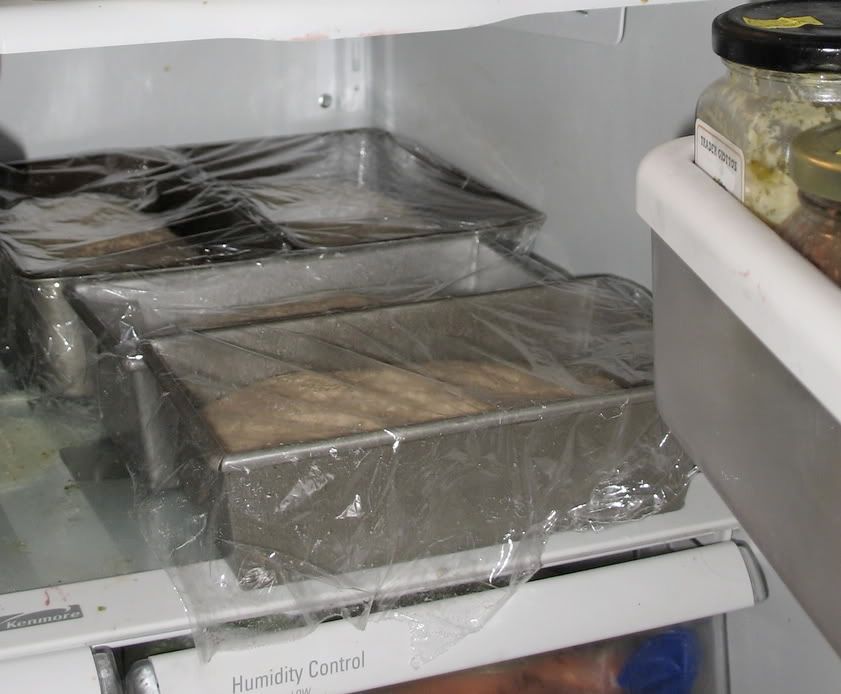
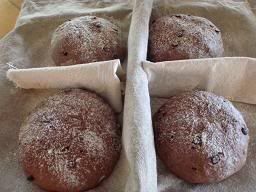
  6. Shape as boules and place in linen-lined bannetons that have been well dusted with a mix of AP and Rice flours.

  7. Place bannetons in plastic bags and refrigerate overnight. (This was actually from about 4 pm to about 2:30 pm the next day.)

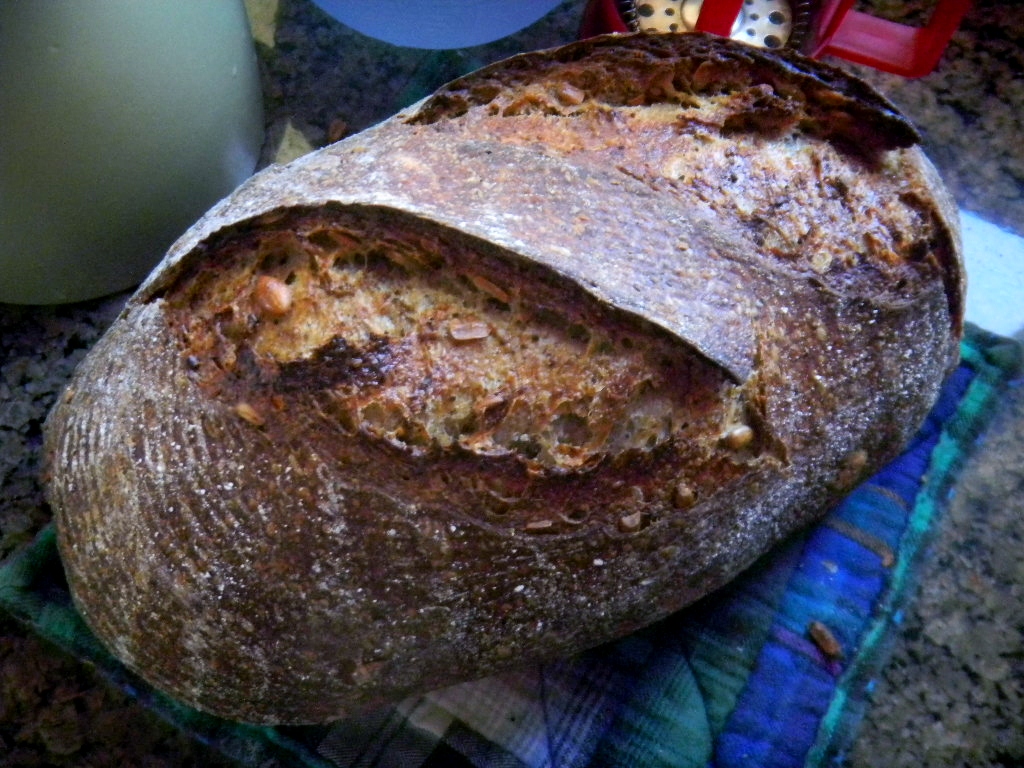
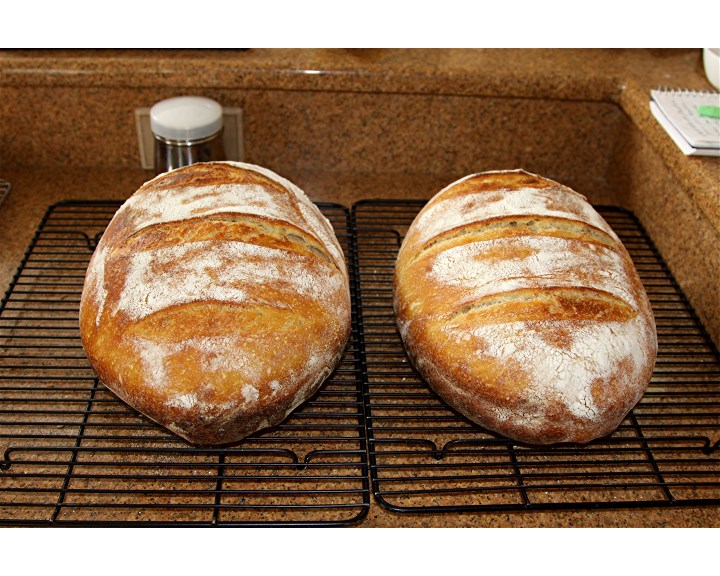
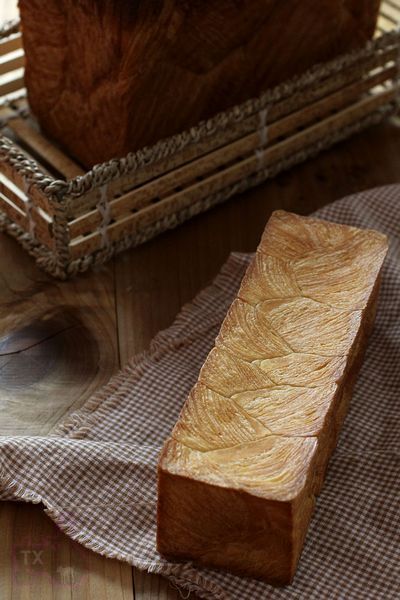
  8. Bake at 475ºF in Dutch ovens, as Forkish describes.

  9. Transfer to a cooling rack and let cool before slicing.


In summary, I altered Forkish's procedures by drastically shortening the very long, room temperature bulk fermentation and adding a long, cold retardation of the formed loaves. And the levain was also cold retarded overnight.

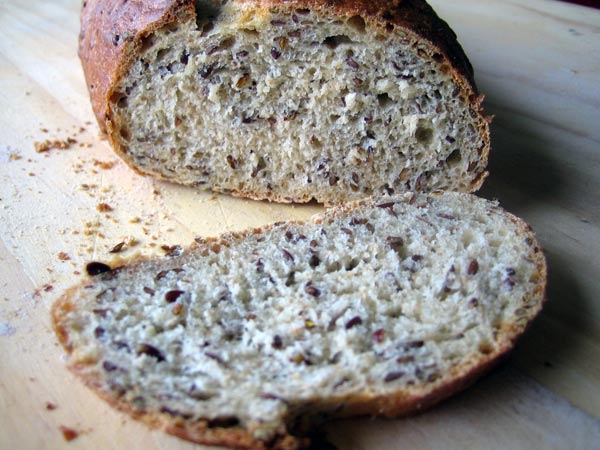
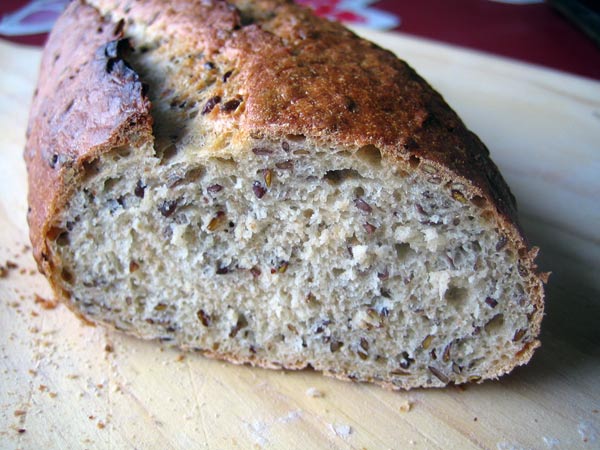
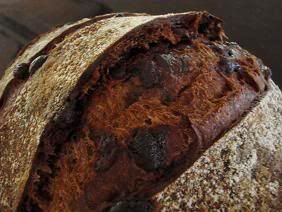
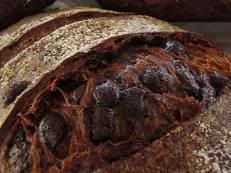
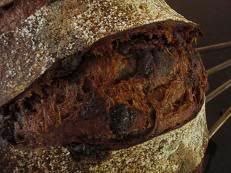
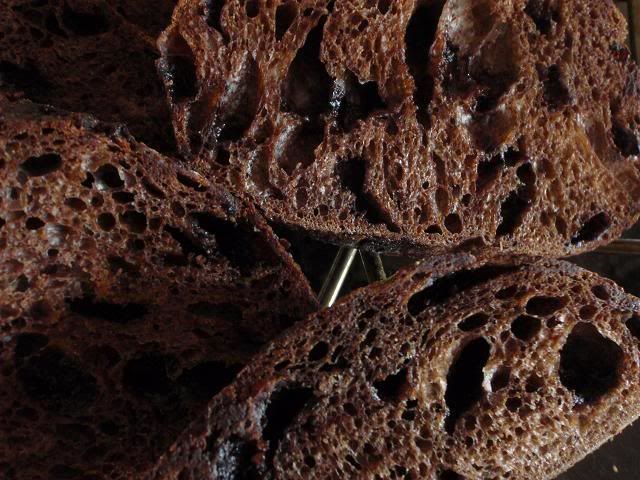
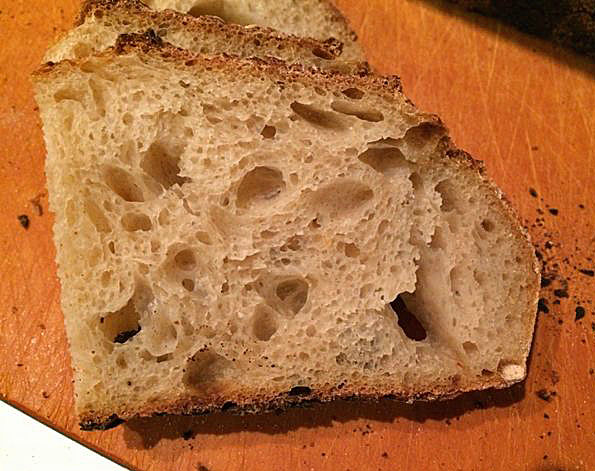
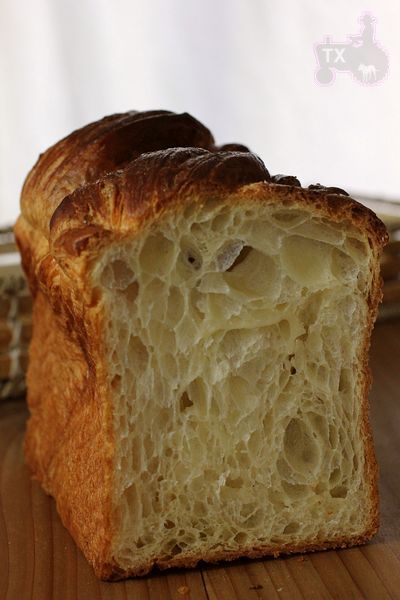
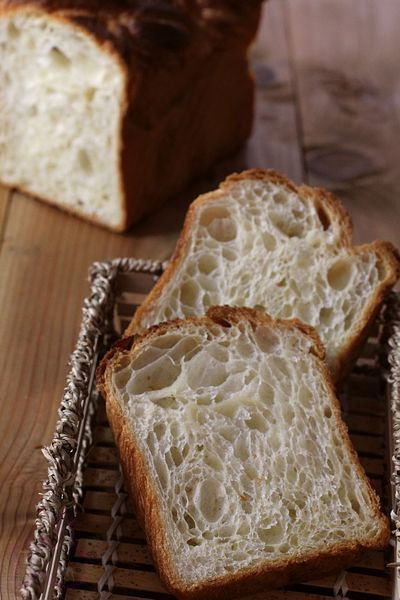
 Forkish describes the flavor of this bread as having a mild tang that mellows over the first couple days after baking. My bread had a sweet, wheaty flavor and a moderate tang, tasted when just cooled to room temperature. The crust was crunchy, and the crumb was quite chewy. Pretty good stuff.


Happy baking!


David

Antilope's picture
Antilope

My Tangzhong Roux FAQ

I put together this FAQ about using a Tangzhong Roux in yeast breads based on my experiences using the technique.
.
.
.
--WHAT IS A TANGZHONG ROUX?--
.
A Tangzhong Roux (also called a Tangzhong Water Roux or Water Roux) is a flour and water roux that is added to yeast bread recipes. This is done in order to make a loaf of bread that is lighter, that has a more tender crumb and a longer shelf life.
.
Bread flour or all-purpose flour is usually used to make the roux. Water is the liquid usually used to make the roux, but milk or a mixture of milk and water can also be used, if desired.
.
The flour and water are mixed and heated to 149-F (65C). This gelatinizes the flour and forms an unflavored translucent pudding-like roux. The roux ingredients come from the original recipe amounts. This roux is added to remaining liquids in the yeast bread recipe. The water roux traps and retains moisture during baking. Using this technique is similar to adding pudding to a pudding cake. The final result is a moister, lighter loaf of bread with a more tender crumb and a longer shelf life. These beneficial effects are all the result of the moisture retained by the water roux during baking.
.
The Tangzhong roux technique was developed in Asia around 2000. The technique was first mentioned by Yvonne Chen in her book, “Bread Doctor”, published in Taiwan in about 2003. Tangzhong means "soup" in Chinese.
.
.
--WHAT YEAST BREAD RECIPES BENEFIT FROM A TANGZHONG ROUX?--
.
The Tangzhong roux technique will work with pretty much any yeast bread recipe, making a lighter, more tender and longer lasting loaf of bread. I've only used the technique for straight dough breads. I haven't used it for sponge breads, etc. But there is no reason it shouldn't work on those, also.
.
I've used the Tangzhong roux technique on white bread, sourdough bread, hawaiian bread, cinnamon rolls and cinnamon swirl bread, light wheat bread (part bread flour and part whole wheat flour), rye bread, vienna bread, French bread, hamburger buns, lean breads, rich breads and sweet bread doughs, etc.
.
The Tangzhong roux technique will work for most hand kneaded, mixer kneaded and bread machine recipes. I've even used it on 65% hydration, stretch and fold, yeast bread recipes.
.
The only type of yeast bread recipe where it didn't seem to have much effect was one that used whole wheat flour to make the water roux for a 100% whole wheat bread. It didn't seem to lighten the loaf very much. However, using 3 Tablespoons (20g) of white flour in the roux of the 100% whole wheat loaf did seem to lighten it. In this case, we are adding 3 Tbsp (20g) of white flour to the recipe, so remove 3 Tbsp (20g) of the whole wheat flour to keep the recipe in balance.
.
When I make a light wheat bread (part bread flour and part whole wheat) I take 3 Tbsp (20g) of the roux flour from the white flour. This will lighten the light wheat loaf, don't use whole wheat flour in the roux.
.
.
--HOW DO I USE A TANGZHONG ROUX IN AN EXISTING YEAST BREAD RECIPE?--
.
Use 3 level tablespoons (20g) of white flour in 1/2 cup (120g) of water, for either 1-1/2 lb (750g) or 2 lb (1kg) yeast bread loaves. I use bread flour or all-purpose flour in the roux.
.
The Tangzhong roux ingredients come from the original recipe amounts. Don't add extra amounts. Measure out the original recipe ingredients and take the Tangzhong roux ingredients from that. If the recipe uses only milk, make the roux using milk.
.
I make the roux in a microwave. Mix 3 Tbsp (20g) of flour and 1/2 cup (120g) of water (or milk) in a microwaveable cup. Microwave on High for 25 seconds. Stir well. Microwave 15 seconds more. Stir. The roux temperature should be at about 149 F (65C) and a white translucent pudding should have formed. If not, microwave another 5 seconds and stir well. If necessary, continue microwaving 5 seconds at a time and then stir well, until the white translucent pudding forms. I use a 1000-watt microwave.
.
The roux can also be made on the stovetop in a saucepan.
.
Be careful to only heat the roux to around 149-F (65C). Five or ten degrees more doesn't hurt. I haven't explored heating the roux higher than that. I'm not sure what higher temperatures would do to its effectiveness. References I have reviewed don't address overheating the roux.
.
I mix the hot roux into the remaining recipe liquid ingredients immediately. Mixing well. The recipe liquid will then end up lukewarm. The roux can also be cooled to room temperature first or stored in the fridge, if desired.
.
Once you confirm that the recipe liquid is lukewarm, it's then safe to mix in instant yeast or proofed active dry yeast, if desired. Otherwise, follow the original recipe instructions for adding yeast. Just be careful to keep the hot roux away from the yeast.
.
After mixing the Tangzhong roux into the remaining recipe liquid ingredients, continue with your original yeast bread recipe just as you always do.
.
.
--HOW MUCH TANGZHONG ROUX SHOULD BE USED IN A YEAST BREAD RECIPE?
.
I use 3 level tablespoons (20g) of white flour (bread or all-purpose) in 1/2 cup (120g) of water, for either a 1-1/2 lb (750g) or a 2 lb (1kg) loaf.
.
Here is how these quantities are arrived at: (You really don't have to be this exact, unless you want to, this info is just for background info):
.
Most Tangzhong roux references say to use 5% of the total recipe flour weight as roux flour. The roux flour is mixed with five times its weight in water. So a loaf using 500 grams of flour would use 25 grams as roux flour (5% the total flour weight) and 125 grams of roux water (5 times 25 grams ). Both of these ingredient amounts are taken from the original recipe ingredients. Extra amounts are not added to the recipe.
.
Once again, this is roughly equal to about 3 level Tablespoons (20g) of flour mixed in 1/2 cup (120g) of water. I use this same amount in 1-1/2 lb (750g) and 2 lb (1kg) loaves. It's close enough for the recipes I have tested.

holds99's picture
holds99

Dutch Oven Baking - Atta Durum Flour and K.A. Bread Flour

This bread is made using 50% Golden Temple Atta durum wheat flour (not semolina) and 50% King Arthur bread flour.  In the past I have used King Arthur durum flour.  For this bake I decided to try Golden Temple Atta.  The main difference I noticed between the King Arthur and Golden Temple durum flour, is King Arthur durum gives a yellowish color to the crumb, whereas Atta gives the crumb a light- golden tan color.  Other than color, I think the flavor of the two flours are comparable in taste/flavor.  After I finished baking this bread, I was putting away the Golden Temple Atta, it dawned on me that Varda had written a blog a while back on Atta durum flour, where she discussed some problems, options for mixing and hydration.  Using the TFL search function I found Varda’s: “Atta Durum Hearth Loaf” and read her excellent post on the characteristics of this flour and how she dealt with “taming the beast”.   The comments on the post were also interesting.  Varda used 100% Atta durum in her loaf, where I used only 50% Atta.  Incidentally, Varda’s loaf was beautiful.  Next time I will try using 100% Atta durum flour for this formula to see what results I get.

As can be seen in the photos, I used the Dutch oven method, which works well with this high-hydration dough.  In fact, I bake about half of all my bread in a Dutch oven.  As for shape, my personal preference is oval, rather than round Dutch oven.  The main reason is the oval (except for each end of the loaf) allows the slices to be fairly uniform in size/shape; nice for sandwiches.

After shaping, the loaves were retarded overnight in bannetons inside a plastic bag.  I preheated the oven to 500 degrees.  The temperature of the Dutch oven were room temp., not preheated.  I turned the shaped loaves from the bannetons into the Dutch oven, put the lid on and set them on the stone in my oven (see photo).  As can be seen in the photo, these Dutch ovens are large; the pair span the entire oven rack. 

I made slightly less than 8 pounds (7.85 lbs.) of dough and divided it equally into 2 – nearly four pound loaves.  The formula can be halved to produce approximately 4 pounds of dough, which can then be divided equally to produce 2 – approximately two pound loaves.  I also used a double-levain build.  The first build takes 12-14 hours (overnight), the second build, because of the yeast activity, takes much less time, 2-3 hours.  The final-dough flour and water was mixed together and allowed to autolyse for 30 minutes before adding the levain to the final dough mix.  After the autolyse, the levain was mixed with the final dough mixture for approximately 8 minutes (DLX Attendent - 10 qt. stand mixer - low speed) before the salt was added.  After adding salt it was then mixed an additional 4 minutes on low speed.  The dough was given 4 stretch and folds; one at the beginning of bulk fermentation, 3 more at 20 minute intervals for a total of one hour.  The dough was allowed to bulk ferment for an additional hour after the stretch and folds.  At the end of the 2 hour folding and bulk fermentation process the dough was divided, pre-shaped and allowed to rest on the work surface, covered, for 30 minutes.  Then the final shaping was done, after which the dough was placed into bannetons (seam side up) and retarded in the fridge overnight in plastic bags.

Note 1:  Before turning the dough into the Dutch oven, generously sprinkle the top of the dough in the bannetons with semolina.  After the dough is turned out of the banneton(s) into the Dutch oven, the semolina will act as an insulator and keep the bottom of the loaf from scorching.

Note 2: After 20 minutes of baking at 500 deg. F, reduce the oven temperature to 480 deg. F.  After an additional 10 minutes further reduce the oven temperature to 470 deg. F.

Also, turn the Dutch ovens around every 20 minutes.  Remove the lids approximately 10 minutes before the end of the baking cycle.  These 4 lb. loaves were baked for 58 minutes, the final 10 minute with the lidsoff the Dutch ovens.

Note 3: A few months ago I started experimenting with Chad Robertson’s technique for high-hydration dough.  He uses warm water in his final dough mix.  After final dough mix, Robertson places the dough into a plastic tub and over a 3-4 hour period he thoroughly turns the dough back on itself at half hour intervals (see Chad Robertson’s Masters Video clip on YouTube).  This method is really effective for developing strong gluten and really gets the yeast cranking.  So much so that when you try to retard the dough the yeast keeps on cranking/fermenting in the fridge, and when it is taken out of the fridge the following day the dough is over-proofed.  This results in the dough degassing when it is scored, before going into the oven.  This happen to me three times, with two different types of dough.  So, I asked David Snyder what he thought about solving the problem?  He suggested using cold water in the final dough mix and lowering the fermentation temperature.  Thank you, David.  That’s what I did.  In short, I used cold water for the final dough mix, shortened the total bulk fermentation time to 2 hours and retarded it overnight for about 12 hours.  The combination of cold water and shorter bulk fermentation time kept the yeast activity suppressed during retardation.  After removing the bannetons from the fridge I was able to leave the dough in the bannetons for close to two hours, allowing them to nearly double in volume, at room temperature, before putting them onto the D-o, scoring them, covering them and placing them in the preheated oven.

Note 4: If you are not retarding your loaves, then you don’t need to use cold water in the final dough mix.  You can use room temperature water.

Overall, the final dough mix has: 71 oz. flour, 53.25 oz. water and 1.42 oz. salt.  These ingredients make 7.85 lbs. of dough. The final dough is 75% hydration. 

Levain build No. 1  (12—14 hours)

2 oz. ripe sourdough starter (heaping tablespoon)

8 oz. water

8 oz. bread flour

Levain build No. 2  (2-3 hours)

All of levain build no. 1

8 oz. water

8 oz. bread flour


Final Dough Mix

 19.5 oz. bread flour

35.5 oz. Atta durum flour

37.25 oz. cold water (keeps the dough from over-proofing during retardation)

1.4 oz. salt


txfarmer's picture
txfarmer

Laminated Sandwich loaf - best of both worlds

Sending this toYeastspotting.
Click here for my blog index.


After weeks of driving, moving, and settling down, I've finally gotten my new kitchen more or less in order and ready to start baking/bloging again. Loving everything about Seattle so far, the active lifestyle, the urban living environment in downtown, the seafood, the "green" mentality -- I even like the grey weather! It's good for making laminated dough... :P


Now back to bread, this is a very Asian bread, I don't think I have seen anything similar in a western bakery. It's essentially the love child of Danish and Asian Style Soft Sandwich bread, inheriting the best qualities of both parties: nice and crispy on the outside, soft inside, and full of buttery goodness. While still a laminated dough, in order to rise high in the sandwich tin, it differes from croissants(tips here) and traditional danishs in following ways:
1. For croissants and danishs, we usually keep the dough fairly dry to ensure crisp and clean layers. While more kneading would make layers seperate more, resulting in a better crumb, we usually don't knead the dough to fully developement for the ease of rolling out. However, Asian style soft sandwich breads need to be kneaded very well to pass a very thin and strong windowpane test, otherwise the bread volume would suffer, and the texture won't be shreaddably soft (see details here). For this bread, we do knead the dough well (similar to other Asian style soft sandwich breads). In the mean time, the dough is kept pretty wet to have more extensibility, which make it possible to roll out.
2. Since the dough is fairly wet, and shaping procedure is different from traditional croissants, we don't expect as many honeycomb-like holes in the crumb, instead, crumb just need to be fairly even and open. In the mean time, the final dough doesn't need to be rolled out very thin (15mm instead of 4mm for croissants). For those reasons, the amount of roll-in butter is considerably less than croissants.
3. While for this particular batch in the first photo, I did one 4-fold, and two 3-folds, but this bread usually requires less folding than croissants. The most common method is one 4-fold, and one 3-fold, which I tried in another batch with good result.
In summary, since the dough requires less folds, and doesn't need to be rolled out very thin, it's an easier laminated dough than croissants and danishes. However, it does have different challenges: the intensive kneading to full developement, the final shaping which requires concise cutting and weighing, as well as braiding.

Laminated Sandwich Loaf (Adapted from many different sources)
Note: for details and tips on making croissants, please see this post
Note: for tips on kneading soft sandich loaves see this post
Note: this recipe makes about 930g of dough, less or more depending on how much you trim off the edges etc.

-levain
starter (100%), 44g
water, 75g
bread flour, 134g

1. mix and leave at room temp for 12 hours.

-final dough
bread flour, 361g
milk, 145g
egg, 77g
sugar, 60g
salt, 10g
instant yeast, 7g
butter, 41g, softened
levain, all
roll-in butter, 245g

1. Mix everything other than butter, knead until gluten starts to form. Add in butter, mix until fully developed. see this post for details.

2. Round, press flat, put in fridge immediately for 2 hours.
3. Make butter block, put in fridge for at least one hour before using.  Take out the dough, roll out, and enclose butter. (see this post for details)
4. Roll out to 20X60CM, fold one 4-fold as in the following pictures. Put in fridge for one hour


5. Roll out again and do one 3-fold, put in fridge for one hour. (see this post for details)
6. Repeat 5. (optional)
7. Roll out dough to 1.5CM-2CM thickness. Length of the dough piece  would depend on the tin you use. Since we are braiding them, you will need the length to be about 2X length of the tin.
8. Cut the dough into thin pieces. This is where experience becomes important. We are braiding 3 pieces into one group, each group need to have a certain weight. Do note that if a tin requires more than one group of dough, each group should weigh the same, otherwise bread would appear uneven at the end. In another word, for each tin, select a weight for each dough group (less for flat top, more for round top),  then stick to that weight for each group of dough.
a) For my bigger Chinese pullman tin (pictured on the left), I need 2 groups, each group has 3 pieces, and each group (all 3 pieces together) weigh 225-250g (225g if cover of the tin is used to make a flat top shape, more if cover is not used to make round top as in the picture).
b) For my small Chinese pullman tin, I only need one group of 3 pieces, each group (all 3 pieces together) weigh 150g (if cover of the tin is used to make top flat).
c) For 8X4 US loaf tin,  I suggest to use 2 groups, each group has 3 pieces, and each group (all 3 pieces together) weigh 250-270g.
d) For KAF 13X4X4 pullman pan, I would suggest to use 4 groups, each group has 3 pieces, and each group (all 3 pieces together) weigh 195-215g.
9. For each group of 3 pieces of dough, braid them. Make sure the cut surface is facing up, to expose the layers. Fold ends under, put into tin.

10. Proof at around 27C until 80-90% full, about 4-5 hours in my case. Egg wash if you are not using the pullman pan cover.


11: Bake at 425F for 10min, lowered to 375F and bake until done. The bigger Chinese tin which took 450g - 500g of dough, needed about 40-45min of TOTAL baking time. The smaller tin which took 150g of dough, needed 30min in total. If colors too much, cover with foil.


If the gluten network is fully developed, the bread should be proud and tall, with clear layers visible.

If the pan cover is used, the dough amount needs to be fairly accurate for the pan, other wise it's each too short (not reaching the top), or bursting out (the cover can literally be blown open). This neat rectangle shape is nicknamed "golden sticks".

The crumb soft but open with honeycomb structor.

In general, I feel it's easier than croissants, since you can fold less and doesn't have to roll out as thin. However, the success does depend on proper kneading and careful piecing and shaping.


Susan's picture
Susan

Well, I finally did it!

Today I baked the sourdough bread I've been looking for ever since starting this odyssey. It has a crispy crust and a stretchy, holey crumb. And it's easy. As I told a couple of friends earlier, "...it's reproducible, if the weather stays exactly how it is today."

I'm not suggesting that this could be anyone else's ultimate sourdough, but it sure is mine, at least for right now. Thanks to all who have helped me over the past year or so, even unwittingly. It continues to be great fun. The recipe is below.

My Ultimate Sourdough

Susan's Ultimate Sourdough

Starter is made the way Peter Reinhart suggested to us in class: 1:3:4 (starter:water:flour)

A single small boule, made by hand:

12g starter

175g water

25g whole wheat flour

225g hi-gluten flour (All Trumps, to be exact)

5g salt (I use Kosher)

Mix starter and water, mix in flour. Rest a few minutes, then re-mix. Dump into a greased bowl, let rise until doubled, about 8 hours. Turn the very soft dough onto your counter and pat it out, then sprinkle salt over the top. Roll it up, then gently knead a few times to distribute the salt. Let relax. Do the following until the dough is hard to fold: round up, let the dough relax, stretch and fold. Round up, let relax, shape, and put it in a banneton for proofing 3-4 hours in a warm spot.

The oven was preheated for 30 minutes at 500F, and reduced to 450F after I put the loaf in. It was baked on a tray, covered, for 18 minutes. The cover was then removed and the loaf baked until dark brown, about another 8 minutes.

JMonkey's picture
JMonkey

Lesson: Squeeze more sour from your sourdough

I am far from a sourdough expert. I’ve only been baking sourdough since February, and I still have a lot to learn about shaping, scoring and proofing to perfection.

However, there is one thing I have learned well: how to squeeze more flavor out of my naturally sweet starter. Here's the basic tips.

1) Keep the starter stiff
2) Spike your white starter with whole rye
3) Use starter that is well-fed
4) Keep the dough cool
5) Extend the rise by degassing
6) Proof the shaped loaves overnight in the fridge

Photos and elaboration follow.

It’s a common lament that I see on bread baking forums – Why isn’t my sourdough sour?

Personally, I blame Watertown. My evidence? I gave some of my starter to a friend who lives six miles away in Lexington. Within 6 weeks, she was making sour tasting sourdough. Her local yeastie beasties are clearly more sour than mine.

I don’t know what it is about the microflora that live in the little hollow between the hills that I occupy in Watertown, Mass., but treated traditionally, my white starter and my whole wheat starter pack as much sour taste as a loaf of Wonder Bread. That’s not to say that the loaves don’t taste nice. They do. They’re wheaty with a touch of a buttery aftertaste.

But they don’t taste sour, which is how I think sourdough ought to taste.

Anyway, I’ve finally figured out how to get the tangy loaves I love. If you’re facing the same sweet trouble as me, perhaps some (or all) of these tips will help.

1) Keep your starter stiff:

Traditionally, sourdough starter is kept as a batter. The most common consistency is to have equal weights of water and flour, also known as 100% hydration because the water weight is equal to 100% of the flour weight. That’s roughly 1 scant cup of flour to about ½ cup of water. Jeffrey Hammelman keeps his at 125%, and quite a few folks keep theirs at 200% (1 cup water to 1 cup flour).

I keep my sourdough starter at 50% hydration, meaning that for every 2 units of flour weight, I add 1 unit of water.

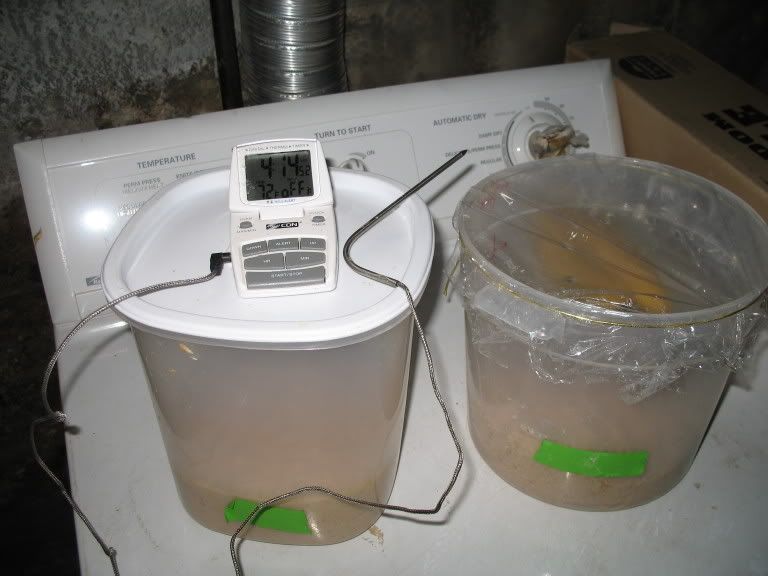
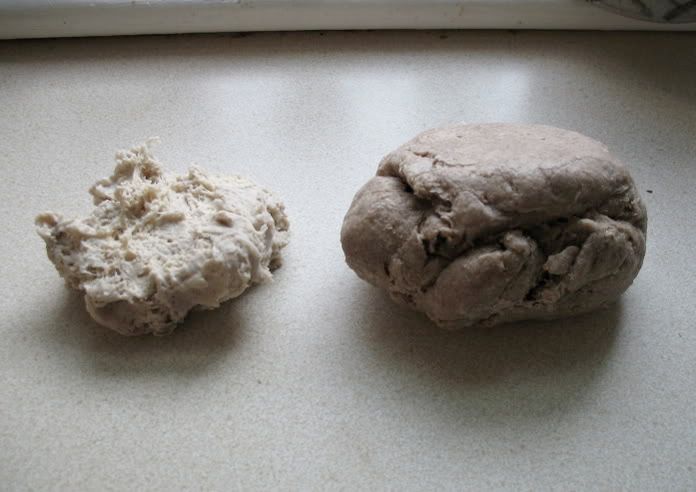
Barney Barm, my white starter is on the left; Arthur the whole wheat starter on the right. The bran and germ in whole wheat absorb a lot of water, so that starter is even stiffer than the white.

There are two basic types of bacteria that flourish in a sourdough starter. One produces lactic acid, which gives the bread a smooth taste, sort of like yogurt. It does best in wet, warm environment. The other makes acetic acid, the acid that gives bread its sharp tang. These bacteria prefer a drier, cooler environment.

(Or so I've read, anyway. I ain't no biochemist; I just know what they print in them books.)

A hydration of 50% is pretty stiff, especially for a whole-wheat starter. You really have to knead strongly to convince the starter to incorporate all the flour.

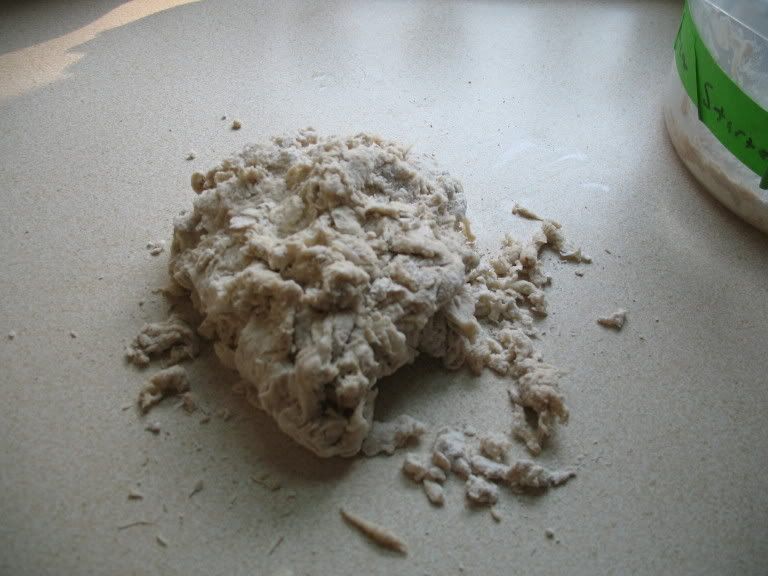
For example, here's my white starter after I've done my best to mix it up in the bucket. Time to knead a bit.

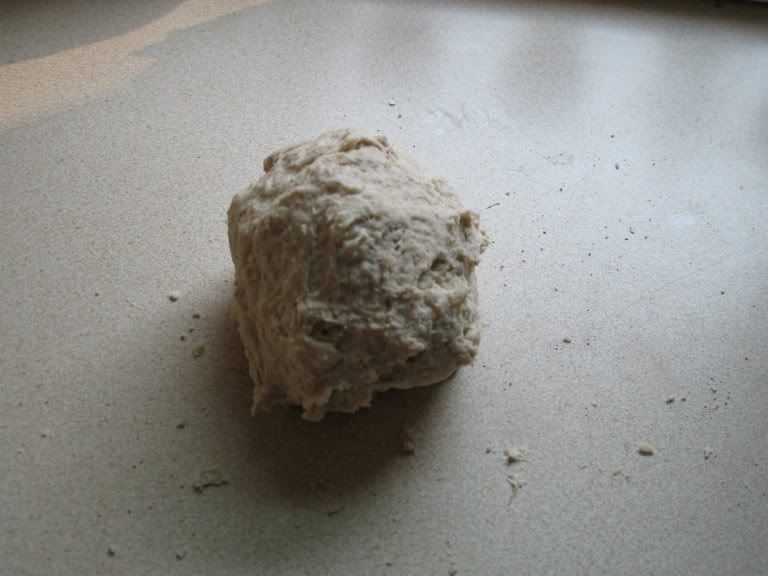
Here's what it looks like after kneading.

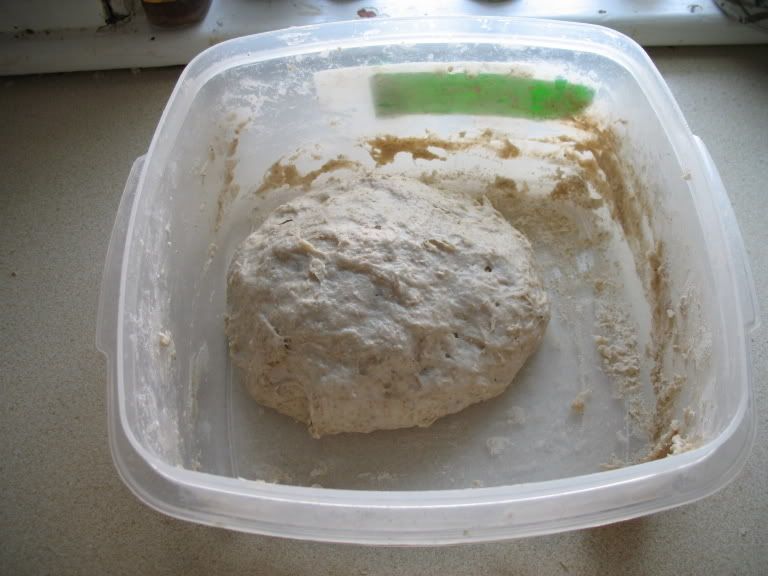
And here's what it looks like 5 hours later once it's ripe.

Conversion from 100% to 50% isn't hard to do if you've got a kitchen scale.

Take 2 ounces of your 100% starter. Then add 5 ounces of flour and 2 ounces of water. This should give you 9 ounces of starter. Leave it overnight, and it should be ripened in the morning.

From there on out when you feed it, add 1 unit of water for every 2 units of flour. I'd recommend feeding it 2 or 3 more times before using it, though, so that the yeast and bacteria can acclimate to the new environment.

There are additional advantages to a stiff starter beyond producing a more sour bread.

First, a stiff starter is easier to transport. Just throw a hunk into a bag, and you’re done.

Supposedly, the stiff stuff keeps longer than the batters. You can leave stiff starter in the fridge for months, or so I hear, and it can still be revived. Never tried it myself, though, so don't take my word for it.

Finally, the math for feeding is easy at 50% hydration, much easier than 60% or 65%. Just feed your starter in multiples of threes. For exmaple, if I’ve got 3 ounces of starter and I need to feed it, I'll probably triple it in size. To get six additional ounces for food, I just add 4 ounces flour and 2 ounces water. Piece of cake.

Converting recipes isn’t hard either. First, figure out the total water weight and total flour weight in the original recipe, including what's in the starter. If the recipe calls for a 100% hydration starter, then half of the starter is flour and the other half is water. Divide it accordingly to get the total flour and total water weights in the final dough.

Now, add the total water and total flour together. Take that figure and multiply by 0.30. This will tell you how much stiff starter you’ll need.

Last, subtract the amount of water in the stiff starter from the total water in the final dough, and the amount of flour in the stiff starter from the total flour in the final dough. The results tell you how much flour and water to add to the starter to get the final dough. Everything else remains the same.

2) Spike your white starter with whole rye flour:

It doesn’t take much. Currently, my white starter is about 10-15% whole rye. Basically, for every 3 ounces of white flour that I feed the starter, I replace ½ ounce with whole rye. That small portion of rye makes a big difference in flavor. Rye is to sourdough microflora as spinach is to Popeye. It’s super-food that’s easily digestible and nutrient rich. That’s why so many recipes for getting a starter going from scratch suggest you start with whole rye.

Here I am, about to add rye to "Barney Barm," my white starter. I haven’t added rye to my whole-wheat starter, though. It hasn’t needed it – there’s more than enough nutrients in the whole wheat to keep the starter party going strong.

3) Use starter that is well fed: Early in my search to sour my sourdough, I’d read that, if you leave a starter unfed and on the counter for a few days before baking, it will make your bread more sour.

I’ve found that’s not the case. The starter gets more sour, but the bread doesn’t taste very sour at all.

The better course is to take your starter out of the fridge at least a couple of days before you use it, and then feed it two or three times before you make the final dough. Healthy microflora make a more flavorful bread.

4) Keep the dough cool:

When I first started out, I was following recipes that called for the dough to be at 79 degrees, and I’d often put it in a fairly warm place to rise. Warmth kills sour taste. Nowadays, I add water that’s room temperature, not warmed, and aim for a much cooler rise, no higher than 75 degrees and often as low as 64.

The cellar is your friend.

5) Extend the rise by degassing:

When I make whole wheat sourdough, I usually let the dough rise until it has doubled and then degass it by folding until it rises a second time. Along with cool dough, this means the bulk fermentation usually lasts 5-6 hours.

When I’m making pain au levain or some other white flour sourdough, I usually have the dough very wet, so it needs more than one fold to give it the strength it needs. In this case, I fold once at 90 minutes and then again after another 90 minutes. Usually, the full bulk rise lasts about 5 hours.

Here's a sequence showing how I fold my whole-wheat sourdough.

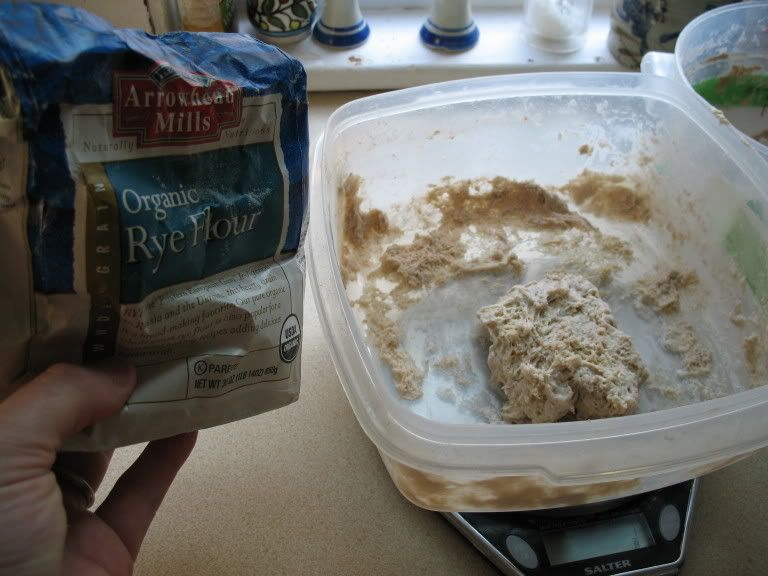
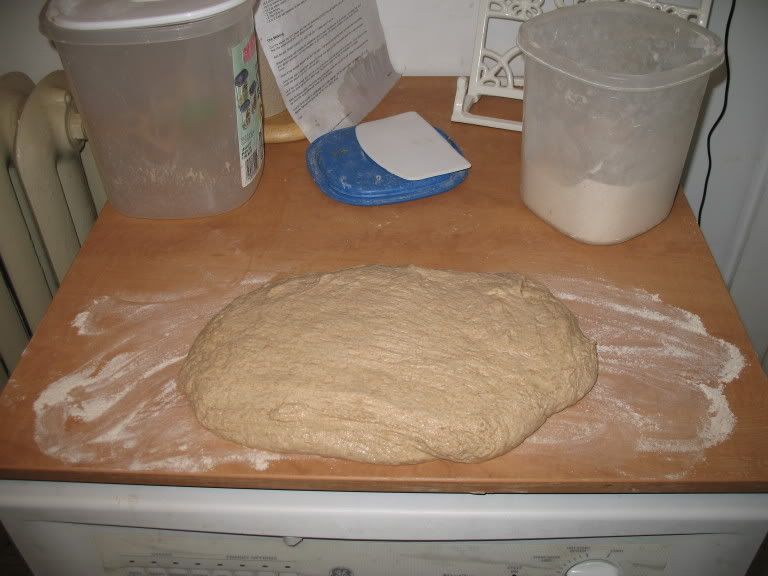
First, turn the risen dough out on a lightly floured surface (heavily floured if your dough is very wet).

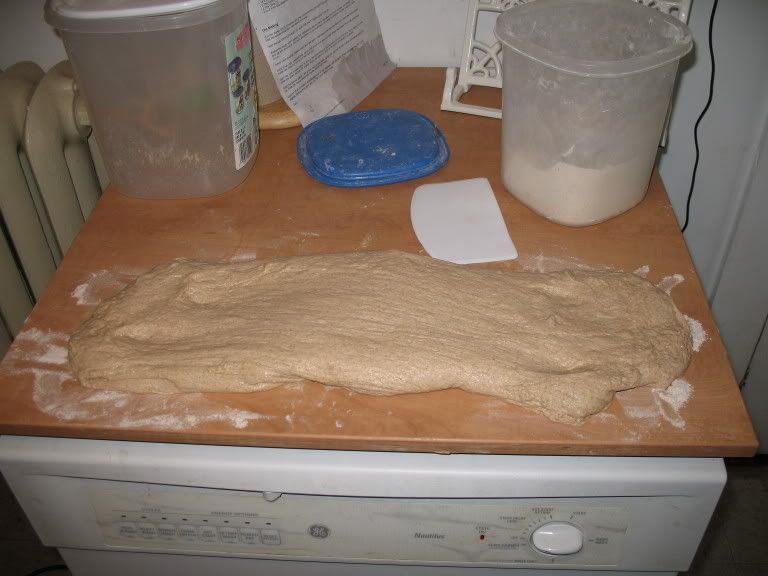
Stretch it to about twice its length.

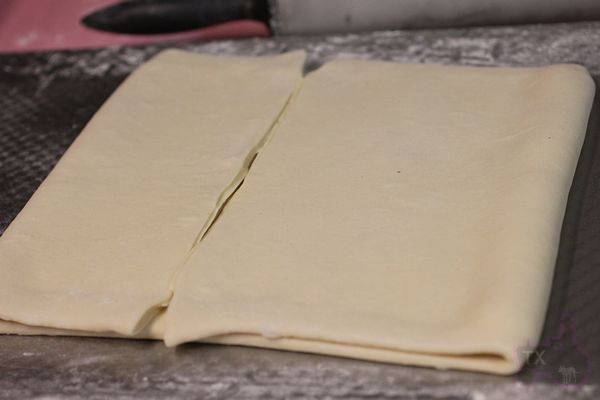
Gently degass one-third of the dough, fold it over the middle, and degass the middle section to seal.

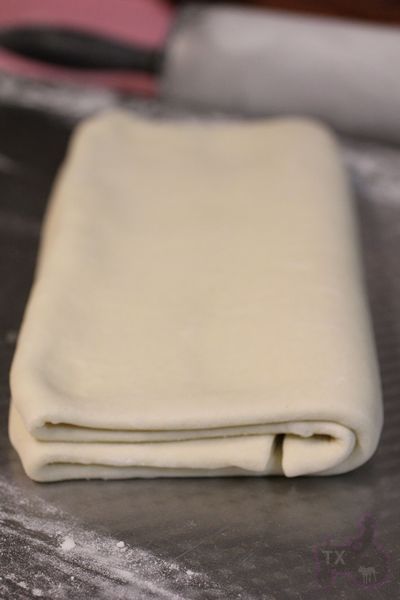
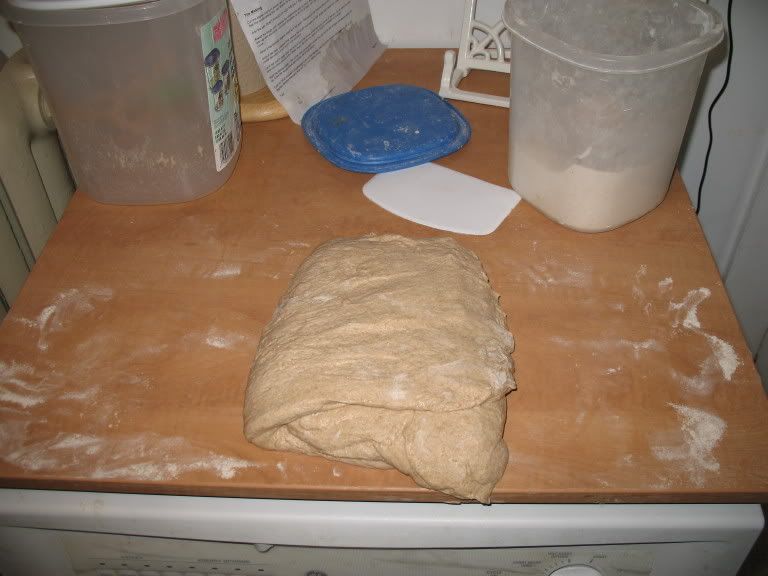
Do the same for the remaining side. Take the folded dough, turn it one-quarter, and fold once more before returning to the bowl or bucket to rise again.

6) Proof the shaped loaves overnight in the fridge:

This final touch really brings out the flavor. So much so that, if you’ve incorporated all the other suggestions, proofing overnight might make your bread a bit too sour for your taste. My wife and I like it assertively sour, however, so this step is a must.

Normally, I’d suggest proofing your loaves on the top shelf where it’s warmest, so as not to kill off any yeast, but I find that if I put my loaves in the top, they’re ready in about 4-6 hours, at which time I’m usually sound asleep. So I started putting them in the bottom, and had better luck.

I hope this helps those of you who dread pulling another beautiful loaf from the oven, only to find it looks better than it tastes. Best of luck!

flax seed wheat bread

I finally got my copy of Dan Lepard's The Handmade Loaf, a book that the Brits on this site have been recommending to me for a while. Occasionally imported copies will show up on Amazon for a reasonable price, but I found it cheaper to order a copy from a bookseller in Ipswich via Abebooks. It is a splendid book, with great photos, easy to follow instructions, and excellent recipes; well worth the cost of admission for a baking fanatic. His website is also worth checking out.

Of the recipes I've baked so far, the Linseed and Wheat Bread has been my favorite. The first loaf I baked we ate in under an hour. I was forced to bake it again the next day. The horror.

The recipe I'm posting below is based on his Linseed and Wheat Bread. I modified it some to match the ingredients I had on hand and my personal taste.

Flax Seed Wheat Bread
makes 1 one pound loaf

200g bread flour
50g whole wheat flour
1 teaspoon salt
100g flax seeds
2 teaspoons malt powder
150 grams water
1 teaspoon instant yeast

Combine the flours, salt, seeds, malt, and yeast in a bowl. Stir in the water and mix until thoroughly combined. This dough is not a terribly moist one: it should be slightly tacky but not sticky. When shaped into a ball it should easily hold its shape.

The seed and bran from the whole wheat prevent a high level of gluten development in this dough, so extensive kneading is not necessary.

Once all of the ingredients are thoroughly combined, place the ball of dough in a greased bowl. Cover with plastic wrap and leave to rise for an hour to an hour and a half.

Shape the dough into 1 large or two small loaves, cover the loaves with plastic, and give them another hour to rise. In the meantime, preheat the oven and baking stone to 425 degrees.

Brush the top of the loaves with water, score the loaves, and place them in the oven. Bake them at 425 for 20 minutes, rotate them 180 degrees, then bake them another 20 to 25 minutes. When done, they will be nicely browned on the outside, make a hollow sound when tapped upon, and register approximately 205 degrees in the center when measured with an instant read thermometer.

flax seed wheat bread

These loaves remind me of yams.

flax seed wheat bread

Related Recipe: Five Seed French Bread

Flax Seed Wheat Bread

dabrownman's picture
dabrownman

Lucy’s Favorite Methods To Make Healthy and Beautiful Bread

This is something that Lucy has been researching and trying to get right for at least a couple of years and she thinks she is close enough to getting a method finalized to post about it.  First off, I am a type 2 Diabetic which makes her quest a little more difficult but the results would be better for everyone - diabetic or not.

 People who have gluten protein sensitivity might also be able to digest this bread better.  Those who have a problem digesting the starches in whole grain breads should also benefit by having more starches pre-digested in the fermentation process.

 Minerals, vitamins and nutrients cannot be released in whole grain yeast bread because of the binding effects of phytic acid in bran.   We want to neutralize it so these nutrients can be utilized by our bodies.

 More than half the nutritional value in grain is stored in the bran and endosperm.  If it is sifted out to make white flour or isn’t treated properly, this extra nutritional value to us is lost.  We want to use all the grain to add nutritional value and not be wasteful.  We want to increase the protein, fiber, vitamins and minerals in the finished bread without any additives at all.

 That is a pretty tall order but the science behind how to do it has now caught up, over the last 100 years, with the bakers who have been doing it for thousands of years without really knowing exactly why what they did had such health benefits.

 On top pf all that, we want the bread to keep well, spring, bloom and brown neautifully, have a soft moist crumb, taste better and not be bitter even if it contains a high percent of whole grain - without adding a sweetener.

Now this bread making task is really starting to get difficult and take longer - but it’s not impossible - Lucy and I do it every week.....and if we can do it ….. then anyone else can too.

 Some keys to maximizing the health benefits while producing a great looking and tasting loaf of bread are:

  1. Use fresh milled whole grains -sprout,mill and dry then first if possible - make whole and sprouted grans 30-50% of the flour or more
  2.  Get some whole rye in every bread recipe - even if only in the starter.  There is no grain like rye when it comes to health benefits.
  3. Autolyse the flour including the flour in the levain build.  The enzymes will make for plenty of food for the wee beasties and the left over sugars make for sweeter and browner bread. Nothing like the pre digestion of starch for our stomachs too.
  4. Make sourdough bread and use less pre-fermented flour to do it - 10% or so. Dump the commercial yeast entirely.  It just works too fast and you lose the health befits only sourdough can provide with LAB and yeast fermentation working together.  Plus the bread will keep much longer too.
  5. Sift your milled whole grain and use the sifted out 15-20% hard bits to feed the levain.  Then retard the finished levain for 24-48 hours.  There is sill 20% starch in the bran that the autolyse enzymes will break down providing plenty of food for the sourdough wee beasties.  The wee beasties will love it and your bloom, spring, crumb and taste bubs will thank you for making the bran as soft as possible.  Plus the phytic acid will be neutralized. This will release half the health goodies that were previously locked up plus the bran will be pre-digested making life easier on your stomach.
  6. Use long cold retards for the starter, levain and dough.  Long, low and slow means extra flavor.  Lucy’s No Muss No Fuss Starter can be stored for up to 20 weeks in the fridge with no maintenance hassles.  Create recipes that have low pre-fermented flour amounts so that you can do a bulk or even shaped final proof of 18 - 48 hours.
  7. Use a higher overall hydration for the dough.  The crumb will be more open, soft and moist than low hydration bread plus the wee beasties love a higher hydration.  Too much liquid will make for Frisbee's Flat Bread.
  8. Do the counter work for building levains, gluten development and countertop bulk ferment at higher temperatures. A mix of high and low temperature brings out all the flavor your SD bread can provide.  Think Detmolder http://germanfood.about.com/od/germanfoodglossary/a/Detmolder-Three-Phase-Sourdough-Method.htm
  9. Try a double levain - one white and one dark each made with high and low temperatures with high and low hydration to squeeze out more flavor.
  10. Try a different liquid for the dough like potato water or yogurt whey to enhance the flavor and fortify the nutritional benefits of the bread. Put some healthy add ins into the dough like seeds n nuts and re-hydrated dried fruits to increase it’s nutritional value and flavor too.

Here is a recent bread that utilizes most of Lucy’s methods above.  Double Levain Sprouted 4 Grain Sourdough with Seeds and here are many, many sites for further reading about the health benefits of making sourdough bread

Happy sourdough baking Lucy’s way.

https://en.wikipedia.org/wiki/Bran

https://en.wikipedia.org/wiki/Phytic_acid

http://realfoodforager.com/5-reasons-to-make-sourdough-your-only-bread/

http://www.naturaltherapypages.com.au/article/Benefits_Sprouted_Grains

http://health.usnews.com/health-news/blogs/eat-run/2012/11/27/what-are-sprouted-grains

Shiao-Ping's picture
Shiao-Ping

Chocolate Sourdough - Chad Robertson's way

Chad Roberson's Tartine Bakery doesn't do chocolate sourdough (if they do, I haven't had the fortune of tasting it).  We did Pane Cioccolata (chocolate bread) at Artisan III, SFBI, and it was very good.  Everybody loved it but at the time I was thinking to myself if I were to make it at home I would make some changes for the following reasons: 

First of all, I feel really uneasy about "double hydration" method, which is supposed to be good whenever you have any "add-ins" for your dough, be it dried fruits, nuts, seeds or soakers, or in this case, chocolate chips.  The procedure is: you mix your dough with only 80 - 85%% of the recipe water in the first and 2nd speed as usual until a slightly stronger than normal gluten development has achieved, then turn the mixer back to first speed, slowly incorporate the reserved water and finish off on 2nd speed, then, add the seeds and nuts (or whatever add-ins you have) in the first speed initially for incorporation, and finish off, again, in 2nd speed.  The reasoning for this method is it is easier to develop dough strength with a stiffer dough than a wet dough and so the purpose is to build up the strength before you incorporate any add-ins.  Because of the longer mixing time, the temperature of water you use with this method is lower than for other doughs. 

I remember we mixed the dough for nearly 20 minutes in the spiral mixer.  I am not confident that I could do such a long mixing time with the mixer I have at home.  I always feel "traumatized," looking at the dried fruits or nuts being beaten up and chopped up while they try to be mixed in to the dough after the latter's gluten structure has already been formed; it really takes time to break the gluten bond.

Secondly, after the dough was bulk fermented, it was scored then proofed. One other type of bread where we scored first then proofed was rye bread.  It was said that because of the delicate gluten structure in both of these cases, if you were to score after the dough is proofed, you may destroy the gases that were produced.  While this makes sense to me, I don't care for the look when it's baked.

Thirdly, the Pane Cioccolata formula we used at Artisan III has only 20% levain (in baker's percentages) and therefore it also has a small percentage of dry instant yeast (DIY).  If I increase levain to 100% I wouldn't have to have DIY!  Also, chocolate chips used were only 12% of total flour, I know my son would just LOVE more chocolate chips. 

So here is my Chocolate Sourdough inspired by Chad Robertson's method all by hand (timeline as described in Daniel Wing and Alan Scott's The Bread Builder) in my previous post.


Formula for My Chocolate Sourdough 

Two nights before bake day - first stage of levain build-up

  • 61 g starter @ 75% hydration
  • 121 g bread flour (i.e. two times starter amount for me; I do not know what ratio Chad Robertson uses.)
  • 91 g water

Mix and ferment for 6 - 8 hours at 18C / 65 F (depending on your room temperature, you may need shorter or longer fermentation time for your starter to mature)

The morning before bake day - second (and final) stage of levain expansion

  • 273 g starter @ 75% hydration (all from above)
  • 273 g bread flour (I use one time starter amount in flour but I do not know what amount Chad Robertson uses)
  • 204 g water

Mix and ferment for two hours only

Formula for final dough

  • 750 g starter (all from above)
  • 650 g bread flour
  • 100 g cocoa powder (8.5% of total flours*verses 5% in SFBI recipe)
  • 86 g honey (7% of total flours verses 15% in SFBI recipe)
  • 250 g chocolate chips (21% of total flour verses 12.6% in SBFI recipe)
  • 433 g water (note: with every 12 g extra water, your total dough hydration will increase by 1%. If you wish, you can increase up to 5% more hydration. See step 10 below.)
  • 1 to 2 vanilla pods (optional but really worth it)
  • 20 g salt

Total dough weight 2.3 kg and total dough hydration 73%

*Total flour calculation takes into account the flour in starter. 

  1. In a big bowl, first put in water then put in the starter.  Break up the starter thoroughly in the water with your hands.
  2. Then put in honey; scrape the seeds from the vanilla pods and put it in, and stir to combine
  3. Put in all the remaining ingredients except choc. chips
  4. Stir with a wooden spoon to combine for 1 - 2 minutes. (Take down the time when this is done, this will be your start time.  Starting from this time, your dough is fermenting.  From this start time to the time when the dough is divided and shaped, it will be 4 hours; i.e., bulk fermentation is 4 hours.  The preferred room temperature is 18 - 21C / 65 - 70F.  You may need to adjust your dough temperature by using cooler or warmer water.)
  5. Autolyse 20 - 30 minutes
  6. Sprinkle half of the choc. chips on a work surface (spreading about 30 cm by 30 cm) and stretch or pad the sticky dough thinly to cover the choc. chips.  Then sprinkle the other half of choc. chips over it; press the choc. chips into the dough so they stick.
  7. Gather the dough from the edges to the centre and place the choc. chip dough back into the mixing bowl.
  8. Start the first set of stretch and folds in the bowl by pinching the edges of the dough and fold onto itself to the centre (10 - 20 times).  Rotate the bowl as you go.  As the dough is quite stiff, you may need both hands for the folding.  The hand folding serves as mixing.  I used my left hand to press down the centre, so my right hand can pinch an edge of the dough and fold it to the centre.  As you stretch and fold, try not to tear the dough; only stretch as far as it can go.
  9. After 45 minutes, do a second set of stretch and folds.  At the end of this stage, the dough will already feel silky and smooth.  As the dough is quite stiff, its strength develops very fast.  Be mindful that the bottom of the dough is the right side of the dough; and the right side of the dough always remain at the bottom in the bowl.
  10. After another 45 minutes, do a final set of stretch and folds.  As the dough feels quite strong, no more folding is necessary (unless you choose to increase total dough hydration, in which case, you may need one more set of stretch and folds).
  11. At the end of the 4 hour bulk fermentation, divide the dough to 3 - 4 pieces as you wish.  Be mindful that the bottom of the dough is the right side; sprinkle some flour on your work bench, and place the pieces right side down.
  12. Shape the pieces - gather the edges to the centre, flip it over (so the right side is now up) and shape it to a tight ball with both hands.  (As I find the dough is quite strong, I did not think pre-shaping is necessary.)
  13. Place the shaped boules in dusted baskets or couche, right side down and seam side up to encourage volume expansion.  Cover.
  14. Proof for 2 hours in room temperature of 18 - 21C / 65 - 70F.
  15. Into the refrigerator for retardation at the end of the 2 hour proofing (minimum 8 hours; I did 18 hours).


Bake Day

  1. Bake the boules cold for best result (ie, straight out of refrigerator).  Just before baking, sift flour on the dough and score it.  Bake at 190C / 380F (not higher due to honey) for 40 minutes.  Once the dough is loaded onto the baking stone, steam the oven with no more than 1 cup of boiling hot water.
  2. Note: I find better result when baked cold.  One boule was left at room temp while others were being baked, and it became quite puffy so when I scored, it deflated quite a lot and there was no noticeable oven spring with this bake.          


I sliced one of the boules and went down to the back yard to water the plants.  When I came back up, my son said to me, Mum, the chocolate sourdough was epic.  How I love his choice of words.  Well, you know how to please a growing boy - make a chocolate sourdough!

This is the first time that I made a chocolate sourdough - it is not sour at all because of the chocolate and honey, but it is very chewy.  And the crust!  Very crispy.  The crumb?  Very more-ish.

I don't imagine you find chocolate sourdough made this way in the shops - they would go bankrupt if they do - too much work (but absolutely worth the trouble for home bakers)!

Shiao-Ping

Steve Petermann's picture
Steve Petermann

Soaker Ingredient Hydration Percents -- Some Data

I really like to use soakers but it can be a pain to try to get the final dough hydration right when playing around with different soaker ingredient combinations and ratios. The problem, as I see it, is that the water absorption of soaker ingredients can vary drastically depending on the ingredient. So what I wanted to do was parameterize the hydration levels of the various ingredients.  I decided to do some tests to see if I could get some reasonably accurate hydration percents for the ingredients and avoid a lot of trial and error.  

So the first thing I did was measure out a known weight of an ingredient. Then I'd put it in a great excess of water (both room temp and boiling) so that I know it would get fully hydrated.  I let them soak overnight. Then the next day I put each soaker mix in some cheesecloth and squeeze out as much of the water as I could.  Then I weighed that again (minus the cheesecloth) and that gave me the supposed weight of water absorbed, and the hydration percent.  What I found was this seemed to work pretty well with some ingredients like most seeds but was a bit dicey when it came to ingredients that made a goo like oatmeal and flaxseeds.  So, I wasn't too sure how accurate that was but it gave me a baseline to work with for the next step.

The next step required some subjectivity like when we make hydration adjustments to a dough. So I got some store brand whole wheat for the tests.  I made three small batches of dough.  One was the control with no soaker and a known hydration.  I chose 67% because it was stiff enough to get a good feel for its hydration.  For the two soakers (room temp and boiling) I used the first cut hydration level to calculate the water needed for the soaker to get fully hydrated and also added another 100% water to make sure they would be. So, I had the supposed free water amount with the soaker.  Then I could adjust the amount of water I put in the dough (without the soaker) such that at the end I should have the right final hydration.  Now, I figured that the first cut soaker hydration percents were really too high and that there would be more free water than the hydration said.  What that would mean is that when I mixed the soaker in with the dough it would be too loose -- at least I hoped that.  It turns out, in many cases, that was true.  So then I could add flour to the dough until I got the same hydration feel as the control dough. I had weighed an excessive amount of flour before and after so I knew how much flour I added.  Then it was a simple calculation to determine the amount of real free water in the soaker and the real hydration % of the ingredient.  So, I had to adjust the hydration percents down for many ingredients except the hard seeds.  

Now in making a real loaf, I could know how much water the ingredient would absorb and then add 100% more to the soaker to make sure it got fully hydrated.  So finally, that told me how much to decrease the water I added to the final dough (because of the excess water I added to the soaker).  The nice thing about it is that you can use any combination of grains, meals, seeds, etc. and still get pretty close.  Of course, some final adjustments may still be needed -- just like with different flours, but in my experience, they aren't that significant. The breads I've made using soakers and this method seem to be pretty close. I haven't made real bread loaves with all these so if anyone tries something and finds it off, I'd appreciate the info.

I have a spreadsheet that does the calculations for all this and will be posting it here as soon as I get a help video done but here's the data. 

IngredientWater Temp% Hydration
   
BarleyRoom Temp138%
BarleyBoiling156%
Barley FlakesRoom Temp125%
Barley FlakesBoiling200%
BuckwheatRoom Temp88%
BuckwheatBoiling91%
Chia SeedsRoom Temp237%
Chia SeedsBoiling276%
Coarse CornmealRoom Temp58%
Coarse CornmealBoiling173%
Cracked WheatRoom Temp178%
Cracked WheatBoiling225%
FlaxseedsRoom Temp130%
FlaxseedsBoiling136%
MilletRoom Temp48%
MilletBoiling48%
Oat GroatsRoom Temp60%
Oat GroatsBoiling85%
Oats, RolledRoom Temp90%
Oats, RolledBoiling206%
Oats, Steel CutRoom Temp70%
Oats, Steel CutBoiling104%
Pumpkin SeedsRoom Temp38%
Pumpkin SeedsBoiling48%
QuinoaRoom Temp78%
QuinoaBoiling104%
Rye ChopsRoom Temp65%
Rye ChopsBoiling154%
Sesame SeedsRoom Temp58%
Sesame SeedsBoiling68%
Sunflower SeedsRoom Temp80%
Sunflower SeedsBoiling80%
TeffRoom Temp72%
TeffBoiling76%
Wheat BranRoom Temp96%
Wheat BranBoiling168%
Wheat FlakesRoom Temp100%
Wheat FlakesBoiling180%

Pages