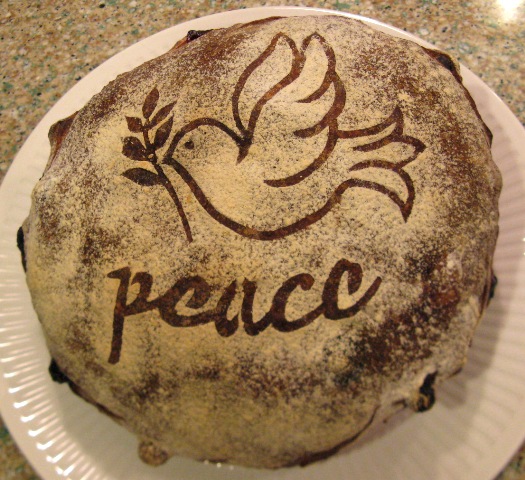
Gilchesters’ Miche/Boules.
Double-leavened Dough, made as a Sandwich Loaf and a Boule.

I have been enjoying using a 3.5kg bag of both the Gilchesters’ “Organic Farmhouse Flour”, and the same size of their “Organic Pizza/Ciabatta Flour” in my breads this week. Alison and I called into the big city [Newcastle!] on Saturday afternoon, en route to our friends’ house in County Durham, to allow me to stock up on specialist flour. I also bought 2 bags of Bacheldre Organic Dark Rye. This must mean a Borodinsky session is not far away!
On Monday this week, I made 4 Gilchesters’ Miche loaves using the same formula and methods as I used today, as posted below. I also used the Pizza/Ciabatta formula with a mix of 2 leavens to make another dough. I baked all this in the wood-fired oven. It continues to be more difficult to build up good bottom heat, but the domed roof is producing a fantastic crust from lovely and gently radiated top heat. I made a boule and 4 baguettines with the second dough. The boule was lovely, but the baguettines convinced me I should not make these solely with natural leaven again. At this stage of my journey, I am only interested in working with the natural leaven. I have very limited capacity, much prefer to use only natural leavens anyway, and my wife has an obvious intolerance of bakers’ yeast as well; all very good reasons. However, a friend had gifted me 2 half stick wires with 2 channels each, so I thought I would at least give them a trial. Anyway, the baking was a success, as I sold all the loaves I made on the day, plus 3 Sourdough Seed breads specially requested by neighbours…which I just happened to have stashed in the freezer.
Since then, I have been working through all my accumulated teaching and learning resources [the paper-based ones!!!], and had a huge “throw out” of all the material I had either duplicated, or that has become out-of-date. Alison was delighted when she got home to watch me filling our Recycling Bin with mountains of paper, previously languishing in cardboard boxes under my desk. I’ve also acquired a website too. More details, obviously to follow, but I have set time to one side 10th and 11th December to work with my brother to build this. He and his wife have a website for their own small business, so I’m utilizing their expertise; how exciting! And I have a Business Plan to write too! These are my pre-Christmas plans, as well as circulating samples of bread to local businesses and flyers through peoples’ letter boxes in the village. The MSc kicks off again later in January, so I need a regular income by then…although it will only be small, and things will be tight in our household. It’s a tough time, but Alison knows how to keep me up-beat and confident this venture will be a big success for both of us. That’s not easy when I know how much she must be worried too.
Anyway, onto the breads for today. I built both my rye sour and wheat levain up over the course of yesterday. The wheat leaven had 3 refreshments and the rye sour had 2. I began with 40g of each in stock, and ended up with around 340g of rye sour and 980g of wheat leaven. I have returned 40g of each to stock, and used up the rest in the formulae posted below.
1. Gilchesters’ Miche/Boules
Material/Stage | Formula [% of flour] | Recipe [grams] |
1. Wheat Levain | | |
Marriage’s Organic Strong White Flour | 25 | 500 |
Water | 15 | 300 |
TOTAL | 40 | 800 |
| | |
2. Final Dough | | |
Wheat Levain [from above] | 40 | 800 |
Gilchesters’ Organic Farmhouse Flour | 75 | 1500 |
Salt | 1.8 | 36 |
Water | 56 | 1120 |
TOTAL | 172.8 | 3456 |
| | |
% pre-fermented flour | 25 | - |
% overall hydration | 71 | - |
% wholegrain flour [approx 85% extraction] | 75 | - |
FACTOR | 20 | - |
Method:
- Build the levain, see description above.
- For mixing, first of all mix on first speed for 3 minutes with a hook attachment, then autolyse the Gilchesters flour with the water for 1 hour.
- Add the levain and the salt. Mix on first speed for 2 minutes, then second speed for 7 minutes.
- Bulk prove the dough maintaining DDT of 26°C for 2 hours.
- Scale and divide as follows: 2 pieces @ 525g, one @ 1050g and the remaining piece @ c.1350g. Mould round and rest for 15 minutes. Prepare bannetons, re-mould dough pieces and set to final proof.
- Final proof DDT maintained at 27°C, for 2 hours
- Tip each loaf out of the banneton onto a peel, score the top and set to bake on the sole of the wood-fired oven. Small loaves bake in half an hour, next biggest takes 45 minutes and the biggest loaf took around 55 minutes.
- Cool on wires.
I set these loaves in the oven with the top heat reading in excess of 300°C and even the bottom heat was close on 280°C. I was confident it would settle out; this is easily the best firing I have achieved with this oven; so very pleasing.


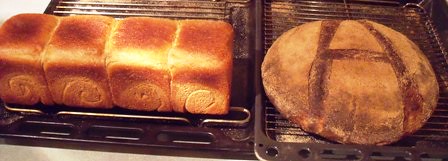
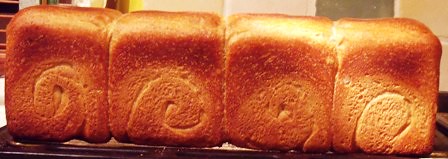
2. Double-leavened Dough, made as a Sandwich Loaf and a Boule.
Material/Stage | Formula [% of flour] | Recipe [grams] |
1a. Rye Sourdough | | |
Bacheldre Organic Dark Rye Flour | 11 | 110 |
Water | 18.3 | 183 |
TOTAL | 29.3 | 293 |
| | |
1b. Wheat Levain | | |
Marriage’s Strong Organic White Flour | 8.4 | 84 |
Water | 5 | 50 |
TOTAL | 13.4 | 134 |
| | |
2. Final Dough | | |
Rye Sourdough [from 1a] | 29.3 | 293 |
Wheat Levain [from 1b] | 13.4 | 134 |
Gilchesters’ Organic Pizza/Ciabatta Flour | 62 | 620 |
Marriage’s Strong Organic White Flour | 13 | 130 |
Gilchesters’ Organic Farmhouse Flour | 5.6 | 56 |
Salt | 1.8 | 18 |
Organic Butter [slightly salted] | 1.8 | 18 |
Water | 43.7 | 437 |
TOTAL | 170.6 | 1706 |
| | |
% pre-fermented flour | 19.4 | - |
% overall hydration | 67 | - |
% wholegrain flour | 16.6 | - |
FACTOR | 10 | - |
Method:
- Build the leavens as described above.
- Weigh all the ingredients into the mixing bowl. Attach a dough hook and mix on first speed for 2 minutes. Scrape down as needed. Mix on second speed for 7 minutes.
- Bulk proof for 1½ hours, DDT maintained at 27°C.
- Scale and divide, 4 pieces @ 300g for a Sandwich loaf, leaving one piece of just over 500g for a small boule. Mould round and rest for 15 minutes. Prepare one banneton and one large Pullman Pan. Re-mould the boule, and shape the four pieces ready and tin up. Attach the pan lid and set both for final proof.
- Final proof; the boule took 2 hours and was loaded with the Gilchester loaves. The panned loaf stood 3 hours and was baked in the wood-fired oven straight after all the other loaves were baked. The Sandwich loaf baked in 50 minutes.
- Cool on wires.
Plenty of photos attached. The wood-fired oven behaved as it has never done so far. When I set the panned loaf in the oven the top heat was still at 250°C and the bottom heat sitting nicely at 220°C. This is so solid compared to previous baking and is really bolstering my confidence that I will be able to bake more in it than I had originally feared might be the case.


The builders across The Square are my latest fans; they bought 3 loaves and have placed an advanced order for Monday already. The rest is for Alison and I and, hopefully, a trip to our local town, Wooler, tomorrow see if one of the shop’s is interested in taking it as samples. We shall see?
Happy Baking!
Andy

 Not viewed yet")
 Not viewed yet")
 Not viewed yet")
 Not viewed yet")