The Fresh Loaf

A Community of Amateur Bakers and Artisan Bread Enthusiasts.

Most bookmarked

theuneditedfoodie's picture
theuneditedfoodie

No Knead Rye Bread

Starting on where I left this in my previous blog, long story short some viewers got offended by my choice of words in my previous blog of No Knead Variations Part I (http://www.thefreshloaf.com/node/26972/no-knead-variations-part-i), hence, I am going to mind my language here. However, if you would like to read the unedited version of this transcript please visit theuneditedfoodie.blogspot.com

Now on to bread, so previously I talked about two no-knead variations both inspired from Jim Lahey’s, “My Bread”. So after a 1-1 score of no-knead baking, where I did well with the Cranberry-raisin version while sort of not so well at the olive-garlic and rosemary version- I ventured further, this time for the first time into the rye bread category. Personally, I hadn’t used rye flour before this and so it was interesting reading Mr. Lahey’s advice, where he suggested using only 25% rye flour, the other 75% just being the regular bread flour. According to Mr. Lahey, the rye flour can be heavy in itself, hence, the idea to mix it with bread flour- just to keep light. Now, I am sure a lot of you will disagree with me here, but that’s not me its Lahey.

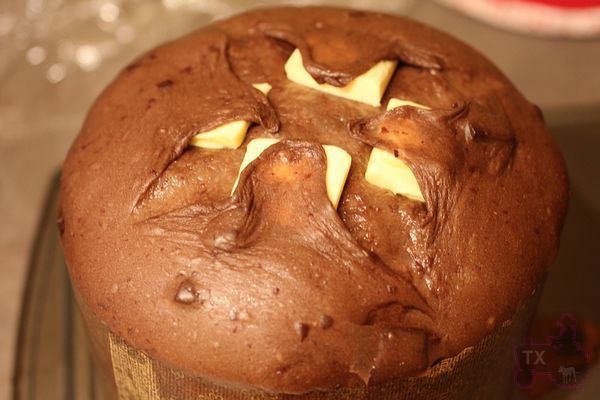
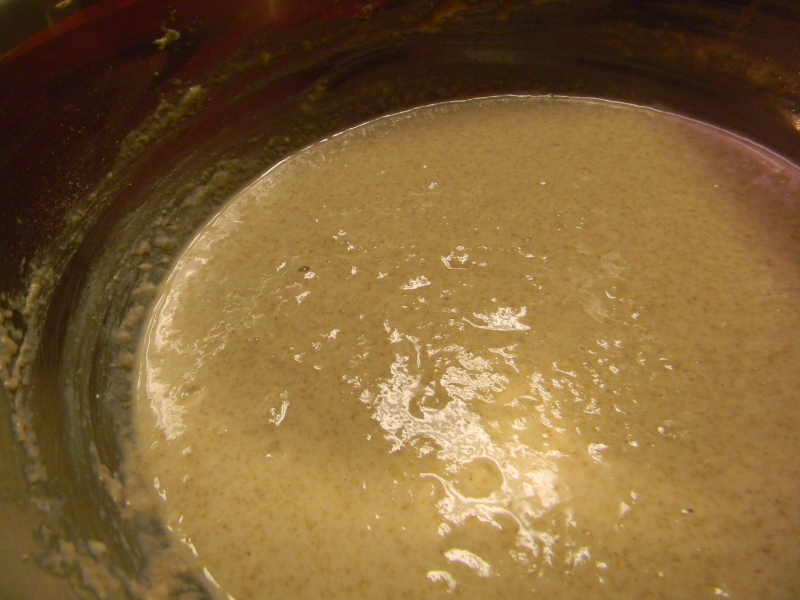
So, now where was I again? Yes, at the no-knead rye bread. Eventually, when I did mix the bread flour, rye flour, yeast, salt and water and basically let it rise for the first time for 18 hours, I was disappointed to see its rise but then that has been the case of my bread rising all this winter. I mean the temperature of the house tends to be around 55 degree Fahrenheit on warm days, so I basically end up locking my no knead mixture in a makeshift proofing room, alongside a petite heater. I mean you have to have your priorities right, either bread or a warm house, I prefer the bread.  If anyone has any better ideas for rising of bread at room temperature of around 50 to 55 degree Fahrenheit, I will be happy to abide.  So once the first rising was done, I took the dough out folded it once or twice, as suggested by Mr. Lahey and wrapped it in a flour towel and let it rest for another two hours.  After, the second rise of two hours, when the bread was finally ready to be slapped into the Dutch oven- I took a deep breath, said my prayers, and even promised my soul to the devil, if the bread came out alright.

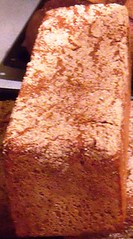
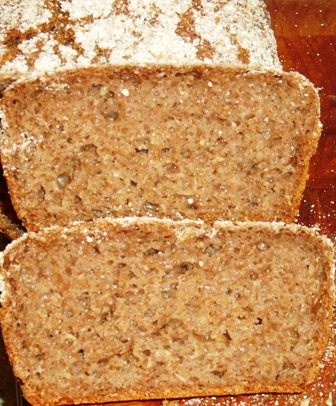
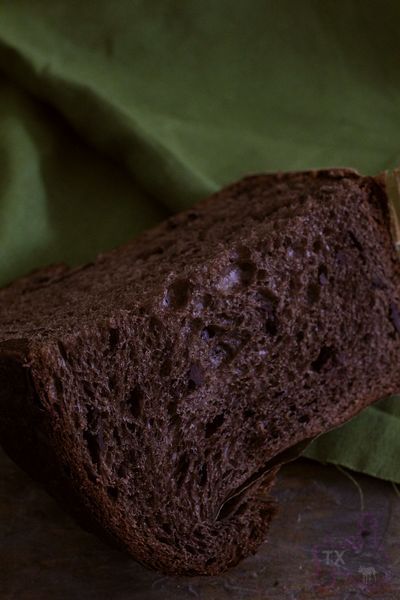
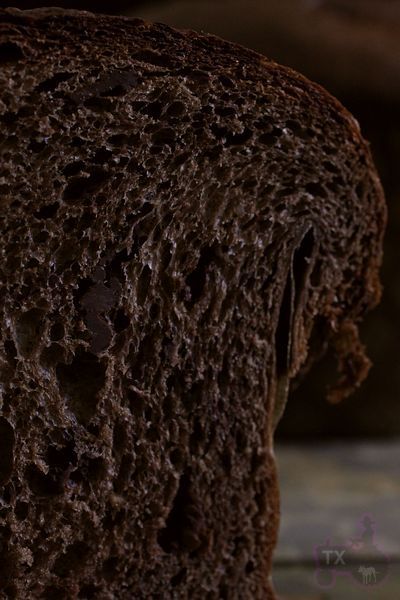
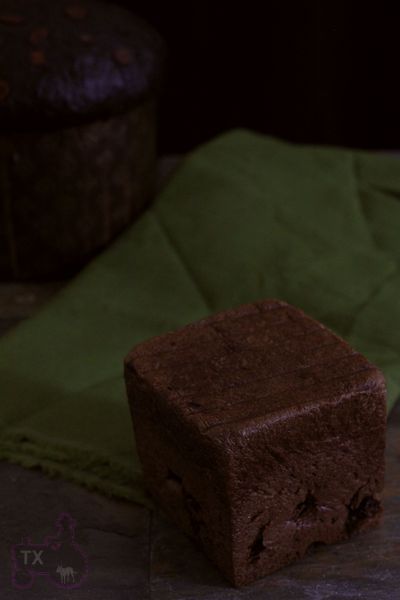
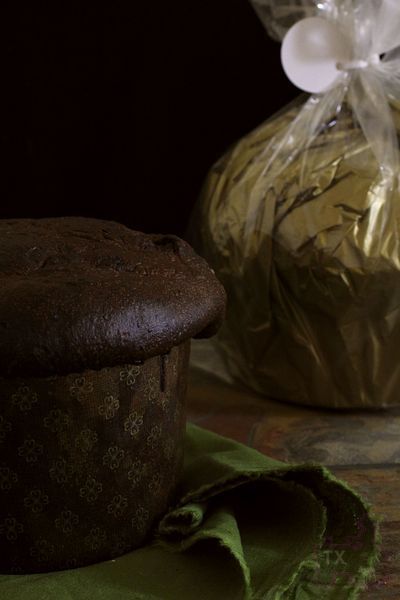
Once, it was done baking, I thought that the texture of the bread looked good from outside. However, when I did cut into the bread, I felt that the holes weren’t big enough as in my regular no-knead bread. Obviously, I understand the fact that rye tends to be lot heavier, and that could have played into it- but you know, it was a success that wasn’t very sweet. Sure, it may be good bread, but it definitely had room for improvement. 

Also, I had another question for my comrades on thefreshloaf-how do I upload pictures? I have tried a couple of times- it just keeps repeating upload failed. Could anyone care to send me some directions?

alpenrose's picture
alpenrose

From Seed to Starter, or is it Levain?

Hello:

After several tries, I finally followed the starter (seed)process posted here under Pineapple Lesson). It worked very well. I am now on day 7 and fed my little seed this morning at 0930 and it is now 1330 (1:30PM) and I have a doubled my lot.  NOW WHAT?  Do I have a sourdough starter yet, or is there next steps?

Can I try to make a loaf of bread now,or should I continue feeding it and start feeding it larger amounts, or more frequently every day?

Thank you again,


theuneditedfoodie's picture
theuneditedfoodie

No Knead Variations Part I


I have been a fan of the no-knead bread ever since two of my friends told me about it having been featured in the NY times by Mark Bittman. Now, Bittman, the minimalist guru, is not the one responsible for the No-Knead Bread; sure he helped to sell the concept by featuring it in his column for the NY times, but the mind/man behind the No-Knead success has been Jim Lahey- founder of the Sullivan Street Bakery in New York City. In 2006, the NY times mentioned the no-knead bread for the first time and it just exploded in the amateur bakers’ world, the success of the bread reached phenomenal heights to the extent that Anothony Bourdain called Lahey the Dalai Lama of bread baking. In 2008, Bittman came back with a twist on this no-knead concept and introduced, alongside Lahey, a speedy no-knead concept- where the idea was basically to add more yeast. And although for an amateur baker the speedy no-knead is a revelation, personally, to me, the holes that the bread webs aren’t big enough to give it the perfect flaky/airy crumb. The thing that I love about the no-knead bread is the use of Dutch oven, I meaning by using this noble vessel one can truly get the heat of a professional oven and the physics behind it is just incredible that even a douche, like myself can prepare some great breads. In the past, I have tried the original no-knead bread, which has an initial rising time of 18 hours and then a secondary rising time of 2 hours before it hits the scorching hot Dutch oven. I have also tried the speedy no-knead too, which has a first rise time of 4 to 5 hours, followed by another hour.  So in my quest to understand more no knead and more Lahey, I got Lahey’s bread book, “My Bread-The Revolutionary No-Work, No-Knead Method". One of the first recipes that inspired me from Lahey’s book was the Pan co’ Santi (Walnut bread); this bread contains bread flour, raisins, walnuts, salt, cinnamon, yeast, black pepper, water and cornmeal for dusting. Now, since I am allergic to walnuts, well not exactly, but since I do not like walnuts- I opted for its exodus. Obviously, with walnuts now out of the scene- the bread wasn’t walnut bread anymore, and so I added some cranberry and called it cranberry-raisin bread.  Also, what was exciting to taste was the cinnamon alongside the black pepper with the cranberry and raisins. I have to confess, this was a good festive bread. High on my success of the cranberry-raisin bread, I decided to pull another bread recipe of Lahey’s, this one called the olive bread or Pane all’Olive. Now, the olive bread had of course bread flour, pitted olives, yeast, water and cornmeal for dusting. Although, Lahey strongly suggested to use kalamata olives, since they are soaked in pure salt brine, it would add to the taste of the bread- however, the cheap bastard that I am, I opted for the regular California olives.  Now, in the past when I have made olive bread, I have witnessed problems with gradually introducing olives within the bread, for olives have a huge amount of water and keep wetting my bread dough to where I am pushed to use more bread flour just to keep the dough dry enough for baking.  So when I was making Leahy’s olive bread, I tried to outsmart the liquefied olives by air-drying it with a hair dryer. Did it work? Yes, to some extent or at least I thought when introducing the olives to the flour mixture.  Unfortunately, after the first and second rising, I knew for sure that the motherfucking olives had peed yet again in my flour. This led to very soggy dough, which was extremely hard to handle. I mean as such it is hard to control the aesthetic of the no-knead bread when you are trying to toss it up in the Dutch oven without burning your hand. Somehow after stretching my dough somewhat, I was able to slam it into the container and finally get in the conventional oven to bake.  The results weren’t very satisfying…not only the bread was somewhat moist, the culprit being the olives-it almost tasted like it didn’t have any salt.  Why so? Well, one could say because Leahy didn’t introduce any salt in it, and why that- because he believed that the kalamata olives brined in sea salt would bring enough saltiness to the bread.  The only thing that I was glad about this bread at that point of time was that thankfully, listening to the wife, I had introduced some rosemary and garlic into the flour mixture, which made the bread somewhat edible. Moral of the blog, you live and learn and you bake and get better. To be continued…

Szanter5339's picture
Szanter5339

Kalács és kenyér bemutató és kóstoló a Kultúra Napján. Cake and bread tasting and presentation,Culture Day.

Yesterday was the Day of Hungarian Culture. The anthem's birthday. In 1823, this dayKölcse Francis finished writing the National Anthem.
On that occasion, a small village in commemoration was very nice. Poetry, music, schoolshow, presentation and taste of bread and cakes.
I'm very happy because it was a great success and was the tasty creations!
The girls cooked a delicious tea cakes. Was a nice ceremony.
  Thanks to the organizers!

joyfulbaker's picture
joyfulbaker

ITJB Week 8: Onion Rolls

I love this recipe!  I followed the recipe pretty closely, just made 3/4 the amount of dough and 1/2 the amount of onion filling (used filling no. 1), which turned out to be just the right amount, resulting in 9 3-oz rolls, just the right size.  The recipe in the book called for 5 tsp. of instant yeast, but I only used 2 1/2 tsp, and it worked just fine.  I mixed the malt in the water mixture (saved the onion soaking water--thanks to Eric's earlier post!).  I photographed just the end results, with no crumb shot, as I made them late in the evening and we were eating dinner and watching the 49'er/Giant game while they were baking.  (Not recommended!  Can't believe we resisted!  But wait til tomorrow's lunch!)  The dried onion flakes worked very well; I have the Safeway brand, and they are cut quite fine.  I had tried using them as a bagel topping but never knew how to handle them.  Leaving them in boiling water for 30 minutes was the secret, then mixing in the poppy seeds, oil and salt.   I baked the rolls on the preheated stone at 400 with light steam (spritzed twice), raised the temp to 425 after 10 minutes as they looked a bit pale; at 12 minutes decided to turn the oven to convection (375 being equivalent of 400), and left it that way for another 5 minutes, so 17 minutes total.  They browned up quickly once I set the oven to convection (I probably missed an important play retrieving them, but first things first!).   I found the directions clear enough, which suggested putting the onion mixture on waxed paper to press the boules to 1/2" after they rested for 15-20 minutes.  I did forget to press the middle down with my thumb before loading them, so I did a little push at half bake (no burns encountered, done quickly).  It worked well enough.  I have luscious memories of onion pletzels from my Brooklyn childhood, so I think I'll try that variation next time.  And I love this smooth, silky
dough; it mixed up easily at speeds 1 and 2 in my K/A Pro 6.  Next on the list will be Kaiser rolls.

Very Joyful!


ananda's picture
ananda

“Rauchmalz” from Germany and Gilchesters from Northumberland, UK.

“Rauchmalz” from Germany and Gilchesters from Northumberland, UK.

I made 6 loaves of Gilchesters’ Miche [2 had been sold before I could take photos], and 3 loaves of very delicious Rye Bread using the lovely Rauchmalz; sour but just balanced by the sweetness in the soaker.   I suspect this will behave like Franko’s recent loaf, and become less sour in the next few days.   The wind has been wild once more, and the wood a trifle damp.   Fires have been tricky to build!

 1.    Rye Sourdough Bread with a Dark Rye and Smoked Malt Soaker


Rye Sour build:

Day/Date

Time

Stock Sour

Dark Rye

Water

TOTAL

Friday 20.01.2012

21:45

50 [F25+W25]

275

475

800

Saturday 21.01.2012

16:30

800

300

500

1600


Material/Stage

Formula [% of flour]

Recipe [grams]

1a. Rye Sourdough


Bacheldre Organic Dark Rye Flour

30

558

Water

50

930

TOTAL

80

1488


1b. “Scald”


“Rauchmalz” Bavarian Smoked Malt

10

186

Bacheldre Organic Dark Rye Flour

10

186

Boiling Water

35

651

TOTAL

55

1023


2. “Sponge”


Rye Sourdough [from 1a.]

80

1488

“Scald” [from 1b.]

55

1023

TOTAL

135

2511


3. Final Paste


“Sponge” [from 2]

135

2511

Bacheldre Organic Dark Rye –finely sifted

20

372

Carrs Special CC Flour

30

558

Salt

1.5

28

Fresh Yeast

1

18.6

TOTAL

187.5

3487.6


% pre-fermented flour

30 + 20 = 50

-

% overall hydration

85

-

% wholegrain flour

70

-

FACTOR

18.6

-


Method:

  • Build the sour to the schedule shown above; make the Scald at the same time as preparing the final refreshment of the sour.   Cover and cool to room temperature overnight.   Make the Sponge first thing in the morning and ferment this for 4 hours.
  • Add the flours, salt and yeast [yeast is optional] to the sponge and mix with a paddle beater until thoroughly combined.
  • Bulk proof for 1 hour.
  • Line a Pullman Pan and other bread pans neatly with silicone paper and scale the paste into the pans, neatening off carefully.   Top with some crushed smoked malt and dark rye flour.    Attach the lid.   I made one panned loaf scaled @ 500g, one @ 1000g with the remainder used for one large Pullman Pan.   Dust the surface tops of the loaves with a mix of dark rye flour and rauchmalz.
  • Final Proof 4 hours.
  • These loaves can be baked in the dead wood-fired oven.   However mine were ready to bake at the same time as the Gilchesters’ Miche, so I baked them long and slow in the electric oven at 140°C with fan.
  • Cool on wires

 2.    Gilchesters’ Miche/Boules

Makes 6 loaves: 3  Boules @ 400g, 1 Boule @ 800g and 2 Miche @ 1200g.

Levain build:

Day/Date

Time

Stock Levain

Strong White Flour

Water

TOTAL

Friday 20.01.2012

22:00

40g[F25,W15]

275

165

480

Saturday 21.01.2012

16:35

480

475

285

1240


Material/Stage

Formula [% of flour]

Recipe [grams]

1. Wheat Levain


Marriage’s Organic Strong White Flour

25

750

Water

15

450

TOTAL

40

1200


2. Final Dough


Wheat Levain [from above]

40

1200

Gilchesters’ Organic Farmhouse Flour

75

2250

Salt

1.8

54

Water

56

1680

TOTAL

172.8

5184


% pre-fermented flour

25

-

% overall hydration

71

-

% wholegrain flour [approx 85% extraction]

75

-

FACTOR

30

-


Method:

  •  Build the levain, see description above.
  • For mixing, first of all mix on first speed for 3 minutes with a hook attachment, then autolyse the Gilchesters flour with the water for 1 hour.
  • Add the levain and the salt.   Mix on first speed only for 10 minutes.   Dough Temperature Calculation worked out as follows: WT = 3[DDT – FRH] – Leaven Temp – Flour Temp.   3[26 – 1] – 20 – 20 = 35.   Water temperature required at 35°C.   Retard overnight.
  • Bulk prove the dough allowing it to reach DDT of 26°C.  
  • Scale and divide as above.   Mould round and rest for 15 minutes.   Prepare bannetons, re-mould dough pieces and set to final proof.
  • Final proof DDT maintained at 26°C, for 3 hours.
  • Tip each loaf out of the banneton onto a peel, score the top and set to bake on the sole of the wood-fired oven.   Small loaves bake in half an hour, next biggest takes 40 minutes and the biggest loaf took around 50 minutes.
  • Cool on wires.

You’ve seen the Gilchester loaves a lot now.   I was amazed at the tolerance within this dough, as I managed to maintain proof at 18°C throughout a  6 hour period, following on from overnight retard and 2 hours in bulk.   Firing the oven today in the wind was a bit of a nightmare!   The rye loaves are new, and the taste is fantastic.   I bought the smoked malt some time ago; it is a brewing adjunct really, but I saw Franko’s recent post:

 http://www.thefreshloaf.com/node/26796/january-bakingpane-de-campagne-red-fife-and-rye-barley-mash-loaf and was reminded of an ingredient I had in the cupboard which needed a good use.

The formula is spiked with yeast as my rye sourdough has been struggling of late.   Some of you will know that I use Bacheldre Rye Four and it is very thirsty.   I have been experimenting with a stiffer sour, hydrated at 100% recently.   This has not been a success.   I have returned to 167% hydration, and, hey presto!   My rye sour has now returned to its full activity.

A few photos attached:

Tomorrow I have a meeting with the Press, who want to run a feature in Thursday’s local paper.   Fantastic timing as I do the first Farmer’s Market the following day.   I am now booked to deliver a talk and demonstration for our local Food Festival in September as well.

It has been a busy week and weekend, with a Consultancy project on Friday which needed writing up straight away.   Next week the MSc in Food Policy starts once more, and I have lined up laminated yeasted pastries, scones, foccacias and some more bread for the Market, along with 3 back-to-back meetings all day on Tyneside on Tuesday.   Busy Busy!

All good wishes

Andy

david1949's picture
david1949

Looking for this recipe

Has anyone made buttermilk bread in there bread maker if so could i have the recipe please.

txfarmer's picture
txfarmer

Sourdough Cocoa Panettone with Dark Chocolate - a grand finale to holiday season

Sending this to Yeastspotting.

Click here for my blog index.

This past holiday season was kinda crazy - a cross country move, a trip back to China, a new job, a new place to live, etc. etc. I did still squeeze in some holiday baking though, well, actually I only baked one holiday bread: the Francesco Elmi Traditional Sourdough Panettone I posted before, however I baked that bread many times. So many times that not only my friends and relatives around US and Canada got to taste it, I even carried 3 loaves back to China last month! Boy, did they go over well. My friends in China were nuts over it. It's not something commonly seen over there.

Even after New Year, I had another batch to make for Chinese New Year (coming up this weekend) as gifts. This time, I want to try something new, something better. But how to improve on perfection? Well, chocolate of course! Lots and lots of 70% Valrhona dark chocolate, in extravagantly big chunks. Oh Yeah.

The original recipe is from here (a google translated Italian baking forum post), I stuck pretty close to the original, but replaced raisins with more chocolate. In this formula, butter ratio is 48%, and yolk ratio is 41%, slightly less than the Francesco Elmi version (53% and 50% respectively), but the extra cocoa and chocolate make up for the richness.

I love sourdough panettone for it's complex flavor profile: richness from all the butter and yolk, with slightly sour note from the stater lingering in the background. In this version, dark chocolate adds another level of flavor, making the bread even more decadent and complex. With a thorough kneading, and proper(very long) fermentation, the crumb is tenderly soft, yet still a little "bouncy".

Two kinds of toppings: one was the chocoalte glaze from AB&P, the other one was scoring and hiding butter pieces underneath (from the forum post), both turned out delicious.

Even after stuffing more dough into the paper moulds than I should (1000g should be perfect, but I kept adding 1100g of dough into each mould because I want my friends to have more delicious breads to taste), I had some dough leftover. It turned out that <200g of dough was perfect for my Chinese cube pullman tin (baked with cover).

Wrapped up and ready to be shipped. This is probably the last batch this year. Time to get some rest and figure out what to do with 100+ egg whites I have in the freezer!


R.Acosta's picture
R.Acosta

Third Time's a Charm (Adventures in Whole Wheat)

So after two loaves with tons of flavor, but not the rise that I was looking for, I decided to try to make up my own honey whole wheat recipe.  I know, 'tis a little ambitious for a novice whole wheat baker, but I did do a little research beforehand, and it was wildly successful!!  So here's the recipe!

Night Before:

1 cup whole wheat flour
2 cups bread flour
2 1/2 cups warm water
2t yeast

Combine all ingredients together and mix until well incorporated, then cover and let sit overnight. Mine was pretty wet:

Day of:

2 cups whole wheat flour
1 1/2 cups bread flour
1/2 cup honey
4 tbsp butter
1/4 cup milk
2t salt
1t yeast

First, stir in honey, butter, milk, salt, and yeast until they are pretty well incorporated.  Then add your flour by the 1/2 cup.

The dough is going to be a pretty sticky mess, but that's ok. Turn the dough out onto a lightly oiled surface and work it the best you can. I tried kneading, which was quite impossible, so you could almost classify this as a no-knead bread.  When I do this again I might incorporate some stretch and folds into this stage of the breadmaking process.  Anyways, shape your dough into a ball and put into an oiled bowl, turn once to coat, and let rise for 45 minutes.

Do your first stretch and fold, put the dough back in the bowl, let it rise for another 45 minutes, and then do your second stretch and fold.*

Now let the dough rise until double its original size.  Approximately 75 minutes for me.  Mine looked like this:

Now, divide your dough evenly in half and preshape into two loaves, let rest for 10 minutes.**

Then, do the final shapingof your loaves and put in oiled bread pans.  Cover them loosely with plastic wrap and let rise til doubled.  Mine only took 45 minutes.

^Those obviously aren't risen, I just snapped a quick photo before covering them for the rise.  I was a little iffy about how these would turn out (especially lefty over there.) because the surface tension just didn't seem to be there like it had before.  Anyways, I think you'll see that I had little to worry about.

Once your loaves are risen, slash them down the middle, and throw in the oven at 375F until they are a deep golden brown and sound hollow when tapped on the bottom. Or until they look like this!

And now for the long-awaited crumb shot:

This bread is so super soft and fluffy, the crust is not as crunchy as the other recipe (which I do miss) but it does make for great sandwich bread in that respect.  This one's going into our family cookbook :)

Rachel

**for the shaping of my loaves I used this video: http://www.youtube.com/watch?v=Q_3zBaKkxMY

*for stretching and folding, this one: http://www.youtube.com/watch?v=1timJlCT3PM

PaulZ's picture
PaulZ

Baking time vs Temperature? And the Winner is...

Hi all,

I have a new Italian convection twin-fan assisted oven with steam function. Very nice, very even bake but oh so f-a-s-t!

Problem is: If I follow recipes times and temperatures to the letter, my breads,pastries and cakes are overbaked and the recommended bake time is not yet up.

Question is:

Is it better to:

1. Retain the advised baking temperature and reduce the bake time?  Or,

2. Retain the advised bake time but reduce the temp by approx 10-15%?

3. Or a combo of both?

Any advice or previous experience of this?

Thanks


Pages