Big day making Pasta ( Maultaschen )
I'm soooooo tired!
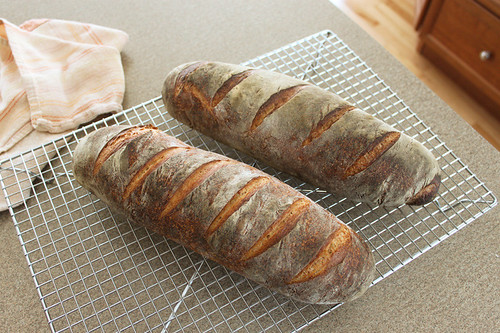
I made my favourite Pasta today, I only do this a few times a year and spend the whole day making them. I always make them in bulk and freeze them, tho most of the time my extended family end up taking most of my stash!lol.....Hmmm I made 100 Maultaschen today, I wonder how many I will get to freeze and eat?
This is a bulk recipe that makes approx. 100 large Maultaschen.
Maultaschen
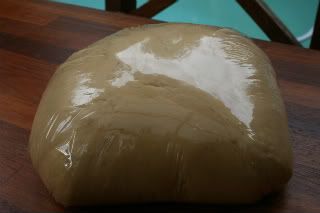
Pasta Dough
2 kilos of type oo flour
2 dozen eggs
salt
Filling
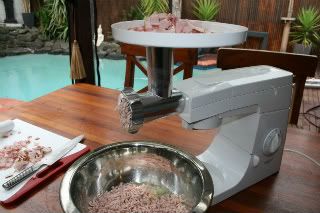
500 grams minced bacon (minced)
8 medium sized onions (minced)
6 cloves of garlic (minced)
1 kilo pork sausage meat ( I used pork sausages and squeezed them out of their castings)
3 stale rolls soaked in water and then squeezed to remove the water
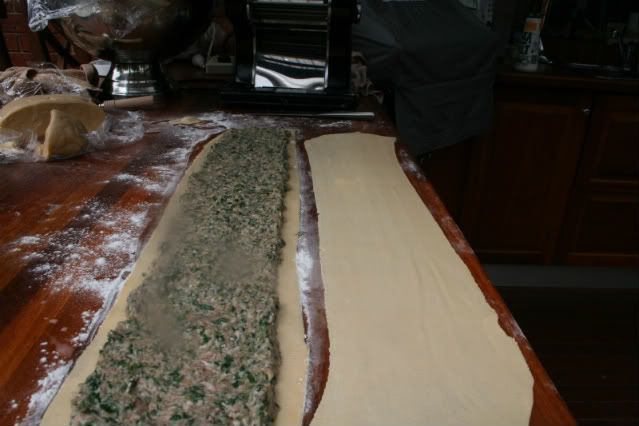
1.5 kilo cooked spinach ( I used finely chopped frozen spinach and removed all the water)
1.5 kilos ground lean beef
9 eggs
10 tablespoons chopped fresh parsley
salt, freshly ground pepper and freshly grated nutmeg to taste
1 egg and 3 tablespoons milk mixed (for brushing the pasta sheets )
Make the pasta dough and refrigerate until needed (depending on the size of eggs you might need a touch more flour). Mince the meat, bacon, garlic and onions and add all the ingredients and mix really well.
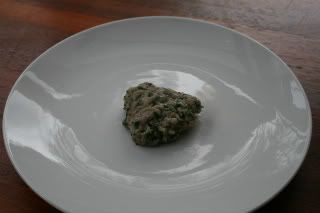
Season to taste with salt, pepper and nutmeg...I recommend placing a tablespoon of mixture onto a plate and popping it into the microwave and having a taste test to make sure it is tasty enough. I had to taste the mixture 3 times before I got the taste to my liking.

Roll out the Pasta into long strips ( Thank god I have an electric pasta machine, I used setting#7 as my final pass) Top with meat mixture (just under 1cm thick approx) and brush the edges with egg/milk wash and top with another strip of pasta. At this stage I normal have a mess everywhere and today I even got flour on my camera lens LOL
Using a wooden spoon handle make impressions to seal each individual Maultaschen.
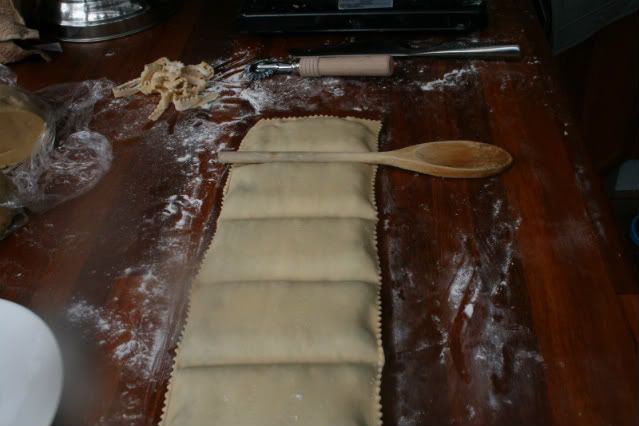
Using a zig zag pastry cutter cut them into individual Maultaschen.

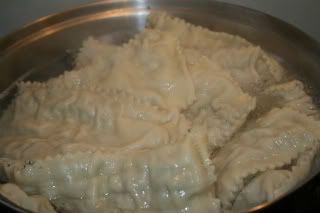
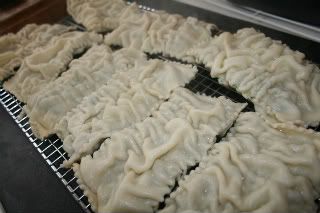
Drop a few (depending on the size of your pot, I cook 10 at a time) into boiling (soft boil or they might split open while cooking) salt water and cook for 15 minutes, then drain. Refrigerate or freeze until needed.
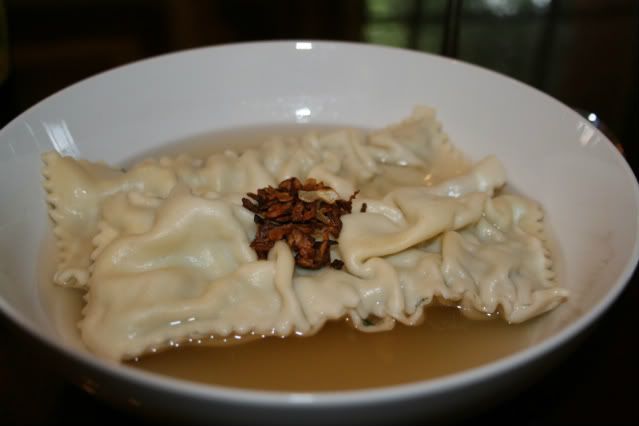
Reheat in stock and serve with either a beef or vegetable stock and top with slow dry fried onions. You can also slice and fry them in butter, or scramble an egg over them.
My reward after a hard day of cooking :-)
Cheers Sonia