The Fresh Loaf

A Community of Amateur Bakers and Artisan Bread Enthusiasts.

Most bookmarked

amolitor's picture
amolitor

Fennel Fig Bread

This was developed from a list of ingredients lifted from the display case at Arizmendi Bakery, in San Francisco. I consulted a few other similar recipes to help out with proportions. The technique is basically a stretch-and-fold approach I lifted from some Tartine recipe in a magazine.

Levain

  • 2 T wheat bran
  • 3/4 cup whole wheat flour
  • 1 cup water
  • 1-2 T active starter ("sufficient" starter to get the levain going)

Set out overnight, or until it is sufficiently developed to float. It's fairly cool here, so 10-12 hours seems to work well for me now.

Dough

  • all of the levain
  • 1/2 cup warm water
  • 2 1/2 cups bread flour ("sufficient" flour to make a fairly wet dough)
  • 1 1/2 tsp salt

Mix well, until the dough separates from the bowl stickily, the usual sort of thing. Stretch and fold every half hour or so for about 3 hours, until the dough is getting close to fully devloped (elastic and as smooth as the bran will allow, and starting to get leavened). Mix in:

  • 2 T fennel seeds
  • 1 tsp fresh ground pepper
  • 12 medium sized dried black figs, quartered (take the stems off if there are any!)

You want the dough mostly but not completely developed. You're going to mix in this stuff with some stretch and fold every 15-20 minutes or so, for 2 or 3 turns. So, another 40 minutes to an hour on the bench.

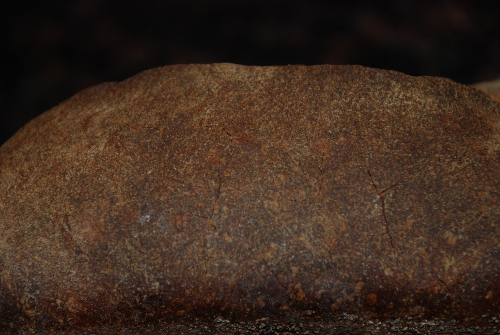
Form up a loaf, bake at 450 for 40 minutes or so. You'll want to bake a few minutes longer than you would normally bake a loaf of this size, for the figs.

The pepper really makes this one. 1 tsp adds a definitely peppery bite, so you may want to start with less if you're not a pepper fan, or if you are worried about big flavors.


jamesjr54's picture
jamesjr54

Oat Bran Sourdough - The Flavor!

Wanted to share this success. Like you all, I hate discarding so much starter, so I've been experimenting with uses - pancakes, english muffins etc. Got the English Muffins to where I'm happy - more batter-like than dough is the secret. Emboldened by English Muffin success, I wanted to experiment with some bread. I tried this formula:

2 days before baking:

Fed  25g of my 100% starter with 50g each KAP and water = 125 G.

Day before: saved 30g, and used 50g in a levain (discarded the rest).

Levain

50g starter

68g AP flour

12g Rye

100g water


Baking Day

Dough - about 68.5% hydration

650g KAP

480 water

All of the Levain (230g)

85G White Whole Wheat (KA)

45G Rye

20G Oat Bran (Bob's Red Mill)

10g salt

7 g flax seed meal (Bob's Red Mill)

Mix all but salt. Autolyse 90 minutes. Add in salt and knead 10-12 minutes by hand. 

Bulk ferment 2.5 hours with S&F at 50 minutes

Preshape; rest for 10 minutes, then shape.

Final Proof 90 minutes (my house was a cool 68F, while outside was about 20F)

Then, my usual baking regimen: 500F preheat with cast iron dutch oven/combo cooker; 20 minutes covered at 475F; 20 minutes uncovered (final 10 minutes with parchment paper removed).

This bread came out great! The flavor was really sublime - slightly nutty and sweet - I guess from the oat bran/flax seed meal combo. Not much sourdough tang at all, which was fine with me.  The crumb was a little too open, owing I think to not enough kneading/development. We demolished the first boule with some homemade minestrone and grilled cheese. 

thihal123's picture
thihal123

Free Book: The Future of Flour

I found complete PDFs of the book "The Future of Flour" directly from the publisher's site. It's completely legitimate. Here it is:

http://www.muehlenchemie.de/english/know-how/future-of-flour.html

Enjoy!

Isand66's picture
Isand66

German Pretzel Rolls (Laugenweck)

There is nothing like authentic German Pretzel Rolls hot from the oven.  I made these to bring to a friend's house for Christmas Eve and everyone was raving about them all night.

The key to making these is that you must use Food Grade Lye better known as Sodium Hydroxide.  Don't let anyone tell you that you can skip this step by using baking soda.  If you want the real deal you must use Sodium Hydroxide or the crust will not be dark brown like it is supposed to.  You must be careful of course when using this product and where protective gloves and long sleeves and goggles.  Do not ever add the crystals to hot water or you will cause the water mixture to over flow and probably burn yourself in the process.

You can order Sodiuym Hydroxide on-line through Amazon and it will take about 4-5 days to ship since it is considered dangerous cargo.

I followed this recipe from German Foodie as posted on the The Fresh Loaf and it worked out great.

Another note, don't do what I did the first time and use parchment paper to line your cookie sheets.  I did this foolish thing and had to cut the paper off the bottom of most of the pretzel rolls.  Instead, use metal baking sheets and spray them heavily with cooking spray.  If they still stick you can simply use your dough scraper to loosen them from the baking sheet.

Make sure you have real pretzel salt as this will make a huge difference if you don't.

They came out just as good the second time around as the first.  Next time I will start experimenting a little and try some with cheese stuffed inside and I may try adding some rye flour into a batch to make Pumpernickel pretzels.

I made double the recipe which makes around 20 pretzel rolls.

Make sure after you mix the dough you use a big enough container to let the dough double in size while in the refrigerator.


shoshanna673's picture
shoshanna673

Starter Maintenance

Hi from Oz

I need some advice.  I bake bread weekly for myself.  Now I have an urge to attempt sourdough bread.  I know nothing about starters, but have been the recipient of 100g of mature white starter from a fellow poster (a baker by trade) on an Oz forum.  The donor amazingly lives just 15 mins from me, but as he was leaving for a month long holiday, he left me the starter in his letter box.  I collected about 1.5 hrs later.  His instructions were to feed 100g flour/65g water but  to just frig if not intending to bake for a while (maths not being my forte, I assume this is 65% hydration?)  Is this a good hydration for a white starter?  I think I need to feed and increase the base starter a little?  The trouble I have is this .. I brought it home and put it into frig am 28/12 (very warm summer here .. up to 40 dC some days). It was fed by the donor at 6pm on 27/12.  I transferred it to a sterilised glass container and popped it into the frig.

 When do I need to feed it next. .. in a week, or less?  It inhabits my frig and will do so between feeds.  I will not be baking until I have a little more starter built up.  There are just so many blogs, posts, books, etc. I am totally confused.

Unfortunately, I must have the bug .. I have given it a name already!

Sondra

Isand66's picture
Isand66

Asiago-Cheddar Cheese Egg Sourdough

    This was going to be bread for my wife's stuffing this weekend, but the impending snow storm has postponed our family dinner and the need for stuffing.  Not to mention she informed me she wanted a simple white bread and challah bread anyway, so I will be happy to eat this tasty cheesy, eggy bread all by myself.  No complaints here as this turned out excellent.  This bread tastes like cheese since I mixed both cheddar and Asiago cheese into the dough before it went for its overnight slumber in the fridge.  I think this method really distributes the cheese flavor throughout the entire bread.

I have to say the crust came out nice and chewy and the crumb was open and soft.  This bread is a keeper and is good enough to eat without any additional toppings.

I used my standard trusty AP starter at 65% hydration refreshed per below.

AP Starter

227 grams AP Flour

71 grams AP Seed Starter

151 grams Water at Room Temperature (80-90 degrees F.)

Mix ingredients in a bowl until thoroughly combined.  Cover the bowl and let it sit at room temperature for around 8 hours.  The starter should almost double when ready to proceed.  You can either mix in final dough or put in refrigerator for at most 1 day before using.

Main Dough Ingredients

425 grams AP Starter from above

130 grams First Clear Flour

290 grams European Style Flour (KAF--you can substitute AP or Bread Flour)

100 grams Durum Flour

25 grams Potato Flour

80 grams Grated Cheddar Cheese

40 grams Grated Asiago Cheese

142 grams Whole Egg Beaten (3 large eggs)

262 grams Water at Room Temperature

15  grams Olive Oil

18 grams Seas Salt or Table Salt

Directions

Mix the flours, oil, water (hold back 50 grams for later) and eggs in your mixer or by hand for 1 minute. Let it rest covered in your bowl for 10 minutes.   Next cut the starter into small pieces and put into the bowl on top of the dough and let it rest another 10 minutes covered.  After the autolyse is complete add the salt and the rest of the water as needed and mix for 3 minutes on low to incorporate all the ingredients.  The dough should form a sticky ball at the end of 3 minutes mixing.  Now add the cheese and mix for 1 additional minute to incorporate all of the cheese throughout the dough.  the dough will be rather sticky but resist the urge to add more flour.

Next take the dough out of the bowl and place it a well oiled bowl.  Do several stretch and folds in the bowl and rest the dough uncovered for 10 minutes.  After the rest do several more stretch and folds in the bowl and cover the bowl and let it rest for 10 minutes.  Do one more stretch and fold and let it sit at room temperature covered for 2 hours.  Feel free to do some additional S&F''s to build up more gluten strength.  After 2 hours you can put the dough into the refrigerator for 24 hours or up to 2 days before baking.  I baked the bread about 14 hours later.

The next day (or when ready to bake) let the dough sit out at room temperature for 1.5 - 2  hours.

Next, form the dough into your desired shape and put it in a floured basket  or bowl and let it rise covered for 1.5 to 2 hours or until it passes the poke test.

Score the loaves as desired and prepare your oven for baking with steam.

Set your oven for 500 degrees F. at least 30 minutes before ready to bake.  When ready to bake place the loaves into your on  your oven stone with steam and lower the temperature immediately to 450 degrees.    When the loaf is golden brown and reached an internal temperature of 205 degrees F. you can remove it from the oven.

Let it cool on a wire rack for at least 2 hours before digging in if you can wait that long.

HAPPY HOLIDAYS FROM CLEO, COSMO, LUCY, MISTY AND MOOKIE!

gmabaking's picture
gmabaking

Carrots and Peppers and Olives Oh My

This morning my refrigerator looked like it should be in a chemistry lab. Decided I only really needed one starter as a base so I gathered up the rest and made two loaves of bread. Since the Carnival season that culminates in Mardi Gras starts next week, I thought it would be fun to use the leftover olive salad from making Muffaleta sandwiches. I chopped the salad which basically consists of a jar of Italian Gardenia (pickled cauliflower, carrots, celery, onions and peppers) drained and mixed with olive oil. The colors of the vegetable bits look like little pieces of confetti. Not the big holes and deep flavor of a long fermentation but the olives make up for some of that depth of taste. The crust is crispy and the crumb is soft. All in all, a pretty tasty bread for half a day. Have to admit I couldn't quite winnow the number of starters to just one-but did get it down to one Tartine and one Silverton.

Mardi Gras Bread2 cups starter1 1/2 cup to 2 cups room temperature water (depending on how thick your starter is) 1/2 cup nonfat dry milk (I used the non instant type)5 cups all purpose flour1 Tablespoon sugar1 Tablespoon salt2 teaspoons instant yeast1 1/2 Tablespoons chopped fresh rosemary2/3 cup chopped olive salad mix with some added Kalamata olives, with its oil left on (about one tablespoonful)                 (This is basically well drained Italian garden mix with added olives, well drained and then covered in olive oil)Place starter and water into mixing bowl with dough hook, slosh around until mixed. Add rest of ingredients and mix until the dough cleans the bowl and reaches around 75 degrees F. By then it should no longer be sticky. Turn out onto a lightly floured counter and knead for a minute or so. Place in oiled bowl, cover with damp towel or plastic wrap. Let ferment until double in size, about 1 1/2 hours. Gently degas, turn dough over in bowl and let it rest for about 30 minutes. Divide, shape and let proof for about 1 1/2 to 2 hours, until doubled. Slash and bake at 475 degreesF with steam for about ten minutes, remove steam, turn oven down to 450 degrees F and continue baking until browned. For my oven, that was about 22 minutes total baking time. Interior temperature should be around 200 degreesF.
ars pistorica's picture
ars pistorica

Breaking Bread, an exploration of bread and its many facets.

Timing is everything.

Good timing makes a joke work, as bad timing does the same for tragedy.

For bread, though, it means nothing.  Bakers who brag about using long fermentation times puzzle me.  I mean, I know what they mean, but do they?  I, too, am guilty of using this idea when discussing bread.  Why?  It's convenient.  Everybody knows it.  It's an available reference point.

And yet it all means nothing.

Handmade things that take a long time to make are usually thought of as being of a higher quality than a similar product made fast and cheaply on an industrial scale.  Why?  The answer to this question will help us a bit further on.

First, let's talk about time.  What is it?  For our purposes, it's the same thing as dough rheology, the progression from one physical state of being into another, with the possibility of never returning to the previous state.  The tricky thing to pin down, though, is the rate of change, which is consequently affected by the hows and whys of the physical transformation attempting to be measured.

For us, as bakers, time is merely a very long string connecting together a series of snapshots of a dough's state of being.  And, no, I am not about to get Heideggerian.  For me, this offers a better framework by which to understand time.

Some bakers view time as an ingredient.  This is silly.  It is okay to have one cup of thyme, but not one cup of time.  Others, still, insist it is a procedural parameter, which it certainly is.  In a real-world environment, we all have busy lives.  There are only so many hours in the day, and this might dictate our baking schedule.  It is much easier to control time when it is viewed as an outcome, and not as an independent variable.

Fermentation is the change in the physical state of being from a dough and into bread.  There are simply so many controllable variables available to a diligent baker that she might be able to make two loaves of bread, both with nearly identical results, but with vastly different times it took to achieve that end result.  This tells us that time is irrelevant to understanding fermentation.

So, how to we better measure the physical state of our would-be bread?  What tools are available to us to better understand and measure the rate of metabolic activity, the degradation of the dough?  There are many methods already available to the baker (e.g., measuring pH, CO2 production, and so on).  What other data points can we find to build a better, more robust model?

And why does taking a long time by hand necessarily make something better?  Because:  there's simply more time to interact with the substance to be measured, and thus more available data points for an astute baker to collect (with or without her consciously knowing).  Good bread is not about time; it's about doing the right thing at the right time.  It is in our, the baker's, interaction, when and how we handle the dough, from which good bread emerges.

So, let's take our time and find more reference points.  Answer why and we discover how and when.

varda's picture
varda

Tis the Season for Pain Au Levain

I didn't do much holiday baking this year mostly because I have had my focus firmly on bread and flour, and the infinite variety that flour, water, salt, and yeast can create.   For my last post of the year, back to my learning bread - the bread that I made over and over and over again for a year before I went on to other things.   Of course what's the fun without variation.   This one is made with a mix of KA AP flour, White Rye, and High Extraction flour.  

The White Rye for reasons I don't understand gives oven spring a boost.  

The High Extraction flour, while containing a fair amount of bran, does nothing to reduce the lightness of the crumb.  

The crust is crisp and crackly.

I thank all of you out there for helping me to learn how to bake, and also for sharing all your wonderful creations.   Here's to a happy new year of baking in 2013!


Starter


Seed

52

1st feed

2nd feed

Total

Percent

KAAP

30

48

95

173

95%

Whole Rye

1

2

5

8

5%

Water

20

35

69

124

69%


306

5.8


Final

Starter


Total

Percent

KAAP

116

158


274

43%

Whole Rye


8


8

1%

High Ex

250


250

40%

White Rye

100


100

16%

Water

320

114


434

69%

Salt

11


11

1.7%

Starter

280


26%


1077


Starter factor

0.92


Mix all but salt and starter by hand


Autolyse 30 minutes


Add starter and salt


Mix various speeds in mixer for around half hour


note that 16g of KAAP were added during the mix


S&F on counter immediately after mix


Rest 10 minutes


S&F on counter  


Rest 10 minutes


S&F on counter


BF 1.5 hours


Cut and preshape


Rest 15 minutes


Shape into batards and place in couche


Proof for 3 hours


Slash and bake at 450 for 20 minutes with steam


20 minutes without


SylviaH's picture
SylviaH

One of my favorite breads and extra

Maggie Glezer - Tomcat's Semolina Filone 


I baked with family and friends for the holidays

German Christmas Biscuits/Cookies

These are soooo delicious, full of spicey goodness, coated with two different glazes and topped with sugar crystals for a little extra holiday shine.  I used my candied orange peel finely chopped instead of orange grated, which made a nice touch.  I will definately make more of these.  


Think Almond Roca

Took me a while to find this resized photo...sorry for the delay posting :)

May this New Year Coming be blessed for all.  

Sylvia 


Pages