You are going to LOVE LOVE LOVE this one…
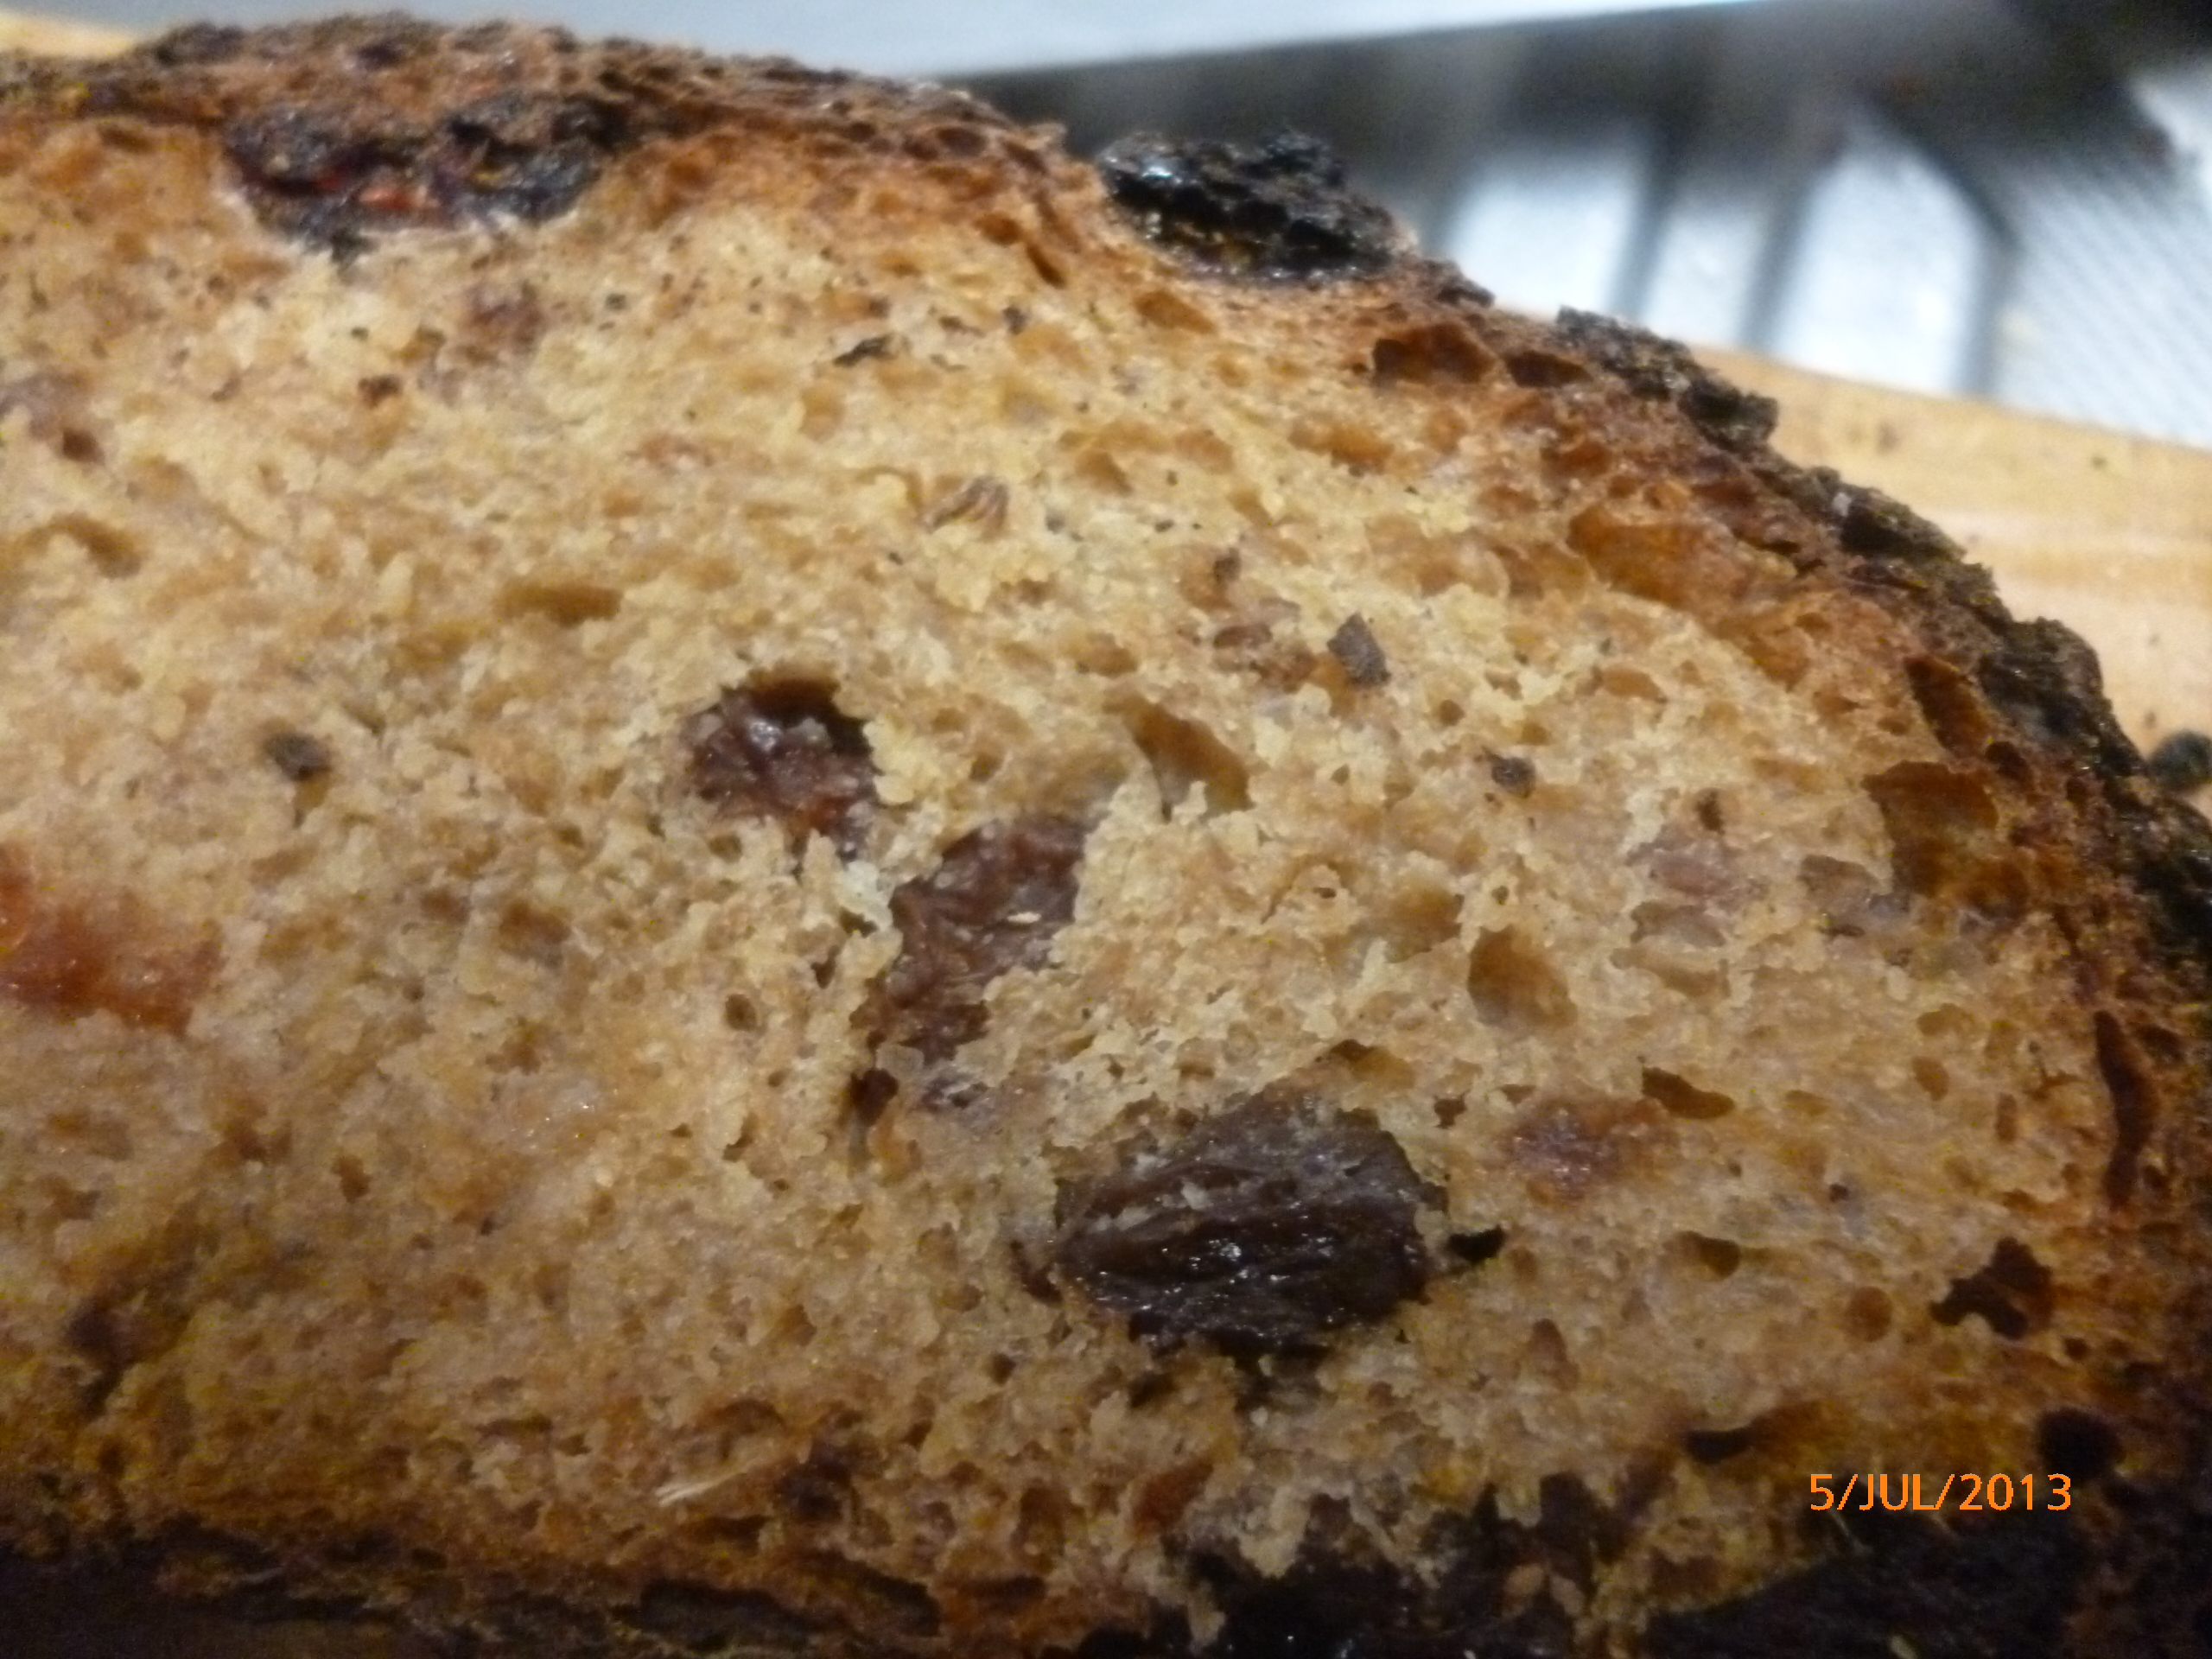
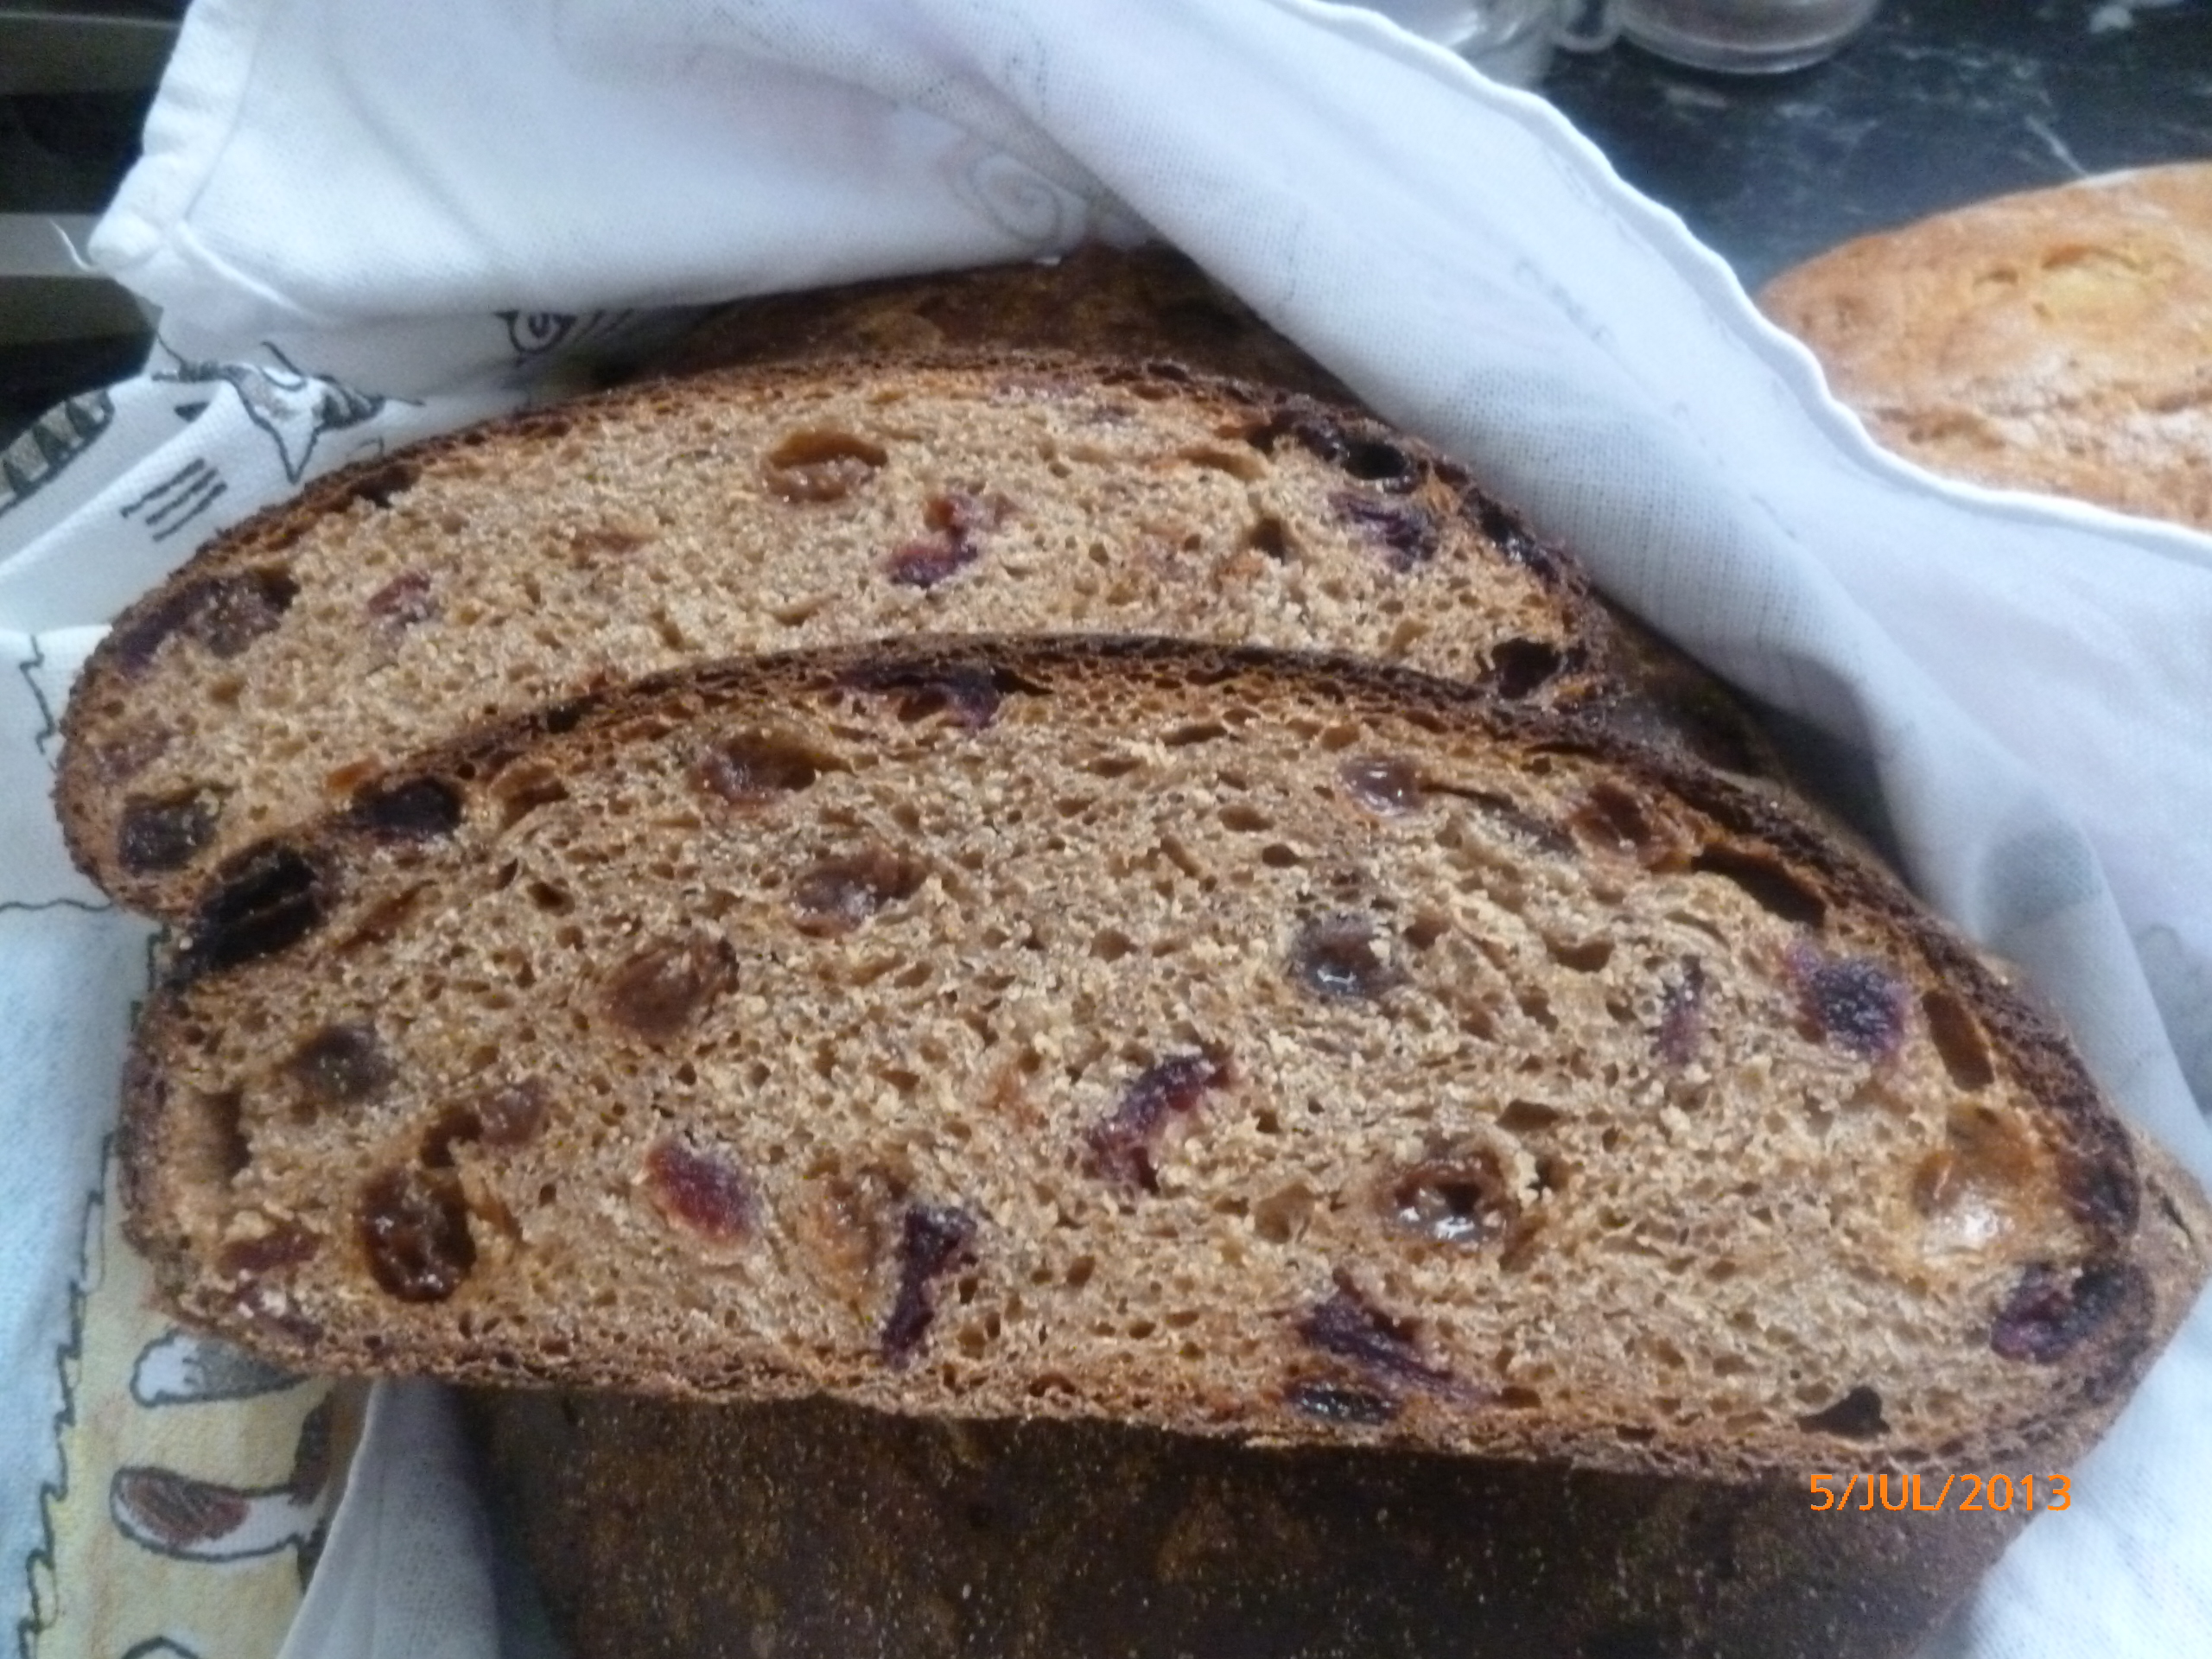
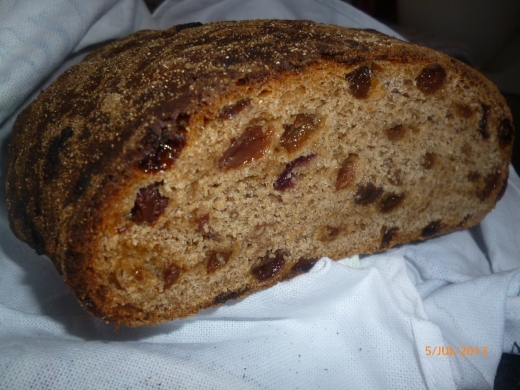
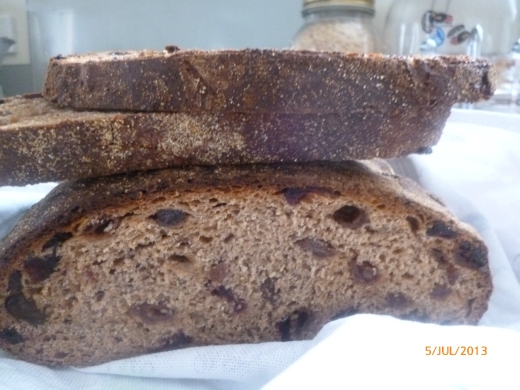
Very fruity
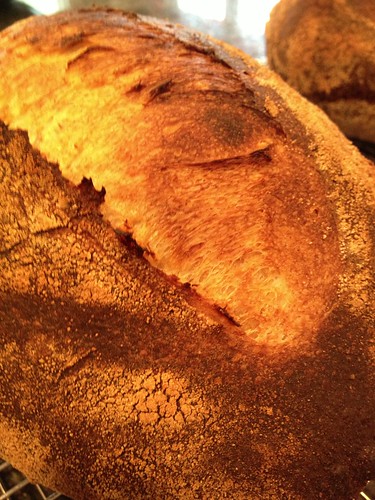
mmmmm Crusty!

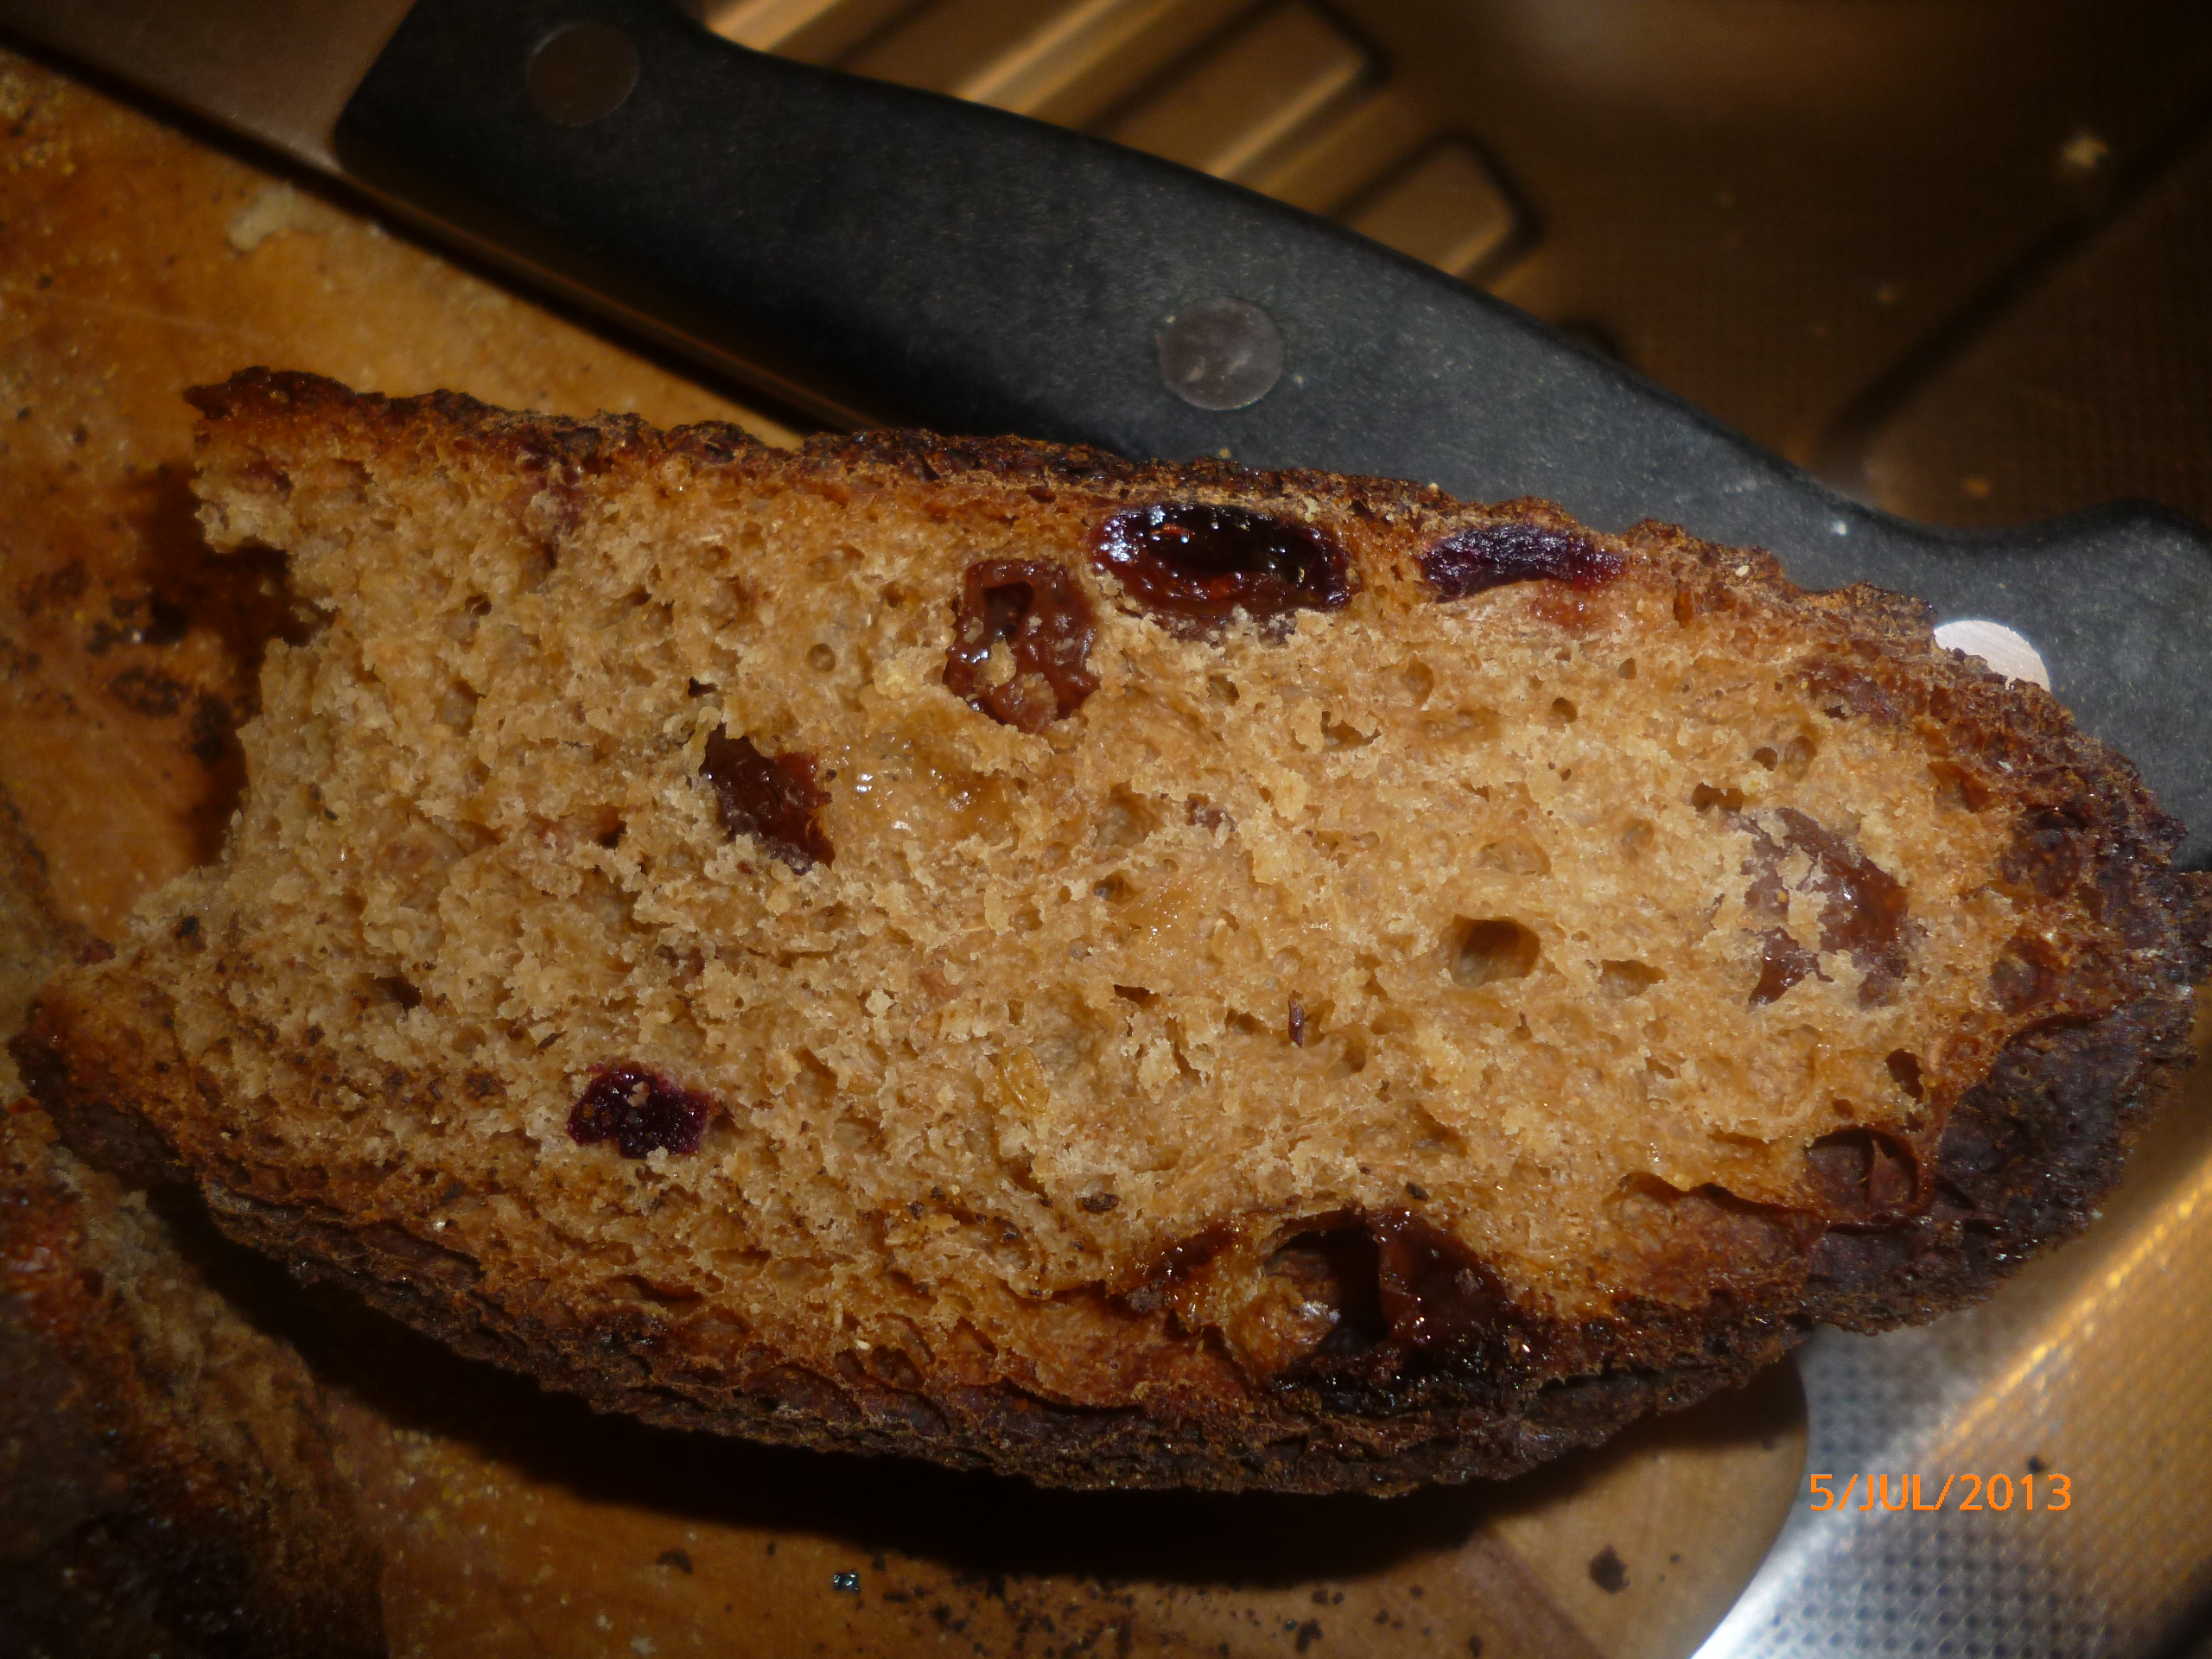
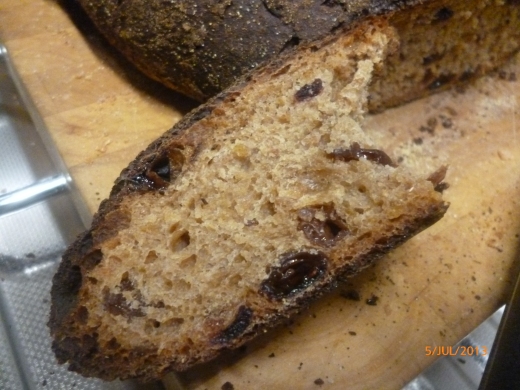
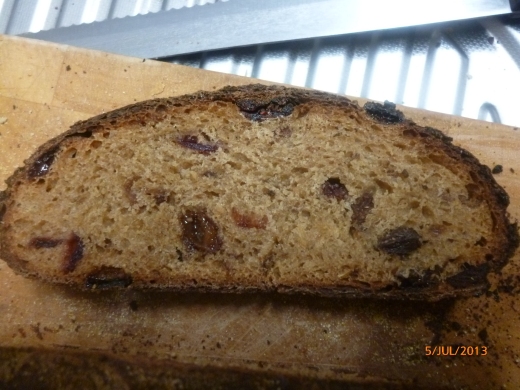
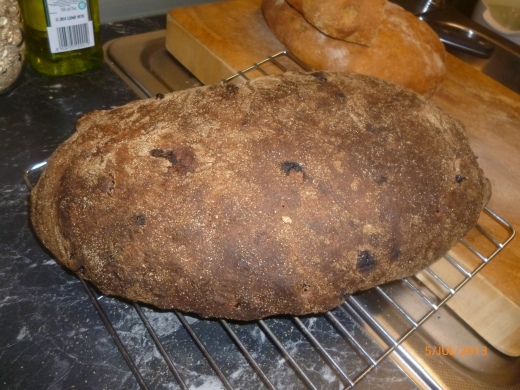
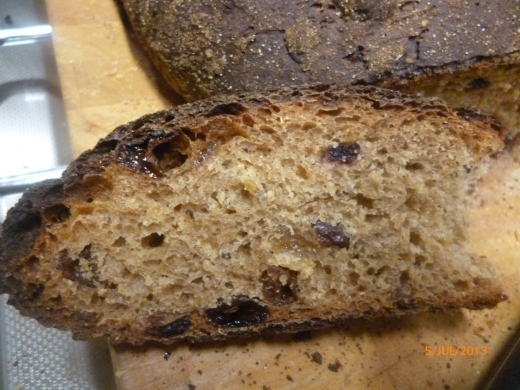
Look at the crumb!
I just love Rustic breads…
The crust on this bread is DIVINE….
Chewy but crunchy…lovely, multi layered.
Wait till I do the pumpernickel and Black breads!
The sours are brewing now:)
Rye a soaking:)
Give it to me!
Are you Ready?
2 cups of Wholewheat flour
2 cups of Strong Bread Flour
I good tbsp of Nev’s malt powder (fabulous and made in NZ)
3 tsp of dried yeast
1 cup of raisins
1/2 cup of cranberries
1 cup of sultanas
pinch of salt
1 and 1/2 cup of fruit water.
1/2 cup of molasses sugar (Billington’s is good)
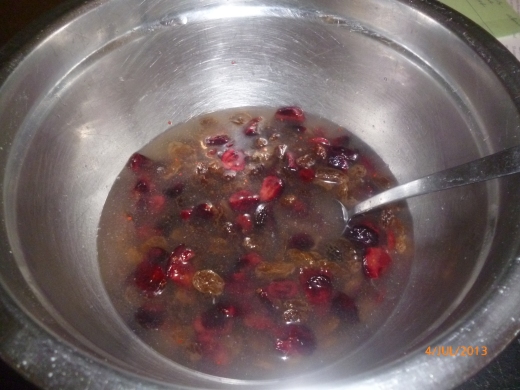
soaking the fruit…
What do you do?
Soak the fruit in a bowl and cover with 2 cups of warm water.
Leave for about 2 hours or do the night before and leave overnight.
Drain the fruit well and keep all the fruity water in a bowl.
Set fruit aside.
Slightly warm the fruity water and add in the yeast and stir well.
Allow to stand and become frothy- usually about ten minutes.
Put all your dry ingredients in a bowl (flours, salt,sugar, malt powder, aniseed) and mix through.
Make sure the sugar gets distributed well through the mix as it is quite moist and clumpy.

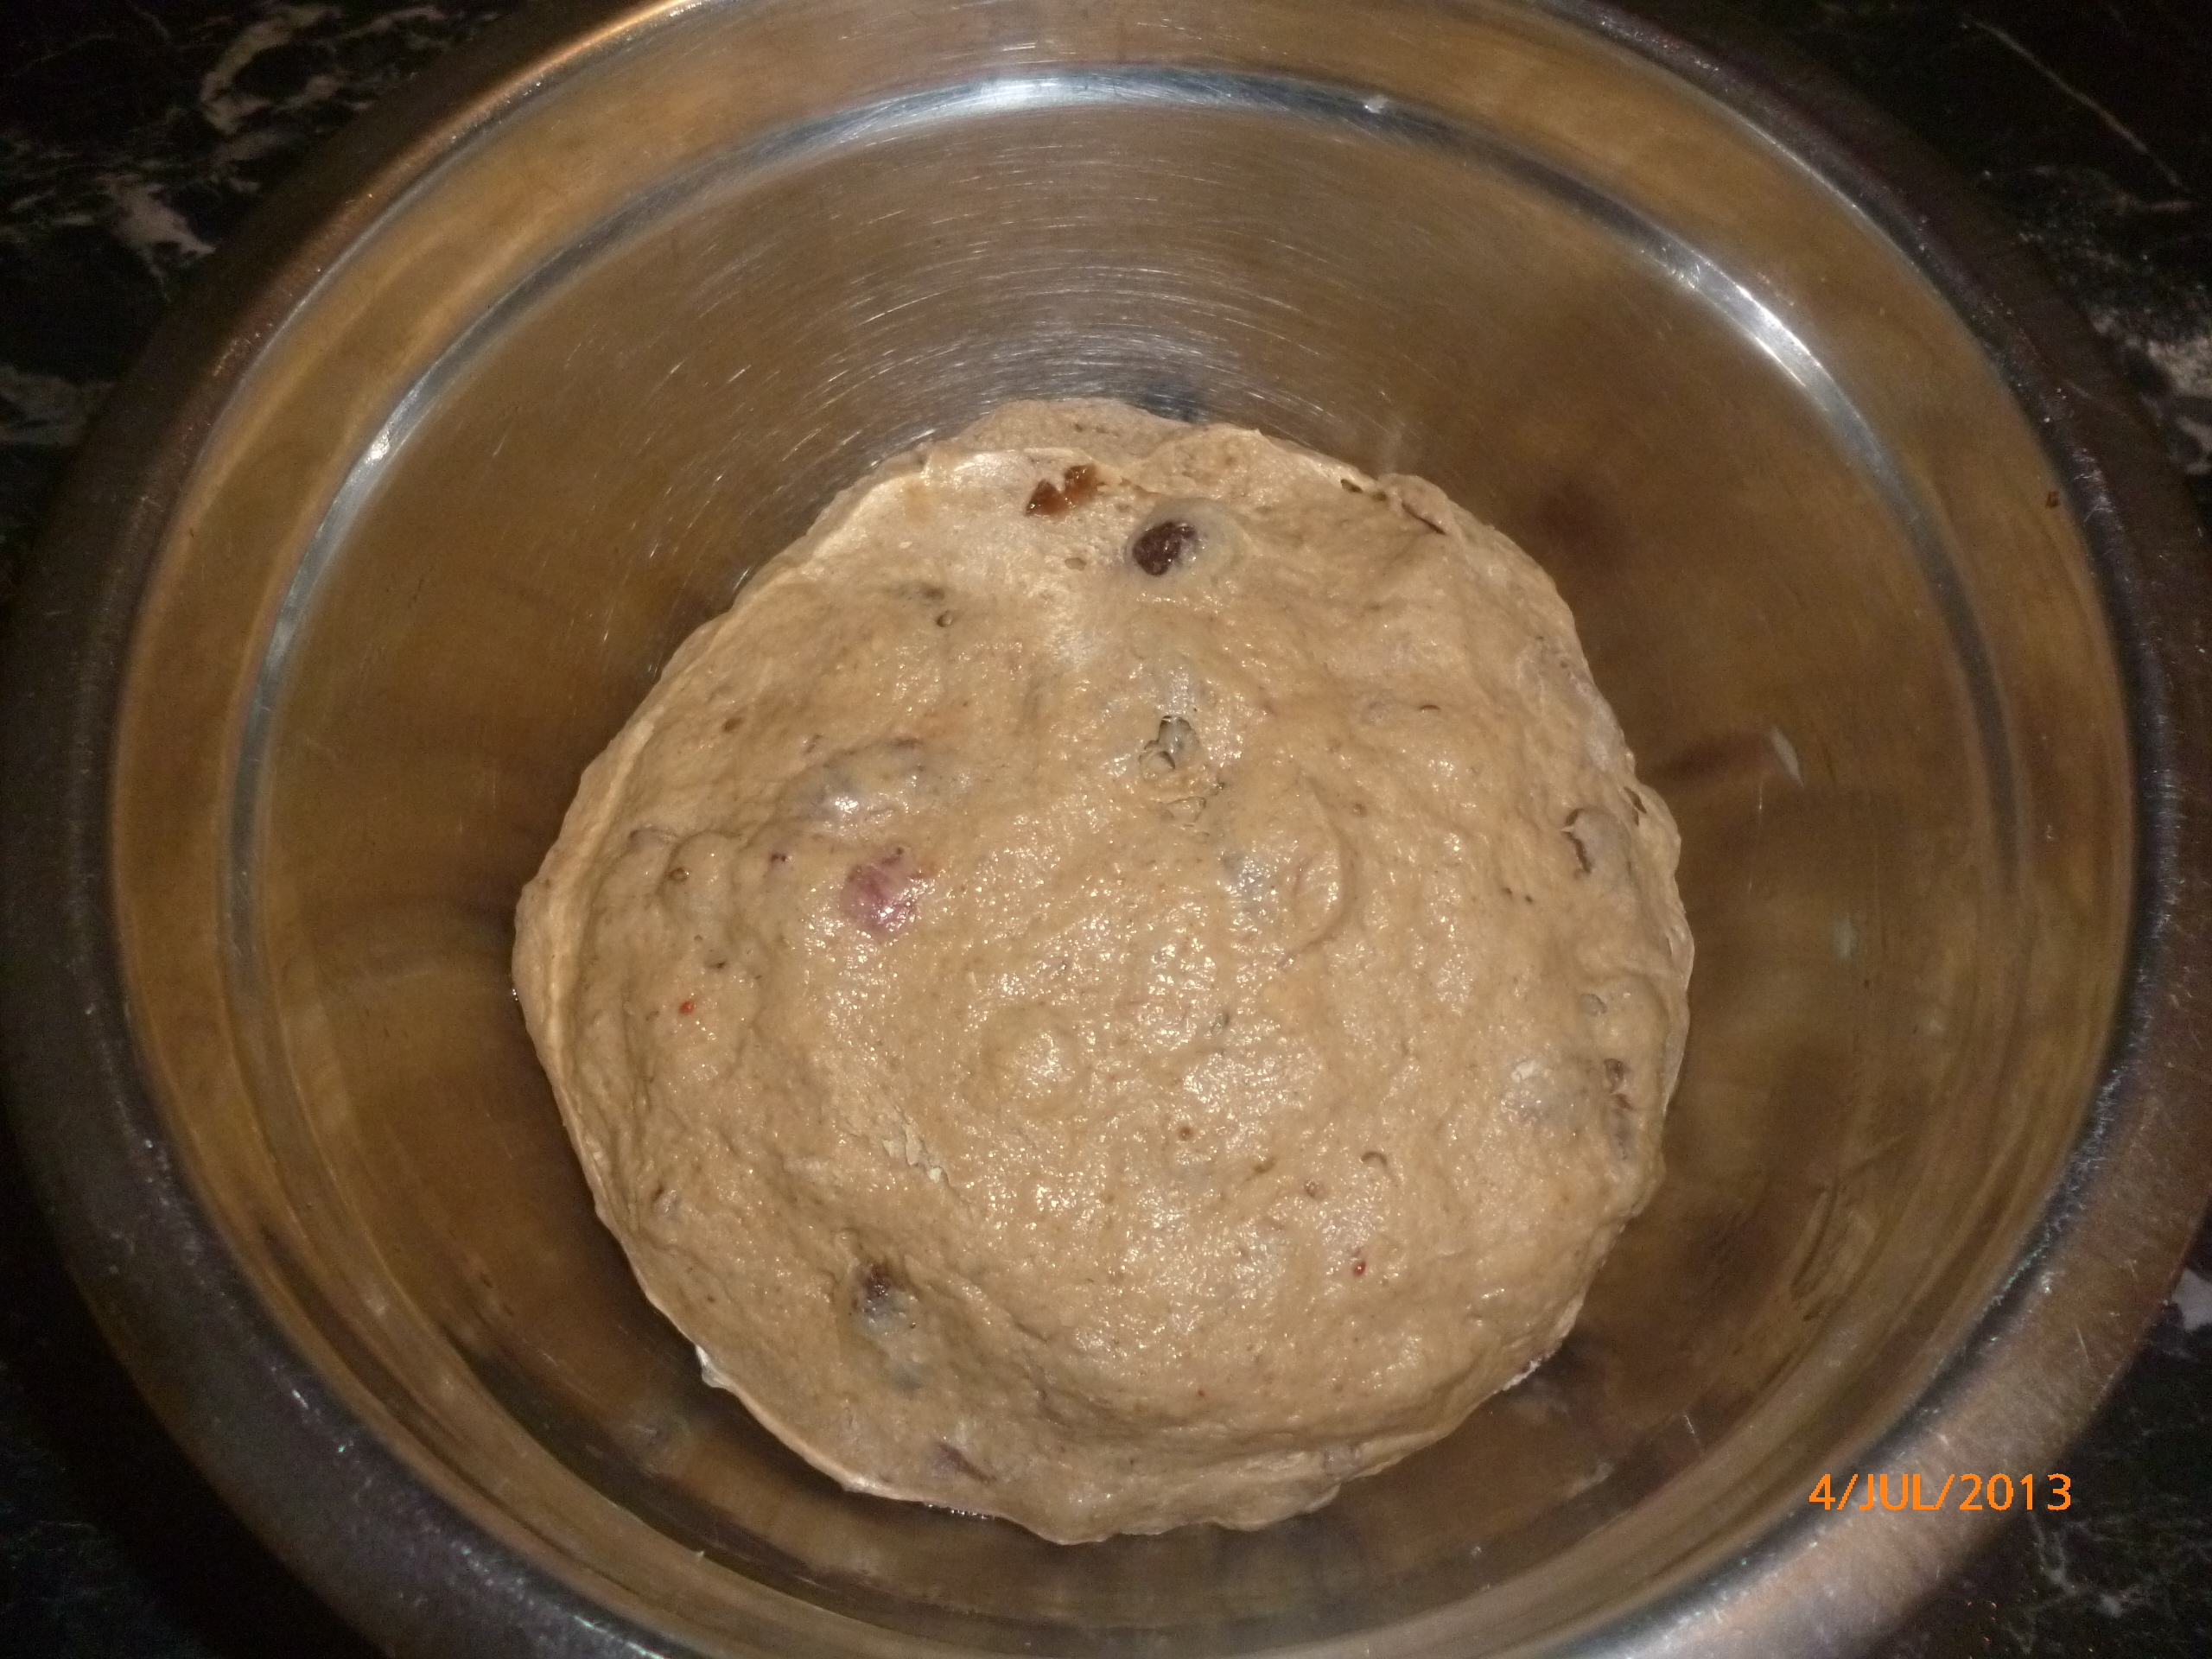
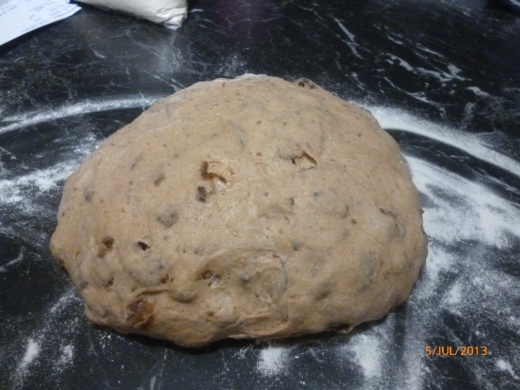
First prove…
Add fruity water to dry mix and form a soft dough..add a little more water if need be.
You want a nice moist dough because the whole-wheat in the bread can make it a little dry.
Knead for about 5-6 minutes until the bread is nice, smooth and elasticy.
Add in the fruit (lightly dusted with flour first) and knead through for a further 2-3 minutes.
Some time I do this after the first prove but in the few times I have done it at this stage lately, the fruit has not been damaged by kneading.
Place in a well oiled bowl, cover and leave to sit for 2 hours.
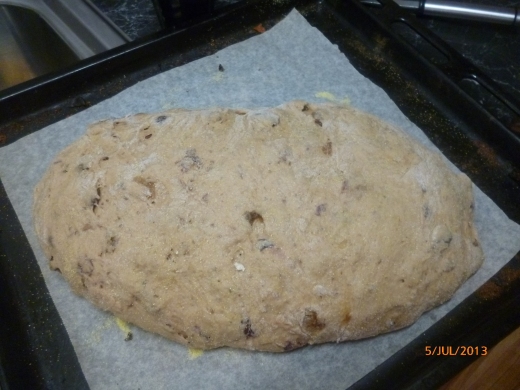
After first prove… slight rest before shaping…
Turn dough out on a lightly floured bench/board.
This dough is enough for 2 good sized loaves or a giant one as I made today.
I roll the dough into the shape I want, making sure it is nice and tight.
This one, I made like a oval.
Place dough on a baking tray with baking paper that has been lightly dusted with very fine polenta.
Cover and allow to rest for 1 hour.
resting before the oven…2nd prove.
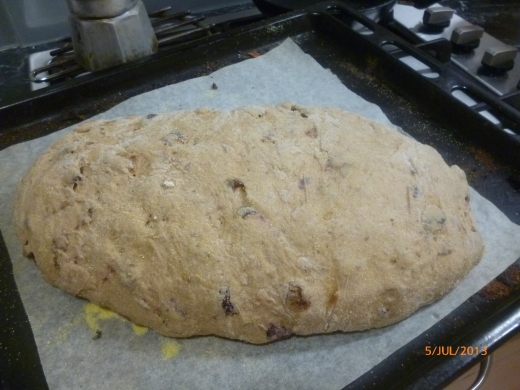
ready?
About 35 minutes before the 2nd proving is done, pre heat the oven to 245 Celsius.
Place a roasting dish or cast iron fry pan at the bottom of the oven so you will be able to create stream.
Why is this important?
The steam allows the outside of the bread to stay moist so it can expand and spring as long as possible..creating volume.
Once a bread hardens(crust forms) then you will get no further spring or volume:)
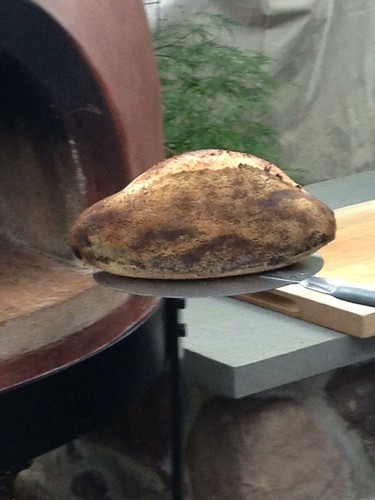
When proving is done, then place bread in the oven.
Chuck 2-3 ice cubes in your roasting pan and close the oven.
After 6 minutes, turn the heat down to 210 celsius and bake for a further 40-50 minutes depending on your oven.
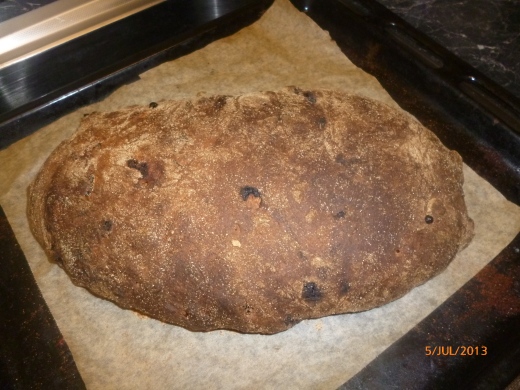
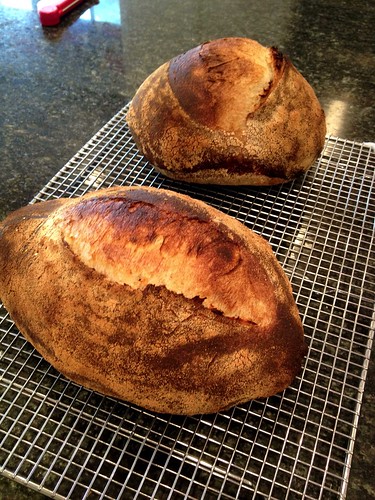
gorgeous!!
double crusty!
Remove from the oven and allow to cool on the tray for 5 minutes, then remove to a wire rack.
I would allow this to cool somewhat before diving in!!
You should have a lovely firm crust but still a little chewy…
You won’t even need butter or anything ….
I still think it will retain its moisture after a few days….
Lovely toasted and again without butter:)
But a smear of ricotta is heavenly!
This is such a gorgeous bread…
ENJOY, ENJOY, ENJOY.

FRUITY….
Crusty too…

lovely….

dig in…
the finale!!
Did you like this yeasty beasty?
Have you tried?
Gorgeous Tramvai bread?
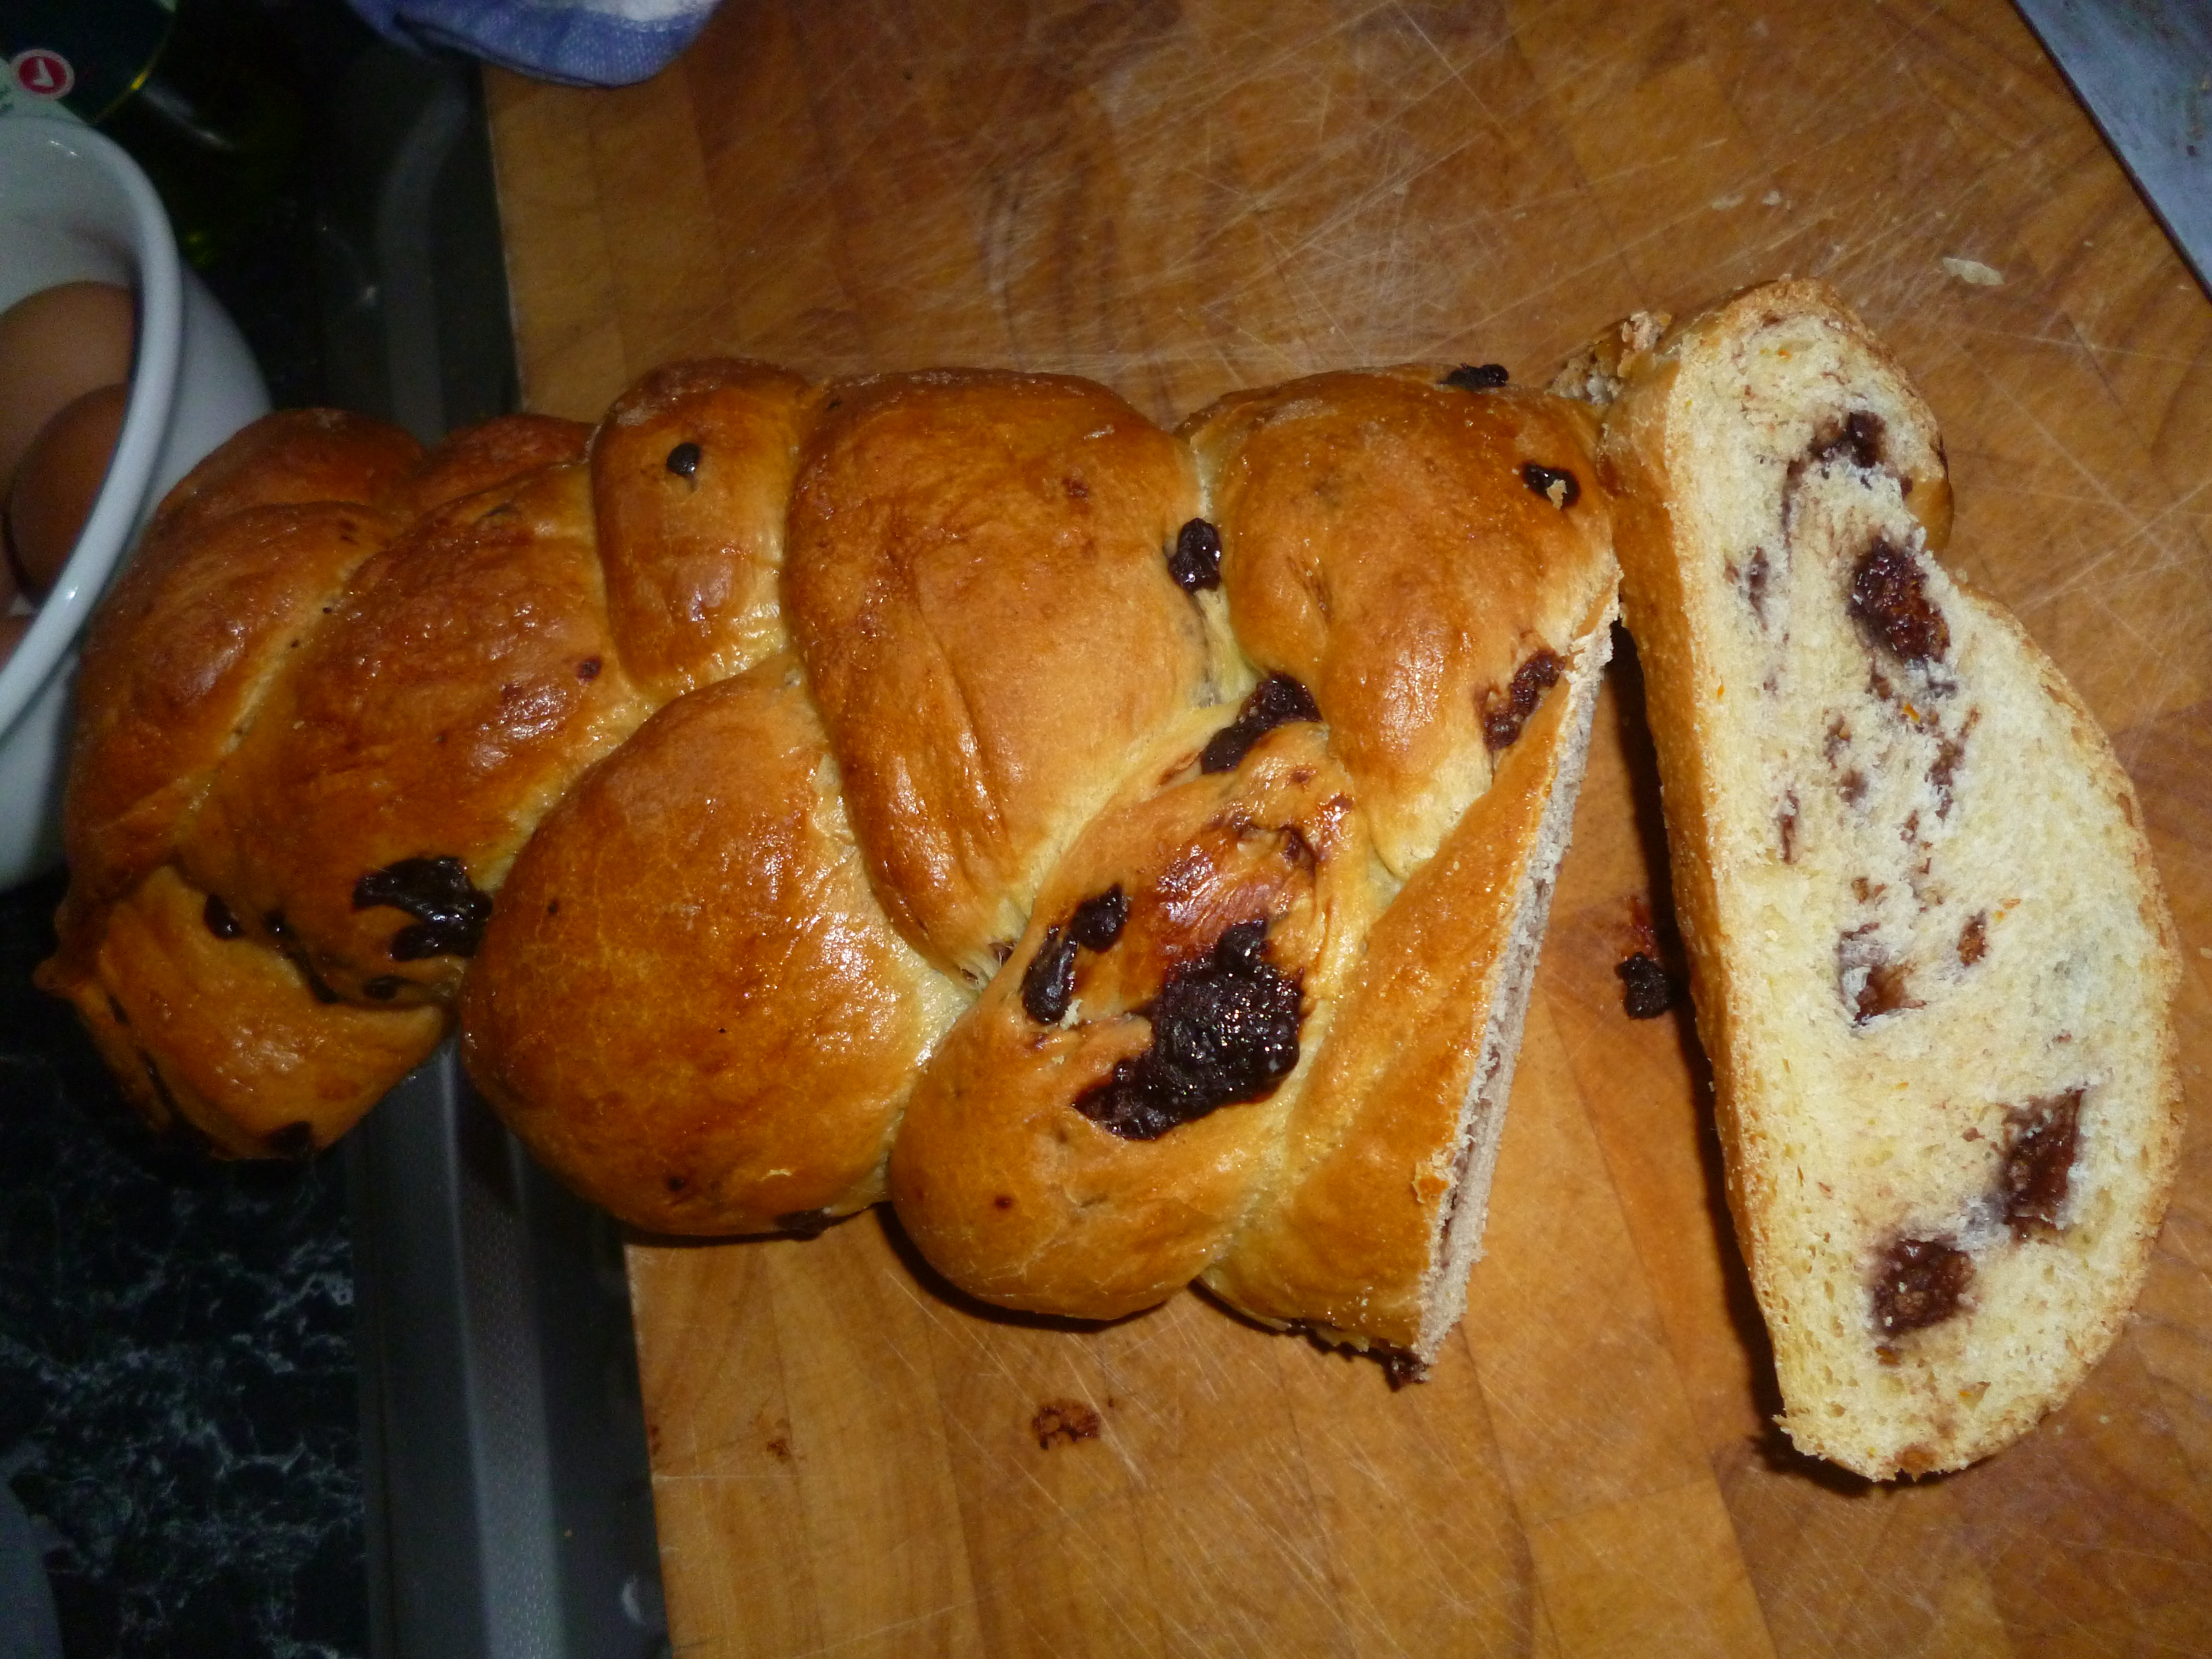
Tremendous Trecchia with orange and choccie!!
Buccellato ?
Don’t forget to get in and enrol @ the Greedybread evening classes starting in August, October and November.!
Or treat yourself for a Greedybread adventure?

treccia