The Fresh Loaf

A Community of Amateur Bakers and Artisan Bread Enthusiasts.

Most bookmarked

ichadwick's picture
ichadwick

Which of these books do you recommend?

I have several books stored in my Amazon cart, but don't want to buy them all at once, or get past my still-basic baking level. Which one or ones (up to three) do you recommend I get right away:

  • The Fundamental Techniques of Classic Bread Baking - French Culinary Institute; 
  • Crust and Crumb: Master Formulas for Serious Bread Bakers - Peter Reinhart; 
  • Classic Sourdoughs, Revised: A Home Baker's Handbook - Ed Wood; 
  • My Bread - Jim Lahey; 
  • Flour Water Salt Yeast: The Fundamentals of Artisan Bread and Pizza - Ken Forkish;
  • Peter Reinhart's Artisan Breads Every Day: Fast and Easy Recipes for World-Class Breads 
  • How to Make Bread - Emmanuel Hadjiandreou; 
  • Bread: A Baker's Book of Techniques and Recipes - Jeffrey Hamelman;
  • 200 Fast and Easy Artisan Breads: No-Knead, One Bowl - Judith Fertig;

 FYI I already have the Artisan Bread in 5 Minutes a Day and Reinhart's Bread Baker's Apprentice.

I have seen most of them in store, and my own favourites were the Lahey and Hadjiandreou books, because they lay things out in easy steps with lots of photos.

Skibum's picture
Skibum

Another blooming boule, Forkish style again

Total flour 300 grams, strong bread flour

Total water 231 grams

Sweet levain @ 100% hydration 25 grams

Yeast water levain @ 100% hydration 25 grams

Salt, 1 tsp or about 7 - 8 grams, should have spent the extra five bucks on the digi scale that gives me the decimal. .  I once again took extra care when pre-folding and folding the boule, making sure the full length of the fold was tucked in nicely.

the dough was proofed seam side down and baked seam side up.

I scored a crescent across the seam I thought most likely to bloom.

The crumb.


So I refreshed my yeast water yesterday and as bake s per dabrownman's directions and made some YW pancakes today with the 'spent' YW,  I also refreshed my sweet levain at the same time and left it on the counter also. 

YW pancakes

100 grams spent YW

100 grams bread flour

I left it on the counter overnight for yesterdays's mix and today's bake and had a massive amount of bubbling dough! This morning I added 1 egg beaten and mixed with 2 Tbs maple syrup adn 2 Tbs melted butter, 1/4 tsp baking powder and mixed it with the flour and YW. The mix took some doing, but when done I mixed in some fresh blueberries, fried it up in the same pan that fried my hone cured/ smoked bacon and YOWSER, some fine breakfast to celebrate myu first day skiing at Lake Louise!

Ahhh, topped with melted butter and real maple syrup.

I discarded the fruit this time. Next tie I will do something with the spent fruit

chera's picture
chera

Bakeable Cream for Danish

I need a recipe for a bakeable custard/pastry cream to use on Danish pastries.

Looking for one that will hold its shape, not "explode", or get completely absorbed into the pasty.

I've used several commercial ones that work great (Puratos) but I need one made from scratch.

If not available, any ideas on how I can keep the pastry "dented" so I can deposit the cream after baking?

varda's picture
varda

Fig Anise Bread

Recently a customer asked me to bake a fig anise bread.   She had bought a loaf from Standard Baking in Portland Maine, and loved it, but doesn't get up there often.   At first I was a little reluctant to go down this road, as I thought figs?   anise?   really?   but then decided to see what I could come up with.   A search on TFL revealed that there was just such a bread in Nancy Silverton's La Brea book.    As this has been on my list forever, I bought a copy, procured some dried black mission figs and anise seed, and put it together.   This morning I baked the loaf, cooled it and then dug in.   I have to say this bread is incredibly delicious.   The anise helps instead of hurts as I had worried.  The figs are absolutely decadent.   Sometimes it is good to listen to people (not always of course.)  

The crust of this bread comes out almost black.   Fortunately Nancy Silverton warns of this, or I would have thought I was burning the bread after only 30 minutes.   The only bread I've seen darker than this is Syd's squid ink bread.   But I didn't use any of that.

I must have read this somewhere on TFL as I'm hardly a gourmand, but this bread is just made to go with goat cheese.   What a treat.  

So two questions.   Has anyone been to Standard Baking?   (Karin?)    Any chance that this is the same bread as they sell there?    What is your favorite bread from  Silverton's book?   I can't wait to try something else.

Theresse's picture
Theresse

Are there any signif. differences between the 1980s DLX's and the new ones?

Hi there -

A very nice person loaned me his older style DLX (looks like it's from maybe the 80s and on the front reads DLX 9000 - or maybe it says 3000 - hard to tell).  So today I made a triple batch of cookies using whole wheat flour (and some white flour) and adding chocolate chips, peanut butter chips, pecans and almonds. :) Tomorrow I'll try bread.

My assessment so far is that a quadruple batch would be too much (not that I'd want to make that much!) but I think I heard somewhere the newer ones have a slightly larger capacity and can do quadruple batches. I did have to move the arm a few times to find a location that would make it so there'd be contact with the dough or else so that it wouldn't creep over the edge, so I sort of see what they mean when they say it needs some babysitting (it may be that all stand mixers do though...I've never used one before). I could imagine maybe wanting to go higher in speed when I used this older one, but not necessarily and I know the newer models have a bit more power.  I didn't like how because my fingers were oily from the batter, I had a hard time unscrewing the arm to move it (it would slip and I had to grab a paper towel to get it to turn).  Not a deal-breaker by any means.  I also noticed that at one point the dough was creeping up the scraper (!) but that's probably a learning-curve issue - something I was doing wrong.

Starting to make the cookie dough, I got the butter to room temp and used the roller to mix that with the sugar and that took a long time compared to if I'd used a handheld electric mixer or no doubt something like a Kitchen Aid.  Granted the newer ones have the plastic bowl with whisks so that might have been less of a pain to mix up the butter had I had that...but then I'd have to switch bowls once time to add the flour lest the whisk/paddle thingies break.  But e.g. with the Bosch, a separate bowl isn't needed - and having a metal bowl to do both kneading and mixing/whisking is an option.  I'm annoyed that the Ankarsrum forces us to use plastic (and also - I really wish they'd make a stronger cookie paddle so we could also make pie dough).  Oh and before I forget, someone told me to grate cold butter and add it to the flour that way, for pie dough.  Sounds like a real pita to have to do that though.  But that is one way that she said has definitely worked well for her re. pie dough.

As someone else mentioned on another thread, the lack of a dedicated on-off swtich on the older model at least (do the new ones have one?) was a PITA cause I had to either wait for the timer to turn off or else unplug the machine.  I assume they no longer make it that way?

When I made the speed faster or slower, I heard the motor sort of shift in sound each time consistently - like with a slight delay each time.  This is normal for this machine, yes? 

When I'd put all the dough and nuts and chips in the bowl tonight and the bowl was pretty full, I did feel like there was one point when I was pushing the motor (yikes - not my machine!) and I could swear I smelled some sort of mechanical subtle burning type of smell if you know what I mean.  LIke maybe the motor was getting hot?  But it may not have been used for years - not sure if that matters.  I guess my point here is that I've read over and over how nothing beats this mixer in terms of thick thick doughs and durability, but is that really true?  Are the extra watts on the new ones going to get rid of this problem (the feel like I was pushing it)?  I seriously hate the look of the Bosch (and that stupid blender tower everyone's always trying to hide in so many of the pictures, lol) but I didn't get the feeling it couldn't handle it from looking at videos anyway.

I have the question/concern that if this mixer takes a while longer to beat/mix everything up, is that a problem with some recipes that say not to over-mix or over-knead?  Maybe only an issue with pie dough? 

Lastly, I read a comment that someone who used the DLX/Assistent was used to making challah bread that came out dense and now since using the Assistent, it comes out light and fluffy.  Ok clearly that's a good thing but see for me, I get nervous every time I read people talking about the DLX making bread lighter.  Because I like it very dense and moist with a tighter crumb I guess you could say - at least when making sandwich bread and probably a few others.  Like Dave's Killer Bread if any of you know it.  Dense is a good thing.  E.g. when I eat fluffy cake, it's usually from a cheaper Safeway bakery type place.  When I eat heavy, moist, dense cake, it's from a higher-end bakery.  If I were to get an Ankarsrum (Assistent, DLX, Electrolux, Magic Mill, whatever you want to call it) - and don't laugh at such a stupid question - can I still have dense breads or will everything be super light and fluffy all the time?  Hahaha I know I sound ridiculous...

Thank you!!  

Oh one last question!  Anyone have any of those cool colors?

Aaargh - sorry so long!!!

golgi70's picture
golgi70

Olive Levain

Made with 35% fresh milled local Hard Red Winter Wheat (Hollis).  I miscalculated with the olives and after pitting came up short but proceeded.  I will post my formula but I'd double this for sure.  The addition of an herb could also be nice but my olives were a mix of three green varieties brined with garlic and oregano.  Had I used enough maybe I wouldn't need any herbs.  I'll find out next time around. 

Olive Levain:                              Makes two large or three smaller loaves                                                                                                                                         

Total Flour       1120

Total H20           813             72.5%

Olives                 150            13.5 %


Levain: 3-4 hours @ 72.5% hydration DDT 78F (20% prefermented flour)
90 Wheat Starter
180 Wheat, fresh milled
118 H20
-------------------------
421
-------------------------
Dough:
200    Wheat
32      Rye
663    Artisan (malted bread flour @ 11.5% protein)
650.   H20
150    Olives, herbed (a mixed variety of garlic oregano green olives)
16      Salt
---------------------------

1711

Total Dough = 2132   3 loaves at 705 or 2 loaves at 1066  

Drain and dry olives on paper towels when you make the levain. 

Autolyse 2 hours

Add levain and mix on speed 1 for 3 minutes 

Add salt and continue mixing on speed 1 until well incorporated. 

Turn to medium speed and devlop dough to medium development.

Add olives and mix until evenly dispersed.

Bulk ferment 2 1/2 hours with stretch and fold at the 30 minute and 1:15 minute mark

Divide, preshape, shape to bowls.  Retard for 8-12 hours

Bake 500 w/steam and turn down to 460 and continue for 20-30 minutes pending size of your loaf. 


JamieD's picture
JamieD

Two things -- Dough too liquidy and what is the importance of the seam?

Hi there,

I'm baking bread according to the tartine method and have gradually been getting better. My starter is healthy and can raise bread with half a tbsp of starter (after making a leaven of course). I know there are a lot of posts on the tartine method but I've gotten so frustrated recently that I felt i had to post something more specific to my actual situation. The main problem i'm having is that my dough is too liquidy and isn't getting enough surface tension to properly shape - it's the stickiest thing in the world!

This is a bit odd because i'm baking 85% white and 15% wholegrain, and at 71% hydration (the recipe in the book is 75!). I'm using allison strong white flour at 12% protein and am bulk fermenting/proofing at 78 degrees Fahrenheit. So I don't understand what's going wrong.

I know people say don't back off on the hydration and that I should learn how to "work with wet dough" but honestly this dough is IMPOSSIBLE to work properly - it sticks to counter whether it is covered in flour or oil, and it even sticks to my bench scraper. Every time I try to handle it and try to remove my hand/scraper the resulting tug distorts any shape i have tried to make. I have made do by scraping my bench scraper around the loaf in circles in order to build tension which works okay. And when it comes to after the bench rest I try to shape as suggested but the dough is so sticky that no real "seam" is created as the dough just merges (and by the way - why do we need a seam anyway?).

After proofing the dough is so liquidy if you shake the banneton it wobbles like jelly - hence when you put it into the pan it loses all shape.... The bread itself tastes nice but is rather ugly (as scoring is impossible) and flat. 

I'd really appreciate some help from you guys because this is getting incredibly frustrating.

Thanks a lot,

Jamie

mcs's picture
mcs

Homemade Proofer

This is a recent project of mine using plywood from a previous project.

Some of the details:
-1/2" hardwood plywood finished with glossy polycryclic
-1/2"x1/2"x1/8" angle iron runners on the inside
-1"x1"x1/8" angle iron on the top to put hot pans on as they come out of the oven
-xenon lights on the inside middle
-for humidity I put a damp towel on the griddle with the griddle set on 'low'
-this proofer holds 6 full size sheetpans with room for the bread to rise

There you go, let me know if you have any questions.

-Mark


This is the thermostat I got through Amazon with a switch for the lights below it.


The griddle is this cheapie from WalMart.

trailrunner's picture
trailrunner

Sweet Potato YW SD with pepitas

I have been traveling since Oct 5th. No baking but lots of eating of great breads from Canada to NYC ! I got home and found my YW and SD happily resting in the fridge. I fed everything and restored all to working order. I noted Ian's sweet potato bread and had an extra baked one so decided to try a variation using what I had on hand. Wild Yeast Blog has a formula from 2007 and I used it as a base to begin. http://www.wildyeastblog.com/2007/10/16/world-bread-food-day/. I used 200g AYW stater and 200g RYW starter each at 100% hydration and made up the rest with my SD 100% hydration . When Ian mentions "wet" sweet potato he is correct. The dough was like ciabatta for sure. I beat it in the KA like a ciabatta until I noted some gluten development. I then placed it in an oiled bucket for 40 min. removed and did a lot of s&f's with a floured counter and gingerly movements. Rested 50 min and did the same...had really nice development at this point and it had nice air bubbles. Divided in two and made no attempt to shape...simply sprayed the top with water and pressed on pepitas and tossed into floured cloth lined baskets seed side down. Proofed for 1 hr and the loaves had filled the baskets. Retarded approx 12 hrs in fridge. Baked straight from fridge as per my usual...500 preheated pans ,place bread in pots lower to 460 , bake 20 min and remove lids and bake 15 min til 210 degrees. Crust snapped and crackled. Amazing fragrance from the pepitas. Lovely crumb but no spring to speak of.Glistening crumb and very tender due to the YW. This is going to be served with a black bean soup tonight . RYW ready to go :  photo IMG_6695_zpse1a8a521.jpg AYW ready :  photo IMG_6696_zps117997ab.jpg "shaped" and seeds on ready for basket to proof:  photo IMG_6697_zps593635ac.jpg straight from fridge:  photo IMG_6700_zps267cefc7.jpg finished:  photo IMG_6701_zpsa15ce6fc.jpg crumb shots:  photo IMG_6702_zps0e9ad8ea.jpg  photo IMG_6703_zps5988ccb8.jpg  photo IMG_6705_zps64ff31a5.jpg

dabrownman's picture
dabrownman

What is the Best Thing You Can Put On Pumpernickel?

I’m not sure exactly but Pate Maison has to be one of them.  The great thing about Pate Maison is that it is true to its name.  As master of your house, you can put what ever you want in it so it is like your favorite loaf of bread you invented and like the best.


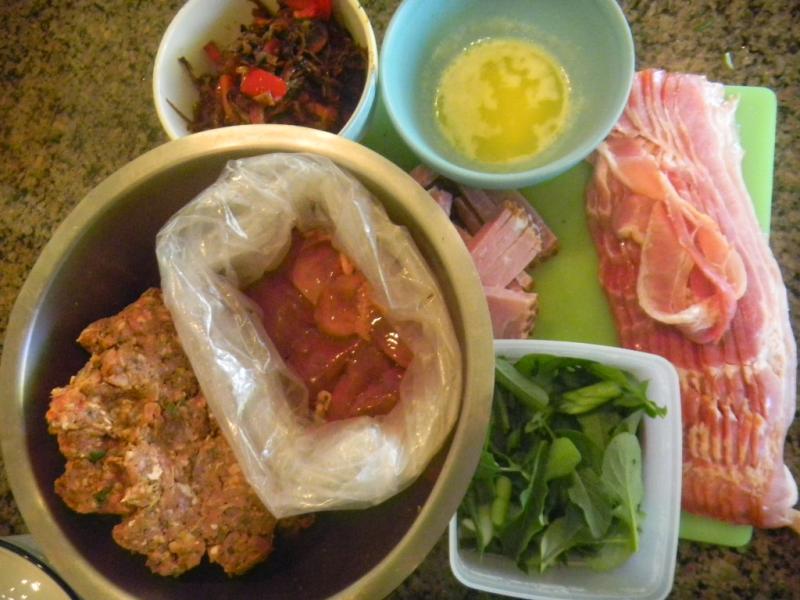
I only make this rich dish once a year, right before Thanksgiving, and it is a large one made in Lucy’s largest soufflé.  Before baking it weighs over 4 pounds, just in various sausages, bacon, ham, beef and chicken livers alone.


The other ingredients are a caramelized mix of 1 large onion, 8 oz of crimini mushrooms, 1/4 of a bell pepper, 1 small carrot and rib of celery all cut into cut into sticks.  The greens are a mix of parsley, 2 green onions and a little bit of arugula and chopped Swiss chard.


 A half a stick of butter is used to sauté 3/4ths of the 1 pound 4 oz of chicken livers in (3minutes only) with some thyme and 2 tsp of pepper and 1 garlic clove.  Cut; 8 oz of your favorite ham  into sticks and 2 hard boiled eggs cut in half.  The sausages were 8 oz each of fresh; Mexican chorizo, hot Italian, beef boudin, andouille and pork country breakfast all home made.


You hold back 1/4 of the ham sticks, 4 chicken livers that are uncooked and chopped in half and the eggs so that you can decorate middle of the pate so when sliced it is a stunner visually.  The remaining bulk of chicken livers are liquefied in a food processor.


To assemble you mix, the caramelized onion  and mushrooms, red bell carrot and celery sticks, green onion, arugula parsley, Swiss chard,  3/4 ths of the ham sticks and the liquefied sautéed chicken livers in with the sausages with a large heavy spoon along with 2 T of brandy and 1 T of dry sherry. 


Line the soufflé with the 12 oz of smoked bacon slices making sure they are long enough to cover the top when the soufflé is full of pate.  Put half the mix in the bottom and then decorate the middle with the reserved egg, ham sticks and raw chicken livers and then cover with the rest of mix and fold over the bacon to cover the top.


Make sure to place the covered soufflé (I have a lid but you can use foil) in a jelly roll pan to catch the copious amounts of fat that will be rendered as it bakes at 350 F for 2 1/2 hours.  Take the lid or foil off with an hour to go to brown the bacon on top.


As it cools put a plate on top and turn the soufflé over squeezing out as much fat as you can. Then leave the pate on top and weigh down with something heavy, I used large enchilada sauce cans.  When cool, keep the weight on and refrigerate overnight.


Un-mold after 12 hours in fridge and cut the huge pate into 8 wedges and freeze them to be ready anytime during the Holidays!  Now if Ski was like me he would take half to the smoker for an hour of smoke just to put the cap in the bottle and have a different pate to choose from!


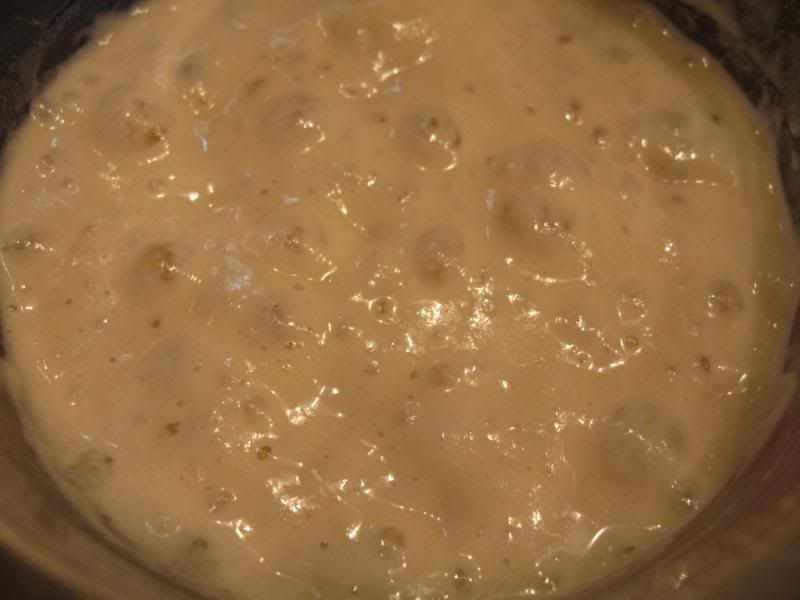
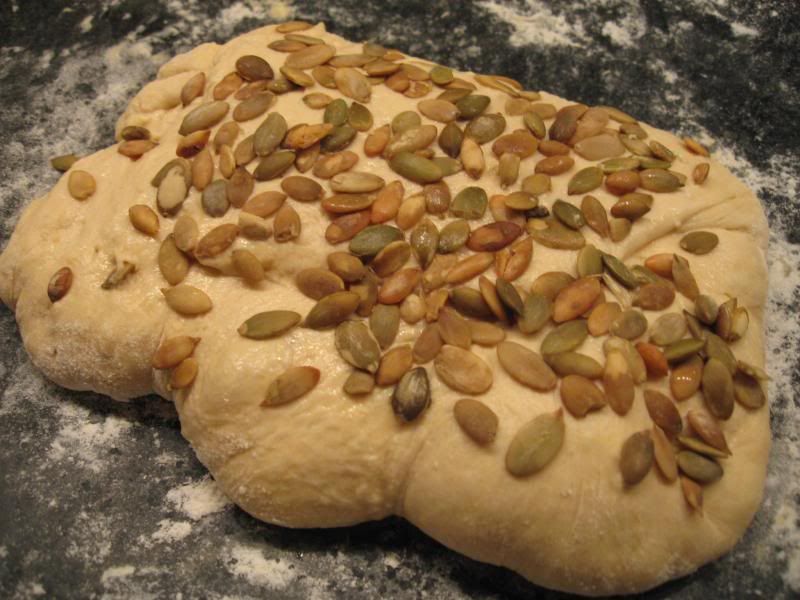
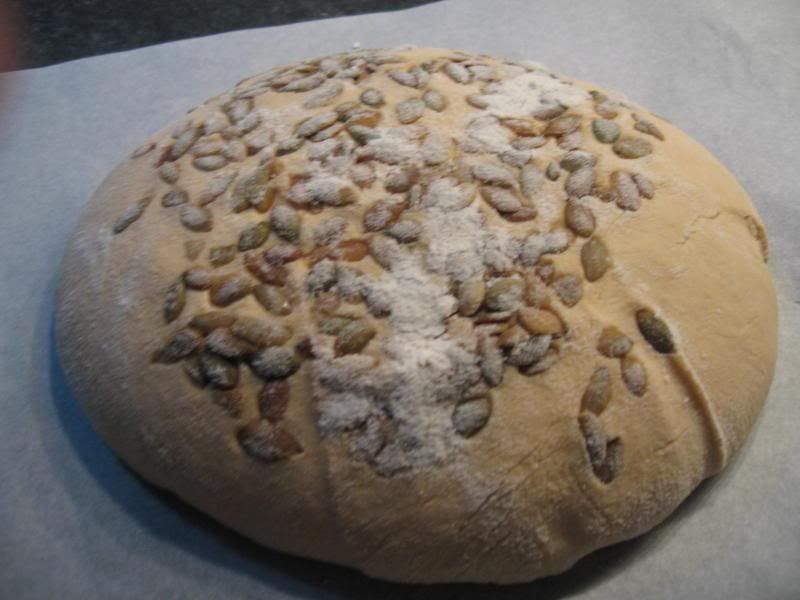
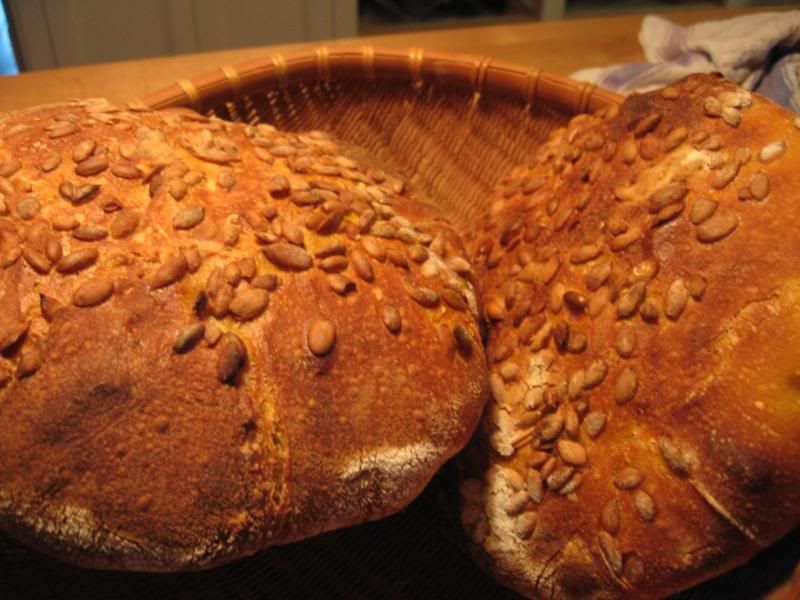
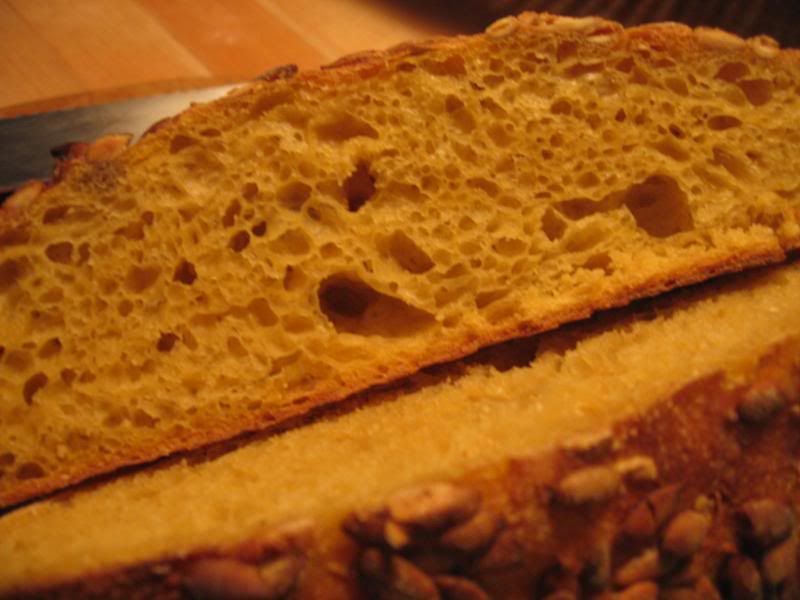
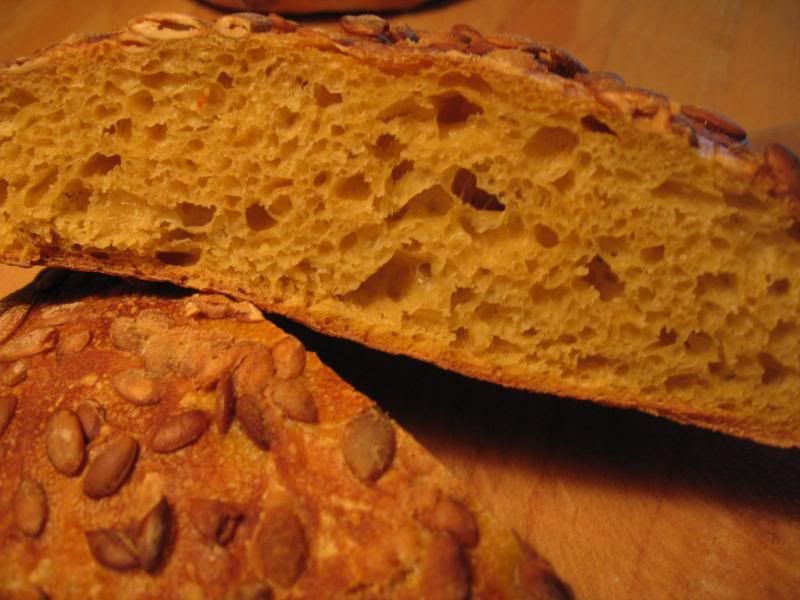
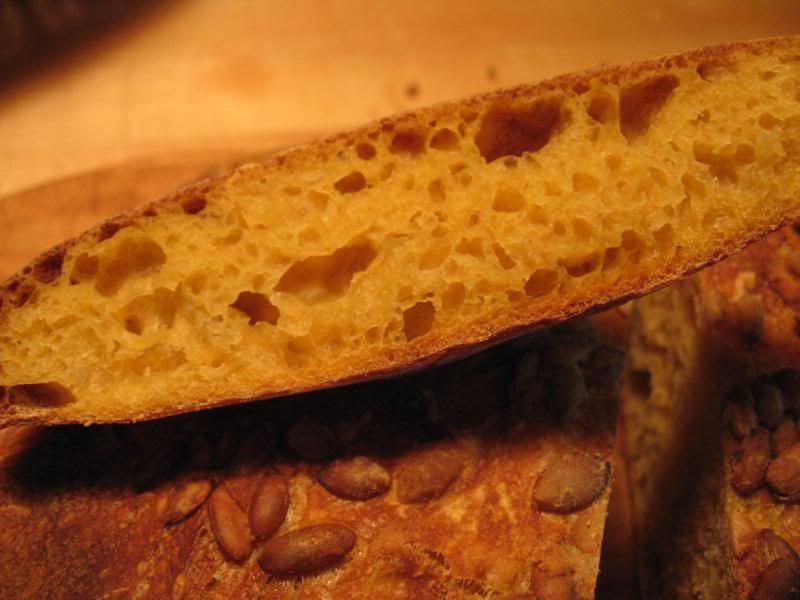
 My favorite topping for my favorite bread - it must be close to the holiday season for sure!  Happy Holiday Baking!

 And yes.....You can have it for breakfast if no one is looking!  The innocent looking lunch has a sandwich what I am sure is even illegal in Canada - A Pate, Pastrami, Pumpernickel, Paddy Melt with Brie.  It might be the most delicious sandwich Lucy has dreamt up lately - certainly the most decadent.

Pages