The Fresh Loaf

A Community of Amateur Bakers and Artisan Bread Enthusiasts.

yeast water

dabrownman's picture
dabrownman

I love the smell of this bread. This is what makes it so alluring and eventually delicious. Stunning toasted. I cut the recipe in half.  My Mandarin, Minneola, Apple Yeast Water (don't ask) was used to build the levain over 2 days with 12 hour feedings.  It was eventually ready at 250 g and I used a like weight of flours but added 5% WW and 5% spelt to the 5% rye and lowered the white flour a like amount.  I had a 5 hour bulk ferment with 3 S&F's at each of the first 3 hours and a 9 hour retard with a 4 hour final proof.  The bulk and final proofs could have each been 2 hours longer but I got impatient and the rise was not a high as it could have been.  This is a very fine bread with open crumb, chewy texture, aromatic and  delicious.  The varied citrus YWwent went well with the Minneola juice that was part of the liquid for the dough.  It was great to be able to find a bread where the YW was so perfectly matched to it.  Lucky indeed.  I will make this bread often - and be more patient....... since patience comes to those who wait ........a long long time.

My lentil soup used homemade chicken stock and the leftover caramelized onion and smoke pork jowl from isand66's bacon, cheese and onion bread I baked this morning. I also added some whole Thai chilies for heat. No chicken required because of the hog jowl.. The soup was so simple and delicious. A perfect foil for the beautiful yellow bread. A very fine combination. Thanks Shiao-Ping

varda's picture
varda


Over the last few months I've been trying to bake bread with yeast water and found it challenging to say the least.   However the taste of these breads is so wonderful and the prospect of lovely open crumb so enticing that I keep coming back to it.   I have made a number of adaptations to keep the yeast water from consuming the dough before baking (from aggressive enzyme activity) that seem to be working.   At the same time, I've been trying to learn how to use my WFO.    For the first many bakes, I was plagued by pale doughy crust.   At first I attributed it to the tight seal on the oven door which wasn't allowing the crust to develop.    But tipping open the door for the last half of the bake didn't help.   Then I got an infrared thermometer, and finally realized that I wasn't getting high enough temperature in the oven to start with.    So the bread was baking at a low temp that wasn't high enough to finish the crust.   I insulated the top of the dome which had the highest heat loss, sharpened my fire building skills and went back to work.   Yesterday I was  successful beyond my wildest dreams.  Ok.   Not really.   I incinerated two loaves of whole wheat Pain au Levain that never did me any harm.   Too hot.   Way too hot.   It's one thing to have a good thermometer.   It's another thing to know how to use it.   Today, I made a number of adjustments and got only a too hot oven - rather than a way too hot oven.   And baked a yeast water loaf.   Since the oven was too hot (floor at around 650F) it expanded too fast for its own good and baked too rapidly.   But I did start to see a hint of the crumb I've been looking for.    Onward and upward. 

Yeast water loaf with oven in the background. 

Not like Akiko's yet, but I'm getting there (I hope.)

I prefer charred crust to the pale doughy stuff I've been getting but I'm still not the master of oven temp.

Updated with formula and method:

8/19/2011    
     
Yeast water9362%  
KABF150   
     
8/20/2011    
 FinalStarterTotalPercents
KAAP500 500 
KABF 150150 
Yeast water 9393 
Water362 36270%
Salt12 121.8%
Starter243  23%
percent yeast water   20%
   1117 

Night before mix yeast water and flour and leave on counter overnight (around 10 hours).   Next day mix all ingredients but salt and autolyze for 1 hour.   Add salt and mix for 4 minutes in stand mixer at medium speed.  Bulk fement for 2.5 hours with first stretch and fold in the bowl and second on the counter.   Shape into boule and place upside down in lined basket.   Proof around two hours until soft.   Slash and bake in WFO for 20 minutes at high heat (over 650F)  - crack door open after first 10 minutes.  Leave another 5 minutes in oven with door open to bring internal temperature up to 210F. 

A few points:  I used King Arthur Bread Flour in the starter to have enough gluten strength to counteract the high enzyme activity of the yeast water.  I also used a fairly low hydration starter (62%) for the same reason.   The dough was quite wet after the mix and required an aggressive in the bowl stretch and fold to develop.   That worked.   For the second stretch and fold I was able to stretch it out on the counter.   When I removed it from the basket it sort of flopped out in all directions.   However when it went into the oven it sprang up immediately - probably due to the high heat.  I did not use steam in the oven and perhaps if I had the cuts would have opened up better.  

jyslouey's picture

Gregoire Michaud, pastry chef and author at the Four Seasons Hotel and his yeast water

August 5, 2011 - 9:21pm -- jyslouey

method to make his sourdough for the hotel bakery.

I have been following his blog recently mainly because he is also using the much talked about yeast water to make his sourdough,  very similar to the multi-levain builds that I have learnt from TFL.  I'd very much like to share this with those who are interested in baking with this method.  I am surprised to learn that fermentation with the aid of yeast water is done in hotels and not only for home bakers as I understand this to be a very lengthy process and not a practice frequently used by commercial bakers.

varda's picture
varda

Last year, I built a WFO platform and hearth,  and a dome out of sandy dirt that I dug up from a pile in my yard.   I had hoped (and convinced myself) that there was enough clay in the dirt to make the dome hold together.   That was not the case.   The dome slowly crumbled over the course of the summer.   I patched it up and patched it up again and finally wrote it off in the fall.    Amazingly the platform survived intact through a very difficult winter.   This summer I decided to build a new dome using real instead of imagined clay.    So I bought fire clay from a potter's supply and with help from my husband mixed up 600 pounds or so of clay, sand and water and built a new dome.   Then my husband, who finally took pity on me taking on a project like this with no building skills whatsoever, decided to make me a good door.   He built an offset with the leftover clay/sand mix which perfectly fit a door made of thick plywood.   This morning after waiting forever for the oven to dry, it was time.   I fired it up (and up and up and up) and finally loaded it with a loaf of bread.   After 30 minutes, I checked it, and the loaf was pale, so I closed the door and let it bake for 15 more minutes.    

The loaf was still pale, but I checked the interior temperature and it was 210degF.    Then I paced around in the yard pulling weeds and thinking this over, and finally figured out that the door was so carefully fit that no steam was escaping from the oven at all (I didn't add steam but there is plenty of moisture in the dough) and the crust simply hadn't baked even though the bread had.   By that time I had opened the door so much that the heat was way down, so I took the loaf inside and baked it for 15 minutes at 450 to brown it up.    I certainly didn't have this problem last year, when the door was just a piece of plywood leaned up against the opening with plenty of room for steam (and heat) to leak out.   Fixing this isn't as easy as you would think - the door is fit so tightly (and the bottom beveled so that it's flush with the hearth) that you can't just move it over a bit.   Undoubtedly a precision venting system is now on the drawing board.

But anyhow, the bread.   I decided to go back to yeast water, since I didn't think I had much chance for success today, given that i was just getting to know the oven.   I continued reducing both the hydration of the yeast water based starter and decreasing yeast water as a percentage of total water.   I also interpreted an earlier post by Andy (on enzyme issues in high ash content flour bread) pointed out to me by Juergen Krauss and added salt with the first mix instead of autolyzing.  All this seemed to get the enzyme problems I've been having with yeast water doughs under control.   But perhaps not completely so, as you can see below.   But (as seems to be a feature of yeast water) this is a delicious bread and more successful than I expected under the circumstances. 

varda's picture
varda

Over the last month or so I have been chasing the elusive yeast water open crumb.   I was working under the theory that one could replace a regular poolish with a combination of yeast water and flour and then bake as usual.   This ran into some technical problems - namely aggressive protease action.   In trying to figure out how to respond to this, I came upon the following enlightening sentence in Hamelman: "Protease is an enzyme whose function is to denature protein, and in a loose mixture like poolish, protease activity is relatively high."  I think this means that protease is generated by yeast as it tries to digest (i.e. denature) the proteins in flour and that in a poolish environment at 100% hydration and with an unknown quantity of yeast in my yeast water  that I was overdoing it.   This time, I pulled back on the amount of yeast water and the hydration of the poolish but not on the hydration of the bread.    The result was much better.  

I have still not got the cuts to open as I would like, but I am quite happy with the flavor which has a lot of depth and somewhat happy with the crumb.   Suggestions for improvements are most welcome.

Formula:

7/5/2011


Final Dough

    Poolish

     Total

  %

KAAP

500

150

650


Yeast water


120

120


Water

340


340

71%

Salt

12


12

1.8%

Poolish

270


23%


1122


Method:

Mix yeast water and flour night before.   Leave on counter for 12 hours.   Add flour and water for final dough and mix to develop dough.   Autolyze 1/2 hour.   Mix in salt and mix again.   Ferment for 30 minutes, then stretch and fold in the bowl.   After 30 minutes stretch and fold on the counter.   Gather dough together and do a loose shaping.   Do a third stretch and fold after 30 minutes and another shaping.   Let ferment for 30 more minutes.   Cut in half and preshape.    Rest for 20 minutes.   Shape into batards and place in couche.   Proof for just over an hour.   Bake for 20 minutes at 450 with steam, 25 minutes without. 

A few notes about this.   The dough was quite liquidy until the first counter stretch and fold when it came together pretty nicely.   This was despite two 3 minute mixes in a kitchenaid at progressively increasing speeds.   It was difficult to slash because it was quite sticky and the blade got caught.   

RonRay's picture
RonRay

Light Rye, Caraway, and Emulsified Raisin
Yeast Water Loaf

 Updated: 110615-1100 Added Summary Table of the 3 loaves at the very end of this blog

For the initial two loaves,
see these link:s:

http://www.thefreshloaf.com/node/23945/emulsified-raisin-yeast-water-loaf
http://www.thefreshloaf.com/node/24010/replication-bake-emulsified-raisin-yeast-water-loaf

  This loaf combined light rye flour and caraway seed with emulsified raisins in the Raisin Yeast Water (RYW). I also made the overall development come very close to the initial loaf's 105 hour development timing, about 106 hours. However, rather than a 45+ hours final dough retard the major retardation was done with the Build-#3 of the 3-build RYW Levain.

  This loaf, was baked primarily to test two points: Firstly, was the prolonged final rise a result of the newness of the culture in the initial loaf's levain, or was it the extended retardation periods that most caused the slower final rise?  Secondly, how well would the emulsified RYW flavors work when combined with rye flour (and caraway seed, of course) ?

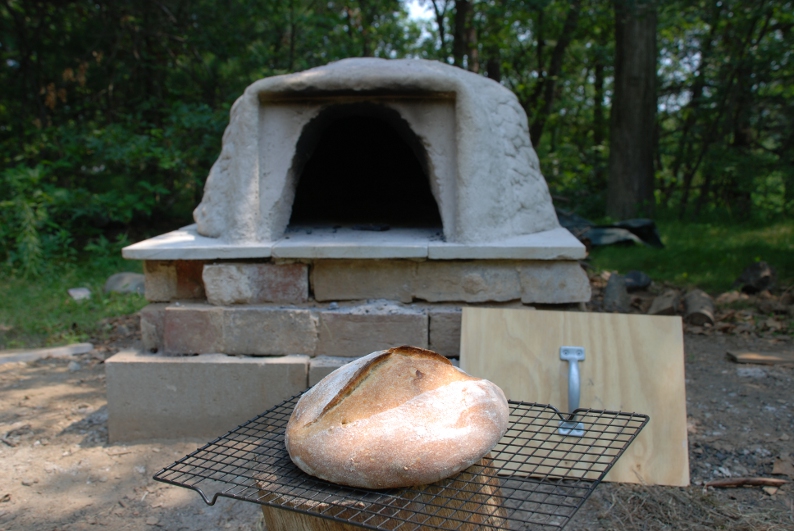
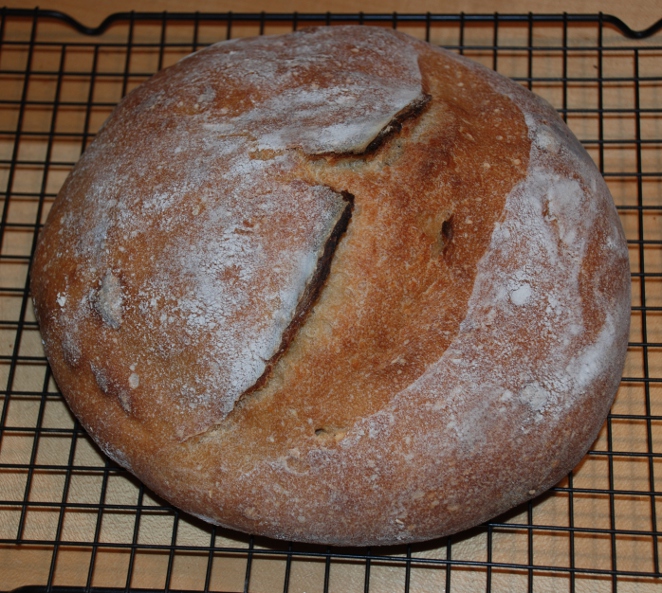
  Oven spring was comparable to both previous emulsified RYW loaves, as was the darkness of crust - although, the longer development loaves (this and the first) may have a slightly darker crust, but if so, it is marginally so.
  The two longer development loaves also did develop a more full bodied flavor, but even the short development loaf (second loaf) had an above average flavor – at least in my opinion. 

   The first and (this) last loaf had development times of 105 and 106 hours, respectively, from start of Build-#1 of the 3-build levain to the dough entering the oven, while the second shorter development loaf was developed over 28½ hours. The long cycled loaves took 10 and 9 hours respectively for final rise, while the short cycle only took 6¼ hours for final rise. Thus, I conclude that the culture's age had little, or nothing to do with the longer rise time, and that extended retardation, be it in the levain builds, or in the final dough, caused the observed increase in final rise's time that were observed.

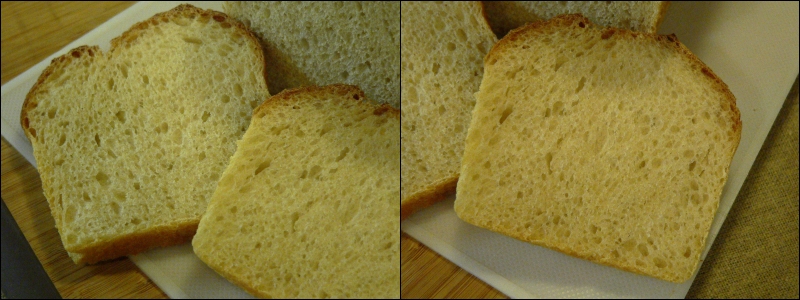
   The crumb texture, moistness, and flavor of this final loaf were judged by me to be very good. The Rye and Caraway certainly did nothing to decrease my pleasure with the loaf.

   When I next make this combination, I will likely increase the percentage of rye flour and maintain the caraway seed at the 2 B% used here.

   These next links are to 3 baking logs in PDF format for this loaf, the initial loaf, and the previous 'replication' loaf.

    This
loaf's baking log at
Google Docs link:

2B_110621-17_Rye&BF_RYW_Repli_
478g [Photos]_110623-14305 .pdf -
https://docs.google.com/viewer?a=v&pid=explorer&chrome=true&srcid=0B_MScoZfDZkwODFlOTk0MDItZDAyMi00ZWVmLTlhYTUtYWE1NjRhNmUxMDc4&hl=en_US

     The
previous 'replication' loaf's baking log at
Google Docs link:

2A_(Z)-110618-17_RYW_Replicate
478g[Photos]_110619-1200 .pdf -
https://docs.google.com/viewer?a=v&pid=explorer&chrome=true&srcid=0B_MScoZfDZkwMmViYjljN2ItMzVjZS00NWE1LWJjZjQtYzg2ZWMxNmIxN2Ew&hl=en_US

     The
initial loaf's baking log
at Google Docs link:

Z-110614-10_RYW_478g
[Photos]_110615-1540 .pdf -
https://docs.google.com/viewer?a=v&pid=explorer&chrome=true&srcid=0B_MScoZfDZkwMDVmMmVkYWQtNjlmMC00YjVmLTgwMmYtODhlOTM3ZjE4ZDli&hl=en_US

Update - Added Summary Table of the 3 loaves below:

The above table, without a doubt, will have time entry errors of a few percent, but then I would hate being perfect ROFL

    Ron


varda's picture
varda


Syd's white sandwich loaf http://www.thefreshloaf.com/node/22464/white-sandwich-loaf has been on my to bake list since it was posted.   But those lists are ever growing and time is ever short and I'm ever distractable, so...  One of the distractions has been the yeast water craze.   As much as I pride myself on being above fashion, the simple fact is I'm not.   So when Daisy suggested that an enriched bread might be a good candidate for yeast water, I decided to kill two birds with one stone and try Syd's loaf with yeast water.   The problem with converting a recipe before trying it first, is one has (I have) no idea what one is (I am) doing, so I had a failure or three.    Then I decided to bake two loaves side by side - one Syd's original formula and the other, his formula converted to yeast water.    The loaf pictured in the first four photos is made with Syd's original formula scaled down by 3/4.   The only deviation is that I did not use ascorbic acid.   


The resulting bread is probably the most feathery light I have ever made.   The taste is mild but delicious.    Unfortunately the pictures can barely capture the wonderful taste and texture of this bread.    My recommendation - if you have any taste at all for white bread, go to Syd's original post and bake it.  

For the second loaf, I converted to yeast water by replacing all of the water in the poolish with yeast water and omitting the yeast.    I also omitted the yeast from the final dough.   Otherwise I followed exactly the same formula, again without the ascorbic acid.   After mixing both batches of dough this morning I had to go out for a few hours, so I refrigerated both bowls.    When I got back, the yeast version had already doubled, while there appeared to be no change to the yeast water one.    I shaped the yeast one and placed in a bread pan to proof, and stretched and folded the yeast water dough and let it bulk ferment on the counter.    Before long (I wasn't watching the clock) the yeast loaf had risen an inch above the pan so I baked it, and then shaped and proofed the yeast water loaf.   By the time the yeast water loaf was ready to go in, it hadn't even cleared the pan top.   But it was softening so I decided to bake it.   In the oven it grew to around 80% of the volume of the yeast version.   

After tasting the original, I was ready to hate the yeast water version, but surprise, surprise, there was nothing to hate.   While the yeast water loaf wasn't as feathery light as the original, and really the taste was completely different, it was every bit as delicious as the first - just a different style of bread.   It's hard to come up with exactly the right words, but the yeast water loaf had a tiny bit of a tang, and a more complex flavor in a somewhat denser (not dense, just denser) bread.   The picture below is of both loaves (yeast water on the bottom) and below that two shots of the yeast water crumb.   I will be hard put to decide which one of these to make next time.   Such dilemmas are fun to have.   Thank you Syd, for posting your fabulous and delicious formula.


RonRay's picture
RonRay

Replication Bake of Emulsified Raisin
Yeast Water Loaf


For the initial loaf, see
link:

http://www.thefreshloaf.com/node/23945/emulsified-raisin-yeast-water-loaf


   In the initial baking of a loaf using emulsified raisins in the Raisin Yeast Water (RYW),
the loaf's crust came out a very dark mahogany color.  The final rise took 10 hours, which was longer than my normal nominal 6 hour rise times. The flour used was 60% APF and 40% B/F, and the loaf volume was excellent. Loaf taste was a very pleasant, full bodied flavor without noticeable sweetness, nor raisin flavor, nor any trace of sour tang.

   The previous loaf was developed over 105 hours from the start of the first of 3-levain builds, until the dough was placed in the oven. Also, the RYW culture was only 48 hours at the start of the levain builds.

   In an attempt to get a better idea of how important the initial methods and ingredients were to the initial loaf’s resulting characteristics, this, 'replication' was made. The construction was was the same, however, the timing was shortened from 105 hours down to 28½ hours. The 40% B/F was replaced with APF. Also, the RYW culture was 7 day more mature at the start of these levain builds.

   I specifically wanted to compare four points: 1/ Crust color; 2/ final rise time; 3/ loaf volume; and 4/ loaf flavor.

   The loaf was perhaps very slightly lighter, but not to any significant degree. This leads me to believe the most significant factor in developing the crust color was the additional sugars introduced by inclusion of the emulsified raisin particles in the RYW levain.

   The final rise time was 6¼ hours for this loaf. This is well with in the minor variations around the nominal 6 hour times I normally expect. So, the added maturity of the RYW culture &or the shorter total development times would seem to account for the initial loaf's long final rise. To decide the role of the longer development time, I have another loaf undergoing an extended development with the last of the RYW culture.

   The physical characteristics of the crumb were fully comparable to those of the previous loaf. However, I felt that the very impressive full bodied flavor had suffered some from the shortening of the retardation of the final dough.  That portion of the initial loaf's development was 45½ hours, whereas, this loaf development gave 10¼ hours to the final dough's retardation  This loaf has a very nice flavor, but I do feel it does not fully match the full bodied quality the initial loaf had.


  Below
are the links to my baking logs in PDF formate for both the initial loaf, and this 'replication' loaf.


     This
loaf's baking log at Google Docs link:

2A_(Z)-110618-17_RYW_Replicate
478g[Photos]_110619-1200 .pdf -
https://docs.google.com/viewer?a=v&pid=explorer&chrome=true&srcid=0B_MScoZfDZkwMmViYjljN2ItMzVjZS00NWE1LWJjZjQtYzg2ZWMxNmIxN2Ew&hl=en_US


     The
initial loaf's baking log at Google Docs link:

Z-110614-10_RYW_478g
[Photos]_110615-1540 .pdf -
https://docs.google.com/viewer?a=v&pid=explorer&chrome=true&srcid=0B_MScoZfDZkwMDVmMmVkYWQtNjlmMC00YjVmLTgwMmYtODhlOTM3ZjE4ZDli&hl=en_US


   Ron

RonRay's picture
RonRay

Sourdough, and Yeast Water Combinations  From Sour to Sweet and Way Back Again
Previously, I posted details on the loaf I use as a 'standard', for purposes of testing. Link:A Standard KISS Loaf, or Keep It Simple Smiley The Fresh Loaf
In that post, I gave a table for three basic types of loaf - White Sourdough [WSD], Yeast Water Levain [YW], Sourdough & Yeast Water Hybrid [SD&YW].These three basic types were shown with there formulae given in two batch sizes, 680g and my 'standard' 478g
In this post, I provide photos of these 3 types, as baked in my standard nominal 478 gram size. At the end is a fourth type loaf, which I will simply call "Aged-SD". The four loaves generated a range of flavors, "nice tang", "fruit and sweet", "sweet with a mild tang", and finally "Strong tang with sweet overtones".

The first images are of the "Straight Sourdough" loaf.  It gave a very nice, mild SD tang to the loaf.

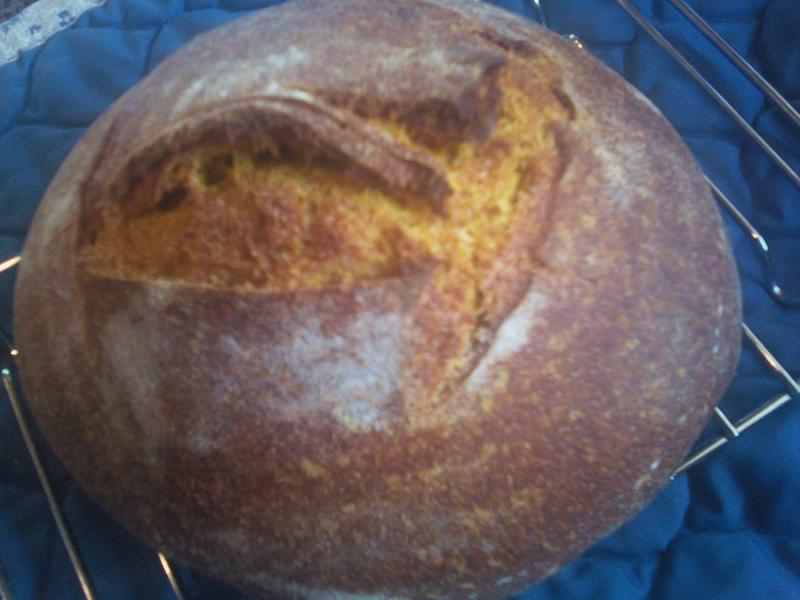
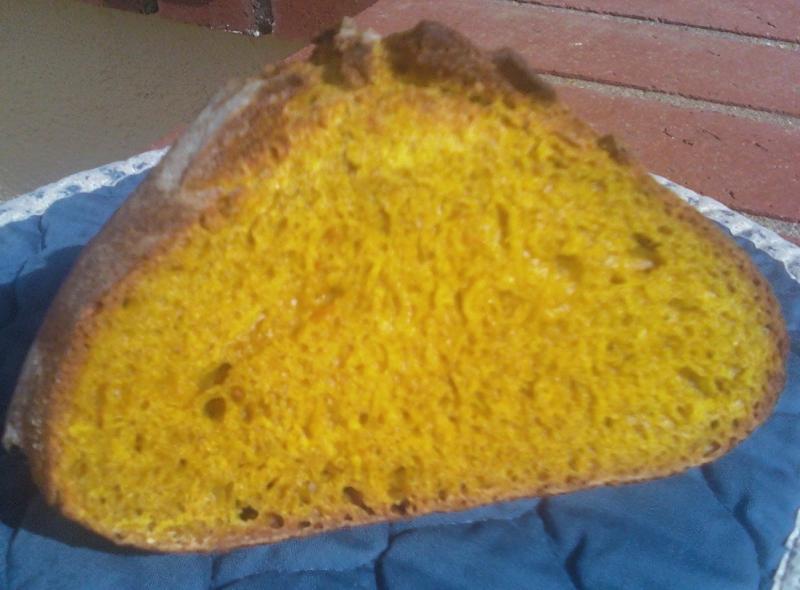
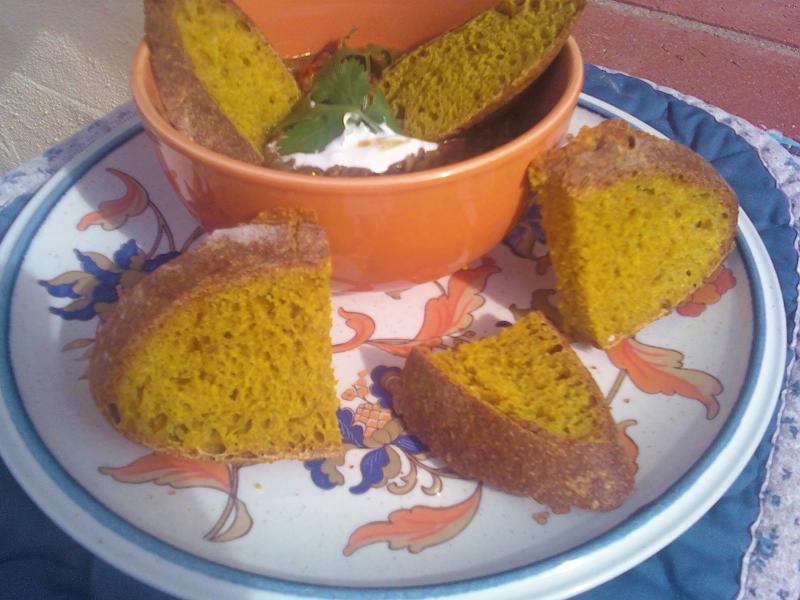
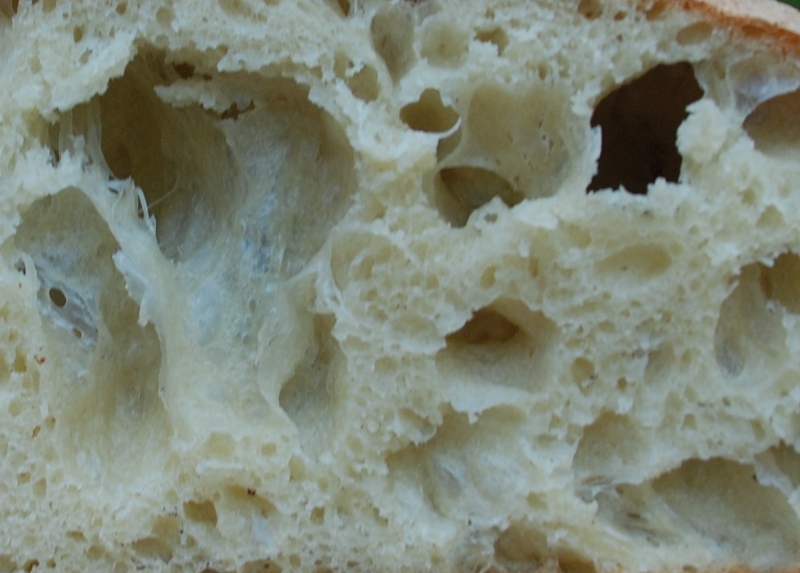
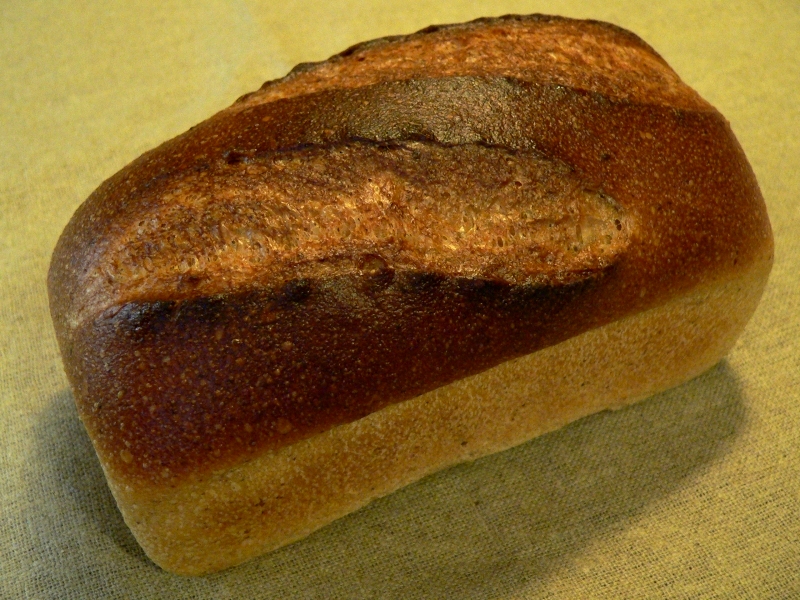
This second set of images is from a totally Apricot YW loaf.There was no sign of any SD tang, nor any apricot flavor, however, there was a very nice flavor with a fruit-like sweetness, and the slightest hint of the type of "tang-like" taste one might detect in an apricot itself.  

This third loaf was a combination of the same sourdough culture used in the first loaf, and the apricot yeast water culture use in the second loaf.

I found the flavor was all I hoped for, a lovely blend of the sourdough tang and sweet, fragrance of the fruit with a slightly different tang from the Apricot YW.

This forth, and final loaf offers a flavor, not unlike the third loaf, but with a "jacked up" sourness. The "Aged-SD", is explained in the PDF copy of my baking log's detail comments, which you can access from Google Docs at the following link:Y-110610-07_Aged-SD+SD&AprYW_478 [Photos]_110611-1115.pdf - https://docs.google.com/viewer?a=v&pid=explorer&chrome=true&srcid=0B_MScoZfDZkwZmU4ZGIyM2EtMmE3OS00OWY5LWI0YjAtYjRkN2VmZTQwYzli&hl=en_US

Extremely good oven spring. Of course, the final rise went 6 hours + 45 minutes, and it was 40% bread flour in the dough. Nonetheless, the 11% levain, which was this first testing of Aged-SD surly didn't cut into the levain's ability to leaven this loaf. The top of crust was strong and very chewy. If you like a good good tang with note of apricot tang, but without identifiable fruitiness and a soft touch of sweetness, then, you would like the loaf's flavor. Crumb was more open than my recent enriched sandwich breads, but still more than tight enough to be an excellent sandwich and toast loaf.   The levain method of adding Aged-SD most definitely accomplished my desired objective of combining SD and YW merits into a Hybrid Sour Sweet and Sour loaf.
Ron


RonRay's picture
RonRay

Apricot Yeast Water Pullman Loaf

Previously, I posted a short Pullman loaf leavened with Potato Yeast Water (PYW). Link:

http://www.thefreshloaf.com/node/23793/potato-yeast-water-pullman-loaf-shorty

In that post, I concluded that “Although, I found PYW worked well, and made a good loaf, I decided that the making of the levain, and creating another YW seems unjustified just to introduce potato flakes and sugar into a loaf.” In this post, I simplified the process by introducing the sugar and potato flakes in the Final Dough, and used a strong Apricot Yeast Water (AYW) culture as very nearly the total water used in the loaf. The only other water was the approximate 3.8g contained in the unsalted butter used.


The formula above provides the Baker's Percentages of the ingredients, as well as the weight of ingredients actually used for the reduced sized Pullman pan, which only required 482g of dough. The percent hydration level was about 62.2%HL.


A fuller account of the formula, Apricot YW (AYW) 2-stage levain builds, method, and observations can also be found in a PDF of my baking log at this link:

D-b_110529_Apricot YW Pullman 482g_[Photos]_110602-1635 .pdf - https://docs.google.com/viewer?a=v&pid=explorer&chrome=true&srcid=0B_MScoZfDZkwMWFjMWNiMzktYjNjMy00MzU1LTkxNjQtOTAyZjM5ODQzMThm&hl=en_US


Actually, a 3-Build Levain had been planned, but in a hectic kitchen moment, I started the Final Dough with only the first two levain builds. Fortunately, I caught my error in time to simply add the remaining 100g of AYW and 100g of AP flour into the Final Dough mix and all worked well.


The short Pullman loaf measured (5-5/8” x 4” x 4”)/(14.3 cm x 10.2 cm) and the 482g batch size managed to fill the pan with a 9 hour rise at 82ºF ( 27.8º C) . For additional details, see the notes in the above mentioned PDF.


The crumb texture was soft, but firm, moist and quite flavorful, with a very pleasant fragrance, however, there was no discernible taste of apricot that I could detect.


It worked very well as both a sandwich bread and for excellent toast.


It has survived three and one half days, as of this writing (I had a loaf in front of it to eat, too). I just had another sandwich made from it and it seems as moist and fresh as it did when first cut. The flavor enhancement resulting from the Apricot YW, rather than just the Potato YW used in some previous loaves, is a fine improvement of the formula. I do think, however, that I will do the Build-#3 as a levain build on the next loaf, rather than mixing the 100g of AYW and AP flour in the final dough. On the other hand, this accident demonstrated that a great loaf can be made this way, as well.

Ron

Pages

Subscribe to RSS - yeast water