The Fresh Loaf

A Community of Amateur Bakers and Artisan Bread Enthusiasts.

WW

dabrownman's picture
dabrownman

After the last white bread bake using the Pharaoh’s Mastaba, we went back to a 67% whole grain; rye and wheat bread with rye and wheat sprouts and a variety of add-ins and seeds including wheat germ, flax, coriander, pumpkin, hemp, rosemary, chia, cumin and red rye malt baked in another variation of the Chacon.

 The Chacon is quickly becoming a favorite bread shaping method.  It is a fun way to make bread with as many variations as one can conjure up and imagine.  This time we used a plain knotted roll in the middle of the basket and surrounded it with a plain two strand braid that was twisted (Twisted Sisters).  Then we added the remainder of the dough which contained all the add ins and sprouts as a disk to the top – which will become the bottom when tipped put of the basket.

This gave us a new but handsome boule shape that had no add-ins in the finish top and all the add-ins on the bottom.  It will be like having two different breads in each slice.

The Chacon came out of the basket easily and it slid into the mini oven, without slashing, just as well and onto my new ceramic tile / stone - which quickly broke when we threw water onit by accident before closing the door to steam.  No worries, the tile only cost 88 cents and I have 11 more of them.  In the back of the mini, we used Sylvia’s steaming method with a Pyrex 1 cup measure half full of water with dish rag in it.

 The stone worked well and the Chacon was very brown and crunchy when it came out of the oven and it smelled wonderful too.  The boule cracked at each twist of the sister and at the knot seams.  We just love the way the Chacon cracks almost exactly where we want it to and think it should instead of willy nilly.  

 The crumb shots and tasting will follow after the Chaon cools.  The formula and method follow the pix’s. 

 Method

The method was similar to our recent bakes with (3) - 4 hours each, 12 hour SD levain build.  This time it was not retarded overnight because we used some sliced onion in the build that made it smell more sour than normal.  The flours were autolysed with the wet and salt for 12 hours in the fridge too.  We have been adding the salt in with the autolyse recently and cannot tell any difference when we do it this way.  Forgetting to add the salt days are now over.

After soaking in water for 4 hours, we placed the seeds to be sprouted on 2 damp paper towels covered with another and wrapped in plastic on a plastic cutting board.  Half way through the 24 hour sprouting period, we re-dampened the top towel and covered it back up.  The seeds were sprouted in 24 hours. 

 We mixed the dough with the autolyse with the KA for 8 minutes on 2 and  2 minutes more on KA3.  The dough was then moved to an oiled, plastic covered bowl to rest for 15 minutes before doing 5 sets of S&F’s every 15 minutes on a floured work surface.  When the S&F’s were complete the dough was left to develop and ferment for 1 ½ hours before going into the fridge overnight for 8 hours.  In the morning the dough was allowed to come to room temperature over 1 ½ hours on the counter.

 The dough was then portioned into (3) 150 g pieces for the knotted roll and the 2 strand, ‘twisted sister’ braid.  In a rice floured basket the knotted roll went in first in the center, then the twisted sister went in around the knotted roll.  The remainder of the dough was flattened out gently and all the sprouts and add ins were incorporated.  Once the add ins were incorporated evenly, the remaining dough was shaped into a boule and allowed to rest for about 5 minutes until it had relaxed.

 It was then flattened into a disk the width of the basket and placed on top of the roll and braid to make the finished Chacon in 3 distinct sections.

 After a 2 hour proof it had passed the poke test and was ready for the mini oven stone and 12 minutes of steaming at 450 F regular bake.  The steam was then removed and the mini oven turned down to 425 F convection this time.  The Chacon was rotated 90 degrees every 5 minutes.

 After the 2nd rotation the oven was turned down to 400  F convection.  20 minutes after the steam was removed, the bread was done – 32 minutes total.  It was allowed to cool with the oven off and the door ajar for 10 more minutes before being moved to the cooling rack.

67% Whole Rye and Whole Wheat with Sprouts, Wheat Germ, Flax and Red Rye Malt.     
      
StarterBuild 1Build 2 Build 3Total%
SD Starter15100254.57%
Rye304007017.50%
WW00707017.50%
Water 40 4010.00%
Milk 3000307.50%
Total Starter75907023558.75%
      
Starter     
Hydration93.22%    
Levain % of Total25.59%    
      
Dough Flour %   
Dark Rye107.526.88%   
Potato Flakes102.50%   
Ground Flax Seed102.50%   
AP16541.25%   
WW107.526.88%   
Dough Flour400100.00%   
      
Salt82.00%   
Water33583.75%   
Dough Hydration83.75%    
      
Total Flour547.5    
Milk 30, Water 432.5472.5    
T. Dough Hydration86.30%    
Whole Grain %69.50%    
      
Hydration w/ Adds82.53%    
Total Weight1,153    
      
Add - Ins %   
Wheat Germ102.50%   
Red Rye Malt30.75%   
Hemp 20, Chia 10, Pumpkin 306015.00%   
VW Gluten123.00%   
Total8521.25%   
      
Multigrain Sprouts %   
WW205.00%   
Rye205.00%   
Total Sprouts4010.00%   
      
Coriander, Cumin & Rosemary30.75%   
dabrownman's picture
dabrownman

This fancy French named bread is really a Rustic Country San Francisco Sourdough.  It originally started out as a Glenn Snyder Country SD bread minus the rustic and the sweetbird, that she is,  took the recipe and tweaked it some and came up with the most amazing crust on a bread I have ever seen.   I just had to try my hand at it and converted it further to more my liking by; using a rye sour starter,  grinding my own WW and rye, increasing the rye to equal the WW, reducing the AP accordingly and then adding 50 g of whole WW and rye berries that were boiled in water for 30 minutes and then drained.  The berries were put back into the pot with 1 tsp of olive oil and then sauteed until caramelized.  I was hoping for a bread that would be more rustic, have a deeper more flavorful taste, a deep brown crust and crumb that was soft, moist and still somewhat open.  Well, I think all but the somewhat open crumb was achieved.  I guess you can't have everything.  It is the one of the best textured and tasty breads I have ever eaten.  It, like most breads, is much better toasted with butter and I'm guessing the flavor will be better tomorrow as well.  I can't wait to try this on a new sandwich creation tomorrow.  Here are some pix's.  The recipe follows the pix's

 Rustique Pain Comté de San Francisco

Yield: Two 750g Loaves

Ingredients

Levain Build

86 g AP flour

25 g Whole Wheat flour

25 g Whole rye flour

175 g water, cool (60 F or so)

30 g active culture (72% hydration)


   Final Dough (68% hydration, including levain)

600 g AP flour (77.5%)

87 g whole wheat flour (11.25%)

87 g whole rye flour (11.25%)

440 g warm water (80 F or so) (57%)

14 g pink Himalayan sea salt (1.5%)

313 Levain (40%)

Scald and Caramelize: 50 grams of WW and rye berries boiled in twice as much water as berries by volume for 40 minutes.  Drain berries and return to pan with 1 tsp of olive oil and sauté until the berries caramelize and start to leave color on the bottom of the pan.  When color starts sticking to the pan they are done.

Directions

 1.  Levain : Make the final build 10-12 hours before the final mix.

2. Mix: Add all the ingredients to the mixing bowl, including the levain, but not the salt or the scalded berries. Mix just until the ingredients are incorporated into a shaggy mass. Correct the hydration as necessary. Cover the bowl and let stand for an autolyse phase of 60 minutes. At the end of the autolyse, sprinkle the salt over the surface of the dough, and knead 4 minutes with dough hook on KA 3. The dough should have a medium consistency.  Add the scalded and caramelized  berries and mix on KA 3 for 1 minute   

3. Ferment with S&F: 3 hours. Stretch and fold the dough in the bowl once 10 strokes at the 30minute mark. Stretch and fold again, 5 strokes, at the one hour mark folding it into a ball in lightly oiled bowl.  Leave to ferment 1-2 more hours until the dough is at least 75% larger than when you started the ferment.

4. Retard: do 1 S&F in the lightly oiled bowl forming the dough into a ball again.  Refrigerate 8-20 hours, depending on how much time you have and sour your taste.

5. Divide and Shape:  take dough out of refrigerator and let it come to room temperature about 1 ½ hours.   Divide the dough into what 2 pieces and pre-shape, then shape into boules or batards 20 minutes later.

6. Proof: Approximately 1.5 to 2.5 hours at 72° F. Ready when poke test dictates.

7. Pre-heat: oven to 500 with steam apparatus in place - 45 minutes minimum.  I use a loaf pan half full of water and a dry12”cast iron skillet that go in the bottom rack of the oven at the beginning of pre heat and the stone on the rack above.  When the loaves go in, I throw 1 cup of boiling water into the cast iron skillet right after loading the bread on the stone.

8. Bake:  Slash loaves. Bake with steam, on stone. Turn oven to 450 F when it hits 500 F after loading loaves. Remove steaming apparatus after 15 minutes. Bake for another 15 minutes more or 30 to 35 minutes total. Rotate loaves for evenness as necessary. When done (205 Finternal temp), leave loaves on stone with oven door ajar, oven off for 10 minutes.  Move to cooling rack until loaf is room temperature.


Fenrir's picture
Fenrir

Well, after a bit of a break from baking I'm trying to get the hang of it all over again. I had a few loaves I wasn't happy with so I went back to the first recipes I used, namely the 1984 version of Laurel's. I came up with these, they're the best ones I've made, so obviously I could use some tips! I pretty much make only WW bread, this time with KA.


KipperCat's picture
KipperCat

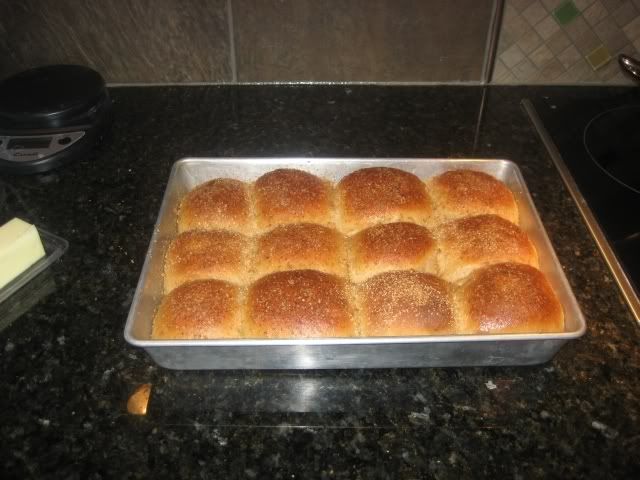
The 2nd time's a charm!


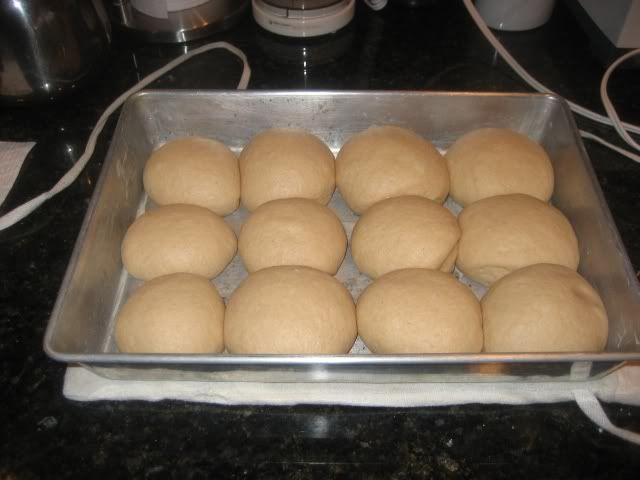
Partially Proofed Rolls - they started out 1/2 inch apart.


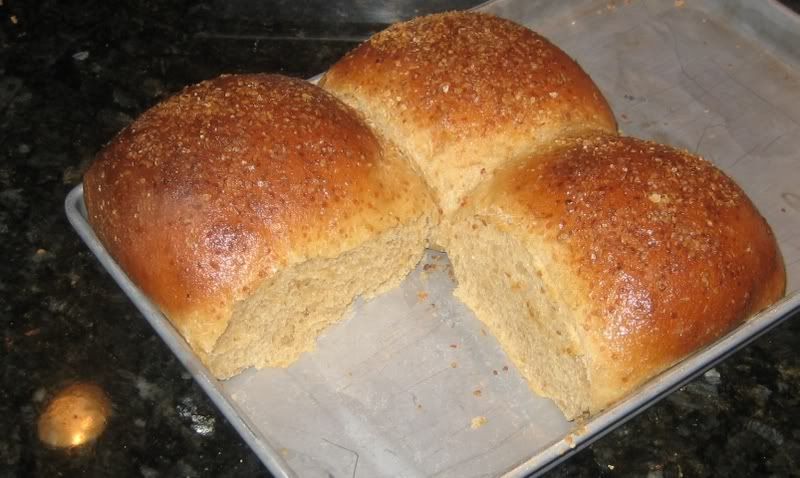
A few extras. These are baked in a 6 1/2" x 10 1/4" sheet.
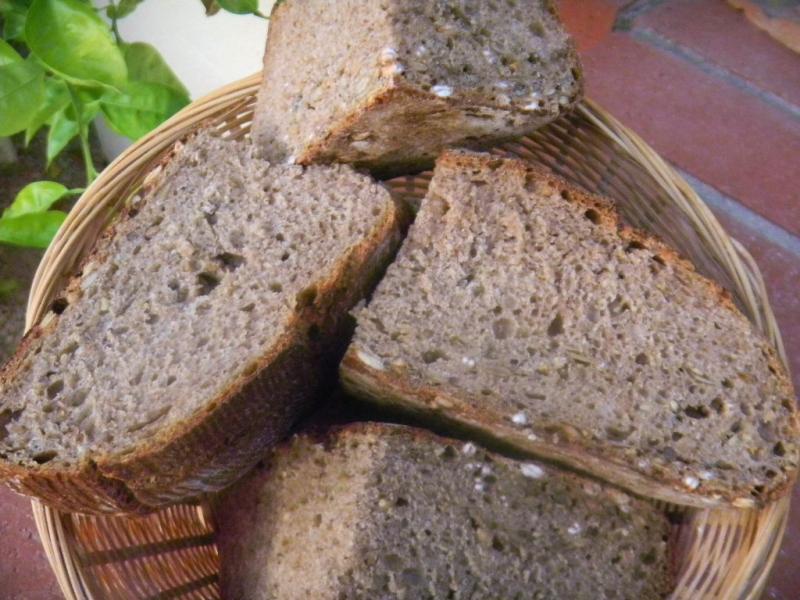
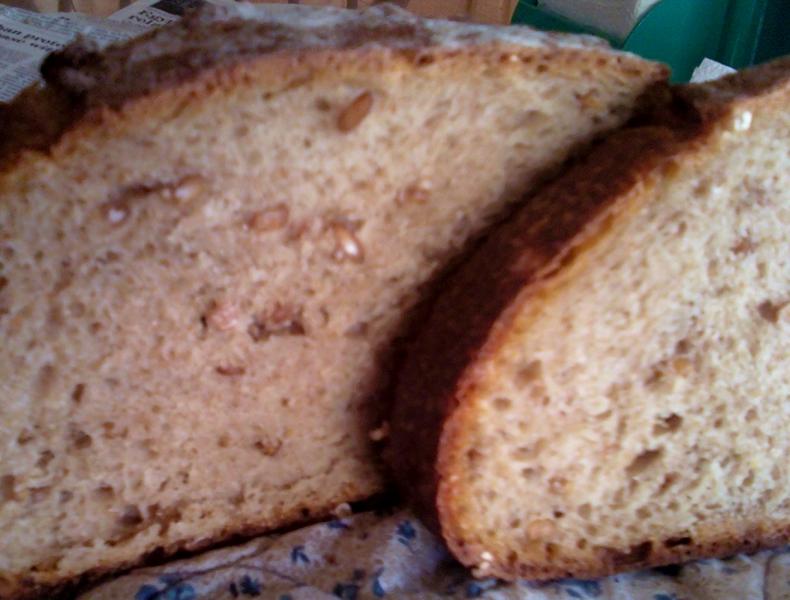
 

Interior Crumb

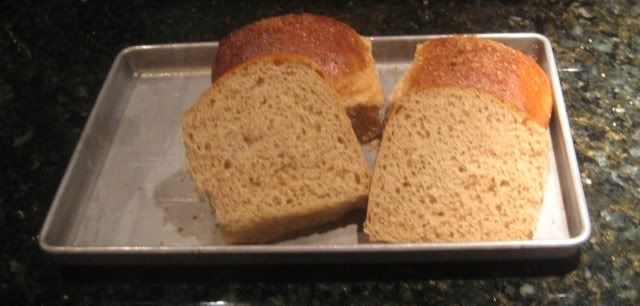
Much nicer results this time – I used a higher percentage of WW pastry flour, less potato & may have developed the dough better. I had a nice windowpane with this one, I don’t remember if I did the last time. The dough seemed too sticky at start of bulk rise, but was very nice to work with when I shaped. Shaping this dough was like night and day compared to my first attempt - the dough was that different. I had planned to make half the dough into a sandwich loaf, but it was so nice to work with I just continued shaping rolls. Now I have 8 in the freezer to pull out and bake.

I used a heating pad set on low for the final proof. It took quite awhile - about 3 hours I think. Maybe next time I'll see if I can preheat an oven to about 95F, which is the recommended temp for rising rolls. I tried to follow Laurel's insruction to let them just barely overproof, i.e. just start to sag a bit. But I was too impatient. They hadn't quite reached that stage, though I think they were close.


Whole Wheat Dinner Rolls
- based on Dinner Rolls for Aunt Agatha in Laurel’s Kitchen Bread Book
- using Peter Reinhart’s mixing method for whole grain breads

Soaker
20 grams potato flakes
300 grams WW pastry flour
130 grams finely ground white WW flour
¼ cup (45 grams) buttermilk powder
1 tsp. Salt
325 grams water

Biga
470 grams finely ground white WW flour
340 grams water
½ tsp. Instant yeast

Final Dough
All of soaker
All of biga
1½ cup (about 325 grams) extra WW flour
2 tsp instant yeast
3 tablespoons honey
1 egg
1¼ tsp salt
¼ cup (56 grams) soft unsalted butter – ½ stick

Topping
A few tablespoons of wheat germ

Mix the soaker and biga separately. Cover and refrigerate overnight.

The next morning, let doughs sit on counter for 2 hours to warm up. Flour work surface using some of the extra flour. Spread soaker and biga into similarly sized rectangles, and generously flour the tops of both. Place one rectangle of dough on top of the other, and chop the stacked dough into about 20 pieces. Place in mixing bowl. Hold back about ½ cup of flour. Add all other final dough ingredients to bowl. Mix with paddle attachment until thoroughly mixed. Allow dough to rest for about 20 minutes. Switch to dough hook for kneading. Add remaining flour in small increments if required (I used it, not sure afterwards that I needed to.) Knead with stand mixer until you develop a nice windowpane. The time will depend on your machine. The dough will be very sticky. Place dough ball in a well-buttered bowl, turning over to coat top. Cover and let rise in a warm room for about 2 hours – until your wet finger makes a hole that does not fill in.

Turn dough onto a lightly floured kneading surface and deflate. Divide dough into four equal sections and form each one into a ball. Keep these covered with a damp cloth or plastic wrap. Let the dough rest until the first ball is relaxed, soft and pliable. Gently flatten the dough and cut into 6 pieces. Form one round roll out of each piece, keeping the smooth surface intact. Place the finished rolls on a buttered cookie sheet or cake pan, keeping them ½ inch apart. This recipe should about fill 2 9x13 pans. Cover the rolls and allow to rise in a very warm place (95F) until slightly overproofed, i.e. rolls show slight signs of sagging. Don’t let them dry out.

When rolls are ready to bake, spray generously with water or brush with eggwash. Sprinkle wheat germ on top. Bake in a preheated 400F oven with steam for about 20 minutes (check sooner), just until they are beautifully brown. Remove from oven and brush with melted butter. If not serving immediately, remove from pan to cool on rack.

I froze some of the shaped rolls for later use.

~~~ Things I would do differently next time ~~~

- Increase yeast in final dough to 2¾ teaspoons.
- Make the soaker with all whole wheat pastry flour.
- Increase butter to 5 or 6 tablespoons.
- Include a 2nd bulk rise before shaping. Ideally this would be at a temp of around 80F.
- Make slightly smaller rolls – form each quarter of dough into 8 or even 10 rolls. These might not fit quite as evenly in a 9 x 13” pan but would be a better size.
KipperCat's picture

NYT/Lahey no-knead sourdough question

October 2, 2007 - 10:35am -- KipperCat

When you make this, how much starter do you use, at what hydration? How vigorous is your starter? The first time I tried this, I used way too much starter, I think 80 grams.   In the morning my dough had obviously risen and tanked.  Last night I used 6 grams of 60% hydration starter.  AFter 13 hours it had done very little. Since I don't want to go another day without bread, I just added a bunch more starter and will watch it like a hawk.  At 180 grams I probably used too much!

Subscribe to RSS - WW