The Fresh Loaf

A Community of Amateur Bakers and Artisan Bread Enthusiasts.

wood-fired oven

Salilah's picture

Wood-fired clay oven - in progress

September 16, 2012 - 1:59am -- Salilah

Following the course we went on (see previous thread) - we are underway!

Rather than post twice, see here:

http://ukwoodfiredovenforum.proboards.com/index.cgi?board=ceovens&action=display&thread=639

for details of the build...  It's a very useful forum if you are interested in building a wood-fired oven - some lovely examples, and very helpful folk!

S

sweetbird's picture
sweetbird

I haven't been baking lately because I'm on a health regimen (for three weeks!) under which I have to jettison all joy-inducing things like wine, bread and cheese, to name just a few. All self-imposed, I'm not ill, just trying to be healthy. So I haven't been as active on the site, but I've been cheering you all on from the sidelines. It's funny, I've done this regimen quite a few times before and don't miss eating bread as much as I miss the process of making it!

Anyway, I'm working on a project of cataloging and repairing some photographs my mother took way before she was my mother, while she was living in Mexico City in the mid 1930s. Her name (later, after marriage) was Eleanor Ingalls Christensen. She had just graduated from Wheaton and would go on to do graduate work in fine art at Radcliffe, and in between took a job tutoring the children of an American couple living in Mexico. She took many wonderful photographs while living there, and now that she's gone I love looking through them. I'm trying to get an album of them ready to honor her memory on Mother's Day (will also try to even out the variation in overall tone; they have aged differently from one another). I thought you 'TFLoafers' might like to see some of the ones related to baking, so I'm posting them here. The one at the top I have framed and hanging in the entrance to my kitchen. It's my favorite.

Below: "The tamale maker."

Below: This appears to be a wood-fired oven.

And this one just because I like it:

Happy baking to you all!

Janie

sortachef's picture
sortachef

Small fires over time make all the difference


Most woodfired oven owners only use their oven once a week or so to bake pizza or bread at fairly high temperatures. There's another level of cooking available, at lower and constant temperatures, which requires pulsing the oven with small fires. This is useful knowing about both to protect the oven from unnecessary cracking from cold firing and also to expand your cooking repertoire.

There was a time in the not-too-distant past when many home ovens were fueled with either wood or coal. These ovens were used every day, and never lost their warmth. My father remembers his mother stoking the fire at the crack of dawn to bake the daily bread. Even today, I hear through this website of people in Greek villages and Eastern European towns using wood or coal as their main source of cooking fuel.

In order to replicate this method of everyday cooking, you have to commit some time. In order to roast a chicken today, I had to find three different times yesterday - in amongst a busy schedule - to light and maintain fires. If you can find the time, however, the benefits are astounding. When I was ready to roast the chicken (see Woodfired Roast Chicken), my oven maintained a stable temperature in the 350º range for 2½ hours with no active flame throughout the cooking time. With this ability, all kinds of baked goods (including dinner rolls and pastries), casseroles, roasted meats and fish become possible.


Pulsing your oven: The trick is to 'pulse' your oven with small fires over time, in order to slowly heat all of the masonry components - the walls, the floor and the bed of sand beneath the floor. The operative word here is 'slowly'. After a cold spell in which your oven has lain dormant, this will prevent the components from cracking. For more normal cooking or baking operations, this will raise the temperature of your oven into the range of a conventional oven, with very little charring or direct smoke.

Here's what to do:

  • Use a piece of newspaper, a handful of kindling, 2 or 3 pieces of hardwood the thickness of your thumb and 2 thicker pieces of hardwood that weigh about 1 ½ pounds each (2 ½ inches thick) to build successive fires in the center of your oven. Maintain the fire for an hour, relighting and adding a bit more kindling if necessary.
  • After the hour of active fire, put the door in place as tightly as possible. You may have to put a wood wedge under the handle, as I do. Let the oven rest for 3 hours. This rest time can be variable in length.
  • Light another fire using the same amount of wood as above, and maintain for an hour. Let rest again.
  • With each subsequent fire, there will be more unburnt wood from the previous fire. Leave this in the oven and continue to add to it, building your fires on top.
  • Light a third fire in the early evening, maintain for an hour and let rest. During this rest period, you can move the coals to one side in order to cook beans or a casserole, if desired.
  • Close up the oven and let rest overnight.
  • On day 2, start a fire with the same amount of wood, maintain for an hour and let rest. By this time the parts of your oven are hot enough to maintain a temperature of about 350º. From here, you can safely and quickly take your oven much hotter (for pizza, say), or you can build another small fire to maintain low to moderate heat for roasting or baking.


Here are the temperatures I measured in my oven. As atmospheric conditions and your oven will likely be different, you will probably have different results, particularly during the first few fires.

Starting temperature: 52º, which was approximately the overnight low air temperature in Seattle (measured with an accurate thermometer).

After the first fire: 150º (measured with oven thermometer, as are all others)

After the second fire: 225º

After the third fire: 350º (I baked a pot of pinto beans for 2 ½ hours when fire was almost finished)

Starting temperature, 2nd day: 160º

After the fourth fire: 375º (I baked dinner rolls after this fire)

After the fifth fire: 425º (I let the oven cool to 350º and roasted a chicken. After 2 ½ hours, the oven temperature was 325º and the chicken was perfectly cooked.)


Final note: I just checked (10 a.m. on the third day) and, with no active fire since yesterday's noontime fire, the temperature of the oven is 160º. Hmm. I could just keep this whole thing going. Flame on!

sortachef's picture
sortachef

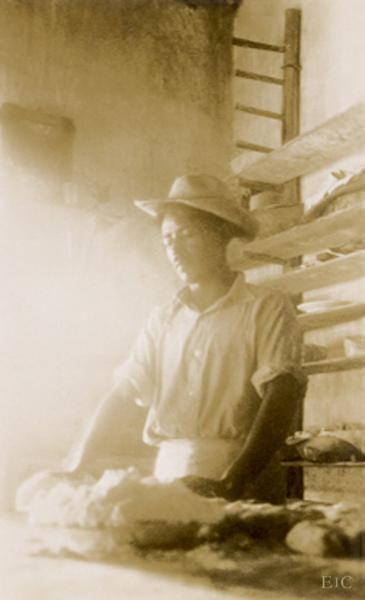
 I left the East Coast 30 years ago and, except for sporadic family visits, I've hardly been back. One of the things I still long for, after all that time, is a good soft pretzel.

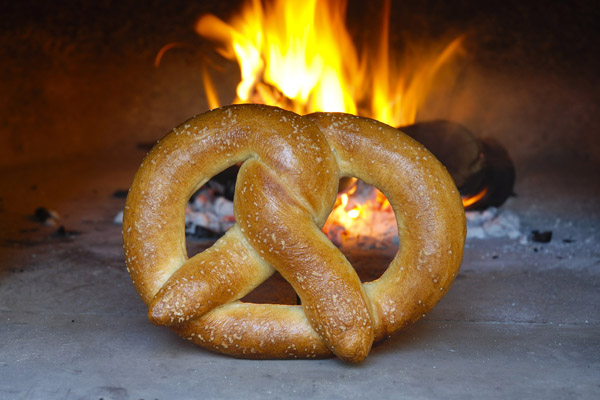
 The trick to making pretzels is to slow fermentation at about 65º and utilize a short boiling time, so that the crust of the pretzel has a chance to form without too much heat transfer that will kill the yeast. The result is a plump pretzel, crusty and smooth on the outside and dense and chewy on the inside. Perfect!

woodfired pretzel

Woodfired or Conventional Soft Pretzels 

Makes 2 large 8 ounce pretzels

2 cups Bread Flour

3 Tablespoons spelt

1 teaspoon brown sugar

¾ teaspoon salt

1/8 teaspoon baking powder

¾ teaspoon yeast

¾ cup water at room temperature

3 quarts water for boiling water bath

Sheet pan and rack for applying topping

1 egg + 1 teaspoon water for egg wash

1 teaspoon salt (preferably kosher or large-grained sea salt)

Parchment paper for rising and baking

Make the dough: In a large bread bowl, mix bread flour, spelt, brown sugar, salt, baking powder and dry yeast together. Make a well in the middle and pour in the water. Mix with the handle of a wooden spoon to incorporate. Scrape down the sides and knead for a few minutes to smooth out the lumps.

Put the dough onto a sprinkling of flour on a counter, invert the bowl to cover the dough and let it rest for 20-30 minutes.

Knead and proof the dough: Knead the dough for 5 minutes and, when soft and supple, stretch it to form a fat snake. Curl the dough snake in on itself, put it back on the counter, cover with the bowl and let sit for an hour or two. It is important at this time to think about stretching your dough to improve the strands of gluten. The longer the better.

Fold your dough snake in thirds and knead for a minute or two to get the air out. (A dough this stiff doesn't so much rise as plumps up.) Stretch it back into a fat snake, cover and let rest for another hour.

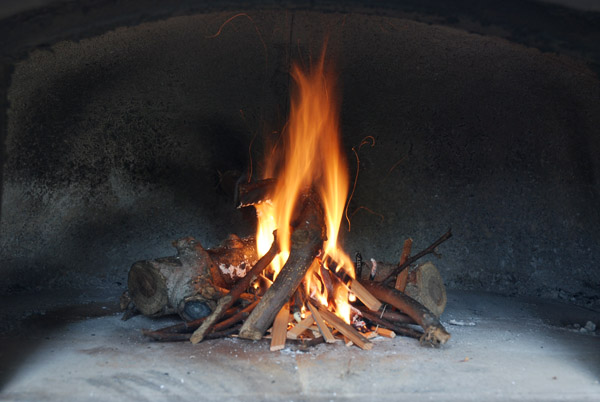
Heat the woodfired oven: Your fire should be 2 hours old, with enough heat to sustain for an hour's baking, but not so much heat that it will scorch the pretzels. Keep the fire to either the left or right of center, in order to heat the oven deck. Every 20 minutes for the last hour or so, move your fire side to side to evenly heat the floor tiles. A half hour before the pretzels are ready, put two thin sticks of dry wood on and 2 wrist-thick pieces and bring to a flame. A few minutes before putting in the pretzels, push the mature coals to the back center of the oven, near the wall, and brush the ashes off of the floor.  There should be 6 to 8 fist-sized chunks of glowing hardwood coal and a good bed of embers, but no flame when the pretzels go in. 

Heat the conventional oven (alternate): Heat quarry tiles on the center rack of your oven at 400º for at least 30 minutes. For more on this, see 'Baking bread on quarry tiles' on my site (www.woodfiredkitchen.com).

Form the pretzels: Roll your dough snake out until it is about 3 feet long, and cut it into 2 equal pieces. Roll each piece out until it is 27 inches long. You may have to let your dough rest a few times to accomplish this without tearing the gluten.

Cut two pieces of parchment 7" x 10" for woodfired, or to fit a sheet pan for conventional baking. Hold the ends of one dough rope and let the middle sag down to sit on the parchment two inches in from the edge. Let the rope of dough make most of a circle on the pan and then twist the ends once around to form a loose knot a few inches from the ends. Bring the tips toward you to overlap the curve of the dough, dividing the area of the circle roughly into thirds.

Repeat with the other piece. Let the pretzels rise for 45 minutes, covered with a cloth. Stretch each pretzel out slightly halfway through to improve its shape.

Make an assembly line: Boil 3 quarts of water. Have a 12-14 inch sauté or frying pan ready on the stove. Put a rack to one side with a pan under it to catch the excess egg and salt. Mix the egg and water until frothy in a ramekin and have a brush handy. When the pretzels have risen for 45 minutes, put the water into the sauté pan and keep at a boil.

For woodfired baking, have two wooden peels ready to one side, and move the fire around as noted above.

Boil and coat the pretzels: Put a pretzel face down into the boiling water, for 40 seconds only. After 40 seconds (no more!), gently flip the pretzel with the backs of two spoons and boil on the other side for a further 30 seconds. Remove to the rack.

Brush the pretzels with the egg wash twice to ensure a good coating. Sprinkle 1/2 teaspoon of salt onto each pretzel. Carefully move the pretzels back to the parchment and arrange the final shape.

Bake the pretzels in a woodfired oven: Slide the pretzels on their parchment mats to within 8" of the coals. Close the door completely. Bake for 7 minutes, by which time the pretzels will have miraculously sprung up to twice their former height. Carefully turn the parchment, using a metal peel and a gloved hand, and bake for a further 7 or 8 minutes, again with the door closed.

When they are brown and lovely, remove the pretzels from the oven, place them on a rack and allow them to cool for about an hour (if you can wait that long!)

Bake in a conventional oven: Bake in sheet pan on quarry tiles for 10 minutes at 375º,  turn pan around and bake for a further 10 minutes, until the pretzels are brown and lovely. Let cool for an hour, and then devour!

For whole blog and other similar recipes, visit www.woodfiredkitchen.com. Flame On!

breadnerd's picture
breadnerd

Still working on the nuances of oven temperature. It’s really a comedy of timing between two ancient processes—bread making and fire building. It seem like if I get it over 600 degrees at the start, it takes a good 45 minutes to reach a more comfortable 550 for bread baking, but then it holds the temps nicely for hours. Handy if you have multiple batches, less handy if you were hoping to cook your dinner at 350 degrees anytime soon. I do crack the door to bring the temp down a bit quicker.


Common occurrences when firing your mud oven:

  • If you think the fire is not hot enough, it will be MUCH hotter than you think.
  • If your oven is ready, and your bread is not, it will only get HOTTER if you wait to pull the coals out, and you will spend even more waiting for it to cool down. Fortunately, this will give your bread plenty of time to catch up!
  • By the time your oven cools to 350 degrees, you will be too tired and/or stuffed with bread and other roasted goodies to bake that last batch of cookies that you had planned.

Improvised proof box: Sunshine + moisture to keep it from getting a skin. Worked fine in a pinch...

http://farm2.static.flickr.com/1260/1425173125_fb0d261355.jpg


Like opening a package, it’s always a thrill to open the door and discover loaves like these:


http://farm2.static.flickr.com/1129/1426058300_6a233fae2d.jpg


I guess there’s always this thought in the back of my mind that the loaves will be charred black, or pale little lumps with no oven spring. Even though it’s not that much different in the end than using my indoor oven, there’s something magical about baking in my little mud hut. It also smells better. Also? The low-angled sunlight of fall doesn’t hurt the aesthetics.


http://farm2.static.flickr.com/1311/1426057062_b5f6f233a1.jpg


http://farm2.static.flickr.com/1311/1426056540_4941d7432f.jpg


http://farm2.static.flickr.com/1038/1426057642_e30d6f40cb.jpg


http://farm2.static.flickr.com/1124/1426057916_bf9ab49a10.jpg

I just did a bit of bread this time--a batch of Columbia and some Multigrain loaves. After the bread came out (well actually, while the last multigrains were still in—I was hungry) I made a pot roast and some baked potatoes. Also roasted a butternut squash to make soup out of the next day.

breadnerd's picture
breadnerd

I haven't been around as much lately, lots of fun busy-ness like gardening and outdoor activities. But I've have lurked a bit at all the lovely baking on the fresh loaf!

We haven't used the mud oven as much this spring (funny we used it more over the winter) but had a good excuse to fire it up today. We discovered a good system of teamwork--DH managed the fire, and I stuck to the breadmaking. Not that I don't like playing with fire, but trying to do both was a stretch of my multitasking skills. It was a long day of baking but pretty relaxing overall.


Today's breads--an "order" for brat and hamburger buns (honey wheat), ABAA's Columbia Sourdough, Semolina, and french:

Semolina:

Attempt at an artsy crust shot (I was happy with the "ears" on this loaf):


I picked up the new edition of Kiko Denzer's book, and tried out a few new techniques on building a more efficient fire. We burned a less wood for a little less time, and I think we were just a bit cooler than ideal. Our top heat was about 575, and quickly cooled down to 450 or so. Plenty of heat for baking all these breads--about 4 consecutive bakes with some overlap, but I didn't get quite the crust color as usual and the french didn't have a huge oven spring from the hot hearth as usual. Also, the last batch of buns took 30 minutes to bake, which is a lot longer than usual. Right now the oven's at about 300 and I have a tiny chicken roasting and a batch of brownies. It's a little cool, but I figure it's like a big crockpot, they'll probably get done eventually!


Still learning, obviously, but still having fun too!


Subscribe to RSS - wood-fired oven