Most woodfired oven owners only use their oven once a week or so to bake pizza or bread at fairly high temperatures. There's another level of cooking available, at lower and constant temperatures, which requires pulsing the oven with small fires. This is useful knowing about both to protect the oven from unnecessary cracking from cold firing and also to expand your cooking repertoire.
There was a time in the not-too-distant past when many home ovens were fueled with either wood or coal. These ovens were used every day, and never lost their warmth. My father remembers his mother stoking the fire at the crack of dawn to bake the daily bread. Even today, I hear through this website of people in Greek villages and Eastern European towns using wood or coal as their main source of cooking fuel.
In order to replicate this method of everyday cooking, you have to commit some time. In order to roast a chicken today, I had to find three different times yesterday - in amongst a busy schedule - to light and maintain fires. If you can find the time, however, the benefits are astounding. When I was ready to roast the chicken (see Woodfired Roast Chicken), my oven maintained a stable temperature in the 350º range for 2½ hours with no active flame throughout the cooking time. With this ability, all kinds of baked goods (including dinner rolls and pastries), casseroles, roasted meats and fish become possible.
Pulsing your oven: The trick is to 'pulse' your oven with small fires over time, in order to slowly heat all of the masonry components - the walls, the floor and the bed of sand beneath the floor. The operative word here is 'slowly'. After a cold spell in which your oven has lain dormant, this will prevent the components from cracking. For more normal cooking or baking operations, this will raise the temperature of your oven into the range of a conventional oven, with very little charring or direct smoke.
Here's what to do:
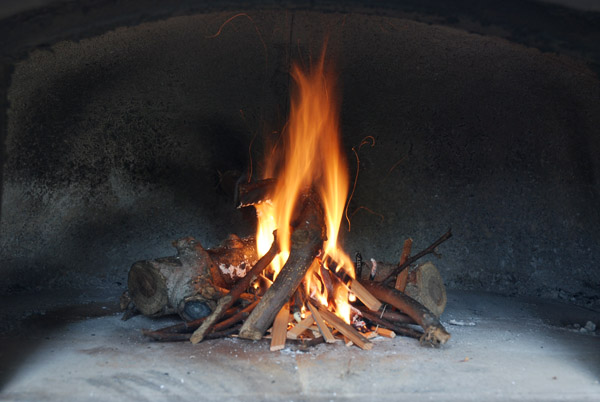
- Use a piece of newspaper, a handful of kindling, 2 or 3 pieces of hardwood the thickness of your thumb and 2 thicker pieces of hardwood that weigh about 1 ½ pounds each (2 ½ inches thick) to build successive fires in the center of your oven. Maintain the fire for an hour, relighting and adding a bit more kindling if necessary.
- After the hour of active fire, put the door in place as tightly as possible. You may have to put a wood wedge under the handle, as I do. Let the oven rest for 3 hours. This rest time can be variable in length.
- Light another fire using the same amount of wood as above, and maintain for an hour. Let rest again.
- With each subsequent fire, there will be more unburnt wood from the previous fire. Leave this in the oven and continue to add to it, building your fires on top.
- Light a third fire in the early evening, maintain for an hour and let rest. During this rest period, you can move the coals to one side in order to cook beans or a casserole, if desired.
- Close up the oven and let rest overnight.
- On day 2, start a fire with the same amount of wood, maintain for an hour and let rest. By this time the parts of your oven are hot enough to maintain a temperature of about 350º. From here, you can safely and quickly take your oven much hotter (for pizza, say), or you can build another small fire to maintain low to moderate heat for roasting or baking.
Here are the temperatures I measured in my oven. As atmospheric conditions and your oven will likely be different, you will probably have different results, particularly during the first few fires.
Starting temperature: 52º, which was approximately the overnight low air temperature in Seattle (measured with an accurate thermometer).
After the first fire: 150º (measured with oven thermometer, as are all others)
After the second fire: 225º
After the third fire: 350º (I baked a pot of pinto beans for 2 ½ hours when fire was almost finished)
Starting temperature, 2nd day: 160º
After the fourth fire: 375º (I baked dinner rolls after this fire)
After the fifth fire: 425º (I let the oven cool to 350º and roasted a chicken. After 2 ½ hours, the oven temperature was 325º and the chicken was perfectly cooked.)
Final note: I just checked (10 a.m. on the third day) and, with no active fire since yesterday's noontime fire, the temperature of the oven is 160º. Hmm. I could just keep this whole thing going. Flame on!


