In Search of a Good Miche Version (2)
")
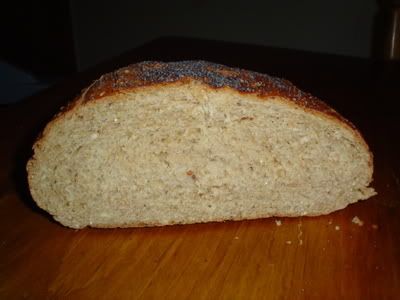
 Crumb (a)") Mixed Flour Miche (2) Crumb (a): Mixed Flour Miche (2) Crumb (a)
Mixed Flour Miche (2) Crumb (a): Mixed Flour Miche (2) Crumb (a)
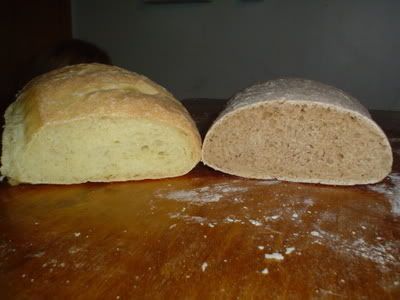
 Crumb (b)") Mixed Flour Miche(2) Crumb (b): Mixed Flour Miche(2) Crumb (b)
Mixed Flour Miche(2) Crumb (b): Mixed Flour Miche(2) Crumb (b)
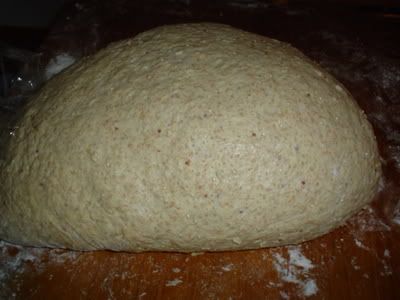
Mixed Flour Miche (2): Mixed Flour Miche (2)
Mixed-Flour Miche: Loosely based on BBA Miche and Hamelman Mixed-Flour Miche.
I did a new slightly different version of the miche in my first blog entry about this recipe. I have a spreadsheet showing the recipe and percentages.
I have some photos of my process, but it is from the original blog entry, not for this specific bread. However, the process was the same other than as noted below.
Many, many thanks to JMonkey, SourdoLady, Zolablue, Mountaindog, Floydm, and numerous others. My results on this and other recipes are much better because of the great ideas I've found in the various blogs, postings, and lessons here.
Mixed-Flour Miche (2) as in version (2): Loosely based on BBA Miche and Hamelman Mixed-Flour Miche.
There is a "firm starter" that is built from white poolish-like starter as in the BBA "barm" version (50/50 by weight using breadflour and water), which is retarded overnight and included in the dough which is baked the same day.
The recipe I've been doing lately has evolved from the BBA miche recipe to be more like the "Mixed-Flour Miche" in Bread by Hamelman. My objective has basically been to have a high whole wheat content, but use sifted flours to get a less coarse crumb. I have also mixed red wheat and white wheat flours as well as tried some spelt trying to come up with a flavor that is not too "grassy" or "nutty". I find the taste of 100% white wheat bread to be a little too bland, whereas using too much red wheat seems bitter in a way I don't like.
As a result, I've ended up mixing various flours in an attempt to get something that is mostly whole wheat with some of the coarser bran sifted out and partly red wheat, partly white wheat for flavor.
The recipe showing in the photos above is as follows, and is loosely based on both the BBA Miche and the Hamelman "Mixed-Flour Miche" in Bread.
For the firm starter:
- 7oz "BBA style barm" (100% hydration bread flour starter)
- 4 oz KA Whole Spelt Flour
- 3 oz KA Organic Whole Wheat
- 2 oz KA Bread Flour
- 4oz water
Mix/knead ingredients for about 3 minutes to get a fairly firm not very sticky dough. Place in container and let rise to about 2x in volume - about 3 hours. No extra punch down and additional rise at this point, compared to original recipe. Place in refrigerator overnight.
The difference in the firm starter above from the version (1) recipe is I substituted 4 oz Whole Spelt and 2 oz KA Bread Flour for 6 oz Golden Bufallo Sifted Red Wheat Flour. The objective was to get a more mild, less sour flavor. I also only let this rise for 3 hours, rather than 5 hours in version 1. This bread tasted better to me. The sour flavors that seemed a little too strong, as noted in the original blog entry, are more mild and complex this time, with no subtle excess of sour dominating the after taste of the crumb.
For the dough:
- 3 oz KA whole spelt flour
- 8 oz Golden Buffalo sifted red wheat flour (Heartland Mills)
- 3 oz KA Organic Whole Wheat
- 8 oz sifted white wheat flour (Homestead Grist Mill)
- 7 oz Sir Lancelot High Gluten flour
- 3 oz KA Rye Blend
- 29.5 oz water
- 3/4 tsp diastatic malted barley flour
- 24 grams salt (about .8 oz) (2 grams less than in the first version)
- Firm starter from day before.
The overall difference from the previous recipe is just a small decrease in red wheat flours, and less spelt flour in the dough, since I have more spelt flour in the firm starter. Also, the hydration is a little higher, about 83% from more like 82% in the previous recipe. Also, I used water on my hands and on the kneading surface instead of flour, instead of the flour that was used in the first recipe (based on some recommendations from the WW gods on the site), so that may account for a significant difference in the wetness of this dough. I imagine that could contribute an additional 1% difference in hydration.
Cut up firm starter and cover with towel to allow the pieces to lose their chill.
Autolyse: Mix all but salt and starter in bowl until the ingredients form a uniform shaggy mass. Allow to rest for 30 minutes.
I decided to use less of an autolyse, based on some advice in Raymond Calvel's book, "The Taste of Bread" which seems to indicate that letting the autolyse go on too long may take away from bread flavor.
Mix and knead dough: Push the pieces of starter into the dough and sprinkle with salt. Use a "frisage", i.e. use the heal of your palm to push the ingredients out along the table, so that all the lumps become mixed. See the Danielle Forestier video on the Julia Child video site. Mix/knead for 5 minutes to form a supple, fairly soft dough. I grab an end, lift it from the table, stretching it from the other end, which is stuck to the table. Then, toss the middle sideways and drop the end back down against the end stuck to the table, which forms a fold. Then, do the same thing from a quarter turn of the dough, i.e. grab an end at a right angle to the end you grabbed before. The total hydration of the entire overall dough is 83%, so it is relatively soft at the beginning. Place in a container to rise.
Fold the dough every 30 minutes: The total bulk fermentation time was 3.5 hours. I was folding it using the technique in Hamelman's Bread, i.e. (very roughly) turn the dough out on a bed of flour top down and gently spread it out/push out some of the gas. Then pull out and stretch one side of the dough and fold it toward the center. Do the same for the other three sides. Put the dough back in the container with the top up and the seams down. I folded 3 times, then let it rise for the rest of the time.
This time I folded every 30 minutes instead of every 60 minutes, and I only folded 3 times instead of 4 times. The result was a much more slack dough after completion of the bulk fermentation. This time, because of the higher hydration of this version, I probably should have folded at least one more time to get a dough that would hold its shape better. This dough spread out a little too much. It had good oven spring, so that compensated to some extent, but overall I wished it would hold its shape better than it did. Next time, I may reduce the water slightly and fold a little more to get a better shape.
Shape into boule: Form a boule not too differently from the folding technique above, except it is more of a gathering in of the edges of the dough and pinching them together underneat to stretch the top of the dough. Let the boule relax for 10 minutes to seal the seams underneath. Flour a couche very lightly with rice flour and place in 8 quart steel mixing bowl, and then place the dough in the couche seams up.
This time I tried to use mountaindog's recently blogged techniques for shaping the boule "right side up" instead of my previous upside down technique. I also allowed the relaxation of the boule for 10 minutes this time. The only gotcha I suffered was that the dough didn't come out of the rising bucket properly because it was still fairly gloppy - not enough folding of the more hydrated dough. As a result, the dough ended up lopsided, and a couple of the seams from the folding were slightly visible on the top of the dough after the final proof. I slashed through it, to not so gracefully hide that - oh well, next time I'll do better. This time, I did an additional fold after turning the dough out on the table, as it seemed quite gloppy. I need the fold to get to the point where I could form the boule.
Final Proof: Allow to rise for about 2 hours.
Last time, I think the final proof went on too long - 3 hours, and that probably contributed to slightly excessive sour flavors I wasn't so happy with. Also, I think it was long enough that the oven spring wasn't that great. This time, the flavor was very good, at least I thought so. The flavor of this one is complex, slightly sour only, with a cool, light, moist crumb. Although the gloppy dough did spread out, it also had decent oven spring, so the overall shape was slightly flatter than I wanted but not a huge disappointment.
Place on parchment: Place parchment on an upside down baking sheet or a peel and flour with coarse corn meal. Invert the bowl with the dough onto the parchment and pull away the bowl. Gently pull away the couche, which works great with the rice flour on the couche. Slash as photos show. I very lightly spray water on the dough with a pump pressure spray mist bottle.
When I placed the dough on the parchment paper this time, it spread out alarmingly, but was not a disaster. I realize that I need to fold the more hydrated dough one or two more times.
Bake: Preheat oven to 500F well before this point, like an hour before. Use various steaming techniques as described many places for home ovens. Drop temperature to 450F after about 5 minutes. Bake at 450 for 10 minutes, then rotate loaf and drop temperature to 400F for another 15 minutes. Then rotate and drop temperature to 375F. Continue to bake until internal temperature is about 208F.
This version had great flavor. I think this is partly because of the more mild starter, which used spelt instead of more red wheat flour. Also, I fermented for less time at all stages this time, which seems to have helped remove the slightly too sour after taste of version 1. I think the oven spring was better because of more hydration and less folds earlier. The crumb was a little more open for the same reason. Next time, I want to use slightly less hydration and one or two extra folds to make the dough a little stiffer - closer to version 1.