The Fresh Loaf

A Community of Amateur Bakers and Artisan Bread Enthusiasts.

whole wheat

hanseata's picture
hanseata

The owner of A&B Naturals, the store that sells my bread, asked me one day: "Can you bake pitas, too?" I had never made them, so I said with conviction: "Yes!"

At least I knew where I could find a pita recipe!

In "Whole Grain Breads", one of my favorite baking books, Peter Reinhart has a recipe for whole wheat pitas - just the right thing for my grain loving customers.

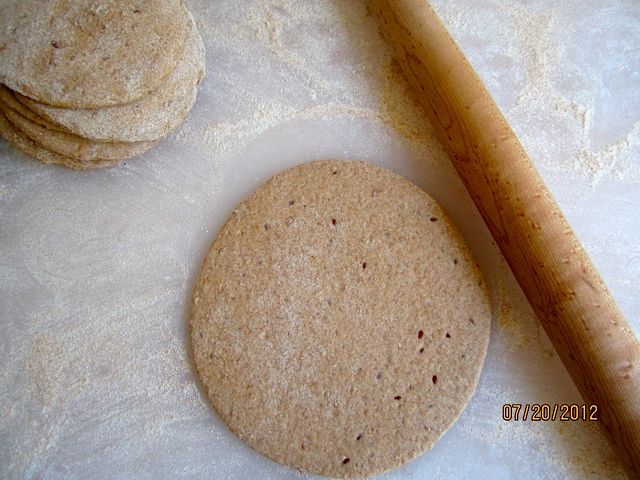
I started my first pita dough. No big deal, until I got to the shaping part. The pitas had to be rolled out no thinner than 1/4 inch (6 mm), and to an 8-inch (20 cm) diameter. But my pitas already reached this thickness at 6 1/2 to 7 inches (16 to 18 cm.)

Pitas are shaped in three steps, first into rolls, then rolled out to 4"/10 cm. Don't skimp on the flouring!

Below: rolling out pitas to a larger round (6 1/2 - 7" or 16 - 18 cm.) Re-flour them, if necessary.
A high oven temperature is key to a pita's proper horizontal separation into two layers. This high temperature has to be maintained during the whole bake, from below as well as from above.

Many cheaper ovens don't heat up to the necessary 550ºF (280ºC.) Without that boost pitas can't produce the large gas bubble that creates a pocket. And without a pocket - no delicious filling!

A baking stone, or a rack lined with unglazed terracotta tiles (like I have), works best for keeping the  temperature stable, even when the oven door has to be opened several time during the baking process. And very hot stones make the best baking surface for pitas, too.

To reheat fast enough after each opening of the door I remembered Peter Reinhart's advice for baking pizza ("American Pie"), where the problem is the same: intermittently switching the oven to broil for a short time.

How many pitas can you bake at the same time? One batch of dough makes 8 (or 6, if you want larger ones.) Peter Reinhart says one at a time, but, of course, being a semi-professional I wanted to do it a little less time consuming.

After some trials, I found that I can put two at the same time in the oven. That's the maximum, with more it becomes very difficult to load and unload them without damage, and to keep control over their baking process.

2 pitas can be baked at the same time. Once out of the oven, they deflate quickly.

Of course, it takes a little bit of experience to slide the pitas into the oven without them folding over in one place, and to extricate them without nicking them with the peel.

But it's not rocket science, a smart child can do it:

  Josh, our carpenter's son, thought it was much more fun to help with my baking than reading his book!

Though Peter Reinhart's original 100% whole wheat pita is very good, I made a few changes to it. I substitute a 7-grain mix for some of the whole wheat flour, and add an overnight bulk rise in the fridge, this is more practical for my baking schedule, and, in my opinion, improves the taste even more. It also has the advantage that I can reduce the yeast amount by 2 grams.

Though I usually cut down on the sweetener in Peter Reinhart's recipes, this whole grain bread needs the full dose.

We like our pita filled with grilled Halloumi cheese, tomato and lettuce - the way we had it in Girne/Kyrenia on Cyprus. And how do my customers at A&B Naturals like them? They fly off the shelf so that I have to bake them every week!

Here is a link to the recipe in my blog "Brot & Bread".

knitsteel's picture

delectable planet whole wheat bread video

July 1, 2012 - 8:17pm -- knitsteel
Forums: 

I think I had my first success with whole wheat bread following the delectable planet website's recipe and video here on youtube http://www.youtube.com/watch?v=-Rjd1NZfG4Y

Are there any other good videos for total whole grain breads?  I've been doing some searches, but it's tough to sort out the totally whole grain bread videos from the ones that mix white and wheat.

dabrownman's picture
dabrownman

After the last white bread bake using the Pharaoh’s Mastaba, we went back to a 67% whole grain; rye and wheat bread with rye and wheat sprouts and a variety of add-ins and seeds including wheat germ, flax, coriander, pumpkin, hemp, rosemary, chia, cumin and red rye malt baked in another variation of the Chacon.

 The Chacon is quickly becoming a favorite bread shaping method.  It is a fun way to make bread with as many variations as one can conjure up and imagine.  This time we used a plain knotted roll in the middle of the basket and surrounded it with a plain two strand braid that was twisted (Twisted Sisters).  Then we added the remainder of the dough which contained all the add ins and sprouts as a disk to the top – which will become the bottom when tipped put of the basket.

This gave us a new but handsome boule shape that had no add-ins in the finish top and all the add-ins on the bottom.  It will be like having two different breads in each slice.

The Chacon came out of the basket easily and it slid into the mini oven, without slashing, just as well and onto my new ceramic tile / stone - which quickly broke when we threw water onit by accident before closing the door to steam.  No worries, the tile only cost 88 cents and I have 11 more of them.  In the back of the mini, we used Sylvia’s steaming method with a Pyrex 1 cup measure half full of water with dish rag in it.

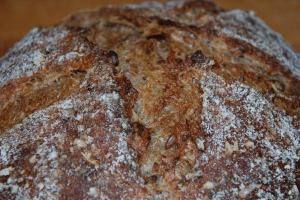
 The stone worked well and the Chacon was very brown and crunchy when it came out of the oven and it smelled wonderful too.  The boule cracked at each twist of the sister and at the knot seams.  We just love the way the Chacon cracks almost exactly where we want it to and think it should instead of willy nilly.  

 The crumb shots and tasting will follow after the Chaon cools.  The formula and method follow the pix’s. 

 Method

The method was similar to our recent bakes with (3) - 4 hours each, 12 hour SD levain build.  This time it was not retarded overnight because we used some sliced onion in the build that made it smell more sour than normal.  The flours were autolysed with the wet and salt for 12 hours in the fridge too.  We have been adding the salt in with the autolyse recently and cannot tell any difference when we do it this way.  Forgetting to add the salt days are now over.

After soaking in water for 4 hours, we placed the seeds to be sprouted on 2 damp paper towels covered with another and wrapped in plastic on a plastic cutting board.  Half way through the 24 hour sprouting period, we re-dampened the top towel and covered it back up.  The seeds were sprouted in 24 hours. 

 We mixed the dough with the autolyse with the KA for 8 minutes on 2 and  2 minutes more on KA3.  The dough was then moved to an oiled, plastic covered bowl to rest for 15 minutes before doing 5 sets of S&F’s every 15 minutes on a floured work surface.  When the S&F’s were complete the dough was left to develop and ferment for 1 ½ hours before going into the fridge overnight for 8 hours.  In the morning the dough was allowed to come to room temperature over 1 ½ hours on the counter.

 The dough was then portioned into (3) 150 g pieces for the knotted roll and the 2 strand, ‘twisted sister’ braid.  In a rice floured basket the knotted roll went in first in the center, then the twisted sister went in around the knotted roll.  The remainder of the dough was flattened out gently and all the sprouts and add ins were incorporated.  Once the add ins were incorporated evenly, the remaining dough was shaped into a boule and allowed to rest for about 5 minutes until it had relaxed.

 It was then flattened into a disk the width of the basket and placed on top of the roll and braid to make the finished Chacon in 3 distinct sections.

 After a 2 hour proof it had passed the poke test and was ready for the mini oven stone and 12 minutes of steaming at 450 F regular bake.  The steam was then removed and the mini oven turned down to 425 F convection this time.  The Chacon was rotated 90 degrees every 5 minutes.

 After the 2nd rotation the oven was turned down to 400  F convection.  20 minutes after the steam was removed, the bread was done – 32 minutes total.  It was allowed to cool with the oven off and the door ajar for 10 more minutes before being moved to the cooling rack.

67% Whole Rye and Whole Wheat with Sprouts, Wheat Germ, Flax and Red Rye Malt.     
      
StarterBuild 1Build 2 Build 3Total%
SD Starter15100254.57%
Rye304007017.50%
WW00707017.50%
Water 40 4010.00%
Milk 3000307.50%
Total Starter75907023558.75%
      
Starter     
Hydration93.22%    
Levain % of Total25.59%    
      
Dough Flour %   
Dark Rye107.526.88%   
Potato Flakes102.50%   
Ground Flax Seed102.50%   
AP16541.25%   
WW107.526.88%   
Dough Flour400100.00%   
      
Salt82.00%   
Water33583.75%   
Dough Hydration83.75%    
      
Total Flour547.5    
Milk 30, Water 432.5472.5    
T. Dough Hydration86.30%    
Whole Grain %69.50%    
      
Hydration w/ Adds82.53%    
Total Weight1,153    
      
Add - Ins %   
Wheat Germ102.50%   
Red Rye Malt30.75%   
Hemp 20, Chia 10, Pumpkin 306015.00%   
VW Gluten123.00%   
Total8521.25%   
      
Multigrain Sprouts %   
WW205.00%   
Rye205.00%   
Total Sprouts4010.00%   
      
Coriander, Cumin & Rosemary30.75%   
jschoell's picture
jschoell

Make a soaker with whole wheat flour and spelt berries. Let it sit at room temp, covered. A day later, mix yeast with warm water and honey. After 5 minutes, add the foaming yeast to the soaker, along with some salt and enough whole wheat flour to make a sticky dough. Knead for 5 minutes, form a ball and transfer to a bowl coated with good EVOO. Let rise until doubled.

Pour out dough and slice off chunks that will form 3 inch diameter balls. Wrap balls in plastic wrap and refrigerate or freeze. 

After a day of chilling, preheat oven to 500 F, with a heavy cast iron pan on the middle rack. Pour 1/4 cup of poppy seeds on a work surface. Take the dough ball from the fridge, unwrap it, and flatten it on top of the poppy seed mound. Flip the dough over and smash it into the seeds again, sweeping the seeds into a pile as needed. Continue until the dough disc is black on both sides with poppy seeds. Slide it onto the preheated pan and bake until puffy, about 5-6 minutes. 

Isand66's picture
Isand66

I've been wanting to try my hand at making Phil's 100% Whole Wheat Desem bread since it sounded so simple but yet so good.  I had started preparing the Desem starter a while ago but had to abandon it when I went away for business.  I was not thrilled with the way it was turning out anyway so it wasn't a great loss.

I decided to try a different approach for building the starter from my 100% AP White Starter by doing a 3 stage build.  For the first build I used 50 grams of seed starter, 125 grams Bread Flour (KAF), 75 grams Organic Whole Wheat Flour and 200 grams of water.  I mixed this up and left it out at room temperature overnight for around 10 hours.  I then put it in the refrigerator until that evening when I proceeded to stage 2.  I added 142 grams of Whole Wheat, and 85.4 grams of Water.  I left this out again overnight and put it in the refrigerator until the next evening.

For the third and final build I added another 142 grams of Whole Wheat and 85 grams of water.  I left this out for one more evening and refrigerated it until that evening when I prepared the final dough.

I ended up making a lot more starter than I needed, but it was worth building it up to around 61% hydration as the starter was nice and fruity and ready to go to work!

Please see Phil's original recipe for the formula and his original procedures here http://www.thefreshloaf.com/node/27999/honest-bread-100-wholewheat-desem-bread-and-some-country-bread.  I decided to change his procedures by using my Bosche Mixer as follows:

After the flour autolyes for 1 hour I added the levain and mixed on speed #1 for 1 minute and #2 for 4 minutes.  I then did a stretch and fold, rested the dough uncovered for 10 minutes.  I then did another stretch and fold, covered the dough and let it rest for 10 minutes.  I did one more stretch and fold and put it in a lightly oiled bowl for 2 hours.  I then put it in the fridge overnight.

The next day I let the dough sit out at room temperature for 2 hours.  After 2 hours I formed it into loaves and put them in floured bannetons and let them rise covered for 2 hours.

I then baked on my oven stone with steam at 450 degrees until both loaves were golden brown and reached an internal temperature of 200 - 210 degrees F.

The dough lived up to all of its good press and had a nice slightly sour/sweet taste.  I have been eating it all week and it makes great toast!


MIchael_O's picture

App-Generated Whole Wheat Cinnamon Rolls Recipe

May 9, 2012 - 12:38pm -- MIchael_O

Hello,

I made a Whole Wheat alternative to the traditional cinnamon roll. Since I like creativity, I tried a recipe generated from http://www.sugardrone.com. which is my site. The set of lower numbers in parentheses is the scaled down version I actually baked. The scaled down version actually took a little longer to rise because I used a scant measure of wet foamy yeast as opposed to sugary water.

bryoria's picture
bryoria

I made another batch of 100% whole wheat buttermilk bread from Laurel's Kitchen Bread Book yesterday.  This time I used freshly ground flour (hard red spring wheat) measured by weight, mixed all the ingredients except the butter for 2 minutes and then let the dough sit for 40 minutes in an attempt to hydrate the fresh ground flour a little bit.  Next time I would attempt this without the salt added as per the various threads on this site regarding autloyse - but yesterday I didn't come up with the idea until after I'd already added everything.

After the 40 minute rest I mixed it for 4 more minutes on speed 4 on the KitchenAid and added the butter in cold, small, pieces as per the recipe.  The butter didn't mix in very well so I moved the dough to the counter and kneaded the butter in for another minute or two, then let the dough sit in a covered bowl (in a cold oven with the lights on for warmth).  I let it rise for 2 hours and 15 minutes, giving a stretch and fold every 45 minutes.  Then divided it into two equal pieces, rounded them and let them sit for 15 minutes before forming them into pan loaves. 

I let the loaves rise for 1 hour, then baked them in a pre-heated 350F convect oven for 35 minutes.  They rose in the oven a little more and ended up the perfect size for sandwiches. 

This bread is always delicious and my family loves its softness and flavour for sandwiches and toast.  The fresh-baked heels are amazing and we usually snitch those from the sliced loaf before we freeze it - no one ever wants the heels for toast or sandwiches later anyway!

jdchurchill's picture
jdchurchill

ayo tfl-ers

dig my bread this week.  twas a good week:

is this photo too big?  i changed the dimensions to (800X535) what size do you guys make your pictures for this type of stuff?

and i know all you bread-nerds dig the crumb shots so here you go:

and even closer up:

omg its so nice and soft.  i am so pleased.  i think lately i have not been letting the final proof go long enough so this one went about 8hrs, but i probably could've gone even longer.   maybe this week i will try the same recipe, but do final proof for closer to 12 hrs.  anybody has an opinion about this?  ok guys thanks for looking and reading, take care.  -jdc

Isand66's picture
Isand66

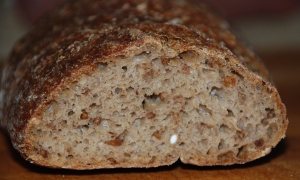
I get a kick out of trying new types of flours and grains in my bread baking.  I frequently shop on-line at King Arthur Flour and like to try new and different products when I can.  I've read many recipes on The Fresh Loaf using soakers and have tried a few recipes from Peter Reinhart's Whole Grain Bread book with mixed results.  I decided the other day to try my own formula using a multi grain soaker from my baking supply bin and also used some of my existing refreshed sourdough starter mixed with some rye, whole wheat and first clear flours.  The results were surprisingly good considering I had no idea what to expect.  The final bread had a great nutty sour flavor with a nice thick crust and moist crumb.

Ingredients

Soaker

2 oz. Rolled Oats

2 oz. Malted Rye Berries

2 oz. Barley Flakes

1 oz. English Malted Wheat Flakes

1 1/2 Cups Boiling Water

Final Dough

15 oz. White Starter recently refreshed

3.5 oz. Whole Wheat Flour

3.5 oz. Medium Rye Flour

4 oz. First Clear Flour (you can substitute bread flour or High Gluten Flour)

2.5 Tsp. Salt

6 oz. Water, 90 degrees F.

Directions

Mix all ingredients for soaker in a bowl and add boiling water.  Let it sit for 2-3 hours covered until the grains are soft.

After 2-3 hours add the soaked grains along with the remaining liquid in your mixing bowl and add the flours, salt and remaining water and mix for 2 minutes.  The dough should come together in a shaggy mess and should be relatively moist at this point.  Let it rest for 5 minutes and mix for 4 minutes more on medium low-speed.

Remove dough from mixing bowl to work surface and do a stretch and fold.  You may need to wet or oil your hands and the work surface since the dough will still be very sticky at this point. Form the dough into a ball and let it rest uncovered for 10 minutes.  Let the dough rest uncovered for 10 minutes.  After 10 minutes do another stretch and fold and cover the dough with a moist lint free towel or plastic wrap sprayed with non-stick cooking spray.  Do another stretch and fold two more times letting the dough rest 10 minutes each time.  After the last stretch and fold put the dough into an oiled bowl and cover it tightly.

Let the dough sit in your bowl for 2 hours at room temperature.  It should only rise slightly at this point.  After the 2 hours are up put in your refrigerator for at least 12 hours or up to 3 days.

When ready to bake the bread take your bowl out of the refrigerator and let it sit at room temperature for around 2 hours.  After 2 hours shape the dough as desired being careful not to handle the dough too roughly so you don't de-gas it.

Place it in your bowl, banneton or shape into baguettes.

Let it sit at room temperature for 2 hours covered with oiled plastic wrap or a moist cloth.

Pre-heat oven with baking stone (I use one on bottom and one on top shelf of my oven), to 500 degrees F.

Slash loaves as desired and place empty pan in bottom shelf of oven.

Pour 1 cup of very hot water into pan and place loaves into oven.

Lower oven to 450 Degrees and bake for 25 - 35 minutes until bread is golden brown and internal temperature reaches 200 degrees.

Shut the oven off and leave the bread inside with the door slightly open for 10 minutes.  This will help dry the loaves out and keep the crust crunchy.

Let cool on cooling rack and enjoy!

This post has been submitted to the Yeast Spotting Site here: http://www.wildyeastblog.com/category/yeastspotting

Mini Oven's picture

Sourdough starter from whole wheat & cumin

February 24, 2012 - 11:52pm -- Mini Oven

Sourdoughs starters methods vary.  Here is one from a Julia Child program featuring Joe Ortiz

Always good to know if you can't get a starter started, try a different method  (but please don't think you are capturing yeast from the "air," they come from the flour)

http://youtu.be/gEP3QW-V0sw

I haven't tried this myself but if you do, come back and comment,  Please!  

Pages

Subscribe to RSS - whole wheat