The Fresh Loaf

A Community of Amateur Bakers and Artisan Bread Enthusiasts.

whole grain

JMonkey's picture
JMonkey

Though I'm sure I'll be lured away once again by the delights of a good poolish, I'm back to baking whole grains. In fact, last week, I think I may have pulled the prettiest loaf of whole grain sourdough hearth bread I've ever made out of the oven.


Here's the loaf just before it went into the oven.


And the innards.


This bread has quickly become my "daily bread," the loaf I make most often, whether for dinner or sandwiches.

I also took a shot at my own variant of the Dragon's Breath Bread that Eric Hanner posted several weeks back. I tried to make a 50% whole wheat ciabatta with sauteed garlic cloves and cheddar cheese chunks. It was an interesting experiment and made a killer sandwich, but next time, I think I'll chop the cloves up a bit and not bother with trying for ciabatta. As you can see, it didn't turn out exactly as I'd hoped, especially since part of the loaf stuck to the peel:


And the crumb ...


Thanks, Eric, for posting that recipe. Was fun!

bwraith's picture
bwraith

Retsel Mill and Brass Sieves

Home Mill High Extraction Sourdough Miche

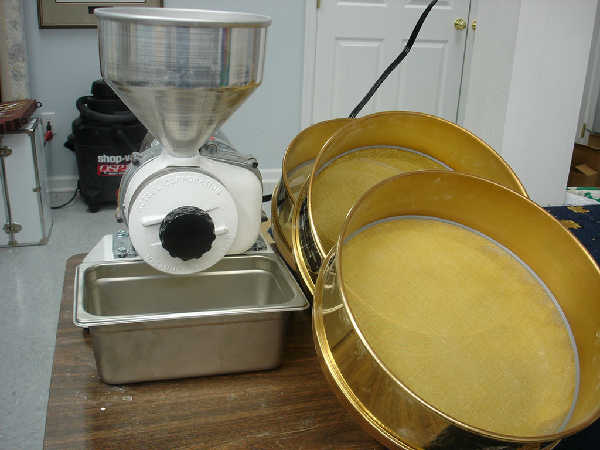
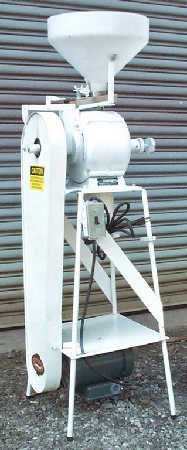
JMonkey's many blog entries on whole wheat, as well several other TFLer's posts, helped me learn to make whole grain breads that are light and flavorful, rather than the rocks and bricks I had thought were inevitable with whole wheat. Then, Peter Reinhart's Whole Grain Breads came out, and I learned more about the reasons for soakers and mashes and gave mash bread a try. Then, I read some posts by Ron, who has posted passionately about whole grains and pushed me to think about trying home milling. Finally, Goetter mentioned stone milling at home with his Retsel, which he said was easy to clean and use, and I was off and running. I just recently received my Retsel Mil-Rite, and I'm happy to say it works just great - quite fast (5 pounds/hr for reasonably finely milled flour) and easy to clean if you need a few pounds of freshly milled whole grain flour.

However, unlike many or most of the home milling aficionados, I am as interested in traditional methods and recipes as I am in the nutritional aspects of bread. As such, I do want to be able to create "high extraction flour" or maybe even some regular bread flour from my whole grain berries to satisfy interests in country style miches and other types of bread that may call for other than pure whole wheat flour. In order to accomplish that, the flour needs to be sifted. MiniOven mentioned brass sieves, and some internet searches revealed a number of places. I finally purchased a range of brass sieves from number 18 through 120 from http://www.lmine.com, hoping to experiment with them to extract more refined flours from my freshly milled whole grain flour. While conversing with the people at Legend Mine, they said it would be backbreaking to sift very much flour by hand, and that I should consider a "sieve shaker". I don't have the sieve shaker yet, but it will arrive soon.

Sieve Shaker

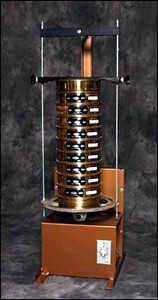
Meanwhile, I went through a laborious process of discovering the right coarseness of grind and which sieves to use. I found that I could get very reasonable results by setting the mill stone adjustment to be just slightly looser than finger tight. The flour coming out was fairly fine - good for a whole wheat bread flour. Yet, it had some percentage of larger particles. I then successively sifted the flour through my #20, #40, and #60 sieves. The #20 caught large particles of bran, about 5% of the weight. The #40 sieve caught smaller particles of bran and other dark parts of the kernel - probably some of the germ from the look of it, with a weight of about 15%. The #60 sieve was catching what I would call a very dark flour, probably some combination of bran, germ, and outer endosperm, about another 15% of the weight. What came out of the bottom of the #60 sieve was very nice bread flour, creamy and slightly dark colored. I'm sure that flour from # 60 would have made a delicious whitish bread. So, the sifting is nowhere near where it could be with a shaker and will never be anything close to the perfect filtering done by commercial mills. However, for my purposes, even this very spur-of-the-moment hand processing was enough to get 65% fresh, creamy, bread flour.

As for grain, I ordered 25 lbs. of Wheat MT Prairie Gold, 25 lbs. of Wheat MT Bronze Chief, 10 lbs. of their wheat berries (hard red winter wheat berries, I think), and 5 lbs. each of spelt and rye berries. I stored them in 6 gallon buckets with screw on hermetically sealed lids and placed oxygen absorbers in the buckets. A 6 gallon bucket comfortably holds 25 lbs. of grain with enough room for the screw-on lid. All the storage buckets and lids were purchased form http://www.pleasanthillgrain.com.

Although the Retsel appears to be more than adequate in retrospect, I went off the deep end ealier in the week and ordered a Meadows 8 inch mill also. This one will grind much faster and hopefully won't be too hard to clean.

To create my high extraction flour, I just took the finest 85% that came out of my sifting, which amounted to all of the bread flour (throughs from the #60), all of the throughs from the #40 (a darker semolina-like flour), and some of the throughs from the #20 sieve (very dark, very coarse), such that I had 85% of the total weight of all the flour that I sifted. I then ran the coarser flours back through the mill at a fairly fine setting, which resulted in making those coarse components much more finely milled. I mixed them in with the good bread flour coming out of the #60 sieve, and that is what I used as my "high extraction flour".

I also finely milled enough spelt and rye to make 55g of whole rye flour and 105g of whole spelt flour. I just mixed all the rye and spelt berries together and ran them through the mill once.

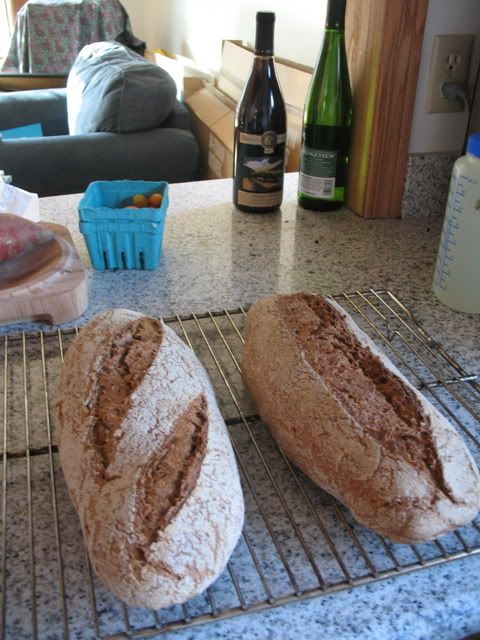
I then made my high extraction miche, along the lines of a Thom Leonard Country French with a spelt and rye levain. The overall recipe is 15% fermented flour in a spelt and rye levain, mixed with a soaker of the high extraction flour with 1% malt syrup, 2% flour, and 1 tbsp of diastatic barley powder.

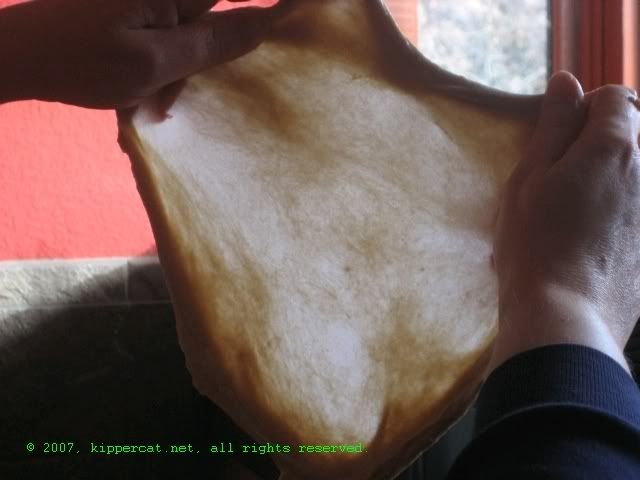
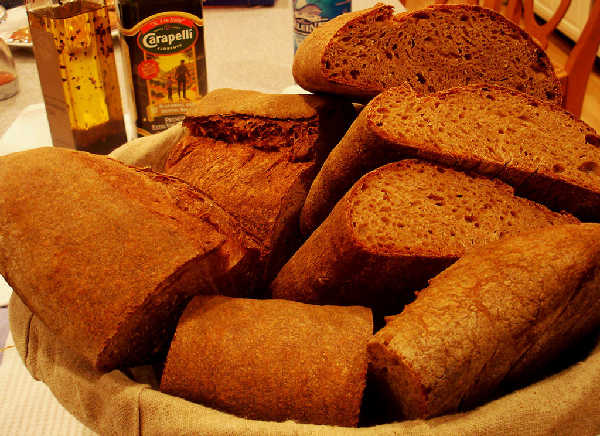
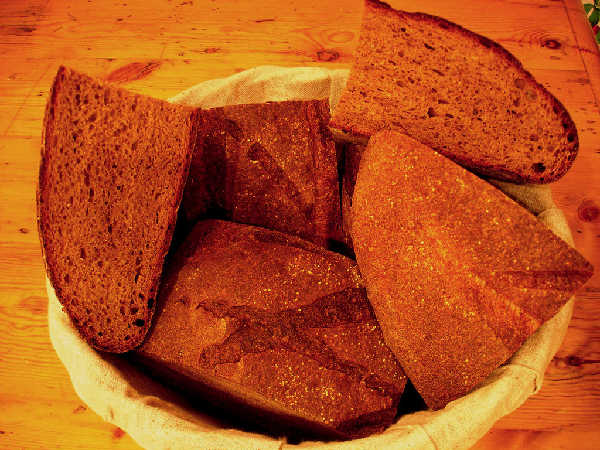
Some photos of the process are posted. Spreadsheets are posted in xls and html format.

Levain:

  • 30g firm storage starter (any starter will work - use 25% more batter starter or about 50% more liquid starter)
  • 52g whole rye flour
  • 104g whole spelt flour

I mixed this starter at 12:45AM after a night of much experimentation and exercise manually sifting about 10 cups of grain into 40 samples from the sieves trying to figure out the best settings for the mill. The levain was designed to rise by double and ferment an hour or so more by 9:00 AM.

Soaker:

  • 10g diastatic malt powder
  • 15g malt syrup
  • 30g salt
  • 1024g water
  • 1300g home milled and manually sifted high extraction flour

I mixed the soaker in a large bowl using a scraper until it was reasonably well mixed. The mixing was done at about 1:00AM and the soaker was refrigerated overnight.

Dough:

At 9:00AM in the morning, the soaker was spread out on a wet counter like a great big pizza. The levain was chopped into marshmallow-sized pieces which spread evenly over the soaker and pressed into the dough with the palms of my wet hands. The dough was rolled up and folded a few times, squished all through with wet hands a few times, rolled a couple of times, and placed in my DLX mixer. The dough was mixed/kneaded in the DLX mixer on low to medium for 4 minutes, allowed to rest for 4 minutes, and then mixed for 4 more minutes.

Bulk Fermentation and Folding

The dough was allowed to rise at a temperature of approximately 74F in a cabinet above my coffee machine. Initially the temperature was around 70, but by the end of the bulk fermentation the temperature was up to about 76F. During the bulk fermentation, I folded the dough at 10:40AM, 11:40AM, and 12:40AM. The total bulk fermentation time was 5.25 hours at roughly 74F.

Shaping and Proofing

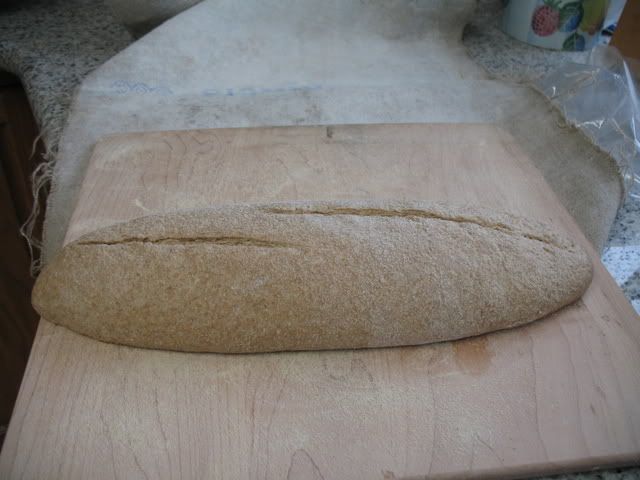
One large boule was formed at 2:15PM, allowed to sit for 15 minutes on the counter, and turned upside down into one of those San Francisco Baking Institute lined baskets (12" diameter). I dusted the loaf and the basket liner with some of the bran and semolina-like flour from my siftings mixed with a small amount of rice flour. In retrospect, since the dough was not that hydrated (77%), it wasn't necessary to use the rice flour. I could have just used some of my home sifted bran and nothing else.

The basket was placed in a large ZipLoc "Big Bag" with a warm bowl of water and sealed. The proofing temperature was about 75F. I slashed with cross-hatch pattern and baked at 5PM for a total mix to bake time of 8 hours, and a proofing time, starting from 2:15PM of 2:45.

Bake

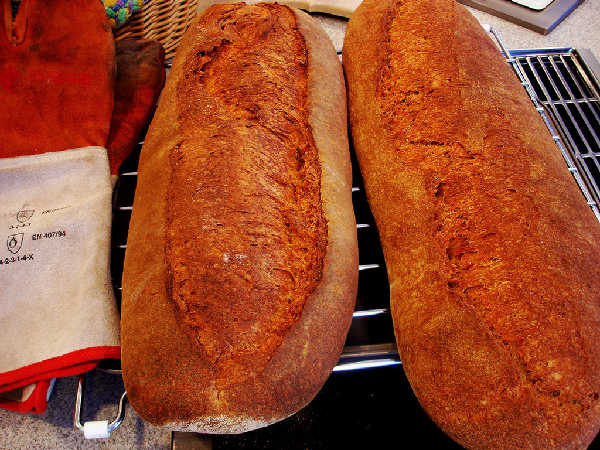
The loaf was baked in my brick oven. The oven was fired earlier and allowed to cool to a hearth temperature of about 450F. I sprayed the loaves with an orchid mister, sprayed the chamber of the oven until it was full of steam (20 seconds), and sealed the door with my wooden wet towel covered door. The bread was rotated every 15 minutes for a total of about 50 minutes bake time. The oven door was left open after 20 minutes, and the hearth temperature dropped to about 400F at the end of the bake.

To do this in a kitchen oven, heat oven to 450F, create steam however you do it, and then drop the oven temperature to about 400F. If the loaf becomes too dark, cover with foil and/or drop the temperature to 350F. Allow to thoroughly bake, so the color of the crust is uniformly dark but hopefully not burnt and the internal temperature is above 205F.

Cool

Allow to completely cool before cutting - several hours at least.

Results

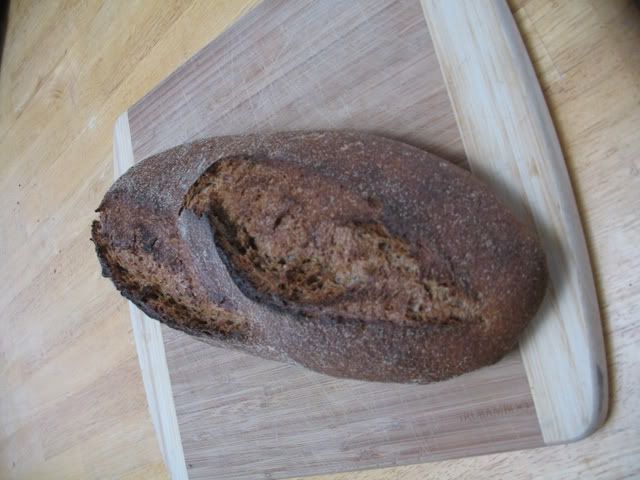
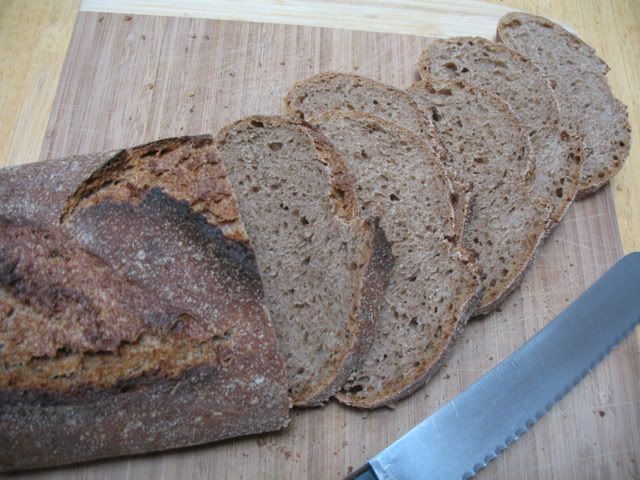
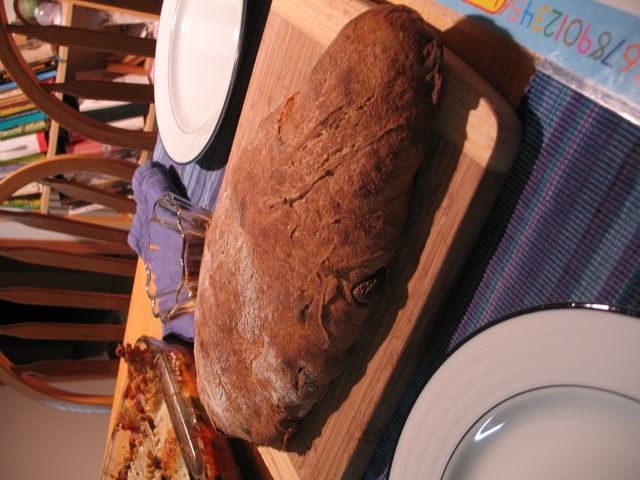
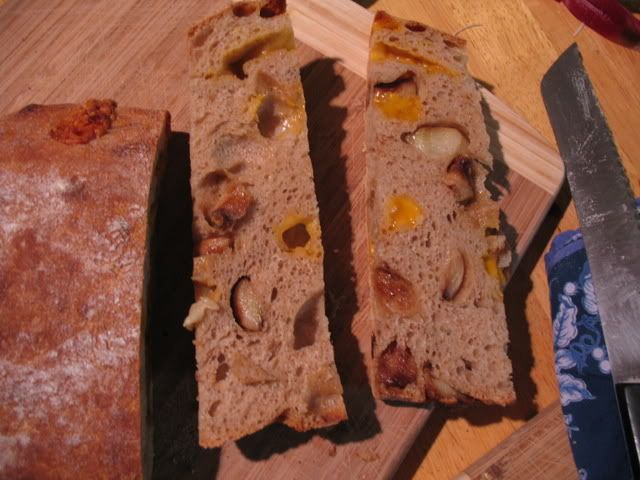
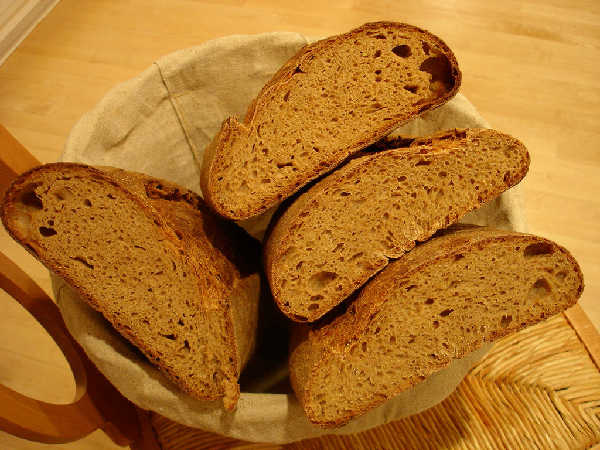
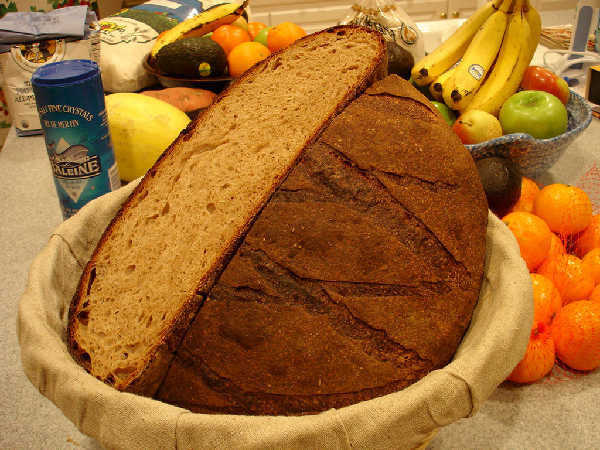
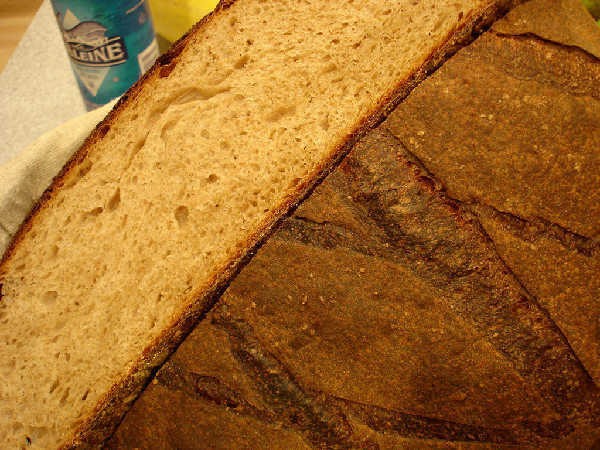
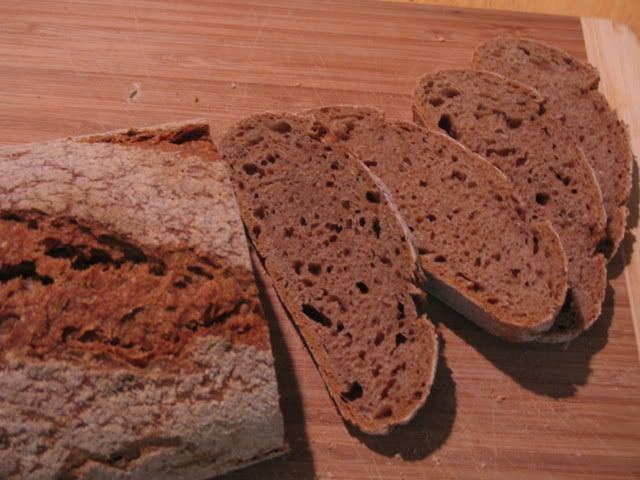
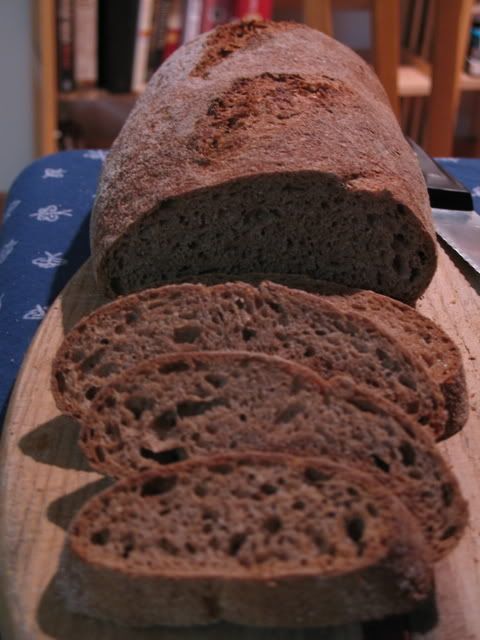
The miche has a color that is darker than my usual whole wheat loaves, which may be partly because my sifting wasn't that efficient, partly because the extraction rate may be higher than for Golden Buffalo, which I would normally use for this application, and maybe just the nature of freshly milled flour, which I've never tried before. The texture is definitely lighter and softer than I expect from a whole grain, so the high extraction worked in that sense. The flavor is closer to a whole grain loaf than I expected. If I want a more mild white flour flavor, it may mean using less of the darker, larger particles, i.e. use a slightly lower extraction rate. By the way, the aroma of the fresh flour when mixed with water is most definitely better than anything I've smelled using commercial flour. Everyone in the house commented on the great aroma coming from the dough and the bread. I do believe the flavor and aroma of the bread is enhanced by the freshness of the milling, something commented on by many on the site.

The Next Phase

When I receive my Meadows mill and the sieve shaker, the next phase of the project will be to discover the right settings of the mills and sieves to gain a more efficient separation of the particles from the milling.

Meadows 8 Inch Light Commercial or Home Mill

But Why Did I Do This?

OK, part of it is just fun with gadgets. However, there are several objectives beyond that. One very significant motivation is that I haven't been very happy with the availability of other than white flour or whole wheat flour. I'd like to be able to create flours with various characteristics in the amount I need when I need it. Also, any flour other than white flour will probably have spoilage issues if kept for too long. So, rather than buy a few pounds of some specific flour, pay a lot for shipping, and then use a small amount and throw out the rest when it spoils, I can create the desired flours to order. Much of the bran can be used for dusting or added to cereal, and even the middlings may be tossed into oatmeal or toasted and used in place of wheat germ, as suggested in the Essential's Columbia recipe. If I can make the process convenient and fast, then it will be easier and cheaper in the long run to occasionally buy bulk amounts of a few different berries, as I already just did. Storage is easy for the berries, and they stay fresh for a very long time in berry form.

The result is a drastic improvement in the freshness of my flours, very little waste or spoilage, and much lower cost. I seem to spend upwards of $4/pound including shipping for small quantities to get particular flours I want over the internet. The berries, purchased mostly in 25 lb. quantities, came to less than $2/pound, even if I'm very particular and buy from Wheat MT or Heartland Mill. It could be much less if I can find sources for high quality berries locally. However, it's not a bad guess to say I lose close to half my purchased whole grain flours to spoilage. I could offset the spoilage with flour freezing strategies, but I just think this home milling approach is better. No freezing, easy to use screw-on lids on buckets of grain, and absolutely fresh flour to order. At least, that's what I'm shooting for.

It's true that the cost of the mill and sifting equipment won't be offset by the lower cost of the berries for something like 2-3 years. However, for me the home milling approach is still justified because of the freshness, flexibility of flours I can generate, and the convenience of storing berries. The fact the lower cost will allow for the recover of the cost of the equipment even if it takes a few years is just an added benefit.

Of course, the benefits above are theoretical. Maybe after the next phase, I'll conclude it's not possible to produce the desired flour characteristics with simple sieves and a small stone mill. However, the first phase was almost sufficient, other than the excessive physical effort required to manually sift the flour. If I can make the separation work a little better by discovering the right series of millings and siftings, which should be far easier to do with the sieve shaker, I'm hopeful the results will justify doing it regularly going forward.

KipperCat's picture

You can get a windowpane in whole wheat dough.

December 19, 2007 - 11:40am -- KipperCat
Forums: 

This picture is from a 100% whole wheat, rather high hydration dough. It had been kneaded for about 20 minutes at speed 2 in a Delonghi/Kenwood mixer. The lighting isn't that great, but if you look at the base of the left thumb, you'll see a fingertip behind the dough. The browner areas are simply dough that has not been stretched. This started as a piece of dough about the size of a golf ball And yes, it made nice bread - in this case a light sandwich loaf.


bwraith's picture
bwraith

100% Whole Grain Hearth Breads

100% Whole Grain Hearth Breads - Crust

100% Whole Grain Hearth Breads - Crumb

After following the recent adventures of JMonkey with 100% Whole Grain Sourdough and working on answering some of the questions concerning whole grain sourdough breads posted by Ron, Shai, and Taygirl, and wanting to make some bread my wife, who is more of a "true believer" in whole grain breads, would be happier to eat, I've decided to do some experimenting again with whole grain hearth breads. Just to be up front about this, I'm not a "true believer". I'm happy to have some "Work Horse Sourdough" or even a white "Pane Casarecio di Genzano" or a "Sourdough Pagnotta" or a "Thom Leonard CF" or the like in smaller quantities, and just eat other foods to get the nutrients and fiber from the bran and germ that might be missing due to indulging in less than 100% whole grain breads. Nonetheless, when my granola eating friends give me that disapproving look, I just feel guilty if I can't come up with a good 100% Whole Grain Sourdough Hearth Bread to settle their doubts.

With the caveats mentioned above, I still thought this bread had good flavor and texture. My wife was especially happy with it and asked me to keep a small quantity of it on hand at all times in the freezer, along with other favorites. The only other time she has made such a request was for the Sourdough Focaccia, which is an addiction, not a healthy choice.

I made this bread in two different ways. The first is a one-step approach with a very long somewhat cool rise from a very small amount of starter added directly to the final dough ingredients. The second is a two-step approach with an overnight levain allowed to somewhat more than double in volume and a soaker of the remaining whole grain flours that are combined in a final dough with salt and a little malt syrup the next day for a faster warmer final rise. Note that to satisfy the "100% whole grain true believers", I have gone to the trouble of making a whole wheat starter, which I did by taking a tiny amount of my white flour starter and feeding it repeatedly over the course of the past week with exclusively whole wheat flour. Given that I feed the starter 1:4:5 (starter:water:flour by weight) every 12 hours, there is still about 1 billionth of a part of white flour in it. Sorry, I just didn't have time to get it any closer to pure whole grain. However, I then dilute it by a factor of about 100 in the dough, so the final dough is 1/100 billionth white flour or so, just in the interests of full disclosure.

I have spreadsheets for both the two-step version (html, xls), and the one-step version (html, xls). Photos of the process, including a nice pair of roast chicken and some roast yams, later mashed, covered with marshmallows, and allowed to brown in the oven. Kids love those marshmallow covered yams, let me tell you.

Version 1 Mixing and Initial Rise

Version 1 Dough:

  • 15g 80% hydration whole wheat starter (you can probably substitute any whole grain starter, or a white flour starter if you don't mind going a little below 100% whole grain).
  • 41g whole rye flour
  • 141g whole spelt flour
  • 383g Wheat Montana Prairie Gold (high protein white whole wheat flour)
  • 375g Wheat Montana Bronze Chief (high protein red whole wheat flour) or just combine the whole wheat flours and use whatever whole wheat flour(s) you like.
  • 10g organic barley malt syrup
  • 18g salt
  • 758g water

Mixed at 9:55PM with DLX mixer on medium/low for 8 minutes, then folded a couple of times and dropped in covered rising bucket for the night. It started at 74F after mixing and dropped to 70F over a few hours. It was at about 69F the next morning.

Version 2 Levain and Soaker

Levain:

  • 15g 80% hydration WW starter (same notes as above)
  • 41g whole rye flour
  • 141g whole spelt flour
  • 146g water

Mixed at 10:15 PM and let rise overnight, covered, at 70F down to about 69F.

Soaker:

  • 375g Wheat MT Prairie Gold (same notes as above)
  • 375g Wheat MT Bronze Chief (same notes as above)
  • 604g water

Mixed at 10:25PM and allowed to rest overnight at 70F down to about 69F.

Version 2 Mixing

Version 2 Dough:

  • Levain
  • Soaker
  • 10g organic barley malt syrup
  • 18g salt

The mixing of Version 2 was done at 7:30 AM. I spread soaker out on wet counter like a big pizza using wet hands. Paint levain onto soaker using a spatula. Paint organic barley malt syrup over levain. Roll up and fold a couple of times. Spread out like a pizza again. Spread salt evenly over the dough. Roll up and fold a couple of times. It was mixed in DLX mixer at medium/low for 8 mintues, folded a couple of times and placed in a covered dough bucket to rise. The dough bucket was put in my "proofing cabinet", a spot above my coffee machine that sits at about 76F in the winter. I knew that if I want to bake "Version 1" and "Version 2" together, I would need to speed up the rise on "Version 2" a little to get them to coincide. So, Version 1 was left in a cool spot at 70F for the morning, while version 2 was placed in the proofing cabinet to get a boost.

Version 1 and Version 2 Folding

At this point both versions are in their respective rising buckets, one in a warm spot, the other in a cool spot. I folded both of them about once per hour during the remainder of the bulk fermentation for a total of 3 folding sessions each. All the folds were typical of the description in Hamelman's "Bread". I pour the dough out on a lightly dusted counter with the smooth side down, fold each side in toward the middle, from the north, east, west, and south, brushing off any flour after each fold, and then turn it back smooth side up and drop it back in the rising bucket. The remainder of the bulk fermentation, measured from the point Version 2 was mixed (7:30AM), was 3.5 hours.

Shaping

At 11:00AM, both loaves were shaped into batards. Each one is about 17 inches long, and both were placed in a half sheet in couche cloths smooth side up, put in a Ziploc "Big Bag", and allowed to proof for another 2.75 hours, until 1:45 PM. The ambient temperature of the kitchen was still about 70F. Version 2 therefore proofed at an average temperature of about 74 or 73F as it started at 75F and dropped to room temperature during the final proof, while version 1 proofed at 70F the whole time.

Slash and Bake

The loaves were turned onto a peel, slashed, and put in my brick oven. The hearth temperature was about 425F and I sprayed a few ounces of water on the loaves and into the oven chamber with an orchid mist sprayer, and sealed the oven with a wet towel covered door. In a kitchen oven, bake at 425F for a few minutes with steam, then drop the temperature to 375F and allow to fully brown. The final hearth temperature was about 375F after 45 minutes of bake. The loaves had browned, the crust seemed done, and the internal temperature was about 209F.

Cool

The loaves were allowed to cool completely.

Results

The crumb is somewhat soft, but not fluffy, the holes are irregular and mostly small, but the crumb is open for a whole grain bread. It doesn't feel dense or heavy when you chew it. The crust is crunchy and fairly chewy with a good toasty flavor. The sourdough flavor of these loaves was mild and the crumb clearly had the characteristic nutty sweetness of spelt in it, even with just 15% spelt. It was hard to tell the difference in flavor between version 1 and version 2, but version 2, with the levain, seemed slightly more sour. Also, version 2 had a wetter, more proofed feel at both shaping and slashing time, even though both had increased in volume almost exactly the same amount. When I shaped version 2, it was harder to shape, as it was more gloppy, and it ended up being longer and flatter after shaping. However, the crumb texture, the crust, and the flavor were virtually identical after baking. Version 1 held its shape better and sprung in the oven, while version 2 seemed to spring up very little but did spread out a lot during baking. Although version 2 was flatter, the crumb was slightly more open. The Whole Wheat Sourdough Sandwich Bread I blogged a while back had a slightly lighter and softer crumb, even though the method was almost identical to version 2 with the levain. I suspect this is because in the sandwich bread version, the loaves were raised and baked in pans at slightly warmer temperatures and allowed to proof a little longer. Also the hydration was slightly higher in the sandwich bread.

Some Thoughts

I have had better luck with one-step versions and with two-step versions where I only allow the levain to just double and no more and with two-step versions with about 10% fermented flour, as opposed to this "Version 2", which had 20% fermented flour in the levain. I think that delivering the extra acid in a riper levain that constitutes 20% or more fermented flour causes a breakdown in the gluten structure of the final dough. This may be why Peter Reinhart's recipes in his whole grain book recommend using instant yeast with the larger levains in his recipes, which works well as many of us have verified. However, if you want to do a sourdough only recipe, my experiences so far point toward doing long slow rises from tiny inoculations, as in the one-step method, or if you are doing a two-step method with a levain, then only allow the levain to rise by double and not more before refrigerating or combining with the final dough. You won't get a big flavor boost from the levain the way you would with a riper levain, but it does allow for a convenient break in the timing, as the levain and soaker can be refrigerated for a day or two, and the the bread making process can be resumed at a convenient time.

bwraith's picture
bwraith

Miche with Spelt and Rye Levain

Miche with Spelt and Rye Levain - Closeup

Zolablue, a frequent TFL contributor, encouraged me to try the Thom Leonard Country French recipe in Artisan Baking by Glezer. This recipe is a variation that incorporates some of the things I have liked in other miche recipes. For example, I am using Heartland Mills Golden Buffalo flour as the main flour, but spelt and rye are added in the levain, and there is some additional whole wheat added with a soaker. The hydration is lower than most of the other miche recipes I've tried or blogged here on TFL, which gives it a slightly more regular, dense crumb that is excellent for sandwiches or for holding honey or any wetter toppings. It is a robust texture, as opposed to a very light, irregular, open structure.

Spreadsheets in xls and html format are posted with weights in ounces, bakers percentages, and other possibly useful information. Some photos of the process are posted, as well.

Levain:

  • 10g white flour paste consistency starter (I used my 90% hydration white flour starter) Use about 8 grams of 60% hydration firm starter.
  • 58g whole rye flour
  • 119g whole spelt flour
  • 141g water

The levain is designed to rise for about 12 hours at 70F. At 76F, the levain would be ready in about 8 hours. At 65F it would be ready in about 17 hours. You can let the levain rise by double and refrigerate it if you want to make it in advance. It can be used after 1-2 days without changing the results of this recipe very much.

Soaker:

  • 203g whole wheat flour (I used Wheat MT Bronze Chief)
  • 203g water

The soaker was mixed the night before and allowed to sit on the counter overnight at about 70F. Refrigerate unless you plan to use it within 12 hours.

Dough:

  • 1 tsp diastatic malted barley powder
  • 15g malt syrup
  • 27g salt
  • 721g water
  • 203g AP flour (I used KA Organic AP)
  • 763g high extraction flour (I used Heartland Mills Golden Buffalo)

Mix and Knead

The dough was initially mixed/kneaded in a DLX mixer on low/medium speed for about 8 minutes. It was allowed to rest in the mixing bowl for about 1/2 hour and then kneaded in the mixer for another 5 minutes. The dough was dropped on the counter and folded into a ball and placed in a rising bucket. It was placed in a warm area, about 76F, for the bulk fermentation, which should run about 4.25 hours at 75F. The bulk fermentation should take about 6 hours at 70F or 8.5 hours at 65F.

Folding

The dough is fairly firm with the very water absorpent Heartland Mills Golden Buffalo and whole rye at a 79% hydration. At this consistency, the dough is stiff enough that it resists much folding, so it was folded only once about 1.5 hours before shaping.

Shaping and Final Proof

A boule was formed and allowed to sit on the counter for 10 minutes to seal the seams. Note, the loaf doesn't rise by double during bulk fermentation. The loaf was placed upside down in a lined round wicker basket style banneton dusted with a mixture of semolina, rice, and bread flour. The loaf was also dusted with the dusting mixture plus a small amount of bran. The basket and a bowl of warm water was placed in a Ziploc "Big Bag" and allowed to rise for 3.5 hours at 75F. Allow 4.5 hours at 70F for the final proof or 6.5 hours at 65F.

Peeling and Scoring

The boule was turned out on a piece of semolina and corn meal dusted parchment paper on a large peel and slashed with a cross-hatch pattern.

Bake

This loaf was baked in a brick oven after some focaccias were baked, as noted in another blog entry recently. The hearth temperature had dropped to about 485F, and the air temperature was about 425F. The oven was steamed using a very fine garden sprayer designed for orchids (1/6 gal/minute, by Foggit) and sealed with a towel covered wooden door for 15 minutes. It was then rotated and sealed with a metal door thereafter for a total bake time of about 1 hour. The hearth temperature dropped to about 445F at the end of the bake.

To do the same thing in the kitchen oven, I would use a stone and preheat the oven to 500F and steamed according to your favorite method. I use a cast iron skillet and place a special can with a small hole drilled in it with about 1 cup of water that dribbles out creating steam in the oven for about 10 minutes. I drop the oven temperature to 450F for the first 15 minutes, immediately after adding the water, and then drop the temperature to about 400F or lower, for the rest of the bake, monitoring the crust color and dropping the temperature further to avoid charred crust.

Cool

Allow to fully cool on a rack before cutting.

Results

This is a great loaf for any juicy ingredients, or things like honey, mayo, and whatnot. It's more dense and chewy than other miches I've blogged on TFL. It has a nutty, toasty, and slightly sweet flavor, I believe due to the spelt, and is a little crunchy due to the crisp thick crust that has a little bran encrusted in it, and maybe also from the added whole wheat.

JMonkey's picture
JMonkey

I was concerned that my success with the whole grain hearth bread that I posted about early last month was just a one-hit wonder. Thankfully, it seems I can repeat it. Here's a few loaves that have come out of the oven in the past weeks:


I've also used the same technique for a 60-40 whole wheat to whole rye batard, and it, too, turned out well, though the crumb was, naturally, much tighter than in the loaves pictured here. I'd have taken pictures, but the camera was full and, by the time I got around to downloading them off of the camera's video card, the loaf was just a little nubbin.

JMonkey's picture
JMonkey

As many of you know, I've been questing for a tasty, open crumb, 100% whole grain hearth bread for a long, long time now.

This weekend, I finally achieved my goal.


Nice open crumb, creamy texture, tangy and flavorful crumb, appealing slashes, crunchy crust.

Here's how I made it, and, to be truthful, it was mostly on a whim. The day before, I'd made some whole wheat sourdough sandwich bread, and had about 80 grams of starter left over. I didn't have time, really, to feed it, so I popped it in the fridge figuring I'd do something with it later.

The next evening, as I was thinking about what to cook for a visit from my folks (they'd come all the way from Atlanta, so I wanted something nice), I thought, "Why not try something akin to CrumbBum's miche?"

So here's what I did:

  • 40 grams of whole wheat starter at 60% hydration (Use 50 grams if at 100% hydration)
  • 375 grams water
  • 10 grams salt
  • 300 grams whole wheat flour
  • 150 grams whole spelt flour
  • 50 grams whole rye flour
So basically, its roughly 5 percent of flour in the starter, with a 60-30-10 wheat / spelt / rye flour combination at 75% hydration.

I mixed the starter into the water, added the salt until it was dissolved, and then stirred in the flour. I then did a stretch and fold at one hour, and then two more at half hour intervals. After the last stretch and fold, I shaped it into a ball, and let it sit overnight.

It's pretty chilly in our house at night, getting down to 63 degrees F, so your mileage may very, but the dough was ready to shape after about 12 hours. I preshaped it into a ball, shaped the dough into a batard after a 15 minute rest, wrapped it in baker's linen and then let it rise at 64 degrees for about 3.5 hours. After that, a few slashes and into a hot oven at 450 for 35 minutes.

I think the final piece that came into place for me was shaping gently, but firmly. And I suspect that the long fermentation helped with both flavor and texture. Anyway, I hope I can repeat this success.
umbreadman's picture
umbreadman

I just pulled my Quinoa Struan out of the oven a little while ago, and I'm rather pleased with the results.


I used reinhart's multigrain struan formula and used 6ozs of cooked quinoa in the overnight soaker. I also used Heartland Mill Golden Buffalo flour, which I'm playing aroudn with. I've used "Gold 'n' White" flour before (a high-extraction flour, meaning the coarse bran sifted out of whole wheat flour), and I was pleased with it, so I ordered 25 lbs of this to see how it performed. So far so good i think. Since it called for a substantial amount of yeast to be added for the final proof, I think it rose rather quickly, and was probably ready before I made it back home. I had to reform it and considered letting it proof a second time, but I thought it might become a mess if the yeasts were given too much free reign.

I haven't tasted this loaf yet (it wasn't done cooling), but it smells great. It looks like it would be great for sandwiches or toast. I was intrigued when it called for milk in the soaker, and I wonder how that will impact the bread.

umbreadman's picture

PR's Whole Wheat Hearth Bread - Nutty? Or just plain crazy?

November 6, 2007 - 9:52pm -- umbreadman
Forums: 

Hey everyone,

I recently tried making the whole wheat hearth bread from Peter Reinhart's whole grain breads book. It calls for the use of a soaker (not a heated mash) and a pre-ferment. The result was a beautiful round with great coloring and (a rare event) scoring I was proud of. Alas, I was visiting my parents and didn't have my camera so i can't share pictures, which is sad because i really appreciate your feedback. Anyways...

Pages

Subscribe to RSS - whole grain