Desem bread is a favorite of mine, in no small part because I can only make it in the winter. But it's also beloved because it was one of the first sourdoughs I ever made, and because it comes from The Laurel's Kitchen Bread Book, a book that, though it is not without its flaws, is still a book that I love dearly and continue to bake from several times a month.
Desem is essentially a 100% whole grain pain au levain, done in the old French way for customers who did not like their bread sour. To keep the acid notes to a minimum, bakers kept their starters firm and chilled, both of which are the key to making this loaf. Laurel Robertson recommends making your starter by placing a dough ball in a bin of 10 lbs of flour at about 50 degrees F, and then feeding it once a day for a week or so. I've done it that way, but I've found it's not really necessary. If you've already got a starter, just feed it with whole wheat at 50% hydration (thereabouts) and store it in a place where the temperature stays in the 40s or 50s. Ideally, you want the starter at about 50 degrees F. Feed it a couple of times that way at that temp, and you should be ready to go. This is why Desem remains a winter bread for me, because only then can I rely on my garage to remain within that temperature range.
The result is a lovely loaf. Just a little bit sour, with a creamy texture and a nutty, sightly sweet flavor. It's hearty but, though it doesn't typically have the big holes one usually associates with a lean hearth loaf, it's not a dense bread. Tonight, we ate it with a corn chowder, a dish of which I'm certain Laurel Robertson would not approve, since it's made with chicken stock and a half pound of bacon. I have to say, though, they made fine dinner companions. It will also make tasty sandwiches tomorrow, I'm sure.
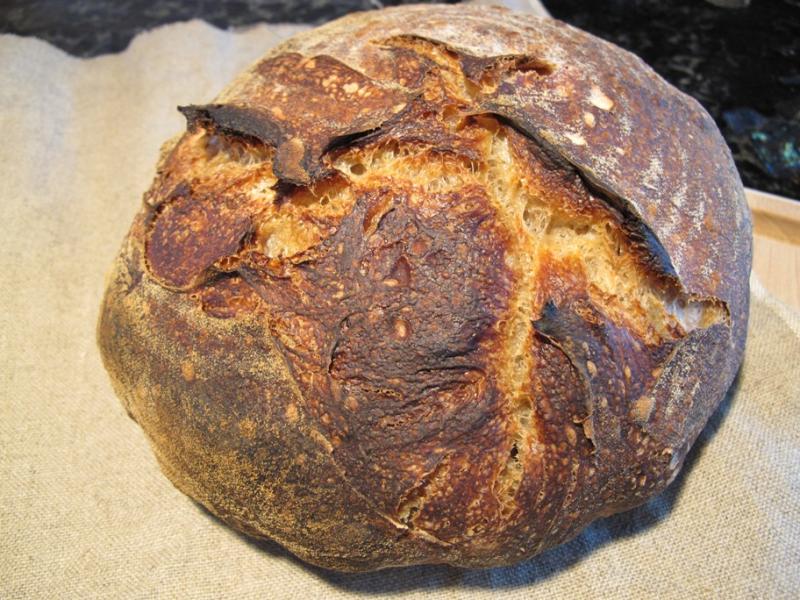
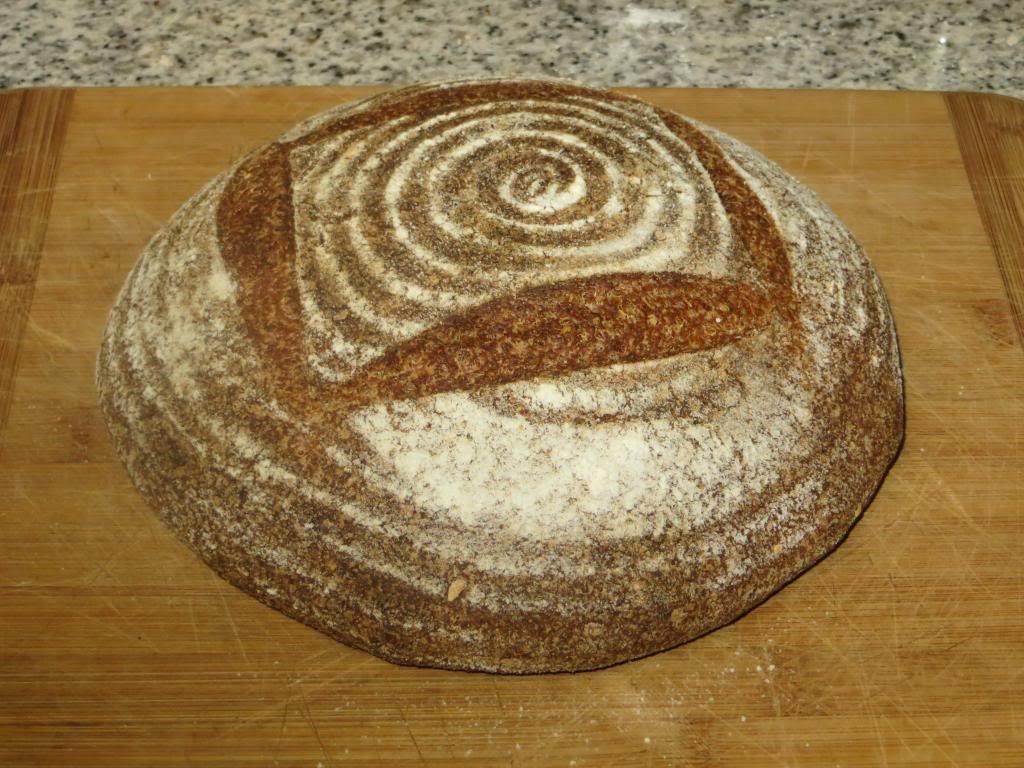
Here's what the loaf looked like out of the oven:
And here's what the insides look like: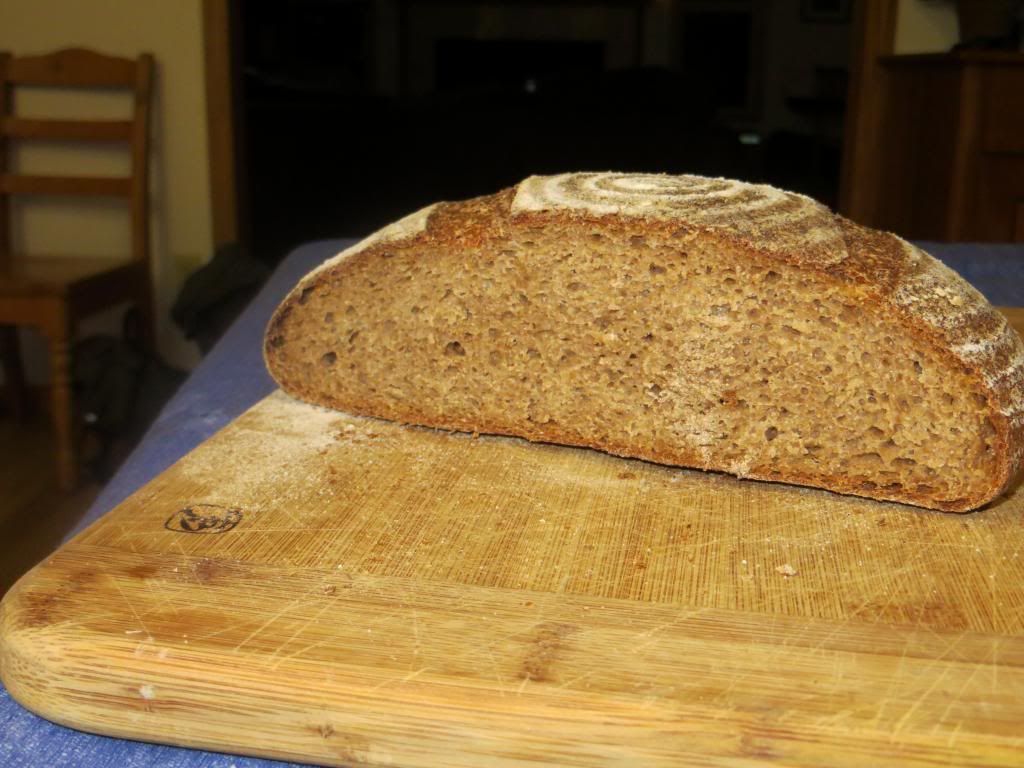
Finally, here's how I made it.
Formula:
- Whole wheat flour: 100%
- Water: 70%
- Salt: 2%
- Starter: 30% of the flour is in the starter at 50% hydration.
Ingredients
- Whole wheat starter at 50% hydration: 225 grams
- Water: 275 grams
- Salt: 10 grams
- Whole wheat flour: 350 grams
Combine the starter and the water, and mash them up together until it's nice and mushy. Add the salt and then add the flour. Stir until it comes together into a mass. I use fresh flour, because I'm one of those nuts with a grinder and a half-dozen 5-gallon buckets full of grain in his garage. If you're not (and your partner or spouse probably thanks you for it) you'll be using store-bought whole wheat flour, which is dryer, so you may want to add some more water, maybe as much as 50 grams. The dough should be shaggy and soft, but not quite sticky.
At this point, I like to let the dough sit for 10 to 20 minutes. I often time this by how long it takes to make a pot of oatmeal or a batch of pancakes, because I usually start making this bread while I'm preparing breakfast. Once the dough has sat for long enough, I knead for 3-4 minutes, let it rest for another 5 minutes or so, and then knead again for another couple of minutes. At this point, it should be done. I love and respect Laurel Robertson to high heaven, but there's really no need to do 300 strokes. Unless you enjoy that kind of thing, of course, which, I'll admit, I sometimes do.
I try to get the dough temperature to about 70-75 degrees F if I'm thinking about it. Jeffrey Hammelman has a good trick for this. Measure the temperature of the starter with an instant read thermometer, then measure the temperature of the flour (since mine's coming right out of the grinder, it's usually close to 100 degrees!). To know how hot the water needs to be, Multiply the desired dough temperature by 3, then subtract the starter and flour temperatures. Voila! But, to be honest, I usually just guesstimate. In my kitchen, the starter's cold and the flour's pretty warm, so if the water feels lukewarm or just an eesny-weensy bit warm, I figure it's good enough. I'm not making a microchip, after all.
It usually takes about 4 hours to rise, but in the winter, my house is usually pretty chilly. It could take three hours if you keep your home at 68 or 70 degrees. Then, I shape the loaf and proof it for two hours in a cooler with the bread on an upturned cereal bowl and a cup or two of hot water thrown into the bottom. I like to bake mine in a covered clay baker at 450 F for 35 minutes with the cover on and 10 minutes with it off. If you're using a baking stone or a cookie sheet, try 450 for 35-40 minutes. Steaming the oven is also nice, if your oven steams well and you don't mind the risk of damaging or ruining your appliance (ask me how I know there's a risk). Let it cool on a rack for about an hour before slicing.