The Fresh Loaf

A Community of Amateur Bakers and Artisan Bread Enthusiasts.

Sourdough

Anomalous's picture
Anomalous

I've been refining the technique for making sourdough during the working week so that it's out of the oven in time for dinner. It's going pretty well now, and I'm regularly turning out loaves that I'm really pleased with.

It starts off the evening before, when I put 100g of sourdough starter and 200g strong white flour and 200g water into a tub, give it a mix and put the lid on to mature overnight ar room temperature. It seems that the longer I mature this levain, the more of a distinctive sourdough tangy quality shows up in the final loaf, but I'm not 100% sure of this. At the same time, I put 300g of strong white flour and 9g salt in a separate dry tub, just to save time next morning, and 100g water in a third container. Sometimes I use 100g wholemeal spelt or a bit of Kamut instead of some of the white flour, or I might toast some hemp seeds, crush them and put them with the dry flour for tomorrow.

Next morning.

07:00. The levain in the tub is nice and bubbly. I tip in the dry tub of 300g flour and 9g salt, plus the little tub of 100g water, then it gets a good mix for a minute or so, the lid goes back on and I go and shower.

07:15. The dough has developed a little. I tip it out onto the board and stretch and pull each corner of the dough up and into the middle as though forming a parcel. This goes on for a minute or so then I flip it over and form a round by scooping my hands half under it and pulling it toward me so the friction of the work surface pulls the surface of the dough taut. This takes about a minute and a half. I cover it with a bowl and get my breakfast.


07:30. The dough has relaxed a bit.

I flip it over and repeat the parcel-forming pulling and stretching then flip it again and form a round. This takes about a minute. The bowl goes on to cover it again and I go and get dressed.

07:45. The dough has more structure now.

Flip, pull, stretch, form a round, cover. This takes less than a minute. I finish getting ready for work.

08:00. Now the structure is more apparent. For the fourth time, I flip the dough, stretch and fold, form a round and now it's looking really taut and elastic.

I flour my proving basket and put in the dough, top side down, dust with a little semolina and put it in a big ziplock plastic bag, then into the fridge. Off to work.

19:00. 11 hours later the dough has nicely risen in the fridge. Not so much this time as it often does, but it will be OK.


I put the oven on to heat for 20 minutes at 230C with the cast iron combo cooker in the oven.

19:20. I dust the skillet of the combo cooker with semolina and tip the dough into it then slash it, put on the lid of the combo cooker and put it in the oven.

This seals in all the steam that would otherwise be lost, and prevents the crust from forming for the first 20 minutes so as to allow the maximum expansion of the dough.


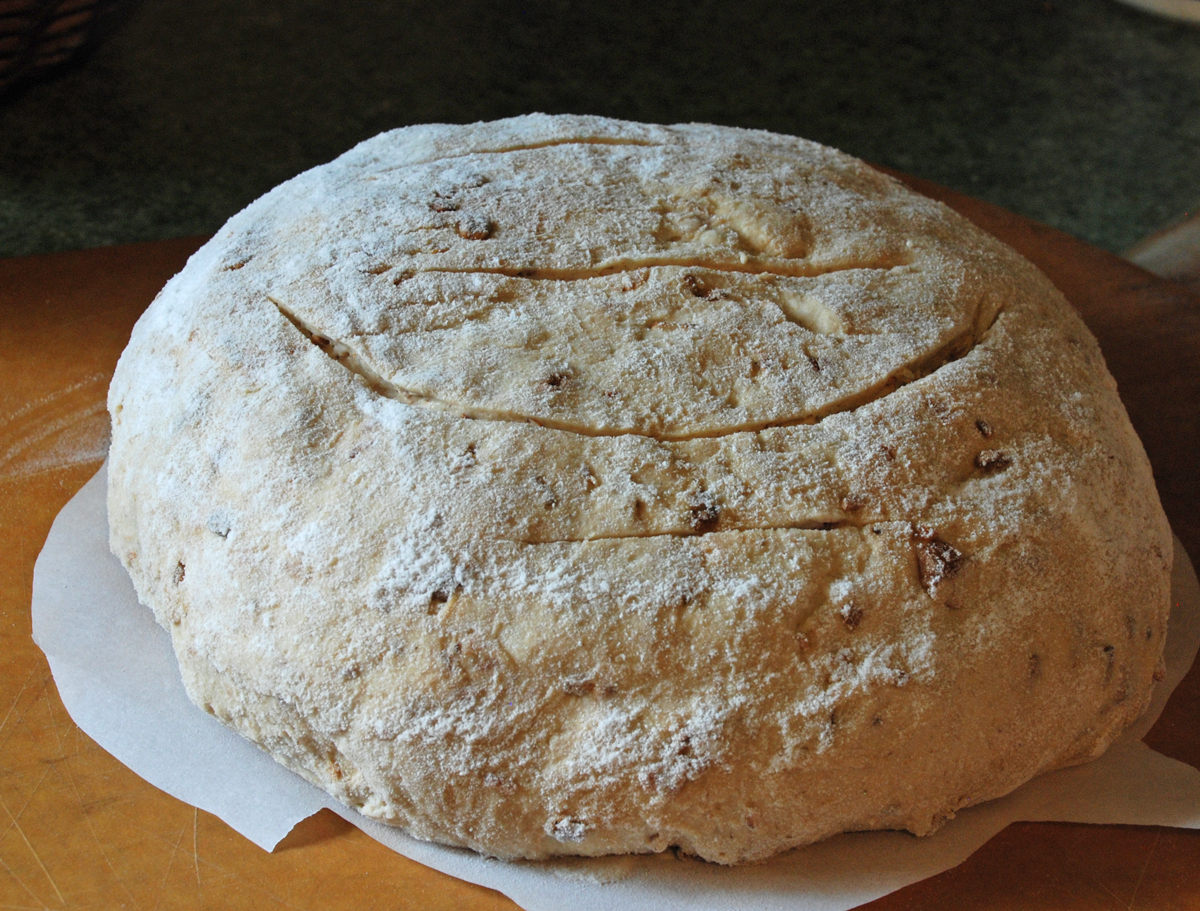
19:40. I take the lid off, so that the crust can form. When the lid comes off, a cloud of steam escapes and the loaf is fully formed, though pale and soft.

Back in the oven. I usually turn it after another ten minutes so that it's evenly browned.

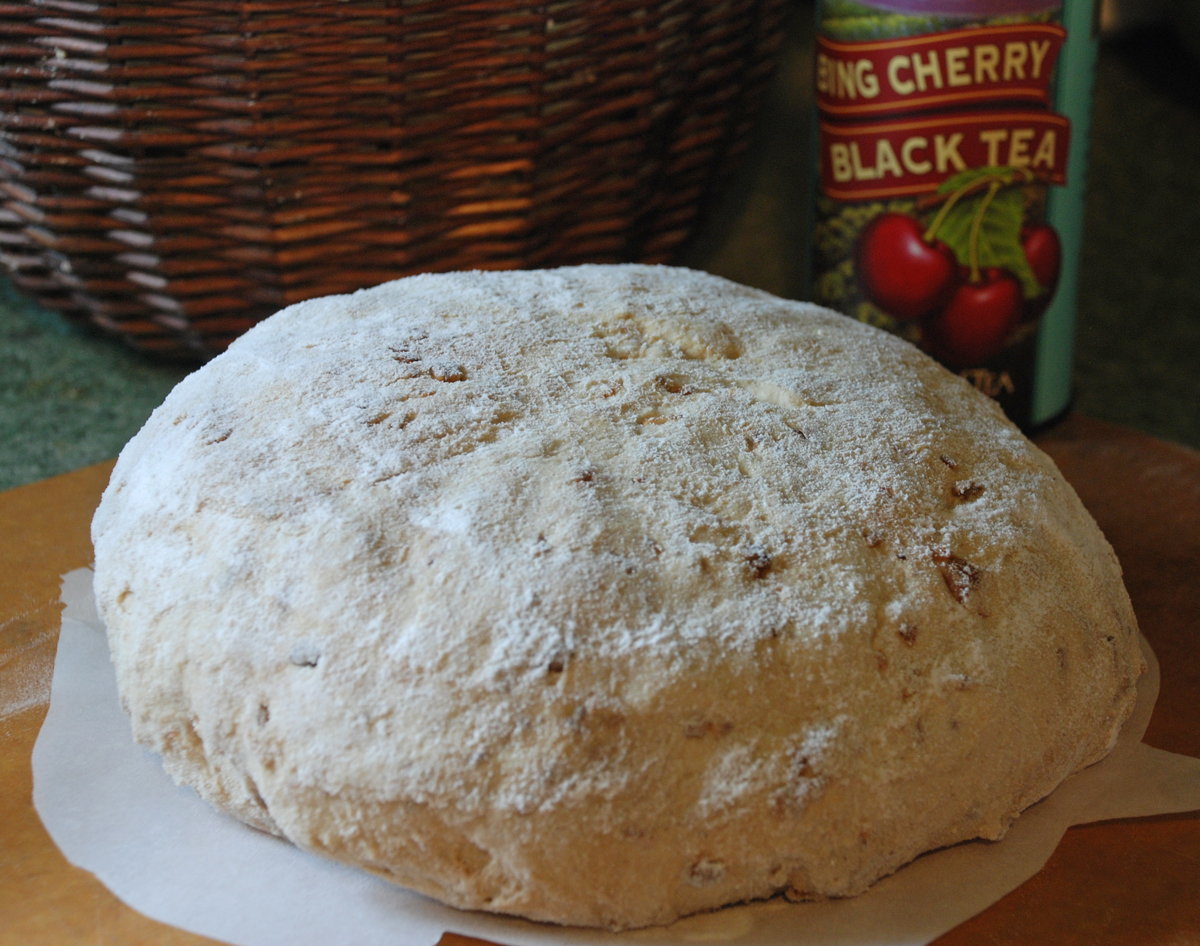
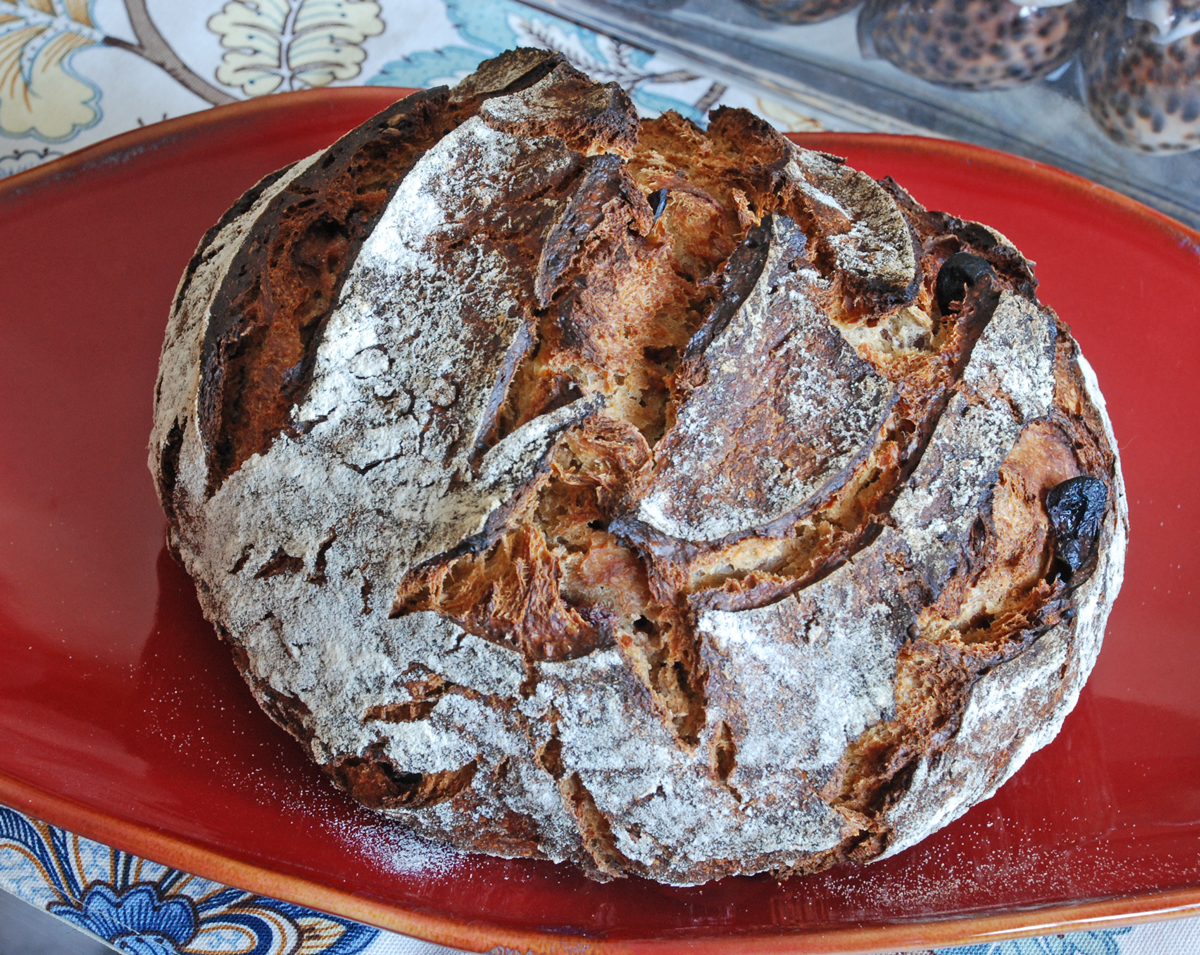
20:00. Finished. Out it comes and onto a rack to cool for at least 30 minutes.

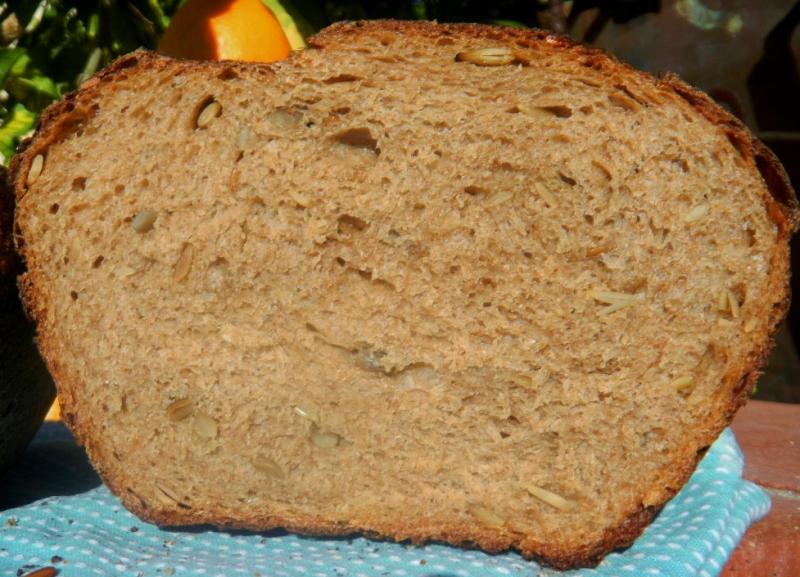
I love the craggy, caramelised crust produced when using the combo cooker. You can hear the crust crackling as it cools.

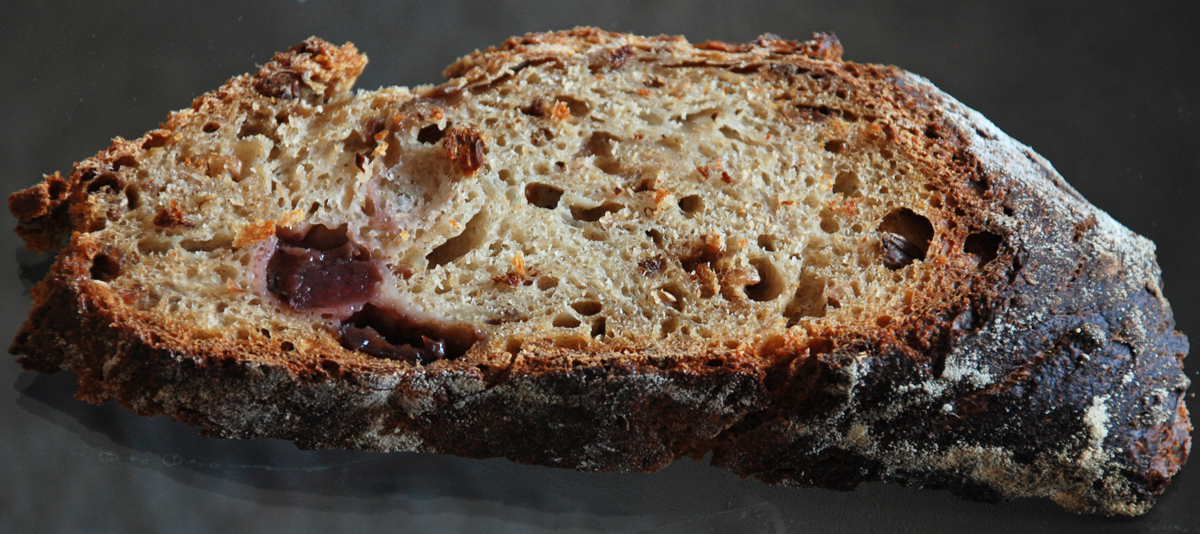
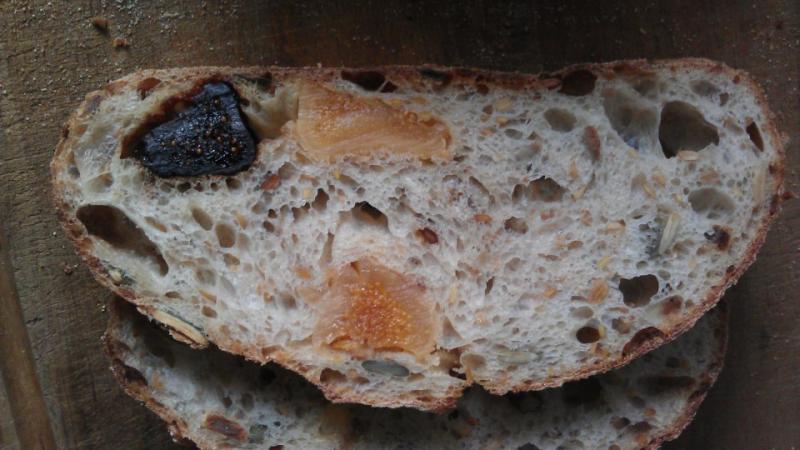
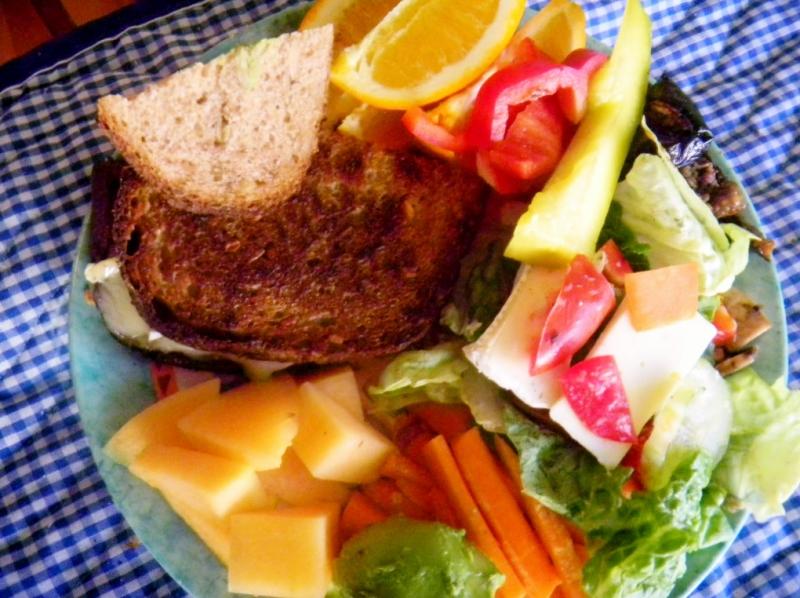
It's a really nice loaf with a good shape, nice sourdough taste, but not the most tangy I've had, and a good, moist, open crust but without too many impractical big air holes. This is bread for sandwiches and I don't want everything to fall out.

The starter is one which was given to me on a training day at a Hackney bakery. I feed it with equal quantities of filtered water and stoneground wholemeal rye and I keep it in the fridge.

The technique works well for me and I can keep up the sourdough production during the working week, though only because of my leisurely one-hour pre-work routine.

dabrownman's picture
dabrownman

After losing the beet pink in our Valentine Rose bake we decided not to give up and try another method hoping the red or pink would stick around in the crumb somewhere.  This time, instead of using beet juice and pulp we used roasted chopped beets.  We didn’t expect the crumb to stay pink but we hope that there would be some red blotches that hung around.


After reading Ian’s post on his fine looking cream cheese butter and milk enriched rolls we decided to use that as a base.  Instead of the milk we used this time, we will use buttermilk next time of the pink does not remain.  We cut the sugar and added more whole grains (30%), some potatoes, the chopped beets.  The hydration came in at 78% if you ignore the cream cheese and beets.  We made enough for 5 rolls of about 140-1455 g each wet - a good size for hamburger buns.


I know that hamburgers don’t sound very romantic for Valentines Day but, if you only get to have them once a month and you really go all out with  the fixings; bacon, caramelized onions, mushrooms and various peppers with lettuce, tomatoes and grilled steak sweet and white potato fries its not so bad and better than nothing.  Especially if you have some kind of Pink Valentine Buns with some sesame seeds on top.


While the SD levain, where all the whole grains ended up with the exception of the malt, Toadies and oat flour,  was building itself up to speed we autolysed the flours and everything else except the beets and cream cheese.  Once the autolyse met the levain we did 10 minutes of French slap and folds.


This is a wet and sticky dough and bits will fly everywhere but stick to it and the dough will come together nicely,  After resting for 15 minutes the first of (2) S& F’s were done 15 minutes apart and the beets were incorporated on the 2nd set


 After another 15 minute rest the cream cheese was added and incorporated with Slap and folds until it disappeared.  Little red bits of beets will fly everywhere and stain what ever they hit so care is required if you care – but I couldn’t care less.  The dough was allowed to ferment on the heating pad for 90 minutes before being bulk retarded for 14 hours.

The next morning the dough was put on the heating pad for 2 hours to warm up before the rolls were shaped and placed on parchment supported by the mini oven’s vented broiler top.  After 2 more hours the mini oven was fired up to 425 F with the bottom of the broiler pan inside with 1 C of water for steam.

The rolls were brushed with melted butter and covered in a seed and salt mix thenan egg wash was applied.  The buns were loaded into the hot bottom of the broiler pan in the mini oven.  After 8 minutes the bottom of the broiler pan and steam was removed.  The temperature was turned down to 350 F, convection this time.


Every 5 minutes the rolls were rotated 180 degrees to ensure even browning.  After 15 minutes the rolls reached 205 F and removed from the oven to a cooling rack.  Total baking time was 23 minutes.

The rolls sprang nicely and spread perfectly for hamburger bun shape.  They browned nicely due to the butter and egg wash, they were slightly crispy too with the seed mix helping.  The crust did go soft as they cooled.  The pink went away on the outside again but to a lesser degree than last time so we have hope there might be some on the inside. 

Valentine Pink Chocolate Rose Left                                                               Pink Valentine Hamberger Bun Right

Well it wasn't pink on the inside but the crumb was tinted a yellowish brown from the beets and there were were more pink/red splotches throughout.  The crumb was very soft, moist glossy and open.  It smelled like a buttery croissant!  Can't wait to taste them tomorrow  They are gorgeous on the outside and in - perfect for the holiday

Caramelized onions, mushrooms. poblano and Hatch chillies, smoked  brown sugar and maple cured bacon, pickled jalapenos, dill pickle spear and aged white cheddar.

Lettuce, tomato, Beauregard, Japanese yams and russet  wedge baked fries.

Formula

Starter Build

Build 1

Total

%

SD Starter

20

20

5.97%

Kamut

12

12

3.58%

Spelt

13

13

3.88%

Dark Rye

13

13

3.88%

Whole Wheat

22

22

6.57%

Milk

60

60

17.91%

Total

140

140

41.79%


SD Starter Totals


%


Flour

70

20.90%


Water

70

20.90%


Starter Hydration

100.00%


Levain % of Total

21.60%


Dough Flour


%


Red Malt

2.5

0.75%


Toadies

5

1.49%


White Malt

2.5

0.75%


Oats

15

4.48%


Potato Flakes

15

4.48%


AP

225

67.16%


Total Dough Flour

265

79.10%


Salt

5

1.49%


Milk

150

44.78%


Dough Hydration w/o starter

56.60%


Add - Ins


%


Egg

44

13.13%


Butter

44

13.13%


Total

88

26.27%


Total Flour w/ Starter

335


Milk

220


Hydration w/ Starter & Adds

78.15%


Total Weight

733


% Whole Grain

28.36%


Chopped Roasted Beet

35


Cream Cheese

50


Chopped Beet and Cream Cheese


Not included in Hydration Calculations


dabrownman's picture
dabrownman

I joined in on The 3 Twisted Sister’s GMA bake this week to do a Valentine Rose.  The premise was to do Vienna bread dough and make it into a Valentine Rose somehow.  The GMA’s posted their fine examples yesterday so this was a tough act, all 3 of them, to follow.  But, we had the last of our left over panettone to use up and on our side.


There were all kinds of new things for us on this bake.  We have never made a Vienna bread before and was sort of taken back by the sugar, egg, fat and milk in most of the recipes on the Internet.  It was sort of Challah like when it came right down to it.  There are some recipes out there without all of these enrichments but if you can use them all – why not?


We wanted to put our own twisted outlook into this bread so we decided to take it pink and savory only to change our mind later, after the savory was in, to take it sweet too.  The pink came from slicing ¼ of a beet and putting it into the mini chopper with 50 g of water and having the mini chopper do its best to liquefy it.  After straining, we were left with some really beet red juice and some red beet pulp.


We mixed the beet juice with the water for the dough and it ended up making a pretty as pink dough.  The beet pulp we sautéed with some beet greens and a clove of garlic to use for the filling in the rose roll-up thinking savory was the way to go and the red and green filling would be nice in this bread.


Then at the last minute Red Velvet Cake into my apprentices brain somehow and she thought that the dough was more sweet than savory and some cocoa powder and sugar added to the filling would make it taste more red velvety.  She also thought that some chocolate chips would also be a good addition to the filling since she and most ladies know roses and chocolates are the bare minimum for Valentines day.


I went ahead with Lucy’s recommendations wondering how the savory beet greens, beet pulp and garlic would jive with the chocolate and sugar.  We added a mix of whole grains, to the leavain only.  It was our usual rye, spelt, Kamut and whole wheat  and got the whole grains up to nearly 20%.


While the last feeding of the levain was ongoing, we autolysed the rest of the ingredients sans filling for 3 hours.  Once the autolyse and the levain came together we did 10 minutes of French slap and folds and then let the dough rest for 20 minutes before performing 3 sets of French folds on 20 minute intervals. 


After the last fold we allowed the dough to rest 10 minutes before dividing it in two and rolling each out to 10” x 18” rectangle.  We brush each with melted butter first then sprinkled on the beet green and pulp, sugar and cocoa mix followed by the chocolate chips.


We then rolled it up from the wide end, pinching the seams and ending up with a rope 18” long.  After finishing the 2nd rope, we split each with a paring knife down the middle ending up with 4 rope halves.


Two of the rope halves were crossed in the middle and then braided each direction making sure to keep the cut side up.  Once the other 2 half ropes were braided together, each of the 2 braided ropes were placed on a baking sheet covered in parchment by coiling each in a snail shape, one following the other, again trying to keep the cut sides up.  The result was one fairly big pink rose.


We let it proof on the counter for 90 minutes in a plastic trash can liner before refrigerating it for a 12 hour retard.  The next morning the rose was allowed to warm up and final proof for 4 hours before being brushed with an egg wash and going into the 425 F baking stone for 10 minutes of steam.  We used a combo Sylvia’s steaming pans and David’s 12” Iron skillet with lava rocks for the steam.


The rose had expanded nicely while doing its final proof but it also sprang very well in the oven too.  After 12 minutes the steam was removed and oven turned down to 350 F, convection this time.  The bread was turned on the stone every 8 minutes to ensure even baking.  The rose reached 205 F and we turned off the oven with the door ajar to allow the crust to further crisp on the stone for 8 more minutes.


The rose was removed from the oven to the cooling rack.  Total baking time was 30 minutes – 12 minutes of steam and 18 minutes without plus 8 minutes resting on the stone for 38 minutes total.  The rose browned nicely due to the egg wash.  It is nice looking rose where we hope the pink survived under the crust but, we will not know for a couple of hours.

This bread turned out to be shocking 3 ways.  One, the pink dough went away with just some red where the beet pulp and leaf saute was incorporated - I was robbed!  Two, you can't taste any beet either - not a trace - nor the garlic either.  Three, this bread tastes wonderful as a sweet chocolate bread. So if you want the pink to stay, put in some red food coloring :-)

The crumb is so soft, moderately glossy and fairly open.  Where the yellow tinge in the crumb came from is strange since it is  coming from a definite pink.  I guess the egg and butter finally won out ?  I love the taste of this bread but I also want tomake a straighten up Vienna bread without the goodies added in.  It also has to be a fantastic bread on the sweet side.

Formula

Starter Build

Build 1

Build 2

Build 3

Total

%

WWW & AP SD Starter

13

0

0

13

1.82%

Kamut

6

6

12

24

3.37%

Spelt

6

6

12

24

3.37%

Dark Rye

6

6

12

24

3.37%

Whole Wheat

6

6

12

24

3.37%

Water

24

24

48

96

13.47%

Total

61

48

96

205

28.77%


SD Starter Totoals


%


Flour

102.5

14.39%


Water

102.5

14.39%


Starter Hydration

100.00%


Levain % of Total

15.89%


Dough Flour


%


Red Malt

10

1.40%


Bread Flour

300

42.11%


AP

300

42.11%


Total Dough Flour

610

85.61%


Salt

10

1.40%


Beet Infused Water

320

44.91%


Dough Hydration w/o starter

52.46%


Add - Ins


%


Sugar

40

5.61%


Egg

50

7.02%


NF Dry Milk powder

15

2.11%


Butter

40

5.61%


Total

145

20.35%


Total Flour w/ Starter

712.5


Beet Infused Water 320 & Water

422.5


Hydration w/ Starter & Adds

65.68%


Total Weight

1,510


% Whole Grain

19.30%


Chocolate Chips

100


Beet, Almond & Cocoa Filling

120


Filling is sauted beet leaves, 2 tsp ea cocoa & sugar


35 g of almond meal & left over beet juice pulp


I676's picture

Mark Bittman's Whole Grain "Sourdough" Article

February 10, 2013 - 7:39am -- I676

So Mark Bittman had a piece in the NY Times today or yesterday on the deliciousness of whole grain bread, and how sourdough is the best method for making it. I tend to agree (warning: rank amateur's lay opinion), but I don't think that any of his recipes are actual sourdough. Instead, his sourdough rye just uses a sponge made with instant yeast and fermented overnight...strains of the Leahy no-knead bread phenomenon Bittman popularized? Nothing wrong with Bittman's rye recipe, but calling it sourdough seems like a real stretch.

neilbaldwyn's picture

Drying starter

February 10, 2013 - 4:17am -- neilbaldwyn

Hello,


After some recent issues with my starter I'm looking to dry some as a back up. I'm going for drying it out on parchment paper, but wondered when is best to dry? I'm assuming that once the starter has reached its peak after feeding would be best but just wondered what other peoples experiences were?


Cheers


Neil

Isand66's picture
Isand66

The storm has come and it has delivered as promised.  Here on the South Shore of Long Island where I live we spent most of the morning digging out of 20+ inches of icy heavy snow.  In between the snow plowing and digging I managed to shape and get my latest bread in the oven.

Using the 36 hour technique I adapted from TxFarmer's blog posts on The Fresh Loaf, I made a hearty style loaf with my favorite cherry flavored tea, fresh chopped cherries and some oat flour.  I used the oat flour in the levain as well as the final dough.  Some potato flour and malted wheat flakes were added to round out this dough.

The end result was a nice moist crumb with a great chewy crust with cherry chunks.  This was a large loaf and took almost 2 hours to bake.  I lowered the temperature to 425 F. to prevent the crust from getting too dark which is one of the reasons why it took so long.

This exciting technique takes a while but it is worth it. I actually let the dough retard longer than 24 hours called for in the recipe due to my schedule and I don't think it effected the final bread either way.

Directions

Starter Build 1

104 grams Seed Starter (Mine is a 65% White AP starter)

100 grams Oat Flour (KAF)

200 grams European Style Flour (KAF)

203 grams Water at Room Temperature (80-90 degrees F.)

Mix ingredients in a bowl until thoroughly combined.  Cover the bowl and let it sit at room temperature for around 8 hours.  The starter should almost double when ready to proceed.

Starter Build 2

All Starter from Build #1:

35 grams Water at Room Temperature (80-90 degrees F.)

Mix ingredients in a bowl until thoroughly combined.  Cover the bowl and let it sit at room temperature for around  4 - 6 hours.  The starter should almost double when ready to proceed.

Main Dough Ingredients

300 grams  Starter  from above (note: you should have a small amount left over)

450 grams European Style Flour

200 grams Oat Flour (KAF)

100 grams Potato Flour

100 grams Malted Wheat Flakes

20 grams Seas Salt or Table Salt

88 grams Fresh Cherries (Pitted and chopped)

600 grams Cherry Tea Iced  (Make sure the tea is ice-cold before using.  I added the hot tea to ice cubes)

Procedure

Mix the flours, malted wheat flakes and the ice tea together in your mixer or by hand until it just starts to come together, maybe about 1 minute.  Put the dough in a slightly covered oiled bowl and put in the refrigerator for 12 hours.

The next day add your starter and salt to the dough and mix by hand until it is thoroughly mixed and evenly distributed.  Due to the high water content in the 100% hydration starter this dough is very easy to mix by hand and is very silky and smooth.

Bulk rise at room temperature for 2-3 hours until it grows around 1/3 in volume doing stretch and folds every half hour until it has developed the correct amount of strength.  During the last stretch and fold flatten out the dough slightly into a rectangle and add the chopped cherries.

Put the dough back into the refrigerator for around 20-30 hours.  I ended up letting it go around 30 hours.

When you take the dough out of the refrigerator you want it to have almost doubled in volume.  Mine only rose about 1/3 in volume.  Let it rise at room temperature for around 2 hours or until the dough has doubled from the night before.

Next, shape as desired.  I made a large Miche and placed it in my cloth lined basket.  Make sure you use enough rice flour with flour in your bowl/basket to prevent this moist dough from sticking.

Cover the dough with a moist towel and let sit at room temperature for 1.5 to 2 hours.

Score as desired and prepare your oven for baking with steam.

Set your oven for 500 degrees F. at least 45 minutes before ready to bake.  When ready to bake place the loaves into your on  your oven stone with steam and lower the temperature immediately to 450 degrees.   Since this loaf was so big I ended up lowering the oven after 35 minutes to around 425 degrees.  When the loaf is nice and brown and reached an internal temperature of 200 degrees F. you can remove it from the oven.

Let the loaves cool down for at least an 3 hours or so before eating as desired.

Cat-Angel Bell Weathering the Storm
The Dolphin is Trying to stay above the snow
Misty waiting for some Cherry Sourdough.....okay so she's waiting for some Kibble!
evonlim's picture
evonlim


Dried black mission figs, dried white USA figs, turkish dried brown figs, fresh turkish figs and fresh Japanese figs..

In the history of foods the fig is one of the earliest fruits to be desiccated and stored by men.  Sumerian civilization, Phoenicians, Ancient Greeks and old Chinese promoted fig culture and gave it sky-scraping fame. In China it has been grown since one thousand years back. Ancient Greeks offered figs to each other as precious gifts. Greek players used it to increase their potency and muscles.  

 Antediluvian king of Pontus Mithridates had ordered his citizens to use figs everyday to keep them away from diseases. It is said that in ancient Rome and Greek, farmers and slaves were given figs on a daily basis to increase their working capabilities. 

The fruit have both nutritional and medicinal values therefore it is regarded as functional food. It has property of keeping people physically and mentally strong. Dry fig has nutrition values more than its fresh variety. Protein, carbohydrates, calcium, thiamin, riboflavin, potassium, iron and high amount of fibers are its main constituents. It contains second highest amount of calcium after Oranges.  The major section has sugar which forms 51 to 70 %of the whole fruit.

Beauticians recommend it for beautification and personal care. Eating figs prevent cracking of lips and premature wrinkles. It puts off bad breath. The milky juice of green fig has necrotic property and can be applied to soften the thickening of skin of toe (Corn). Its sodium-free, cholesterol free, fat free and high fiber properties make it ideal food for dieters.  For those who are planning to quit smoking, figs can be an alternative. For long time it has been used to treat skin pigmentation, warts, mole and blisters. It is used as a medical dressing which applied on infectious skin to get rid of abscess. Its sugary pulp is ideal for making sweetener for dieters. 
 
Softening and soothing effects of figs provide relief from respiratory tract inflammation, cough, colds and aching throats. In folk medicine it is used as a demulcent for the irritation of soft skin tissues. Due to anti-bacterial properties it can inhibit bacterial growth.

For chefs and bakery product makers fig is a favorite ingredient for making of deserts, jams, jelly, cakes, pies etc. Adding figs to food products enhance both their taste and dietetic values. Presence of a substance known as humectants makes figs useful to keep the bakery products fresh and moist for long time. 

In south East Asia, Anjeer and Guava blended, together to make a healthy and refreshing fruit drink. In Mediterranean countries its extract is added in alcohol and tobacco. Dry roasted figs are pressed and grounded to use as alternative to coffee. In America fig puree is part of many sweet recipes.  Combination of figs and milk ensure sufficient supply of proteins, calcium and iron.  

In western countries green figs are available in can and tin and added to yogurt and cream to make deserts.

Figs are rich source of soluble and insoluble dietary fibers. Soluble fibers help to lower blood cholesterol while insoluble fibers prevent breast and colon cancer and heart attack.

in my case, this is how i enjoy fresh and dried figs...


Black mission figs in country boule


black and white..in flaxseeds sourdough


fresh turkish figs on toasted sourdough bread with walnuts and swiss chard


Japanese fresh figs on toasted sourdough bread with grilled gorgonzola and smoke salmon


Health benefits of figs
  • Fig fruit is low in calories. 100 g fresh fruits provide only 74 calories. However, they contain health benefiting soluble dietary fiber, minerals, vitamins, and pigment anti-oxidants that contribute immensely for optimum health and wellness.

  • Dried figs are an excellent source of minerals, vitamins and anti-oxidants. In fact, dried fruits are concentrated sources of energy. 100 g dried figs provide 249 calories. 

  • Fresh figs, especially black mission, are good in poly-phenolic flavonoid anti-oxidants such ascarotenes, lutein, tannins, chlorogenic acid...etc. Their anti-oxidant value is comparable to that ofapples at 3200 umol/100 g.

  • In addition, fresh fruits contain adequate levels of some of the anti-oxidant vitamins such as vitamin A, E, and K. Altogether these phyto-chemical compounds in fig fruit help scavenge harmful oxygen derived free radicals from the body and thereby protect us from cancers, diabetes, degenerative diseases and infections.

  • Furthermore, research studies suggest that chlorogenic acid in these berries help lower blood sugar levels and control blood-glucose levels in type-II diabetes mellitus (Adult onset) condition.

  • Fresh as well as dried figs contain good levels of B-complex group of vitamins such as niacin, pyridoxine, folates, and pantothenic acid. These vitamins function as co-factors for metabolism of carbohydrates, proteins, and fats.

  • Dried figs are excellent source minerals like calcium, copper, potassium, manganese, iron, selenium and zinc. 100 g of dried figs contain 640 mg of potassium, 162 mg of calcium, 2.03 mg of iron and 232 mg of potassium. Potassium is an important component of cell and body fluids that helps controlling heart rate and blood pressure. Copper is required in the production of red blood cells. Iron is required for red blood cell formation as well for cellular oxidation.

enjoy... a fig a day keep the doctor away too :)

evonlim


dabrownman's picture
dabrownman

This is another ‘Post Panettone Levain Build’ bake.  It is amazing how much wasted starter you can; will, end up with when making the Italian levain for panettone!  Not to worry….we came up with another bake that used up all of left over SD and YW levain; 392 g worth, with the exception of 100 g of SD levain we are saving for the Valentine Rose Vienna Bread bake with the Three Twisted Sister GMA’s on Monday.

These near white levains had been in the fridge for a few days and were a little sleepy so we gave them 108 g of our whole Rye, spelt and WW mix with 125 g of water and let it sit out on the heating pad to warm up and get perky again.


While the huge, now 625 g YW/SD levain. was waking up, we autolysed the dough flour; half WW and half bread flour with the salt, Toadies, VWG, malts, honey, molasses, and Guinness Black Lager for 2 hours.  The only thing left out were the pumpkin and sunflower seeds.


The huge levain ended up being 45% of the total weight if you discount the 100 g of seeds.  This is about 3 times as large as normal for our baking.  Ian uses large levains per Peter Reinhart but I’m not sure he has gone this big!  We have tried this before but forgot what is was like so my apprentice thought this was the perfect time to continue our 'try it and see if we like it' method - our Mikey Technique of bread discovery.


Once the autolyse and the levain came together, we did 10 minutes of slap and folds to get this 80% hydration dough to come together.  I wasn’t at all difficult since we had 60% whole grains, most of it whole wheat, which really soaked up the beer.  After 10 minutes the dough had a great feel, was smooth supple and exhibited fine gluten development for higher percentage whole grain bread.


 After resting for 15 minutes we did 3 sets of French Folds to incorporate and distribute the seeds and further develop the gluten.  We then let the dough ferment on the counter for an hour before retarding it in the fridge for 12 hours.  It more than doubled in the fridge just like John01473’s  did yesterday.


We allowed the dough to warm up on the heating pad for 2 hours before gently shaping it into a batard, loafish, oval shape that would fit nicely into the non stick sprayed, Romertopf, clay baker we got at Goodwill many months ago but never used it to make bread.  It made a fine Sunday Chicken though.  We had soaked the Romertopf in a 5 gallon bucket on the patio for a couple of days waiting for a good time to use it.


This bake was also inspired by Raluca’s boldly baked 65% whole wheat bread and lamberta72 buying a Romertopf and Bobkay1022 posting pictures of a very nice bake in his Romertopf  that healso  got at Goodwill like I did!  So it was time to put these additional inspirations together with Ian’s big levain and long bulk retard in the fridge.  It is not too odd, as odd things can go,  how things can come together for a bake with a little Fresh Lofian help.


After 4 1/2 hours in the Romertopf for final proofing on the heating pad, the bread was ready to be slashed and baked.  Slashing was made with my favorite French bread slicing knife,  We put the Romertopf in the very cold Old Betsy and fired her up to 460 F.  When she beeped that she was at temperature, we set the timer for 20 minutes of steam.  After 20 minutes we removed the lid and turned the oven down to 425 F, convection this time.


After another 10 minutes, rotating every 5 minutes, we removed the bread from the Romertopf and placed it on the stone and continued rotating it every 5 minutes to ensure even browning.  15 minutes later we turned the oven down to 400 F; convection and tented the top with aluminum foil to keep it from browning too much.  The bread reached 205 F 15 minutes later after a total baking time of exactly 1 hour after the oven beeped when reaching the original 460 F.


There was no reason to crisp the crust on the stone for 10 minutes with the door ajar and the oven off as this bread was very brown and crust crisp as all get out.   It was certainly a looker from the outside and the rise and spring were very good indeed.  We are impressed with the Romertopf, as much as we are impressed with Ian’s large levain, bulk retard, warm, shape and proof method.  If the inside is as good as the outside this should be one of those bakes we look forward to doing again.


The crumb wasn't as open as the rise, spring and bloom would have us believe but the crumb was light and moist with lots of smaller holes that must have added up to the rise and spring we saw on the outside.   Sometimes bread can fake you out.  It also tastes well rounded and has a deeply flavorful profile.  There is a slight SD tang that was muted by the YW.  The seeds came though nicely too.   All in all, it is  a very nice WW sandwich bread which is what we were after.  I'm sure my wife will love this for her lunch sandwiches - I know I will.  It is good be nearly out of panettone levain too - only  100 g to go:-)

It's a grilled pepper jack,  brie with pastrami cheese sandwich.  Great bread makes great sandwiches!  And don't forget the salad and fresh fruit, citrus, melon and veggies with a home made pickle.

If you eat right you can have some lemon cheese cake with chocolate sandwich cookie crust once in a while.

Formula

Big Combo Whole   Wheat Multi-grain Bread with Pumpkin and Sunflower Seeds


Starter Build

Build 1

Build 2

Build 3

Total

%

WWW & AP SD Starter

30

0

0

30

3.97%

Yeast Water

80

0

0

80

10.60%

Rye

0

0

0

0

0.00%

WW

0

0

36

36

4.77%

Spelt

0

15

36

51

6.75%

Dark Rye

0

15

36

51

6.75%

White Whole Wheat

66

0

0

66

8.74%

AP

66

40

0

106

14.04%

Water

50

30

125

205

27.15%

Total

292

100

233

625

82.78%


Combo Starter Totals


%


Flour

325

43.05%


Water

300

39.74%


Starter Hydration

92.31%


Levain % of Total

42.26%


Dough Flour


%


Red Malt

3

0.40%


Toadies

10

1.32%


Vital Wheat Gluten

15

1.99%


White Malt

2

0.26%


Bread Flour

200

26.49%


Whole Wheat

200

26.49%


Total Dough Flour

430

56.95%


Salt

12

1.59%


Guinness Black Lager

290

38.41%


Dough Hydration w/o   starter

67.44%


Add - Ins


%


Sunflower, Pumpkin 50   ea

100

13.25%


Molasses $ Honey

22

2.91%


Total

122

16.16%


Total Flour w/ Starter

755


Total Beer & Water   w/ Starter

590


Hydration w/ Starter   & Adds

79.60%


Total Weight

1,479

1,295

Finished Weight

% Whole Grain

60.77%


Daan's picture

Semonlina Bread (Hamelman) - Oven spring

February 6, 2013 - 12:56pm -- Daan

Hello everybody,

I just bought the second edition of Hamelman's Bread.

My question is about oven spring. Since there are hardly pictures in the book, I wonder if every bread should have an oven spring.

I made the Rye Sourdough bread and it was beautiful! A nice ear, the crust open, ... 

Then I made the Semoline sourdough bread (with liquid levain) but there is no oven spring (almost none, no ear, ...).

Is that normal? How to tell if a bread should have an oven spring (based on the formula maybe?).

Or was my bread poorly baked?

Pages

Subscribe to RSS - Sourdough