
Sourdough


More attempts at sourdough...
Old Sourdough Recipe
Forums:
Recently, my grandfather stumbled across an old, OLD cookbook that belonged to HIS grandmother. He knows that I've been dabbling with breads/baking, so he offered me the cookbook (he also knows I'm an archivist, so he knew I'd preserve it!). :) Anyway... I've been browsing through the recipes (trying to translate MANY of them, as this particular gr. gr. grandmother was Pennsylvania Dutch/Amish and spoke a hybrid German). I took four years of German in high school and this is taxing. LOL!
BUT- I'm learning some wonderful recipes and techniques for breads and sweets. Essentially, because of the technology available to her, my gr. gr. grandmother's cookbook is a lesson in patience.
Share
Starter question.
Forums:
I started my starter on Tuesday and have been following the instructions found on the link in one of the lessons. This morning, I went out to find my jar of starter had an inch thick layer of "hooch". I poured some of it off before I fed my starter (whom I've named Earl).
I used whole wheat flour and warm water as the basis of my starter. It's very bubbly and is starting to smell rather sour. When I observe Earl, he will bubble and foam before my very eyes.
Share
Sourdough Banana Bread
Forums:
This is an outstanding sourdough banana bread that I would like to pass on. This came from Don and Myrtle Holm's Sourdough Cookbook in 1972. I have used it many times with excellent results.
1/3 cup shortening
1 cup sugar
1 egg
2 cups all-purpose flour
1 tsp baking powder
1/2 tsp baking soda
1 tsp salt
1 cup mashed banana
1 cup sourdough starter
3/4 cup chopped walnuts
1 tsp vanilla or 1 tsp grated orange rind
Share
More about Sourdough
Keyword:
My first sourdough article generated a fair number of questions from readers and acquaintances of mine. I thought it would be a good idea to answer some of these questions in a place where everyone can read them.
I've baked with my starter a couple of times now. I've learned a few things worth passing on, some of which may be of interest to bakers of yeasted breads too.
You know the routine: click "Read More" to read the full story.
Share
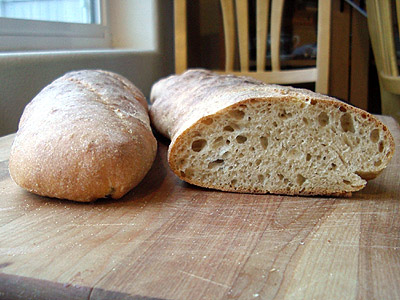
When Yeasts Attack: A First Experience with Naturally Leavened Bread
Keyword:

The ambitious home baker inevitably gets the urge to try baking Sourdough. It's like... like... well, I'm not sure what it is like, but it brings a whole new level of of experimentation to the baking process. It's fun. And it tastes amazing.
I've tried it once before, a few years ago, but ended up abandoning my starter when my son was born. There were only so many organisms I had the time to nurture, and, alas, my starter did not make the cut.
I tried creating another starter a few weeks ago. This time I had more luck.
I'm sharing my experience, some pictures, and a bit of background on sourdough below.
Share