The Fresh Loaf

A Community of Amateur Bakers and Artisan Bread Enthusiasts.

Sourdough

Isand66's picture
Isand66

My last bake was a lemon sourdough which ended up as food for the squirrels unfortunately.  I decided to recover from that calamity and baking a good wholesome multi-grain bread.

I made a soaker with a bunch of different grains and let it sit for 24 hours in a bowl with hot water to soften it up.  The grains will soak up about 75% of the water which will end up making your dough very moist.

This bake came out excellent with a great dark and thick crust and open and moist crumb.

Soaker

45 grams Malted Rye Berries

80 grams Groats

75 grams Soft White Wheat

275 grams Boiling Hot Water

Mix water in a bowl with other ingredients and let sit covered at room temperature for 24 hours.

Starter Build 1

36 grams Seed (Mine is 65% AP Flour Starter)

114 grams European Style Flour (KAF)

45 grams Yeast Water

30 grams Water (85 - 90 degrees F.)

Mix seed with water to break up for a few seconds and then mix in flour until the starter form a smooth dough consistency.  Put it in a lightly oiled bowl and loosely cover and leave at room temperature for at least 6-10 hours.  The starter should double in volume.

Starter Build 2

150 grams European Style Flour (KAF)

95 grams Yeast Water

Mix the Yeast Water and flour in with the starter from Build 1 for about 30 seconds to a minute until all the ingredients are incorporated.  Cover and leave at room temperature for at least 6-10 hours.  The starter should double in volume.

Main Dough

Ingredients

425 grams Starter from above (It's possible you could have a little left over from above but I had exactly 425 grams)

100 grams White Rye Flour

100 grams Potato Flour (KAF)

300 grams European Style Flour (KAF)

All of the Soaker from above

325 grams Water (90 degrees F.)

16 grams Sea Salt (or table salt)

22 grams Honey

Procedure

Prepare the soaker 24 hours before you want to bake the bread.  When the soaker is ready, make sure to drain any of the water it has not soaked up.

Next mix the flours together with all the water except for 90 grams for about 1 minute and let it autolyes covered, for 30 minutes in your mixing bowl .    After 30 minutes add the levain, honey, salt and the soaker and mixed on speed #1 for 1 minute or by hand until everything starts to come together.  Add additional water as needed and mix  for 4 additional minutes.  Note that this is a very sticky dough so don't be afraid to use all the water but make sure you don't end up with soup.

Since this dough is very wet I put it directly into my oiled dough rising bucket and did a couple of stretch and folds.  Rest it in the covered bucket for about 10-15 minutes and do a total of 2-3 additional stretch and folds within 2 hours.  After 2 hours and several stretch and folds (I did a total of 3) place the dough in your refrigerator for 12 - 24 hours.

The next day I let the dough sit out at room temperature for 2 hours.  After 2 hours I formed it into 1 large miche and put it into my floured cloth lined basket.

Let the dough sit at room temperature for 1.5 to 2 hours.  It should start to get a little puffy but it won't rise a lot so don't be alarmed.

Score the loaves as desired and prepare your oven for baking with steam.

I pre-heat my oven to 505 degrees F. about 30-40 minutes before baking.  I add 1 cup of boiling water to a heavy-duty sheet pan on the lowest shelf in my oven and I have 1 oven stone on the top shelf and one above the steam pan.

After placing the loaf in the oven I add the water and lower the temperature to 450 degrees.  Since this loaf is so large I had to lower the temperature after 30 minutes to 425 degrees and baked another 35 minutes until it reached an internal temperature of 205 degrees F.

Let the bread cool for at least 2 hours or longer until you try it.

4akitchenblog's picture
4akitchenblog

I LOVE wine.

I drink wine every single day.

And, I am addicted to baking bread....

Why not!?

My favorite combination : Wine + Bread = Yum :-)

I added chopped cranberries, too.

Sourdough Wine Baguette & Batard 

Thanks to wine and cranberry, it has a nice sweet and tangy flavor and definitely goes well with blue cheese!

I can't stop drinking & eating wine!

———————————————————————

Sourdough - Wine Baguette + Batard

Makes 1 baguettes and 2 small batards

—————————————-

Ingredients

102 g 100% hydration starter

287.8 g Gold Medal All-purpose Flour

80 g Water

123 g Red Wine

6.7 g Salt

80 g Dried Cranberries

—————————————-

Formula

338.8 g Gold Medal All-purpose Flour (100%)

 131 g Water (38.6%)

123 g Red Wine (36.3%)

6.7 g Salt (1.98%)

80 g Dried Cranberries  (23.6%)

—————————————-

Directions

  1. In a bowl, mix flour and Wine + Water roughly, cover it with plastic and Autolyse for 12 hours in the fridge.
  2. Add Sourdough starter and mix by folding dough in the bowl.
  3. Add chopped Cranberries and mix by folding dough in the bowl.
  4. Add Salt and Slap & Fold for 3 - 4 minutes or until the dough becomes a ball.
  5. Bulk fermentation at room temperature, 1 sets Stretch & Fold (1 set = right over left, left over right, bottom over the top, top over bottom) every half hour until enough strength has been developed.
  6. Let it rise until the dough starts showing the 'activity' and becomes about a third in size. It takes about 6 hours total in winter time (it depends on the season) in my kitchen.
  7. Put it in the fridge for 16 – 18 hours.
  8. Pull it out of the fridge and leave it out for 1 hour.
  9. Divide into 2 equal parts and preshape the dough.
  10. Let it rest for 15 - 30 minutes.
  11. Shape into baguettes / batards and place onto a floured couche, seam-side up.
  12. Preheat the oven to 500°F
  13. Final fermentation for 45 minutes - 1 hour.
  14. Score the top of the baguettes / batards using a lame or a sharp, serrated knife.
  15. Place the bread in the preheated oven, pour the water onto the brick blocks and shut the oven door immediately. Turn down the oven to 480°F, bake the bread around 20 minutes.
  16. Let them cool onto a rack.
  17. Ready to eat!

The time and temperature will be changed depends on the season.


Liverpoolbaker's picture

Oven spring in professional deck oven

February 26, 2013 - 9:54am -- Liverpoolbaker

I've just recently started doing some baking in a professional deck oven, its a mono oven 4 years old with a steam system. I was quite excited about baking in it, as I've only every really used my old domestic gas oven at home. My basic white sourdough (800g of dough, 75% hydration, 4 hours bulk ferment, 12+ hours cold prove in banetons), is something I get consisten results with when baking at home using the dutch oven. I always get good oven spring and great looking blooms. 

Netvet007's picture

Dense whole grain bread

February 25, 2013 - 7:49pm -- Netvet007
Forums: 

So I decided to try the whole grain sourdough recipe from How to Make Bread by Emmanuel Hadjiandreou. I have never worked with whole grains before for bread.  My 100% hydration starter was at peak and has been a workhorse so I know I had leavening power.  I followed the recipe exactly except I substituted bukgur for cracked wheat as no grocery store around had cracked wheat.  I followed instructions and amounts carefully.

linder's picture

Sourdough Oat Bread

February 24, 2013 - 6:38pm -- linder
Forums: 

A friend of mine passed along a recipe he made about 15 years ago.  It hails from Arkansas.  I am going to convert the recipe from cups and spoons to grams.  I have some questions regarding the use of sourdough starter, yeast AND baking soda in this bread.  Does it really need all three?  What would baking soda 'bring to the party' aside from some leavening and isn't there enough with all the sourdough and yeast anyway?  Would it be wise to cut back on some of the salt in the recipe since baking soda might add a bit of saltiness to the loaf? 

4akitchenblog's picture
4akitchenblog

Hi all,

I am new here and this is my first post on The Fresh Loaf!

Today I would like to share my first attempt at baking Sourdough Boule with Japanese Clay Pot.

Japanese Clay Pot (a.k.a. Donabe) is a symbol of comfort food for Japanese people.

(Oh, by the way, I am Japanese :-))

Family members or friends come together around the table and share a meal out of one pot, so that you can build a sense of closeness, warmness...

I live in Santa Monica, California and my all family members live in Japan...Therefore, I felt all warm inside when I happened to find this Donabe.

"I want to bake BREAD with this clay pot!"

This idea just popped in my head :-)


The best part of using a clay pot (of course, a cast-iron pan, too) is you don't need to create the steam in your oven.

Because a closed clay pot trap all of the moisture from the dough, and that creates STEAM you need to get a perfect crust!

It's like a "masonry oven" inside your oven, if you will.


Ok, let's bake Donabe-bread!

This is a Sourdough Boule made with 36 hours fermentation.

————————————

Sourdough Boule

Makes 1 small loaf

Submitting this post to YeastSpotting

————————————

Recipe

225 g Bread flour

162 g water

4 g Salt

67.5 g 60% Firm sourdough starter

————————————

Formula

266.3 g Bread Flour (100%)

188.3 g Water (70%)

4.8 g Salt (1.8% )

————————————

Directions

1. Making the preferment dough --- In a mixing bowl, combine Bread Flour, Water and Sourdough seed starter / culture. 

    Let it preferment at room temperature for 12 hours.

2. Meanwhile, mix flour and water, cover it with plastic and Autolyse for for 12 hours.

3. Next day, mix starter into the dough and slap & fold for 1 minute.

4. Add salt and slap & fold for 1 minute or until the dough becomes a rough ball.

5. Let it rest for  30 minutes.

6. 1 set Stretch & Fold (1 set = right over left, left over right, bottom over top, top over bottom)

7. Let it rest for  30 minutes.

8. 1 set Stretch & Fold

9. Let it rest for  30 minutes.

10. 1 set Stretch & Fold

11. At a cooler place, let it rise until the dough just starts showing the yeast activity, about a third in size.

12. Put it in the fridge for 18-24 hours.

13. Pull it out of the fridge and leave it out for 1 hour.

14. Pre-shape the dough and let it rest for 15 minutes.

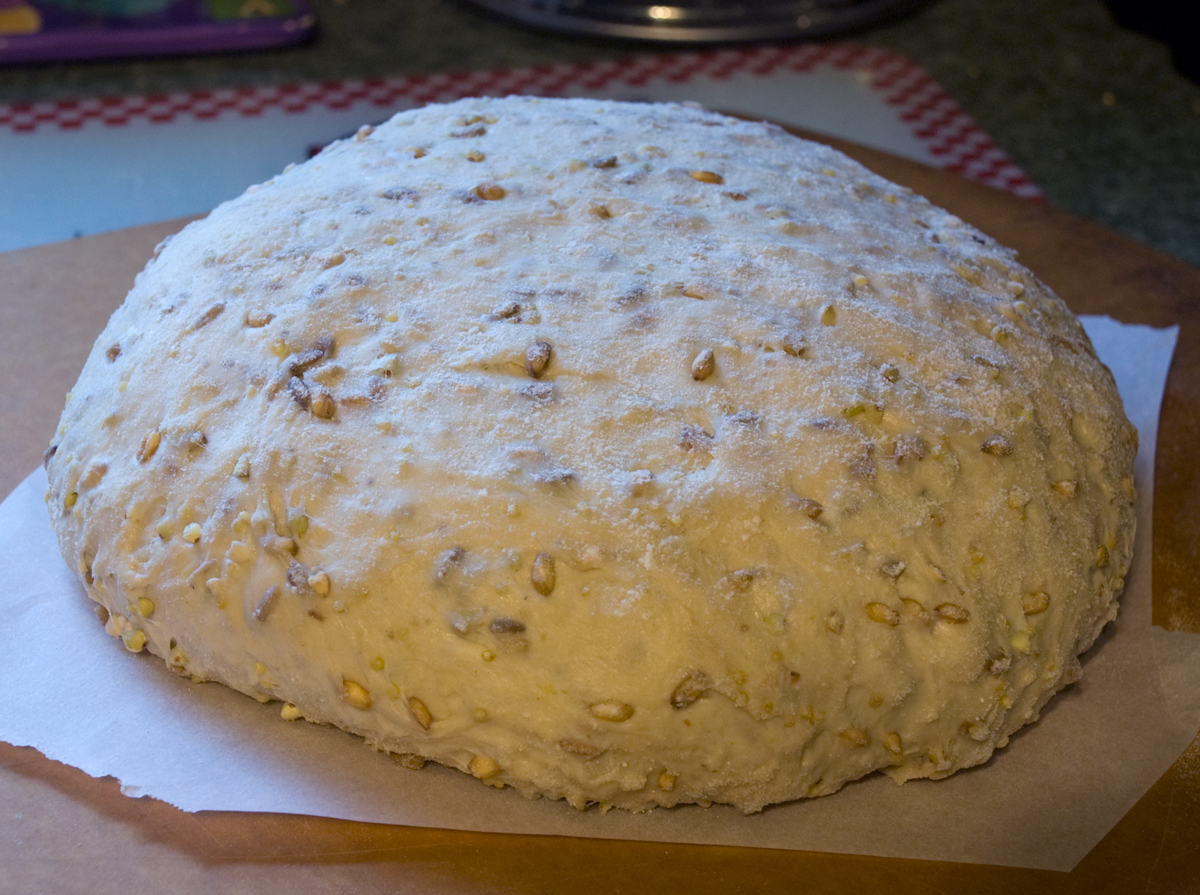
15. Shape into Boule and place into a mixing bowl lined with well-floured tea towel, seam-side up.

❉ Since I didn't have a round banneton, I used a mixing bowl lined with a tea towel and it just worked very well!

16. Final fermentation for 60 - 90 minutes.

17. 1 hour before you plan to bake, place your Donabe / Closed clay pot (must be completely DRY) on the middle shelf in the oven and preheat to 500°F.


18. Flip the bowl over so that the dough sits on the middle of a parchment paper.

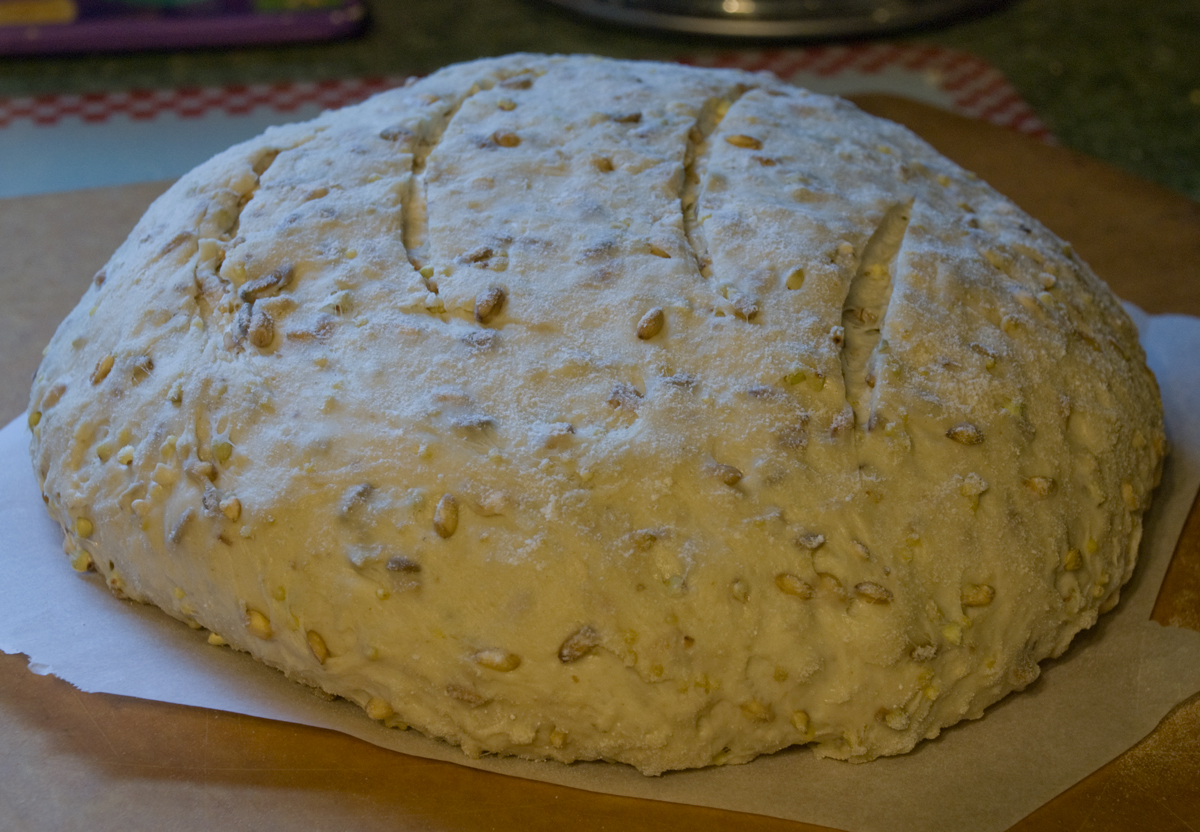
19. Score the top of the Boule using a lame or a sharp, serrated knife.

20. Very very carefully open the lid (it's HOT!) and put the bread in the preheated Donabe, replace the lid and slip it back into the oven.

21. Turn the heat down to 480°F and bake the bread for 30 minutes with lid.

22. Turn the heat down to 450°F and bake for 10-15 minutes without lid.

23. Once the boule is nicely brown, turn the heat off and remove the boule from the Donabe and place directly on a rack in the oven for another 5-10 minutes.

24. Let them cool onto a rack.

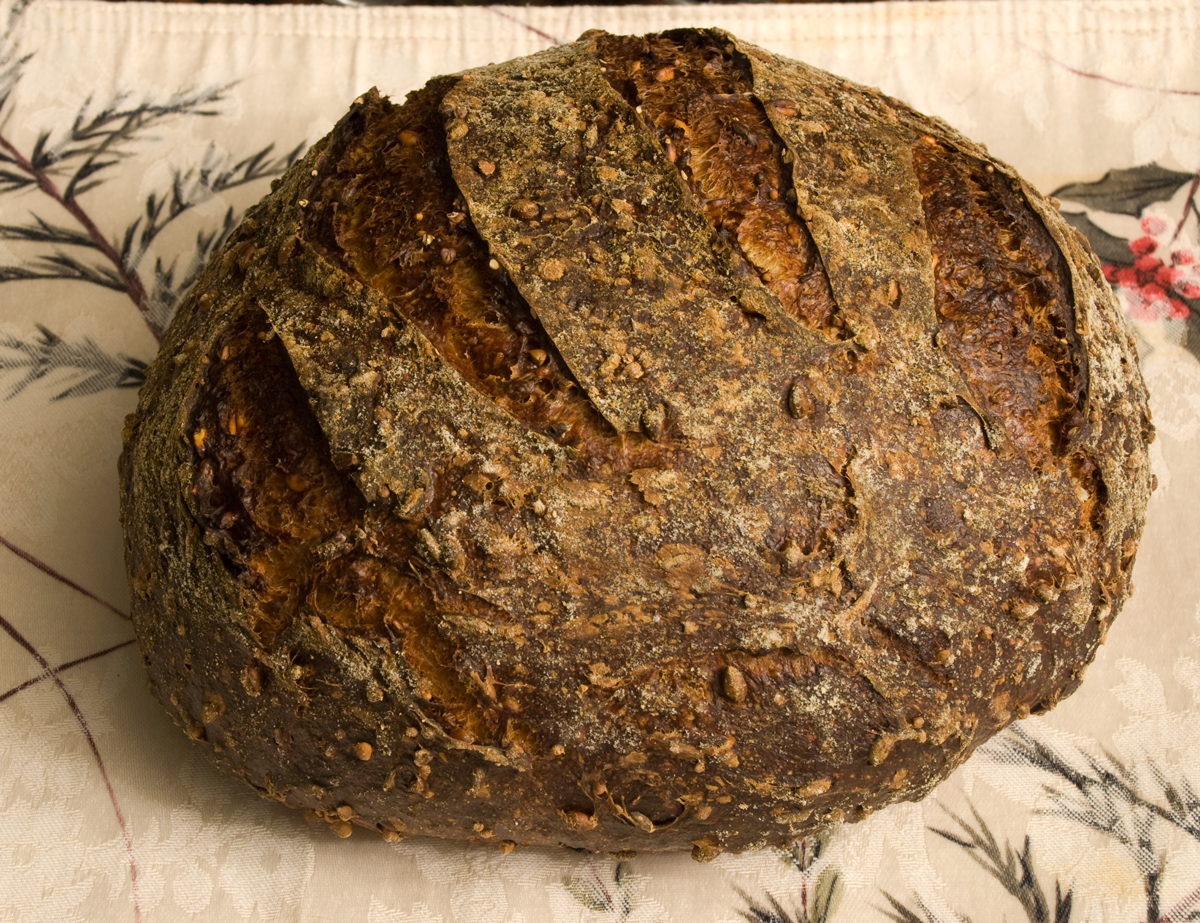
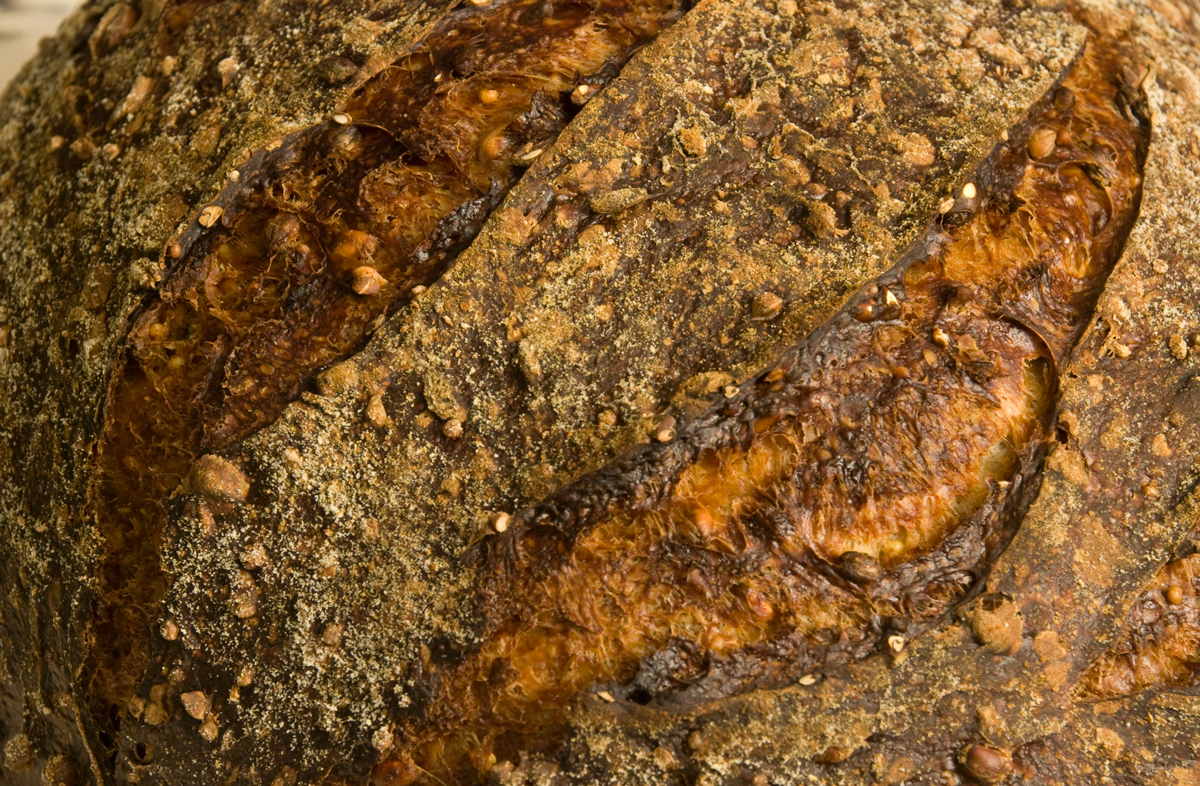
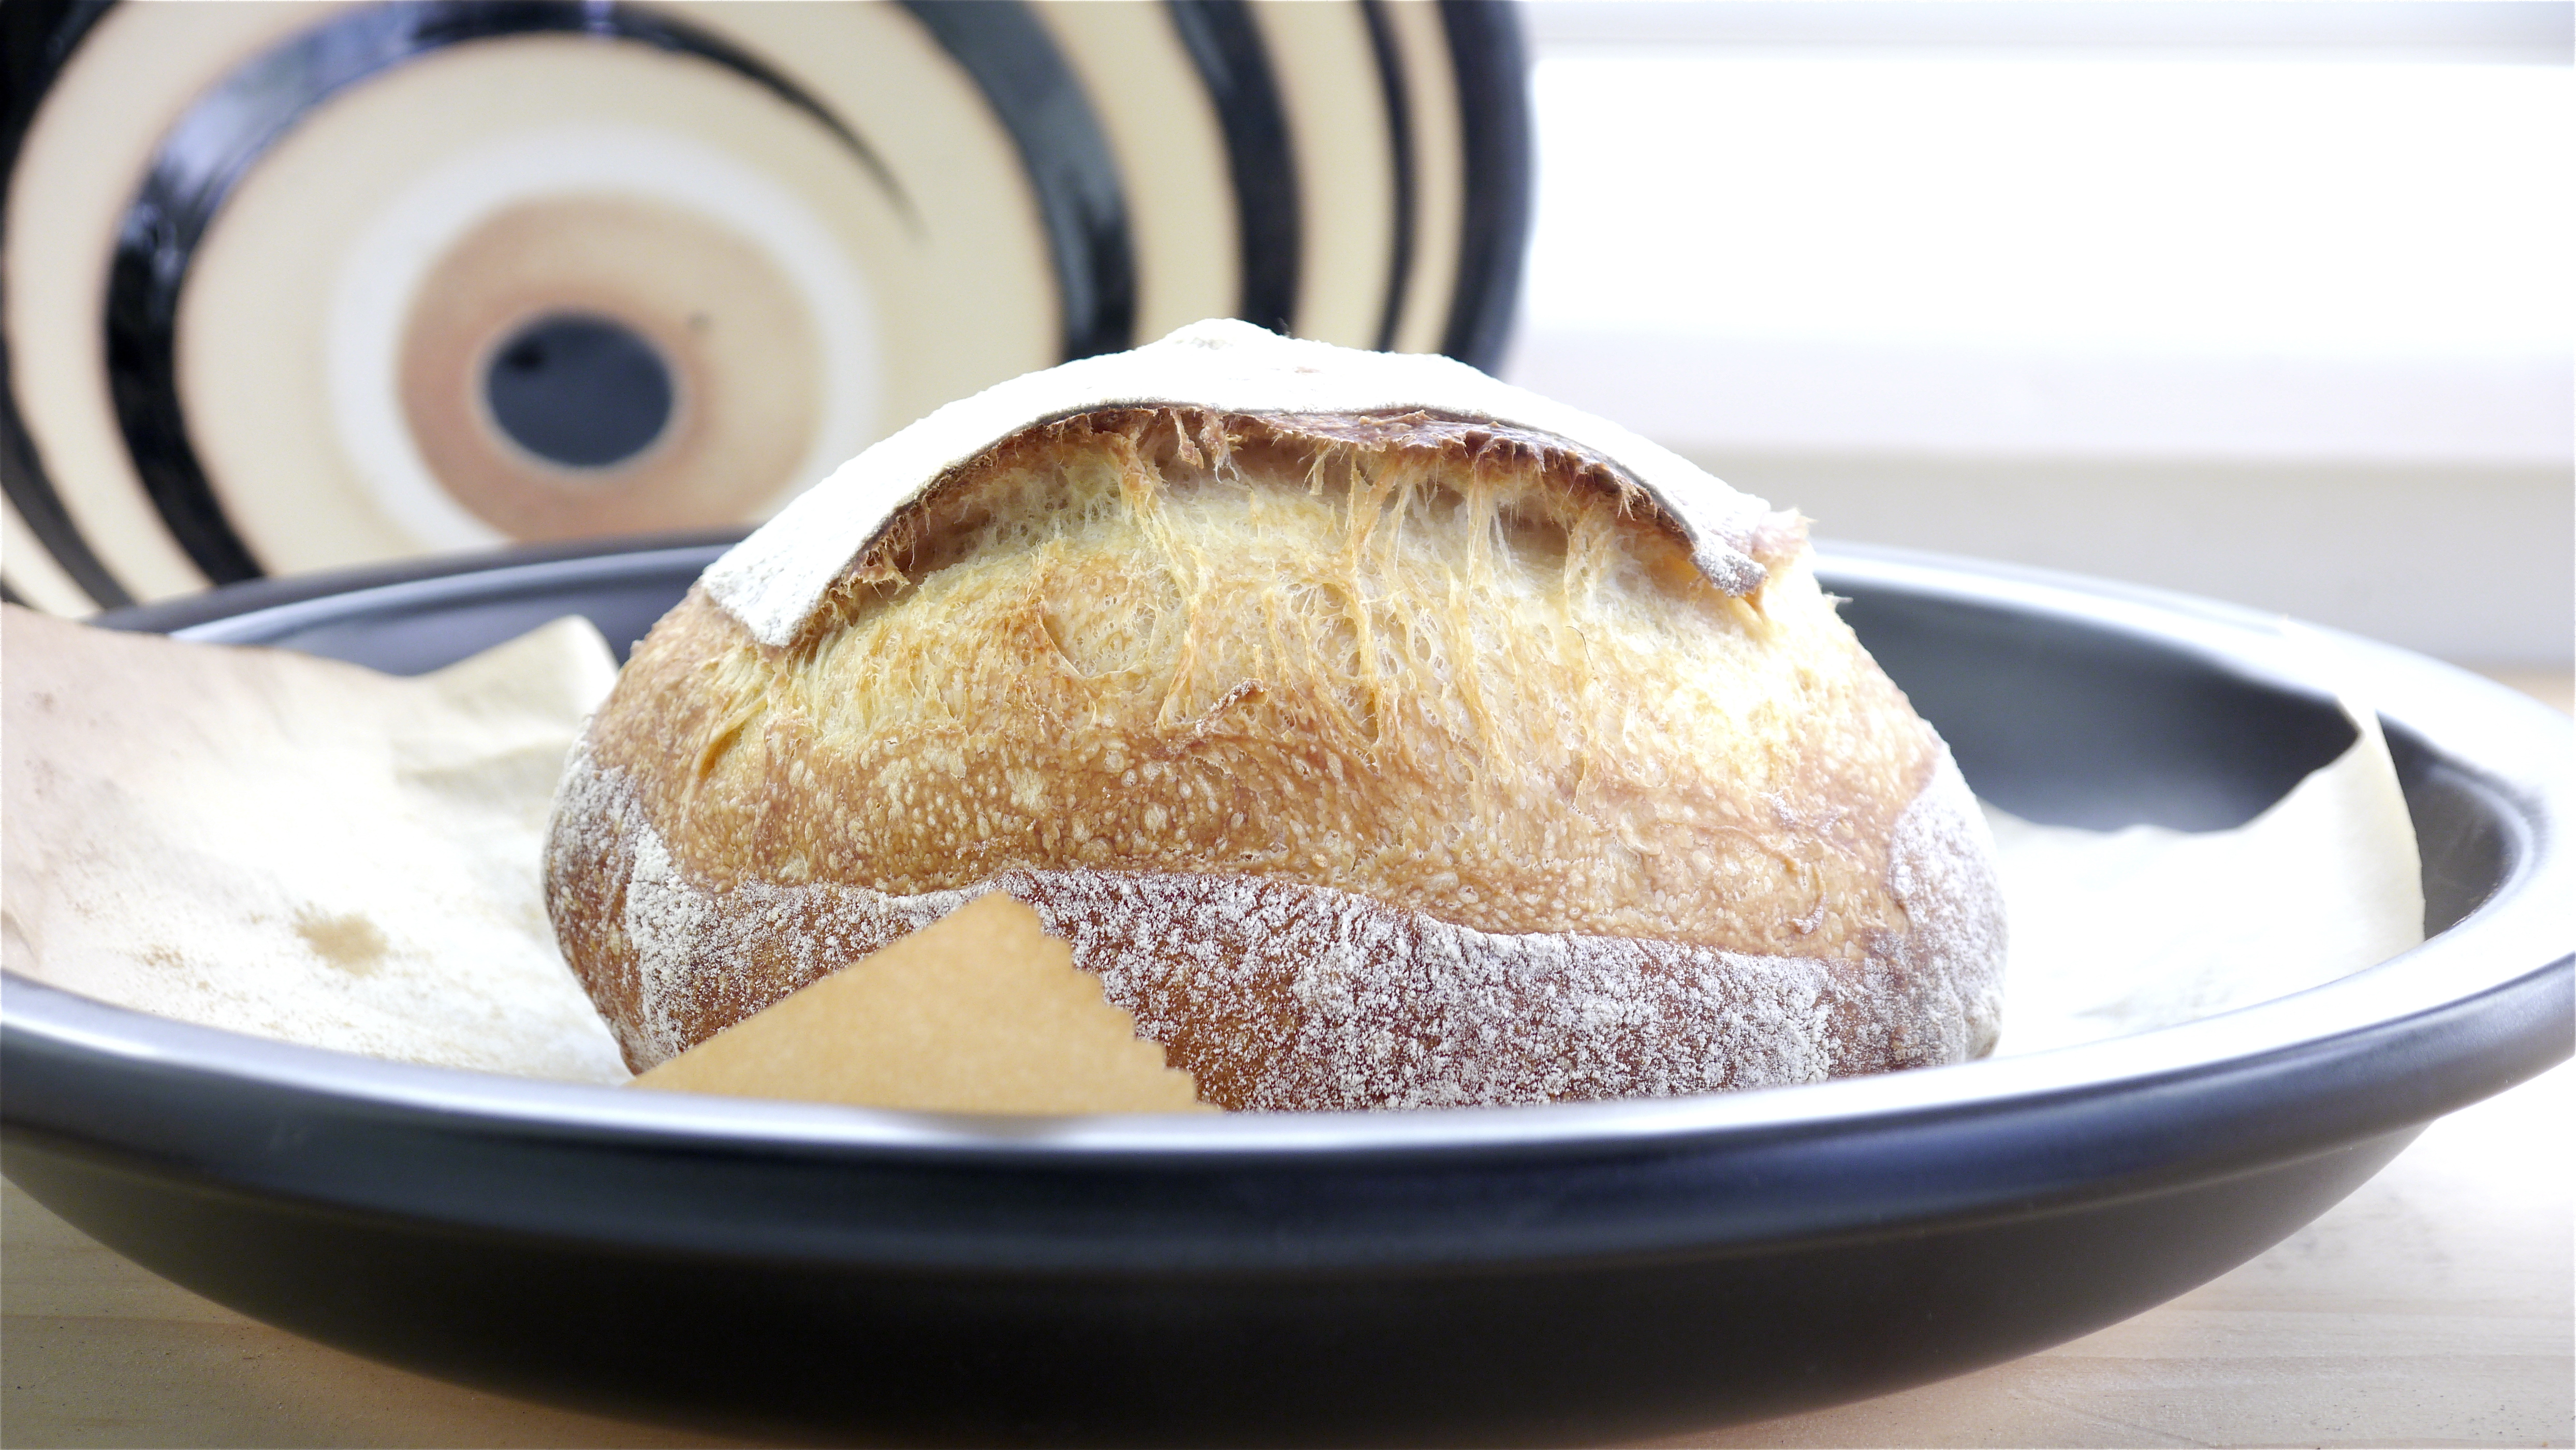
Here is my first Donabe-Bread!

It turned out super nice! I got an amazing crust and silky-fluffy-holey crumb.

To be honest, I was quite surprised by this result. 

Even though I knew this "closed clay pot (La Cloche)" method through this post on a website BREAD IN FIVE,

I was not sure if I could get the same result with this Japanese Donabe or not...

No baking stone? No steam? Really?!

Yes, it really works! Donabe-bread is a new comfort food for me!

Yuko


Isand66's picture
Isand66

Okay, I'm back to my normal self again baking abi-normal breads.  I've made bread with corn flour before, but this time I wanted to use a slurry of roasted corn as well as use corn flour in the sourdough starter.  I also wanted to add some cheese and I thought some nice salty tasting Feta cheese would be a good combination.  The bread is just about to come out of the oven and I can smell the corn and feta cheese all throughout the house.  Not exactly a great thing to control my hunger while on a diet, but such is life.

This is a very wet dough, even though the overall hydration is only 72%, by adding the corn slurry it really increased the moisture content of the dough greatly.  I tried to bake this using a bundt pan mold from my wife's collection. I should have probably baked it in the mold but instead I removed the dough and it kind of flattened out and melded together into a big round blob shape.  I scored the loaf and it did get some good oven spring but next time I will bake it part of the way in the bundt pan and see what happens.

The final bread, while not resembling the intricate bundt mold I used, did come out great with a nice crispy crust and open and tasty crumb.  The bread is nice and moist and really came out amazing.

If you make this recipe, make sure to roast your corn first or you will lose that special sweet flavor that only roasted corn can impart.

I also used avocado oil which I am not sure what it actually added to the flavor profile, so feel free to substitute olive oil or any oil of your choice.

Directions

Starter Build 1

95 grams AP Flour (KAF)

55 grams Corn Flour (Bob's Red Mill)

50 grams Seed Starter at 65% hydration (If you use a 100% hydration starter you need to adjust the water amount and flour amount to compensate)

90 grams Water at room temperature.

Mix all the above ingredients together for about 1 minute and cover with plastic wrap.  Let it sit at room temperature for around 4-8 hours or until the starter has doubled.  I usually do this the night before.

Starter Build 2

75 grams AP Flour

25 grams Corn Flour

75 grams Water at room temperature

Mix all the ingredients into the starter from step 1 until they are incorporated.  Cover with plastic wrap and let it sit for 4-6 hours or until doubled.  You can then refrigerate for up to 1  day or use in the main dough immediately.

Main Dough Ingredients

425 grams  Starter from above  (Note: you will have a little extra starter from above so make sure to weigh it out)

350 grams European Style Flour (KAF, you can sub Bread Flour with a little bit of Whole Wheat)

100 grams Durum Flour ( KAF)

75 grams Potato Flour (KAF)

50 grams Corn Flour (Bob's Red Mill)

77 grams Feta Cheese

17 grams Seas Salt or Table Salt

22 grams Avocado Oil (substitute olive oil if necessary)

425 grams Water at room temperature

155 grams Roasted Corn Slurry (Instructions below)

Total Flour (Including Starters and Seed Starter)

802 grams

Total Water (Including Starters and Seed Starter)

576 grams

Total Hydration: 72%

Procedure

Roasted Corn Slurry

I used a grill pan to do this since I still have too much snow on the ground to get to my barbecue.  Either way, you want to shuck 2 medium ears of corn, spray on or brush on some olive oil and add sprinkle some smoked hickory salt, onion powder, garlic powder and cheese powder. Wrap in aluminum foil or if you have the husks you can wrap them back in the husks.  Grill for about 15-20 minutes until you have a nice char on all sides.

Let the corn cool down and cut the corn from the cobs and place 155 grams in your food processor and give it a whirl until the corn starts resembling a slurry.  You don't want to overdo it since you want some texture to the corn to remain.

Main Dough

Mix the flours, oil and 385  grams of the water together in your mixer or by hand until it just starts to come together, maybe about 1 minute.  Let it rest in your work bowl covered for 20-30 minutes.  Next add the salt, starter (cut into about 7-8 pieces),and corn slurry and mix on low for a minute.  Add the rest of the water unless the dough is way too wet (note this is a very wet dough but you don't want soup).   Mix on low-speed for another 2 minutes.  Next add the cheese and mix for 1 additional minute.  Remove the dough from your bowl and place it in a lightly oiled bowl and with wet or oiled hands do several stretch and folds.  Let it rest covered for 10-15 minutes and then do another stretch and fold.  Let it rest another 10-15 minutes and do one additional stretch and fold.  (Feel free to do additional stretch and folds if necessary).  After a total of 2 hours place your covered bowl in the refrigerator and let it rest for 12 to 24 hours.

When you are ready to bake remove the bowl from the refrigerator and let it set out at room temperature still covered for 1.5 to 2 hours.  Remove the dough and shape as desired.  As mentioned above I used a bundt pan mold.  I shaped the dough into 2 batards and placed both of them in the mold and sealed them together.


 Next I covered the dough with a moist tea towel.  The dough will take 1.5 to 2 hours depending on your room temperature.  Let the dough dictate when it is read to bake not the clock.

Around 45 minutes before ready to bake, pre-heat your oven to 500 degrees F. and prepare it for steam.  I have a heavy-duty baking pan on the bottom rack of my oven with 1 baking stone on above the pan and one on the top shelf.  I pour 1 cup of boiling water in the pan right after I place the dough in the oven.

Right before you are ready to put them in the oven, score as desired and then add 1 cup of boiling water to your steam pan or follow your own steam procedure.

After 1 minute lower the temperature to 450 degrees.  Bake for 35-50 minutes until the crust is nice and brown and the internal temperature of the bread is 205 degrees.

Take the bread out of the oven when done and let it cool on a bakers rack before for at least 2 hours before eating.

mitchjayg's picture

Sourdough Bread - Can I proof and then retard

February 16, 2013 - 8:42am -- mitchjayg

Although I have been lurking here for a year, this is my first post. Let me start out by saying how terrific this site is and how much I have learned.  Thanks so much (and I bought Floyd's book - terrific!).

I have been baking sourdough breads, with my own starter, for about a year.  My usual process, from Emmanuel Hadjiandreou "How to Bake Bread" (wonderful, btw) is to stretch and fold every 10 minutes for about an hour, ferment for an hour, shape, proof for 4 hours, then bake.

evonlim's picture
evonlim

went back hometown to celebrate Chinese New Year with my parents and brothers. it was a long drive because of the heavy traffic. the journey took 7 hours instead of 3 .  i was really looking forward for mom's cooking!!

new year's eve dinner

... of course we started a.. 

Prosperity Toss, also known as lo hei (Cantonese for 撈起 or 捞起). It usually consists of strips of raw fish, mixed with shredded vegetables and a variety of sauces and condiments, among other ingredients. Yusheng literally means "raw fish" but since "fish (鱼)" is commonly conflated with its homophone "abundance (余)", Yúshēng (鱼生) is interpreted as a homophone for Yúshēng (余升) meaning an increase in abundance. Therefore, yusheng is considered a symbol of abundance, prosperity and vigor.

the dishes:

butter prawns :P

hainanese steam chicken.. 


sweet n sour pork ribs..


my all time favorite soup, salted mustard green duck soup!!

this is my nephew, Christopher ( r u ready for PSY??) he loves gangnam song :)


and niece, Le Ann


1 st day new year's lunch

fried yellow noodles .. ( mom had to fried 3 portion of this, everyone was having second helping!)


left my starter for 4 days. refreshed it for 2 days before i bake.

this is a wholewheat with polenta, sunflower seeds and green olives sourdough bread

 (Formula adapted from Tartine) used a rye starter and white starter

the crumb shots... and yes it smells great and tasted delicous


 i had a short and sweet Chinese New Year celebration. started work 2 days ago. my brothers are still back at homtown!!

Happy Chinese New Year to all who celebrates, Gong Xi Fatt Chai

evonlim


baybakin's picture
baybakin


Sourdough Pizza: (Based on Maggie Glezer's Pizza Napoletana crust)

I've fiddled around with this recipe quite a bit, finding the right amount of levain and durum to suit my tastes, and here's what I have settled on.  The key to the big bubbles and flavor is a minimum 24 hours in the fridge, maximum 3 days.  There's lots of instructions on how to make good pizza in a home oven, my setup is as follows: Stone on the bottom of oven (gas in my case), pre-heated at 550F for an hour.  Pizza goes in on parchment, when the crust just starts to get toasty looking I put the broiler on until the top bubbles just begin to char.

150g Levain (100% hydration)
255g Water (room temp)
100g Fancy Durum Wheat Flour
325g Unbleached Bread Flour
10g Salt

Mix all ingrediants together until a rough dough is formed, let rest for 30 mins.
Kneed until smooth, rest on bench for an hour.
Divide into two equal pieces, form into balls.
Wrap in oiled plastic.
Place in fridge for 24-72 hours.

Take dough out of fridge at least one hour before baking.

Hope it works for others as well as it has worked for me.


Pages

Subscribe to RSS - Sourdough