The Fresh Loaf

A Community of Amateur Bakers and Artisan Bread Enthusiasts.

SFBI Artisan II

dmsnyder's picture
dmsnyder

Sourdough Bread made with Liquid Levain fed twice a day

from the SFBI Artisan II Workshop

Probably the key experience provided in the SFBI Artisan II workshop on sourdough baking was baking a series of breads with liquid versus firm starters, starters fed either once or twice a day and breads with different proportions of starter. Each variation produced breads with noticeably different flavor profiles.

Our instructor made it quite clear that he and his colleagues at the SFBI had a clear consensus that the best-tasting bread was produced using a liquid levain fed twice a day and with the liquid levain constituting 40-50% (baker's percentage) of the final dough. The dough had an overall hydration of 68%.

The characteristics of bread made in this manner were a very mild sourdough tang with a predominance of the “milky” sourness provided by lactic acid but a dominance of sweet, wheaty flavor over acidity.

It has been quite a while since I have made bread using this formula, although I did like it a lot. I made it again this weekend. I have made some minor modifications in the procedures prescribed by the SFBI. Note: Apparent discrepancies in the ingredient weights are due to scaling down from the original formula for a much larger dough batch and rounding.


Total Dough Formula

Baker's %

Wt (g)

AP flour

95

641

Rye flour

0.83

5

Water

68

438

Instant yeast (optional)

0.1

0.5

Salt

2.1

13

Total

166.03

1097.5


Levain

Baker's %

Wt (g)

AP flour

95

102

Rye flour

5

5

Water

100

108

Liquid starter

40

43

Total

240

258

Note: for the starter feedings, including the levain mix, I actually used my usual starter feeding mix of 70% AP, 20% WW and 10% Rye. So, in the levain, rather than the AP and Rye specified in the SFBI formula, I used 107 g of the above mix.

  1. Mix ingredients thoroughly.

  2. Ferment 12 hours at room temperature. (Note: Because of my own scheduling needs, I refrigerated the levain overnight before mixing the final dough. This was not the procedure at the SFBI, and it would be expected to make the bread somewhat more sour. If you can, omit this levain retardation.)

Final Dough

Baker's %

Wt (g)

AP flour

100

517

Water

60

310

Instant yeast (optional)

0.1

0.06

Liquid starter

50

259

Salt

2.5

13

Total

212.6

1099.06

Procedures

  1. Mix all ingredients except the salt (and the yeast, if you are using it) to a shaggy mass.

  2. Let rest, covered, for 20-60 minutes.

  3. Add the salt (and yeast, if you are using it) and mix at Speed 2 for 5-6 minutes. Adjust flour or water to achieve a medium consistency. (Note: I did not use added instant yeast.)

  4. Ferment for 2-3 hours at 76ºF with 1 or 2 folds, as needed to strengthen the dough. (Note: The fermentation time depends on whether you use the instant yeast and on your fermentation temperature. As usual, “Watch the dough, not the clock.” The dough should end up expanded by about 20% and should be somewhat light and gassy. If you ferment in a transparent container, your should see the dough to be well-populated with tiny bubbles.)

  5. Divide the dough into two equal pieces and pre-shape as boules.

  6. Let the pieces rest, covered, for 25-30 minutes.

  7. Shape as boules or bâtards.

  8. Proof for 90-120 minutes at 80ºF.

  9. Bake at 450ºF with steam for 25 minutes.

  10. Leave in the turned-off oven with the door ajar for another 10 minutes.

  11. Cool thoroughly on a rack before slicing.


The crust softened as the bread cooled. I think this was mostly because I adjusted the dough consistency by adding a little water. This made for a more open crumb but a less crunchy crust. The aroma of the cut loaf was very nice with a noticeable acetic acid aroma. However the flavor, while more tangy than this bread is meant to be, was still only mildly sour. Otherwise, it had the delicious sweet-wheaty flavor I remember.

This bread was lovely. I am happy with the results I got, but it merits another bake following the SFBI formula and procedures without my modifications.

 David


dmsnyder's picture
dmsnyder


One of the breads we baked at the SFBI Artisan II Workshop last month was a miche. Everyone thought it was one of the best breads we baked. I made it at home for the first time two weeks ago, but used “Organic Type 85” high-extraction flour from Central Milling rather than the mix of white and whole wheat with the addition of toasted wheat germ we had used at SFBI. (See This miche is a hit!)

This bread was delicious, but I did want to make it at least once using the formula we had used at the SFBI, just to see how it turned out at home compared to baked in a commercial steam injected deck oven. Certainly the several TFL members who have baked this miche in their home ovens since I posted the formula have found it to be good. Also, at the SFBI, we had found that miches scaled at 2.5 to 3 kg somehow had an even better flavor than those scaled at 1.25 kg. So, today I baked a 2 kg miche using the original SFBI Artisan II formula.

For those who would like to make this larger version, here is the formula for a 2 kg miche:


Total Dough

Bakers %

Weight (g)

AP Flour

96.67

1087

WW Flour

3.33

38

Water

73.33

824

Salt

2

23

Wheat germ toasted

2.5

28

Total

177.83

2000


Pre-ferment

Bakers %

Weight (g)

AP Flour

75

112

WW Flour

25

38

Water

100

150

Salt

0

0

Liquid starter

50

75

Total

250

375


Final Dough

Bakers %

Weight (g)

AP Flour

100

975

Water

69

675

Salt

2

23

Wheat germ toasted

2.5

28

Levain

31

299

Total

204.5

2000

The procedure used was the same as in my previous blog entry about this bread with one exception – shooting for a slightly lighter crust, I baked with steam for 20 minutes at 450ºF, then turned the oven to convection bake at 425ºF for another 40 minutes. I did not leave the miche in the turned off oven to dry out before removing it to the cooling rack. I did leave it in the oven while I heated the oven back up to 460ºF conventional bake for the next loaves (about 5 minutes).

I was concerned about over-proofing this loaf, and it was lined up ahead of a couple San Joaquin Sourdough breads waiting to bake.

Miche after baking 20 minutes with steam at 450ºF

The blowout I got suggests the loaf was a bit under-proofed. I also shaped the boule really tight, which may well have been a second factor.

The miche sang loud and long while cooling. The crust had some crackles, but not like the last miche.

Crust crackles

Loaf profile, cut through the middle

Crumb

Crumb close-up

2 kg miche beside 514 g San Joaquin Sourdough bâtards

The crust was crunchy-chewy - much thinner than the last bake. It was much less caramelized, and this was apparent in the less wonderful crunch and flavor. The crumb was nice. It was quite noticeably denser in the center of the loaf. I think this is expectable with a miche of this size. I thought the crumb structure was pretty consistent from the center of a slice to the crust.

6 hours after baking: The aroma of the crumb had a pronounced whole wheat grassiness. The crumb was moderately chewy. From past experience, I expect it to be softer tomorrow. The flavor was good - mildly sour with a nice wheaty flavor - but I didn't enjoy it quite as much as the miche made with Central Milling's "Type 85" flour. I think the flavor would have been better had I used fresh-milled whole wheat. That's what I will do the next time I bake this miche.

24 hours after baking: The aroma and flavor have mellowed and melded. The grassy aroma is gone. It just smells like a good sourdough country bread. The flavor is now delightful - very complex - nuttier and sweeter. A very thin smear of unsalted butter makes this bread ambrosial.

I froze half the miche. The other half will be croutons for onion soup gratiné tonight, breakfast toast with almond butter and crostini with ribollita for dinner tomorrow. (The ribollitta was my wife's all-morning project.) That should leave another quarter loaf for sandwiches, panini, French toast ... 

David

Submitted to YeastSpotting


dmsnyder's picture
dmsnyder


We baked a miche the last day of the SFBI Artisan II (sourdough baking) workshop. This was one of the breads we mixed entirely by hand. The students' miches were scaled to 1 kg, as I recall, but our instructor baked a couple larger ones, using the same dough.

These miches were among the favorites of all the students for the wonderful texture of their crust and crumb and their flavor. I gave one of mine to brother Glenn, who has stopped reminding me in the past few days that I promised him the formula.

This formula is substantially different from the miche formula in Advanced Bread and Pastry. I blogged about the background of that miche last month. This one is more similar to contemporary versions such as that of James McGuire, Hamelman's adaptation of which is found in Bread.

The formula we used at the SFBI calls for mostly white flour, with a little whole wheat in the levain refreshment and a little toasted wheat germ in the final dough. From my reading, a high-extraction flour is preferred for miches. I had some of Central Milling's “Organic Type 85” high-extraction flour on hand, so that is what I used.


Total formula


Ingredients

Wt (g)

Baker's %

High-extraction flour

702

100

Water

515

73.33

Wheat germ (toasted)

18

2.5

Salt

15

2.08

Total

1250

177.91

Notes

  • The SFBI formula used 96.67% “Bread flour” and 3.33% Whole wheat flour. All the whole wheat flour is used in the levain. I used Central Milling's “Organic Type 85 Flour” for both the levain and the final dough

  • I did not use wheat germ since I was using high-extraction flour, but this ingredient did contribute to the great flavor of this bread as we made it in Artisan II.


Levain


Ingredients

Wt (g)

Baker's %

High-extraction flour

93.7

100

Water

93.7

100

Liquid starter

50

46.8

Total

237.4

246.8

  1. Dissolve the starter in the water and mix in the flour. Desired Dough Temperature: 78ºF.

  2. Ferment for 8-12 hours.


Final Dough


Ingredients

Wt (g)

Baker's %

High-extraction flour

586

100

Water

398

68

Wheat germ (toasted)

18

3

Salt

15

2.5

Levain

234

40

Total

1251

213.5

Procedure

  1. Dissolve the levain in the water. Add the other ingredients and mix thoroughly by hand. DDT: 75-78ºF.

  2. Transfer the dough to a clean, lightly oiled bowl.

  3. Ferment for 3-4 hours with 4 folds at 50 minute intervals. (I did this by the “stretch and fold in the bowl” technique.)

  4. Transfer the dough to a lightly floured board. Pre-shape as a tight boule.

  5. Cover and let rest for 20-30 minutes to relax the gluten.

  6. Shape as a tight boule and place, seam side up, in a floured banneton.

  7. Cover with plastic and retard overnight in refrigerator.

  8. Remove the boule from the refrigerator and allow to warm and complete proofing for 1-3 hours. (Watch the dough, not the clock!)

  9. 45-60 minutes before baking, pre-heat the over to 500ºF with baking stone and steaming apparatus in place.

  10. When the loaf is proofed, transfer the boule to a peel. Slash the boule as desired, and transfer it to the baking stone. Steam the oven and reduce the temperature to 450ºF.

  11. Bake for 20 minutes, then remove any water remaining in your steaming apparatus.

  12. Continue baking for another 40-50 minutes. (If you have a convection oven, switch to “Convection Bake” and reduce the oven temperature to 430ºF at this point. But see my tasting notes.)

  13. Remove the boule to a cooling rack, and cool thoroughly before slicing.

Notes on procedure

  • Traditionally, we were told, this bread is scored in a diamond pattern, but any scoring pattern that pleases you is fine. Just be aware that the diamond pattern tends to yield a flatter profile loaf than a simple square or cross.

  • This bread benefits from a very bold bake. The crust should be quite dark. It may look almost burned, but the flavor and crunchiness that is desired requires this.

  • This type of bread often improves in flavor very substantially 24 hours after baking.

    Crust

    Crumb


    Crumb close-up

Tasting notes

I sliced and tasted the bread about 4 hours after removing it from the oven. The crust had crackled nicely and was very thick and crunchy – the kind that results in crust flying everywhere when you slice it. The crumb was well-aerated, but without any really large holes. The crumb structure is similar to that I got with the miche from BBA made with this flour, but a bit more open. The crumb is chewy-tender.

The flavor of the crust is very dark – caramelized-sweet but with a bitter overtone where it is almost black. The crumb is sweet, wheaty, nutty and absolutely delicious. My note above notwithstanding, it's hard to imagine the flavor getting any better in another day.

I am enormously impressed with the flavor of the breads I have baked with Central Milling's “Organic Type 85” flour. I want more of it, and I want to try some of their other specialty flours, including those they mill for baguettes.

I will definitely be baking this bread again. I would like to make it as a larger miche, say 2 kg. Next time, I will lower the oven temperature to 420 or 425ºF when I switch to convection bake for the crust to be slightly less dark.

David

Submitted to YeastSpotting

dmsnyder's picture
dmsnyder


Today, we baked the three breads that we had shaped yesterday and retarded overnight – olive bread, raisin-walnut bread and miche. We also mixed and baked francese, French “country shapes” and baguette made with both pâte fermentée and liquid levain.

Olive breads loaded and scored

Raisin-Walnut breads, scored on loader

Miche, scored on loader

Miche, baking in the deck oven

Miche crumb


Some of the breads I baked today

Miches, Olive breads, Raisin-Walnut breads


Frank provided detailed instruction and demonstrations of shaping all the breads, but spend most time on the French Country Shapes, which are seldom baked commercially. They are intentionally innovative and decorative.

Frank demonstrating French Country Shapes

Dough pre-shaped for various French Country Shapes

Couronne Bordelais

Fleur. I have also seen this shape called "Marguerite" (Daisy)

Pain d'Aix

Charleston

French Country Shapes on the loader.

I have not posted photos of all the individual shapes Frank demonstrated, for example the Tordu, the Fendu, the Viverais, the Tabatier, and the Avergnat.

Some of the French Country Shapes I made


As I'm sure you all appreciate, there is no way to share everything I've learned. I have selected a few bits of information each day that either provided me with new insights or suggestions for techniques that violate conventional wisdom.

Today's tidbits

We spent some time this afternoon reviewing all the formulas, methods and theory we had covered during the entire week. In discussing autolyse, Frank recommended holding back the levain from the autolyse, even when using a liquid levain, except when the hydration in the final dough is extremely low – say, less than 60% - when the levain really would have a very large percentage of the total water in the dough. His reason is that one chief purpose of autolyse is to develop gluten with less mixing. The acid in the liquid levain inhibits gluten formation, thus defeating the purpose of the autolyse.

Michel Suas re-joined our class for the “graduation ceremony.” He made a plea for us to do “artisan baking” and, as much as possible, avoid mechanization and the use of artificial ingredients. He also shared a “hot tip” that the coming fashion in artisan baking is the use of “ancient grains” such as kamut, teff, etc. He told us that the SFBI staff have been actively experimenting with these grains to develop formulas that use them to produce great breads. I certainly had noticed the immense quantity of flour made with ancient grains on racks and palettes in the bakery, although we did not use them in Artisan II.

This week just flew by for me. The quality of Frank Sally's instruction was just outstanding, as was his skill demonstrations. The opportunity to try new breads and learn new techniques is wonderful, as is gaining a better understanding of the baking process, especially fermentation itself.

Especially for the home baker, the chance to spend so much time with other serious bakers, whether they be other home bakers, serious professionals in training or seasoned professionals, is a rare and wonderful experience.  

David


dmsnyder's picture
dmsnyder

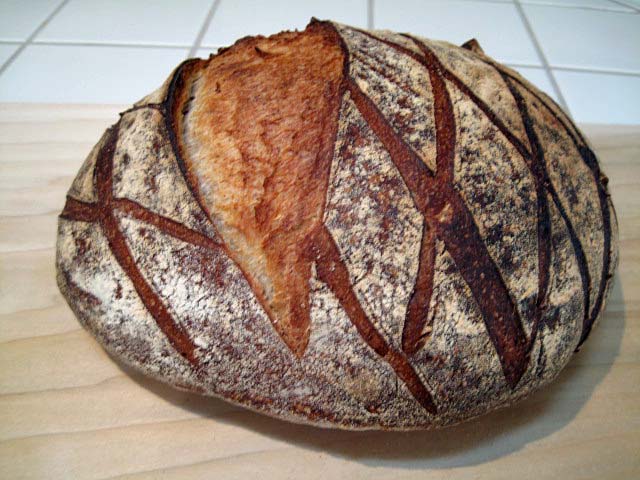
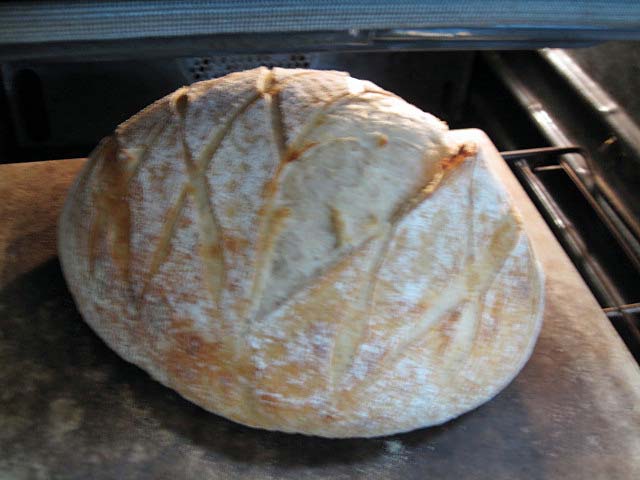
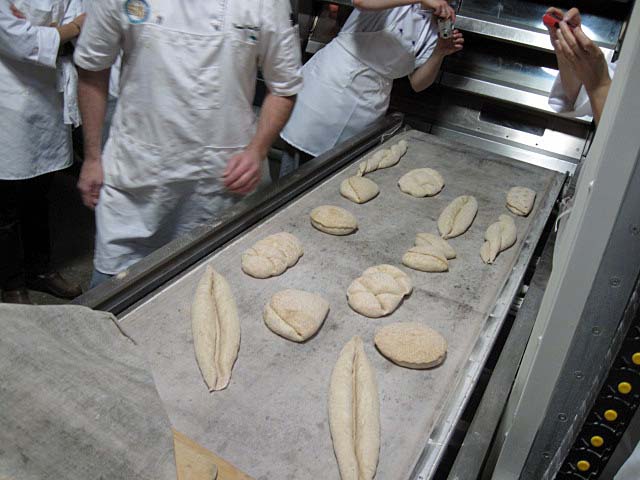
Some of the breads I baked on Day 2

The second day of the Artisan II workshop was spent mostly baking the breads for which we had fed the levains and scaled the ingredients yesterday. We also mixed levains and scaled for tomorrows bakes. Classroom time was bits and pieces between dough foldings and during fermentation, but the content was very good.

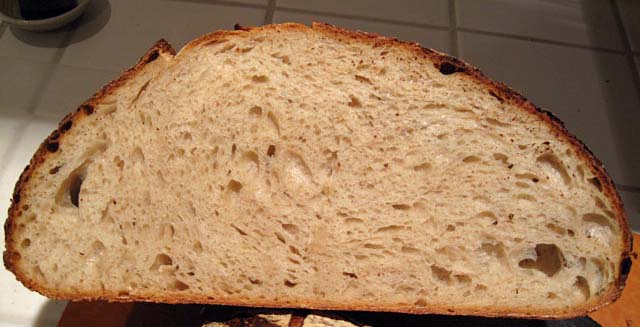
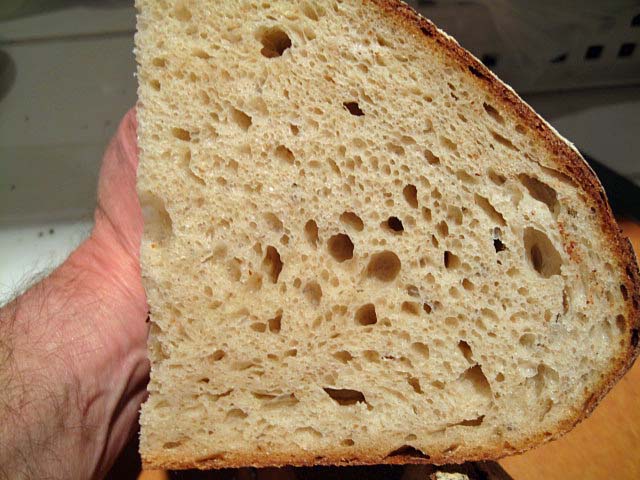
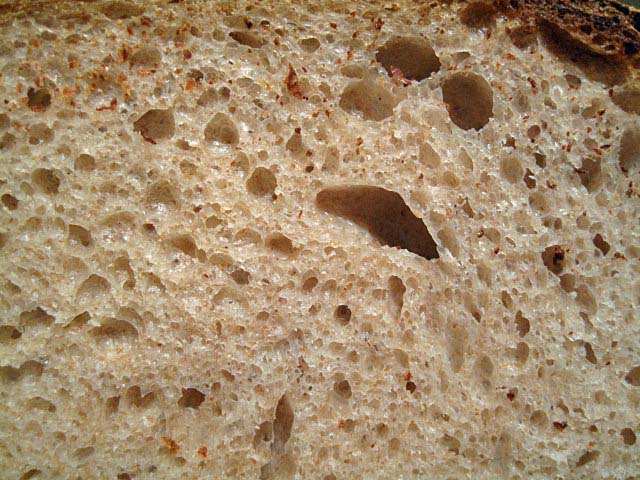
The instructional goal of today's baking was to see the effects of different types and proportions of levains on flavor. We baked four breads which differed only in these respects.

  1. Bread made with a levain fed once a day. (All the others were made with levain fed twice a day.) This bread was notably more sour than any of the others.

  2. Bread made with liquid levain at 100% hydration. (All the others were made with firm levain at 50% hydration.) This bread had notably less acetic acid tang and a noticeable milky lactic acid flavor – very pleasant.

  3. Bread made with 40% firm levain.

  4. Bread made with 70% firm levain.


The last two were not very different from each other in sourdough tang, but the 70% levain bread had a less pleasant, “metallic” after taste, according to some. I didn't perceive the after taste myself. The main take away lesson was that the frequency of starter feeding has more impact on bread flavor than the amount of levain used in the final dough and that the use of liquid versus firm starter really does make a difference in the balance of acetic versus lactic acid flavor in the bread.

Preparing to taste the breads

In the classroom today, Frank reviewed the application of baker's math to breads made with levains and the SFBI's recommendations for levain maintenance for home bakers. I won't go over the baker's math topic, but I'm sure the recommendations for levain maintenance are of interest to many.

The SFBI staff clearly favors keeping liquid levains and twice a day feedings. They also favor keeping your mother/stock starter at 400-500 g. They say smaller amounts result in poorer flavor. However, they also favor feeding your starter in a manner which minimizes the amount of starter you end up discarding. This is accomplished by determining exactly how much starter to feed to get the amount of levain you need to make your dough and not making too much excess.

For a liquid levain feeding, the recommended formula is:

Flour 100% (75% AP flour + 25% WW)

Water 100%

Starter 40%

Again, it is recommended that you feed every 12 hours and that you do two feeding prior to mixing your final dough.

For a firm levain feeding, the recommended formula is:

Flour 100% (same mix as above)

Water 50%

Starter 50%

For the weekend baker, it is recommended that you feed your levain (liquid or firm) as follows:

Flour 100%

Water 50%

Starter 25%

And refrigerate this immediately after the feeding. Activation prior to baking should done with 2 feedings (as described above) at 12 hour intervals. In other words, to mix a dough on Saturday morning, the refrigerated starter should be fed Friday morning and Friday evening.

Frank told us that all of these recommendations derived from extensive experimentation with different formulas and schedules. SFBI staff believes that they result in the best tasting bread. (Need I say that, if your taste differs, you come out of this workshop knowing just what you need to change to get the flavor you prefer?)

At the lunch break, I asked Frank about the formula for miche in AB&P which violates almost all these recommendations. I have described this previously in my TFL blog. He thought this was interesting enough to provide the answer in the next class session.

Michel Suas' intension with his miche formula was to reproduce a bread as close to the traditional miche as possible, and that required knowledge of traditional French village home baking. In the old days – say 150 or more years ago – home made bread was mixed at home but taken to a communal oven or to the village baker to bake in a wood fired oven. The loaves were huge, by today's standards, because baking was a once-a-week chore. So, after the dough was mixed (before adding salt), a portion was removed to perpetuate the culture. This was fed through the week every day, without discarding any of the growing levain. On baking day, some additional flour and water were added, as well as the salt. But, the bulk of the dough consisted of the built up levain. Little additional fermentation was needed. The resulting loaf was very large, very dense and very, very sour. (Frank describes this with a look of disgust on his face.)

While today's breads were baking, we mixed the levains and scaled ingredients for tomorrow's bakes. We will be baking a variety of breads with levain that were made with commercial yeast during the Artisan I class: A whole wheat bread, multi-grain bread, rye bread and challah. We also fed our “from scratch” starters with which we will make breads Friday.

David

Subscribe to RSS - SFBI Artisan II