The Fresh Loaf

A Community of Amateur Bakers and Artisan Bread Enthusiasts.

sesame seed

RonRay's picture
RonRay

No-Knead Multigrain Seed and Nut Loaf

A previous blog:

http://www.thefreshloaf.com/node/20460/banana-saga-%E9%95%B7%E7%AF%87%E6%95%85%E4%BA%8B

Last December a posting by Jaydot caught my interest http://www.thefreshloaf.com/node/21186/huge-amount-seeds-and-sugar
Her sister in law had brought a recipe back from South Africa, which seem a bit strange.

Mini Oven suggested it might be South African Seed Bread, while PmcCool suggested it could be a variation on the Cape Seed Loaf.

After I spent some time seeing what Google had to offer on these subjects I concluded the two things they all had in common was a lot of seeds and no sourdough in sight. It seemed like a fun formula to play with, so I set out trying to come up with a reasonable sourdough version of a seed loaf.

By the end of February, I had a reasonably satisfactory loaf - on my fifth try. When I compared notes with Jaydot, I found that she had independently gotten a loaf that her sister in law found acceptable as well.

I picked up her use of caraway seed and maple syrup as something I wanted to try. So, I dropped the Chia seed and brown sugar I had used, and added her idea of maple syrup and caraway seed. Both proved their worth in the eating of my version number 6.

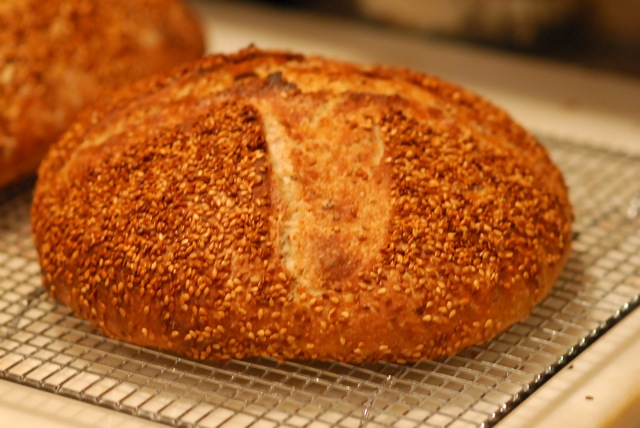
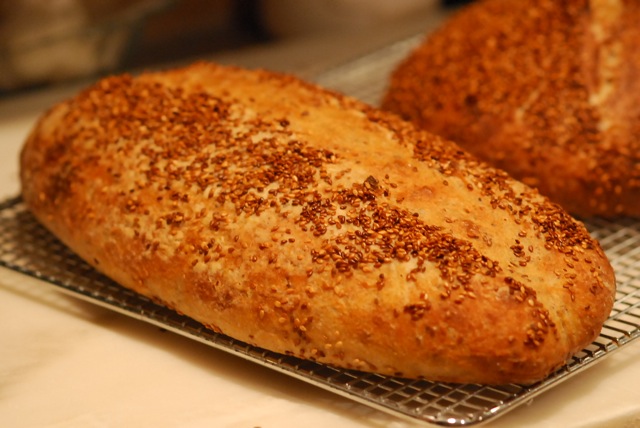
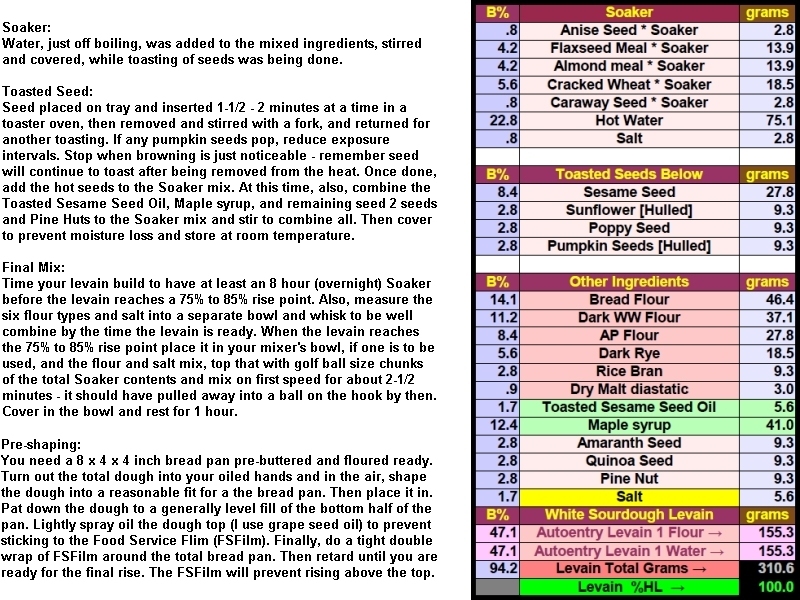
Number Six had nine (9) types of seed, two (2) types of nuts; six (6) types of flour plus maple syrup and toasted sesame seed oil. I was afraid to calculate the calorie count, but I am certain a person could gain weight on a diet of this bread and water, alone.

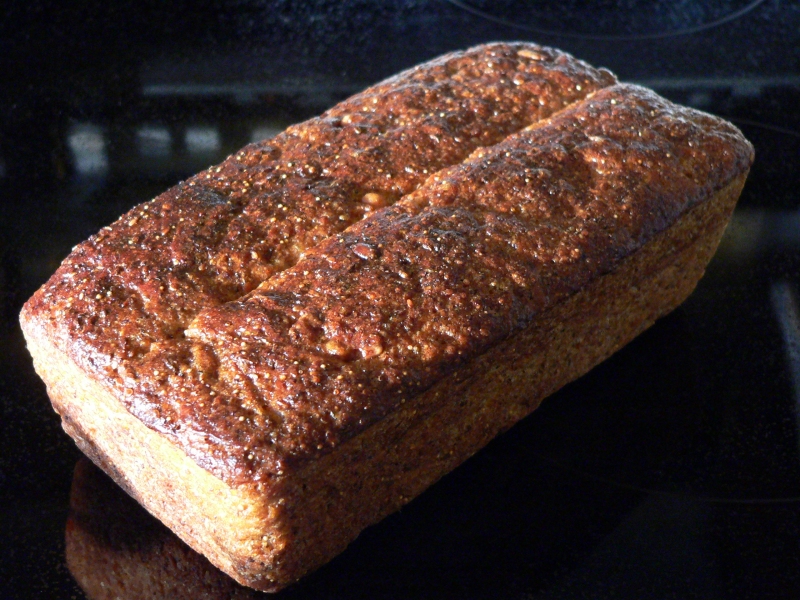
The loaf was 718 grams going into the oven and 665 grams at the time it came out of the oven. The instant internal temperature reading was 209ºF (98ºC).

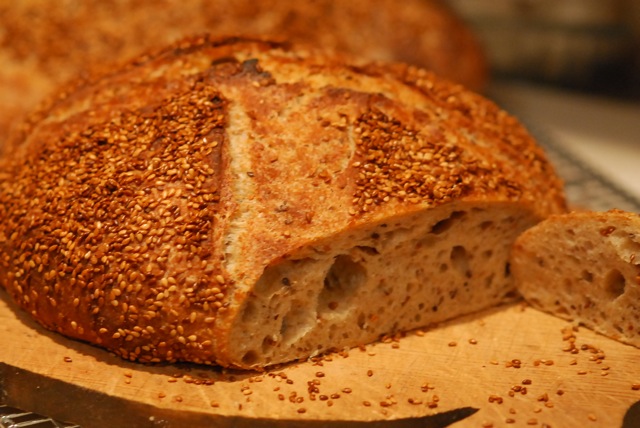
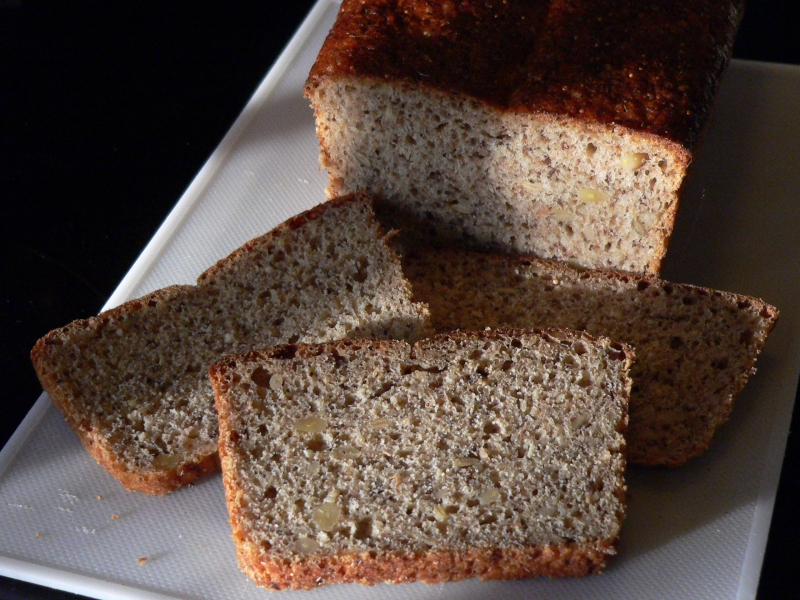
The crumb was as nice, if not better, than the previous version 5 and both v-5 and v-6 were by far the best of the six loaves tested thus far. Texture wise, I feel the better crumb is due to the minimal kneading. The first 4 test loaves were all kneaded gently, but in a rather normal letter fold method common to most of my loaves. I felt that the extremely high nut and seed content did more damage to the gluten during kneading than could be offset by any benefits gained. So, in both v-5 and v-6, I basically switched to a no-knead method, and it seems to have made a major improvement in the openness of the crumb.


All six versions had excellent keeping properties, when kept at room temperature in a simple a bread box.

The sourdough was a 3 build levain using KAF AP flour, and was a baker's 94.2%.


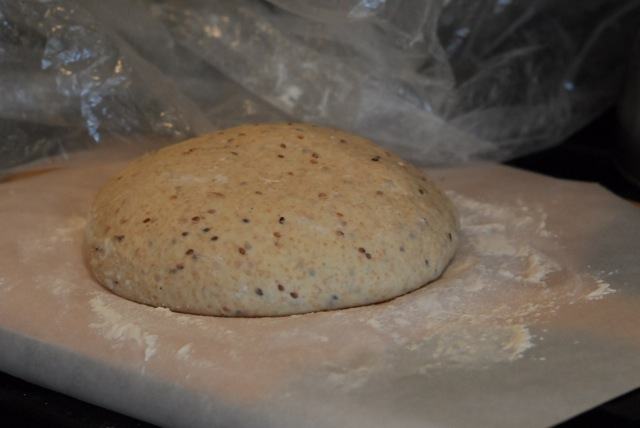
The final rise for this loaf was 7 hours in a proof box at 82ºF( 27.8ºC). By that point it was pressing tightly against the FSFilm. I removed the FSFilm, scored top with 1 whole length center scoring. Bread pan place in a Turkey Pan. The bread pan was elevated from direct bottom contact by two SS knives.

The oven stones were removed from the cold oven. One cup of water was brought to a boil and the boiling water then poured into bottom of the turkey pan and the lid placed on at once, and the turkey pan and its contents were all placed in the cold oven on the lowest rack position. The oven was set to 450ºF (232º C).

With this fabricated "Dutch Oven" - formed from the turkey pan - resting at the lowest position, the constant heat of the electric oven's lower element, while raising the oven's internal heat to its highest setting, maintains the bottom of the "Dutch Oven" well above boiling temperature for 15 to 18 minutes. Steam visibly issues from the oven vent from about 3 minutes into the baking until about 18 minutes.

At 20 minutes, the Dutch Oven's lid was removed, oven heat set to 400ºF (204º C) for the balance of the baking, and the oven door held open by about 1/2" (12 mm) to vent any steam during the remaining 25 minutes of the baking. At the end of the total 45 minute baking, the oven was turned off and the loaf removed from both oven and bread pan. The loaf was placed on wire to cool for two hours. Then it was placed in a bread box at room temperature overnight, before being cut.

At this point, I have no ideas on what I may do different when I bake version 7. In fact, I might just repeat making this same formula, before trying any other possible improvements. Perhaps, that will change
but, for the moment, I am satisfied. ;-)

=====Update: March 18, 2011

Version 7 Seed Loaf has a few changes and , to my taste, is even better. A PDF with full details and photos can be seen at this link:

https://docs.google.com/viewer?a=v&pid=explorer&chrome=true&srcid=0B_MScoZfDZkwZDNlNzk3ZjktYmQ3NC00YWZjLWI1MTgtOTg1MmMxNTM1NGZk&hl=en

=====


110307 Next blog:

http://www.thefreshloaf.com/node/22562/sourdough-crackers


BerniePiel's picture
BerniePiel

I've been doing a lot of baking the last few days to help me meditate and leave the worries somewhere else.  Baking bread is such an enjoyable, fun, healthy and nutritious thing to do for yourself and your family and/or friends.

Today, I decided to try my hand at a semolina-whole wheat sourdough loaf that was infused with darkly toasted sesame seeds in both  the dough and on the crust.

Here are the ingredients, mixed in this order:

  • 700 g of spring water;
  • 200 g of starter, roughly 75% hydration;
  • 200 g of leaven consisting of 2/3's APF, 1/6 whole wheat; and, 1/6 pumperknickel flour; 

[I've had this starter for some time and I'm pretty unorthodox from the scientific baker in that I pour out whatever I think will do the job to keep my starter going, mix in a combo of flours given in the portion listed by volume and mix with spring water till I have the consistency I think works best.  It works for me and I like things to  be simple, enough said.]

  • 900 g of flour, consisting of:
  •  650 g of KA Durum semolina flour;      
  • 250 g my milled whole-wheat flour, somewhat coarse;
  • 20 g sea salt - I used Irish herer, but I doubt it makes a huge difference. ( I'm sure open for comments about this);
  • 50 g spring water (I actually used this to dip my fingers into to do the S&F's and found I used almost all of the water which became well incorporated into the dough and saved the usual sticky mess I've had at other times.

PROCEDURE:

  • Pour the starter in the water, all at room temp, slightly cool;  mix the starter so that it almost disolves in the water;
  • pour in the whole wheat and mix;  by mixing it first with the water, it has a bit longer time to autolyse which is necessary since it is a whole grain product;  I usually mix either by hand or use the Polish bread mixer.  I injured my right wrist tendon playing tennis a few weeks ago and it still hasn't quite healed so I used the whisk to help ease the pain of mixing and not unduly exerting stress on the ligament.
  • Mix all of the flour thoroughly so that there is an even moistness throughout and no dry flour is left on the sides or underneath.
  • Let the dough sit for 20 minutes add the salt and seeds and do several strech and folds and moisten your hands so the flour doesn't stick to them.  When I stretch and fold I usually use a plastic or rubber dough scraper and scoop it down the large glass bowl that I use to mix with.  I then reach the bottom and slip under the dough with the scraper and scoop it up and into the center of the flour.  After a while of doing this, the dough starts to get shaped into a boule/ball.  I do between 10 and twenty of these, just till the dough feels manageable.
  •  My other method is a little more tricky and requires some exercise.  I use the scraper and go under the dough then lift all of the dough out of the bowl and let the weight of the dough stretch out the flour to about a foot or 18" in length.  I then fold the dough over itself as I lower it back into the bowl; rotate the bowl and pick up the dough again so that the new fold is to the side rather than to the top or bottom of the length of dough.  Imagine picking up a kitchen towel from a long end, holding it up so that the towel is straight up and down.  Then put the dough, or fold the dough, i.e, towel in half as you are lowering it into the bowel.  Pick up the towel again, only this time use a side, not the fold, nor the open ends that make up the folded towel.  Again, let the dough stretch itself out and when it reaches about a foot and a half in length, fold it again as you put it back into the bowel.  I  think this procedure helps build structure to the loaf and glutten which is the building block of the structure in the dough.  I will do this five or six times.
  • Next let the dough rest for 30 minutes, and do the stretch and fold again, rest, do it again in another 30 minutes..  But wait, isn't that the standard litany used by most of the bread makers?  Well, that's what  I did for months and months, until today when I was kept from doing so by important telephone calls that went on and on and then a client visit.  I managed to get two stretch and folds and added 3/4s cup of darkly toasted sesame seeds with the salt and mixed very well to spread the seeds evenly thoughout the mass.  Because of complications, I then had to let the dough sit covered on the counter for 5 hours because I just couldn't get to it.  I was surprised to find that it was just fine and doing quite well.  I did one more stretch and fold, put it in  the fridge for two hours, and came back and decided to see if it was really all that necessary to ferment the dough overnight.  Well, it wasn't and  the taste and complexity of the dough was very nice.  But, of course, a true test would be to let it sit in the fridge overnight and shape and bake to see if the taste improves.

Here are the photos.  Sorry no crumb shot of the batard because its a gift, but I'm sure the boule is representative.  The boule was baked in a round covered clouche for 15 minutes at 525 and then uncovered for 25 at 470.  The batard was cooked at 550 on the stone and steam was injected from a garden sprayer on the sides and top of the oven about every 4 minutes for a total of 4 times and the spray was for a duration of about 20 to 25 seconds each time.

This is the resting dough after being pulled from the fridge.  You can see there are a lot of sesame seeds in the loaf which contributed to the nutty flavor given by this bread.  That, along with the texture and taste created a wonderful combination.

resting dough

The next shot is a photo of the sesame seeds which were baked in a pizza pan till dark.  Be certain to stir them around after you take them out of the oven because the pan will continue cooking them and could burn them.  There is an amazing amount of oil in these little seeds.  These seeds were saved to go on the outside of the loaf.  I must ask what is the best way to affix these seeds to the loaf so that they will stay on the loaf.  As I'm cutting the loaf all of the seeds on the outside just pop off.  I had a similar loaf at the Farmer's Market in Prospect Park in Brooklyn a few weeks ago and it was divine and the seeds stayed on the bread slice.  How do you make this happen?  Anyone, please.

The following are the finished loaves and the usual crumb shots.  I hope you will try this bread some time, as it is delicious.

The boule.

I will be the first to admit my batard shaping is woefully lacking.

The batard

BTW, that's my jar of starter in the background.  Just an old mason jar and when I extracted the starter for these loaves, the jar was at half the level you see.  The starter had replenished its growth that I had used in these loaves.  I will take about half of this amount, discard the rest or use it to make pancakes, etc., and then mix with spring water to dissolve and add one cup each of AP or BF and WWF which I mill myself from some local hard winter red wheat.


Here are some crumb shots.


The crust was not crackly, but chewy and crunchy, perhaps from the seeds, but it had a good texture for the flours used.  There was a nice moistness to the crumb, but not wet or damp.  The internal temp was 209 when removed from the oven measured from the bottom of the loaf.


Surprisingly I was eating this bread at 6 pm and had started it about 9:30 a.m.  Very easy bread to make, not a wet dough at all, and quite manageable.  Just have a good strong starter.  I will say this that I'm guessing but I suspect one of my stretch and folds are equal to about two of most other bakers because I really work the dough by letting it stretch from its own weight and fold it over at least ten times, maybe more, just till it feels like it has a good consistency and strength.  Then a longer rest, but at least 30 minutes, but I'm not overly concerned if its 45 minutes or 60 before I do the next S&F.  I think I should call this my "No Anxiety" bread.  It takes care of itself with a little guidance from you.  Happy Baking.

MommaT's picture

recipe or name for greek daily bread with sesame on top

July 18, 2009 - 8:52am -- MommaT
Forums: 

Hi,


I had the very big pleasure of spending the last two weeks in a tiny village on the coast of greece, south and east of Kalamata.

The primary bread at the local grocery store, and every taberna we visited, was the same simple loaf. Oval or torpedo shaped, it had a moderate to fine crumb with white-bread taste (although quite yellow inside) and sesame seeds all over the top.  It did not taste overly milky or egg-y, but more like a loaf with quite basic ingredients.

Subscribe to RSS - sesame seed